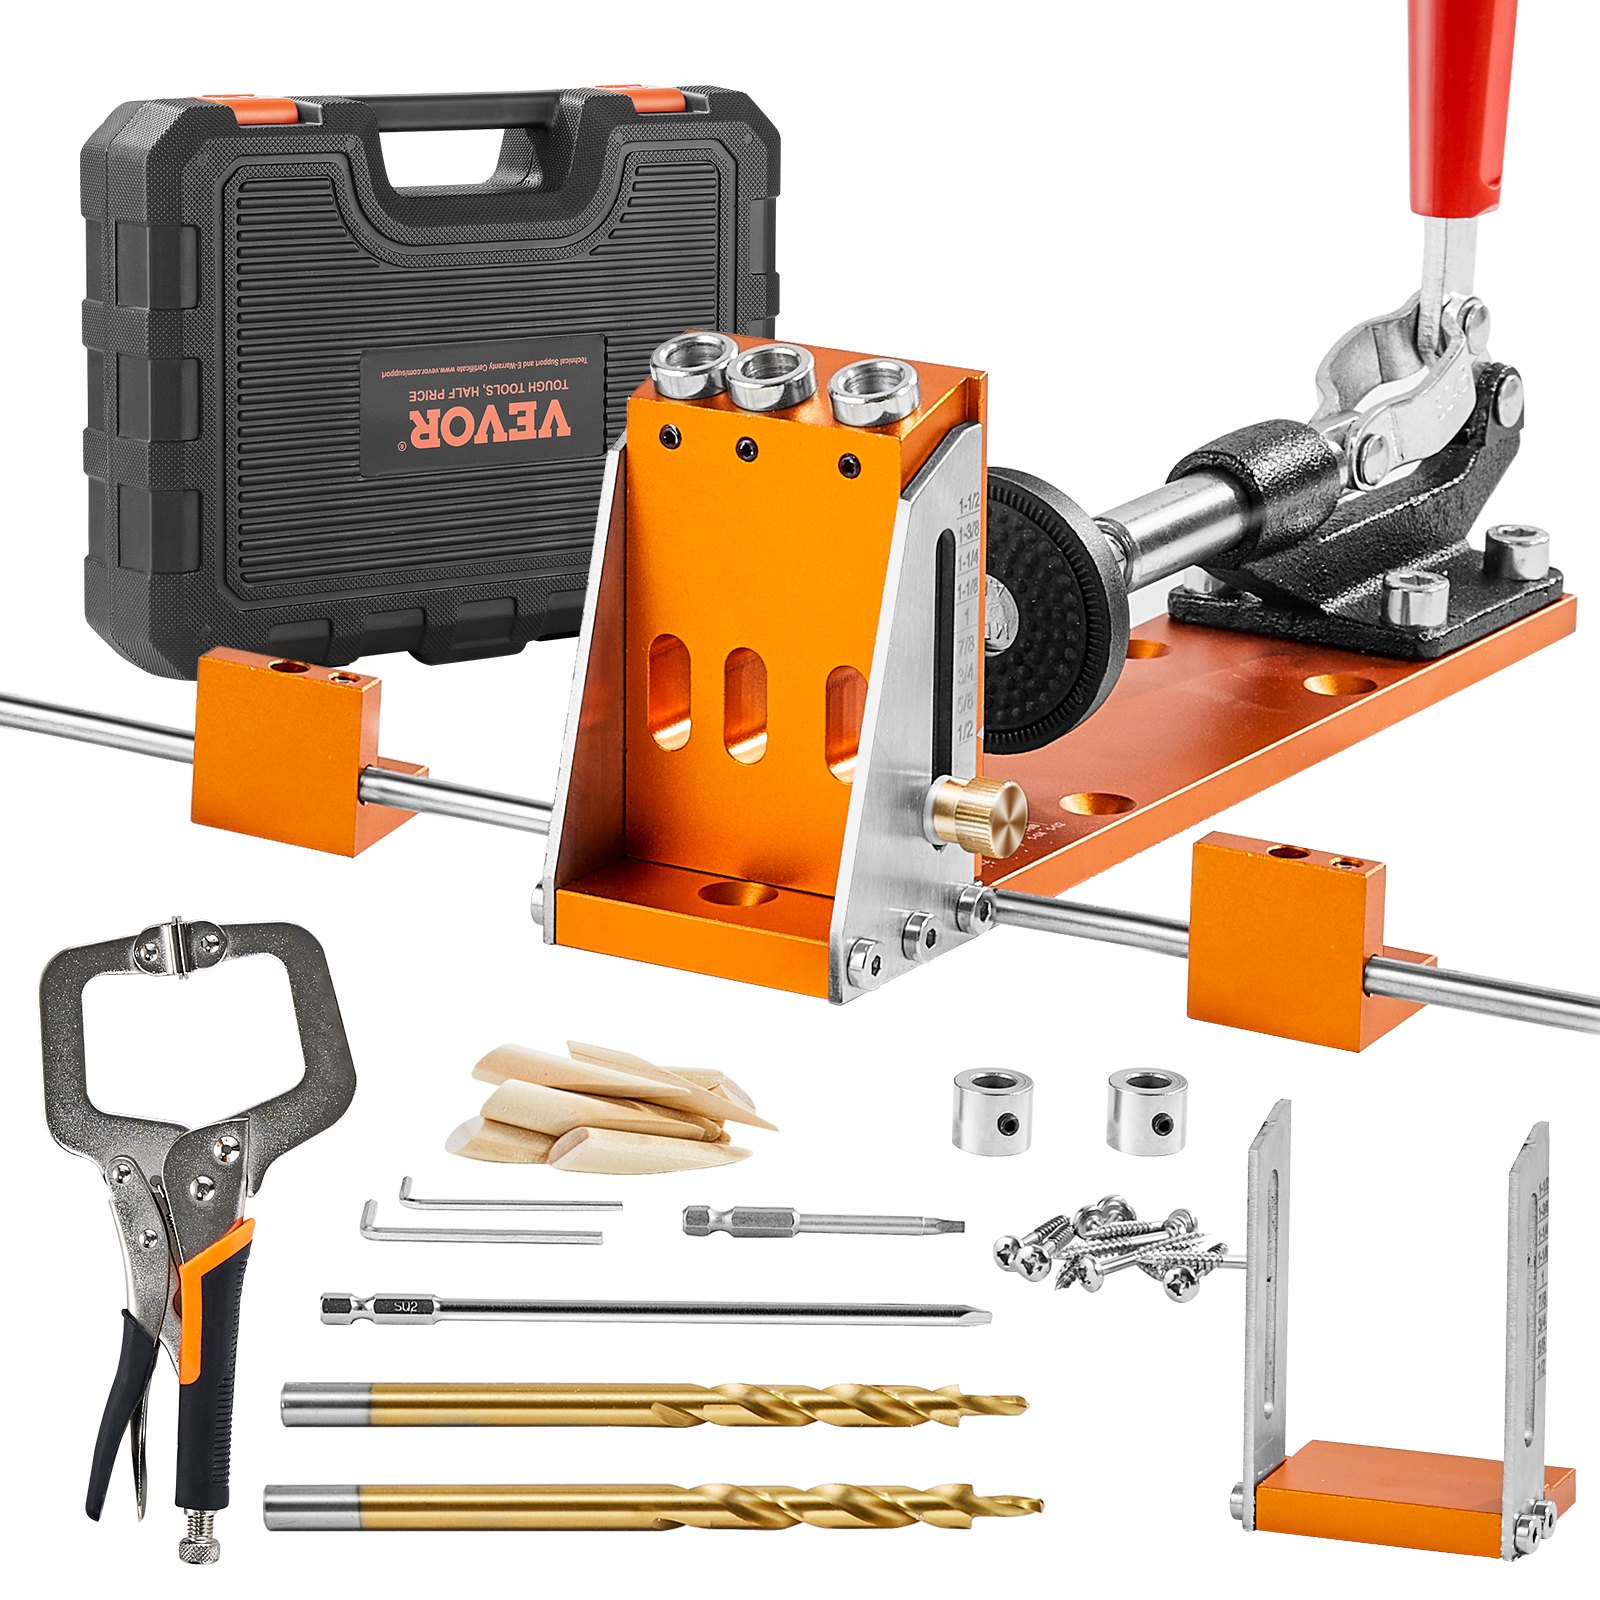
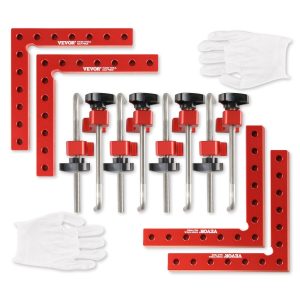
Unlock the full potential of your VEVOR Pocket Hole Jig Kit with our comprehensive product manual. Designed with novice and experienced woodworkers in mind, this manual ensures that you can easily set up, troubleshoot, and optimize your 34-piece Pocket Hole Jig System.
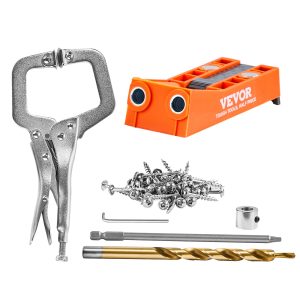
The manual includes detailed instructions on using the 11″ C-clamp, fixture, step drills, wrenches, drill stop rings, square drive bits, and adjustable settings, all neatly stored in a robust toolbox. Whether embarking on DIY carpentry projects or professional woodworking, this guide is your go-to resource for achieving precise and professional results.
Download now to streamline your woodworking process and make the most out of your VEVOR Pocket Hole Jig Kit.
POCKET HOLE JIG MANUAL
INSTRUCTIONS
Thank you very much for choosing this hole jig. Please read all of the instructions before using it. The information will help you achieve the best possible results.
WARNING!
Read and understand all instructions before using this pocket hole jig. The operator must follow basic precautions to reduce the risk of personal injury and/or damage to the equipment. Keep this manual for safety warnings, precautions, operating, inspection and maintenance instructions.
WORK AREA
- Operate in a safe work environment. Keep your work area clean, well-lit, and free of distractions.
- Keep anyone not wearing the appropriate safety equipment away from the work area.
- Store unused tools properly in a safe and dry location to prevent rust or damage. Lock the pocket hole jig away and keep it out of the reach of children.
PERSONAL SAFETY
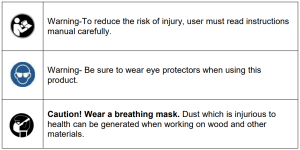
WARNING! Always wear personal protective equipment.
PERSONAL PROTECTIVE EQUIPMENT
- Always wear impact safety goggles that provide front and side eye protection. Depending on the type of work performed, eye protection equipment should comply with CSA Z94.3- 07 or ANSI Z87.1 standards.
- Wear gloves that provide protection based on the work materials or to reduce the effects of tool vibration.
- Wear protective clothing designed for the work environment and a pocket hole jig.
- Non-skid footwear is recommended to maintain footing and balance in the work environment.
PERSONAL PRECAUTIONS
Control the pocket hole jig, personal movement and the work environment to avoid personal injury or damage to the pocket hole jig.
- Do not operate any pocket hole jig when tired or under the influence of drugs, alcohol or medications.
- Avoid wearing clothes or jewellery that can become entangled with a tool’s moving parts. Keep long hair covered or bound.
SPECIFIC SAFETY PRECAUTIONS
- Use the correct pocket hole jig for the job. This jig was designed for a specific function. Do not modify or alter this jig or use it for an unintended purpose.
- Keep body parts away from pinch areas while using.
- Children are not allowed to operate this product unless accompanied by an adult.
- Pay attention to safety during use to avoid crushing fingers.
WARNING!
DO NOT let comfort or familiarity with a product (gained from repeated use)replace strict adherence to the tool safety rules. If you use this tool unsafely or incorrectly, you can suffer serious personal injury.
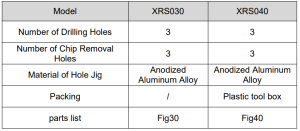
Model and Parameters
Structure Diagram

Assembly and Use
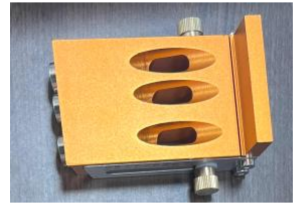
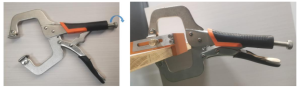
1. Single Hole Jig
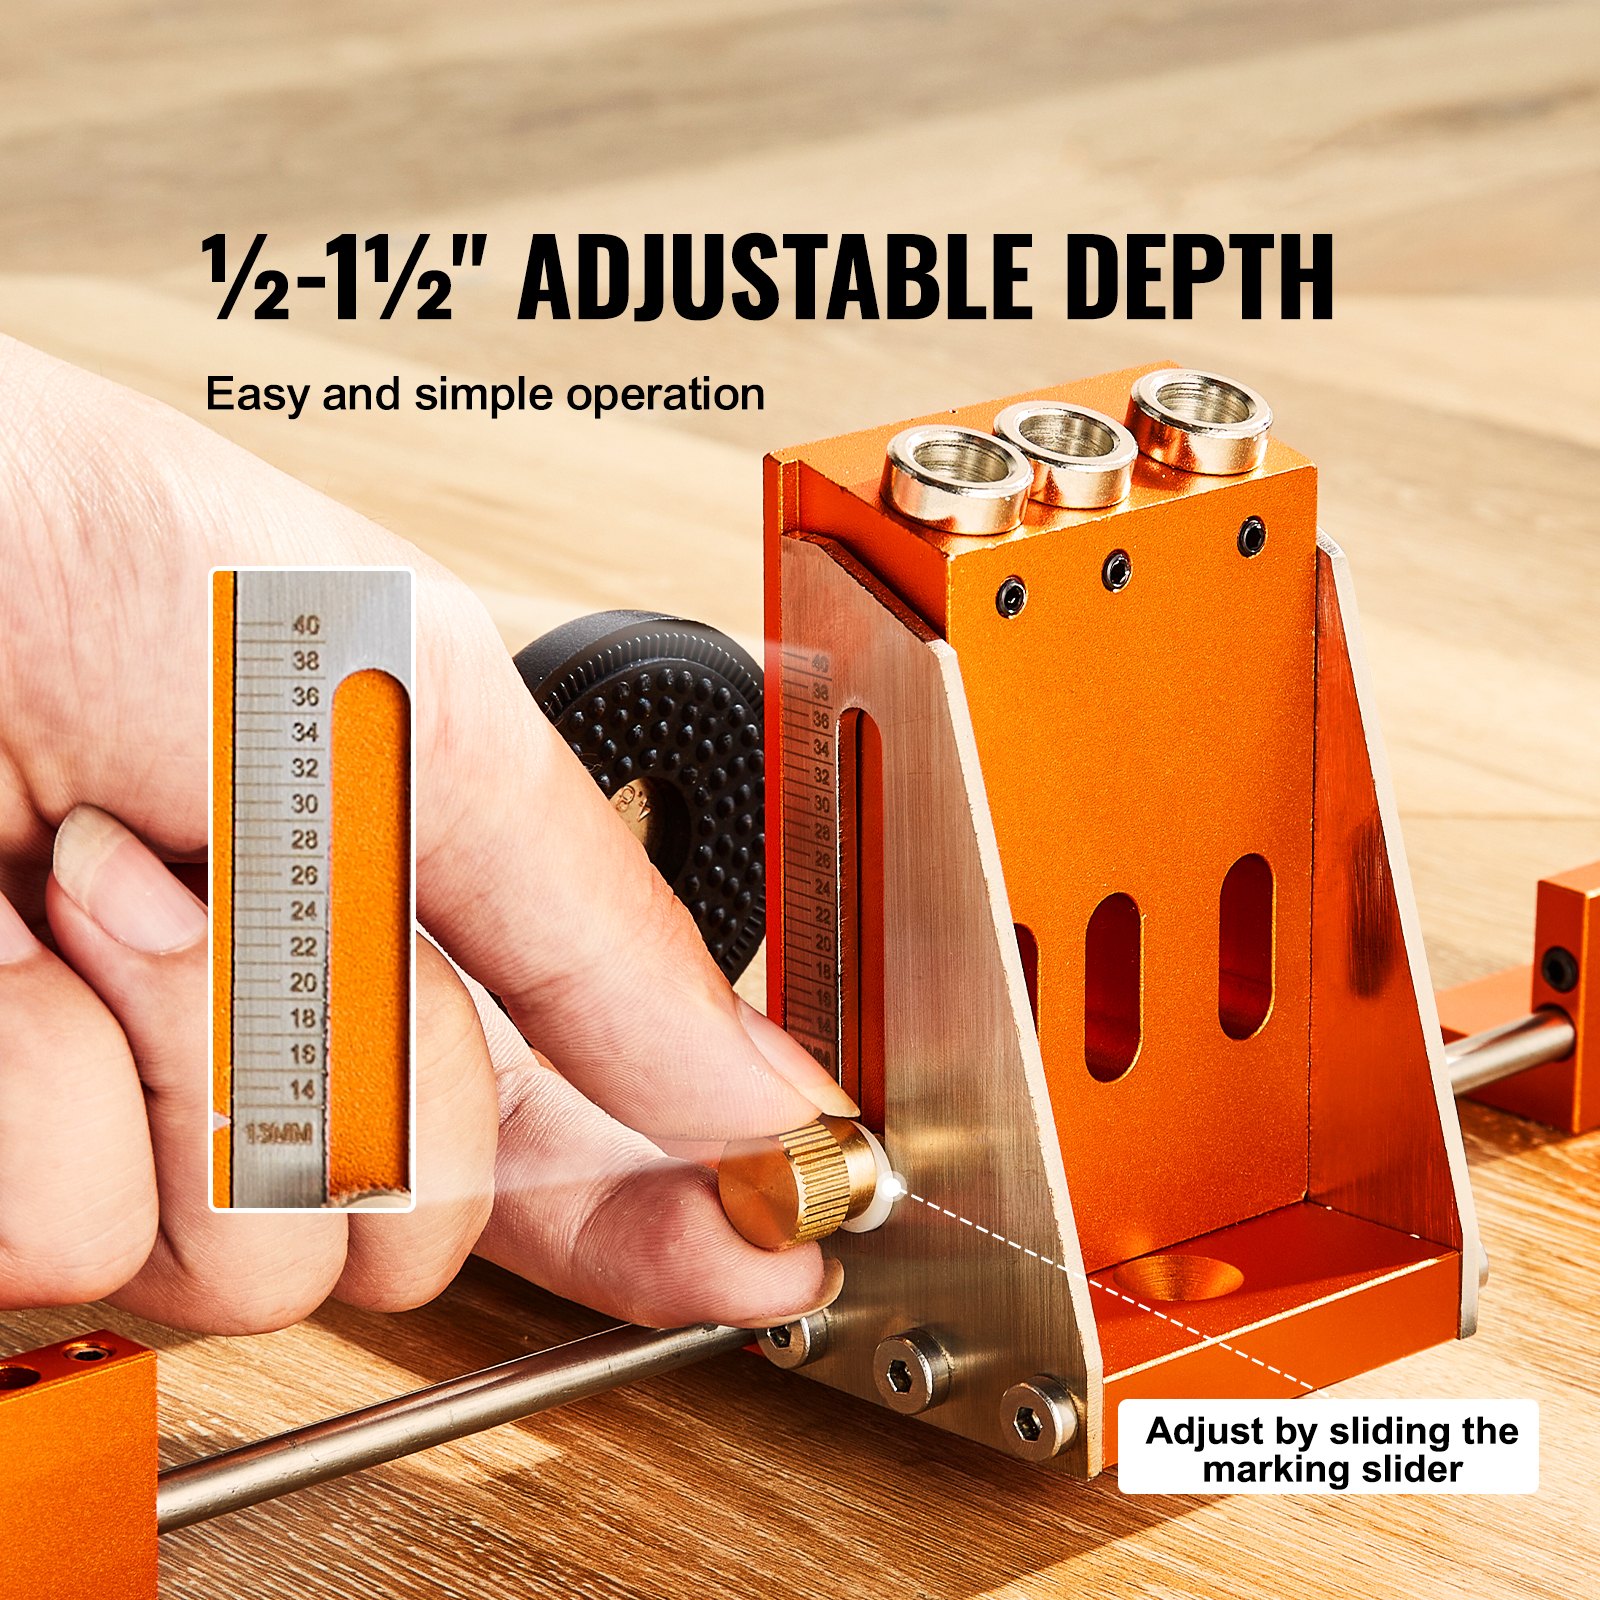
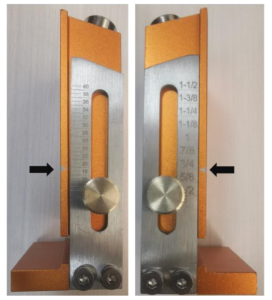
1.1 Adjustable Thickness Setting
Measure the thickness of your board. Markings are in both imperial and metric units. You can quickly adjust the height of the slider according to the thickness of the board by locking the screws and setting them to the appropriate thickness.
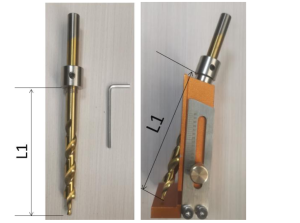
1.2 Adjust the depth of the hole
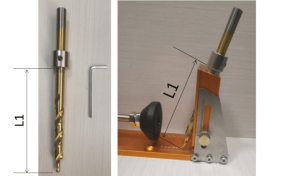
The stop collar is locked on the drill bits at a position equal to that shown in L1.
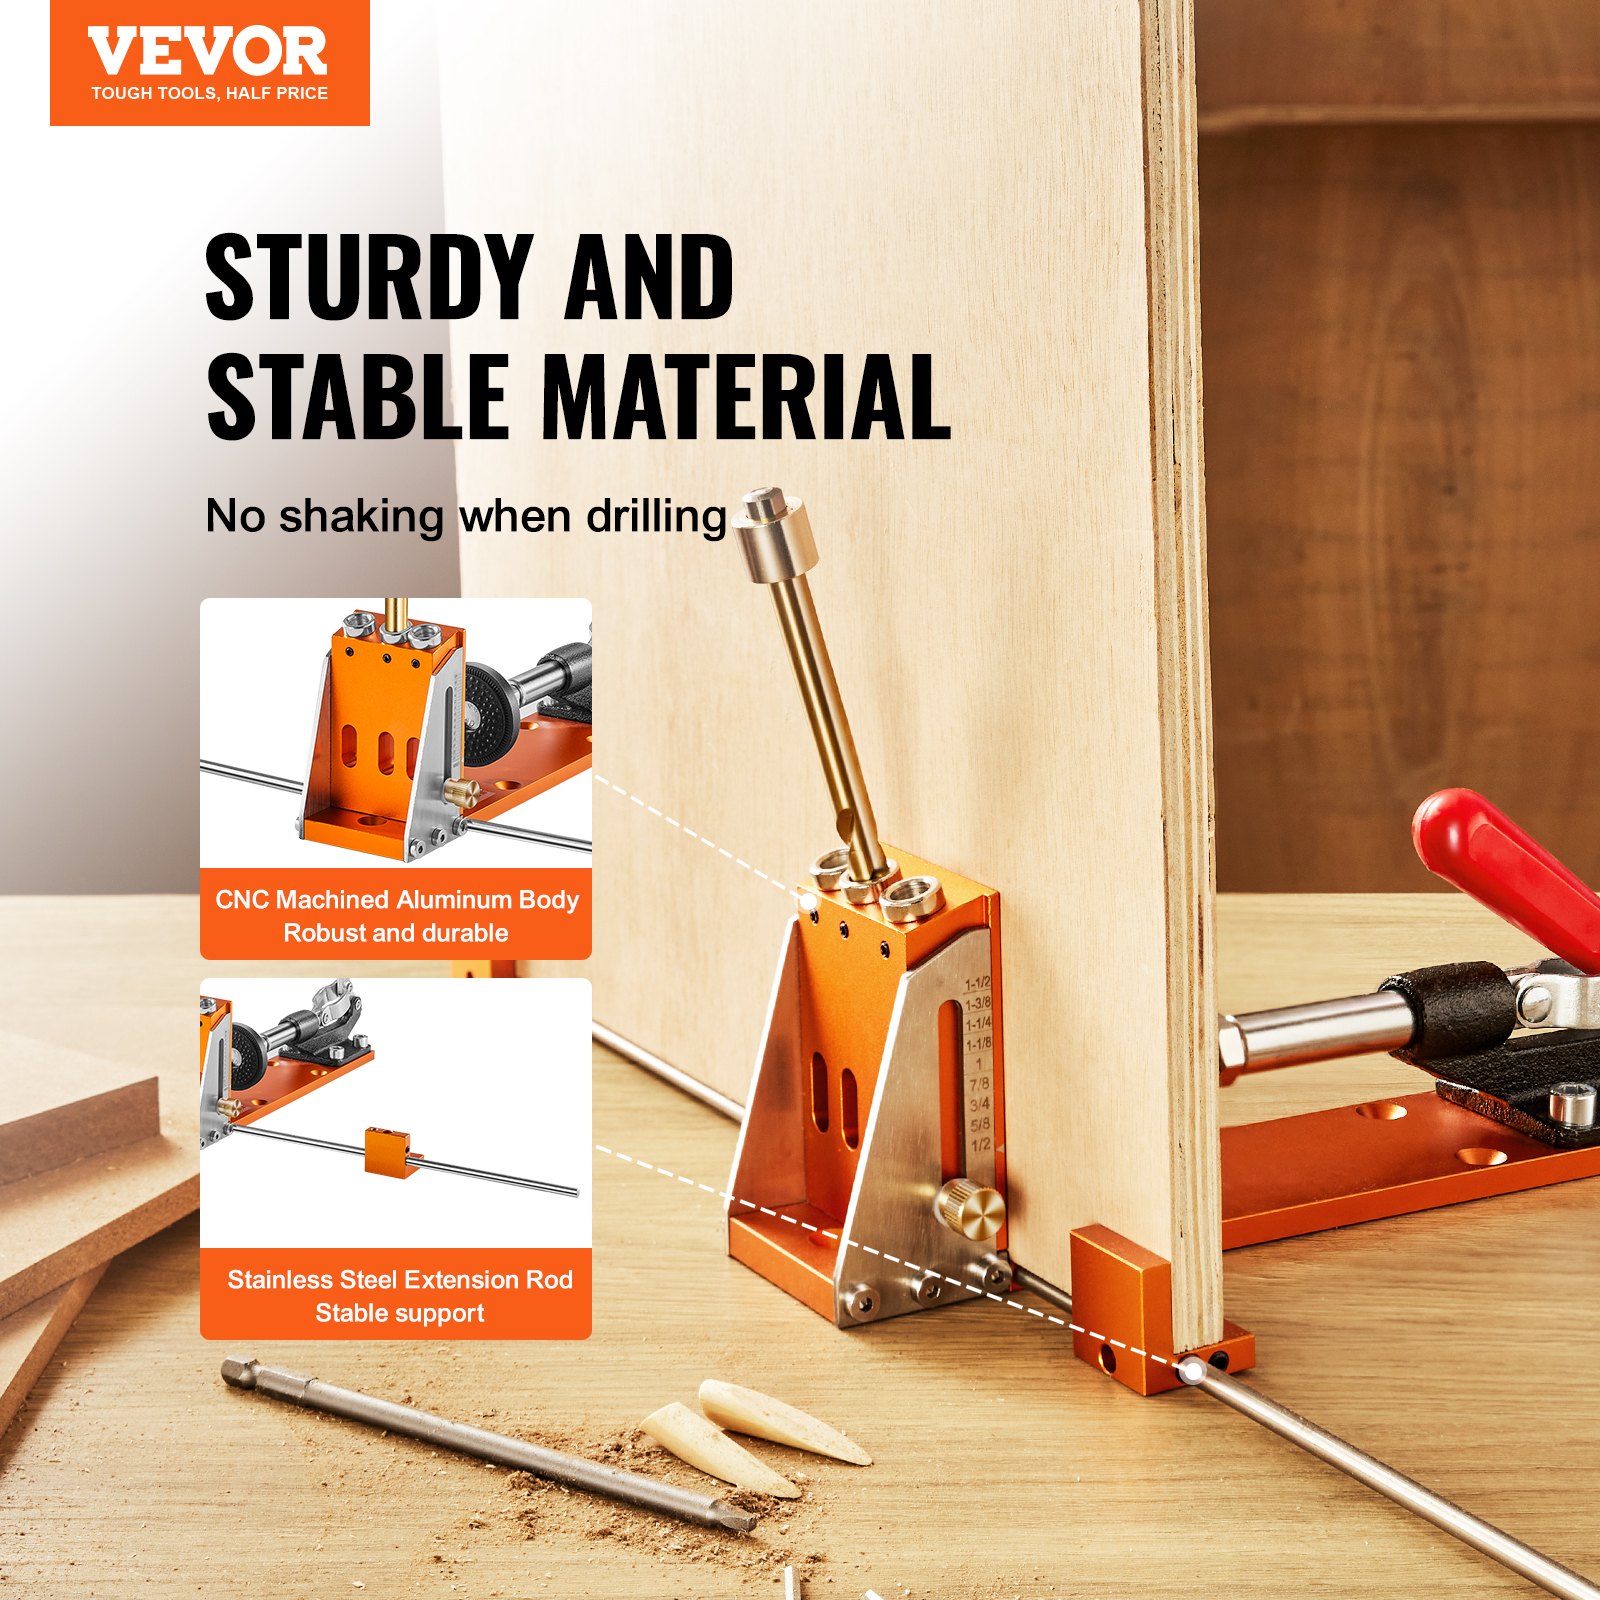
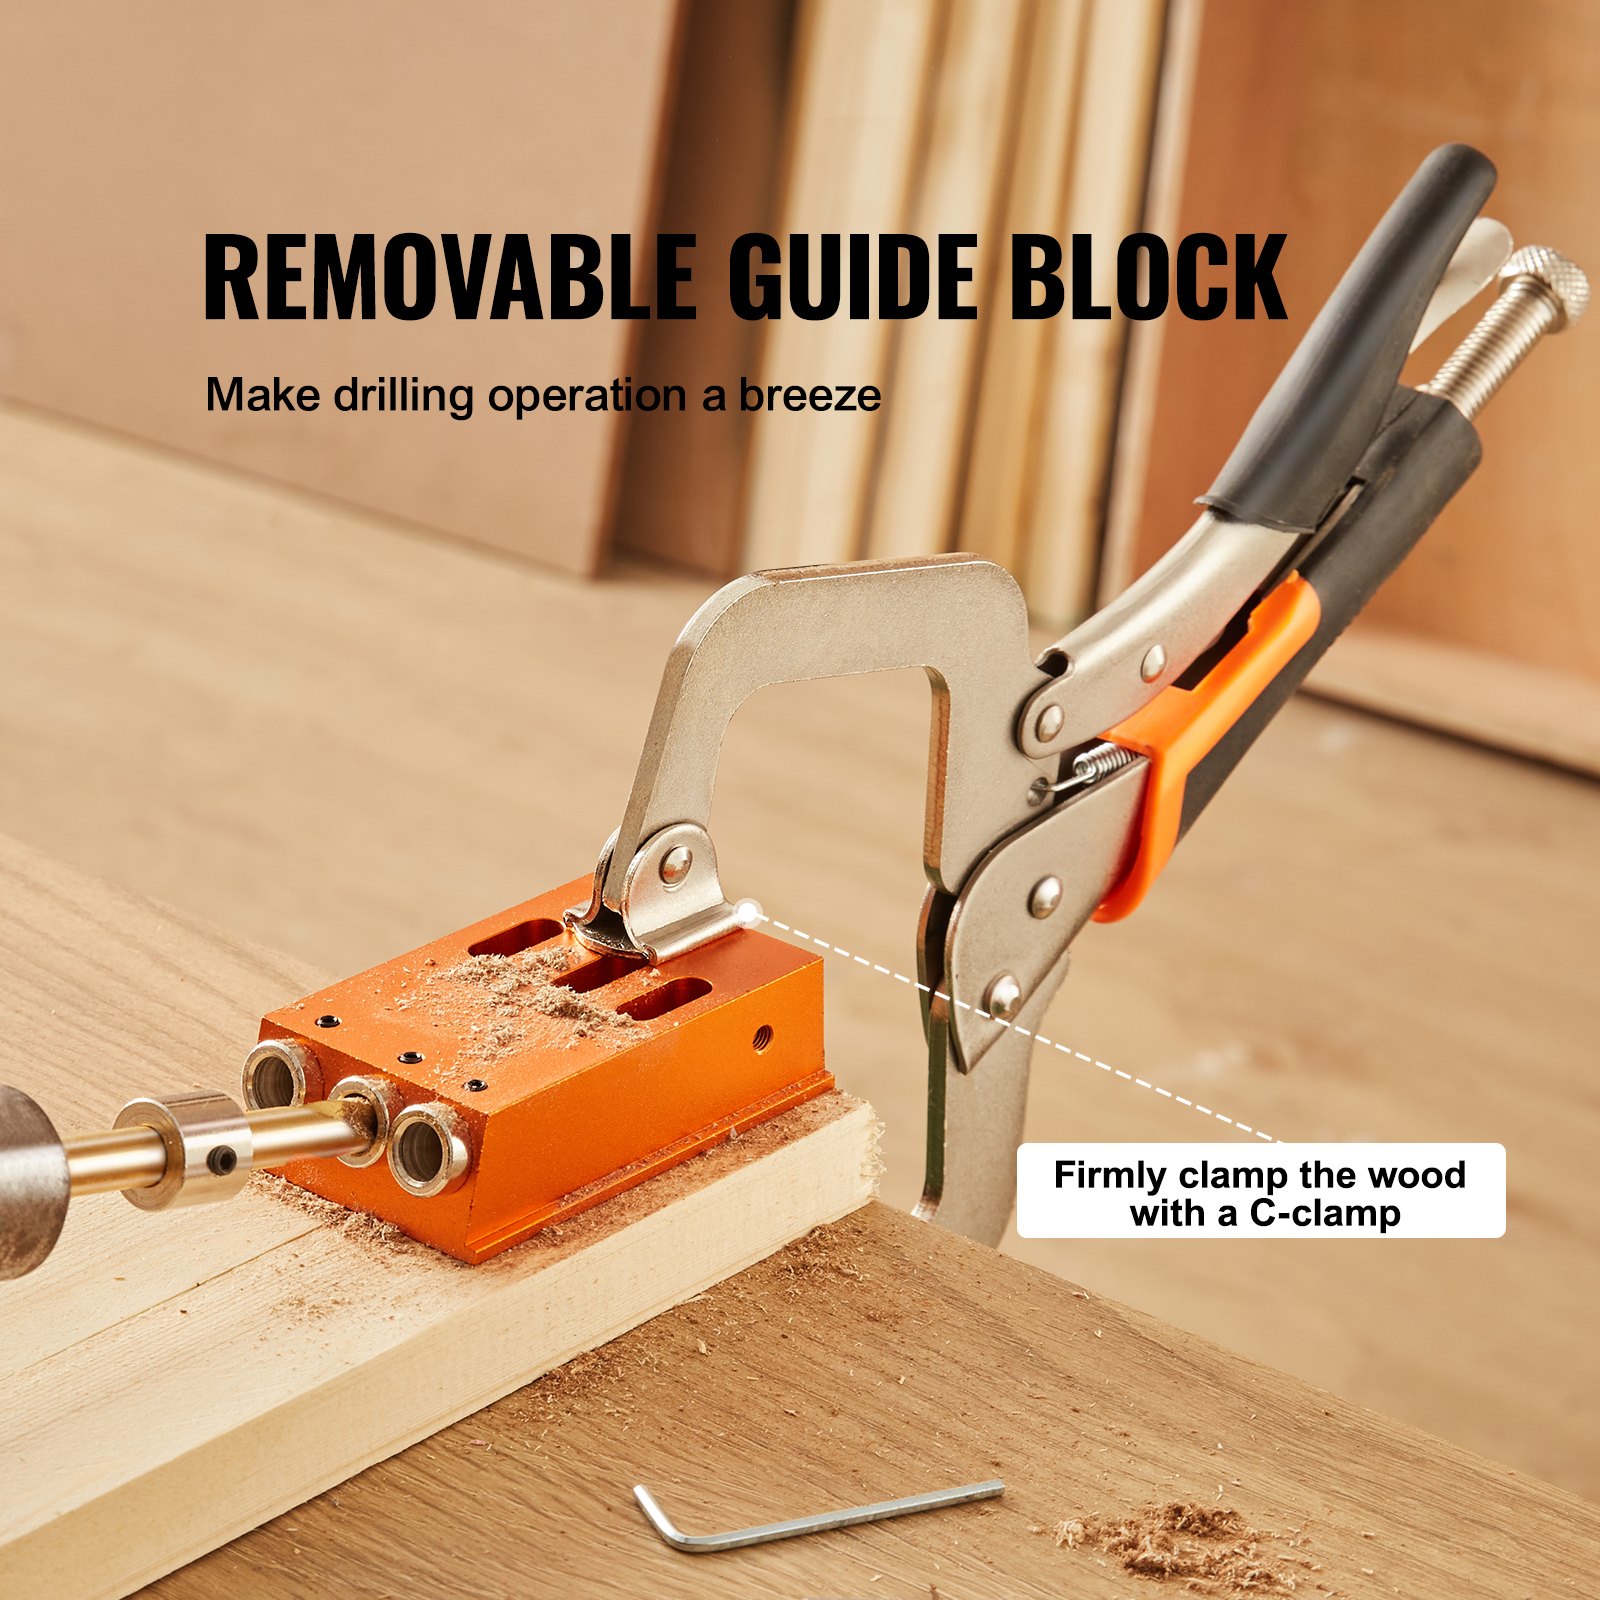
1.3 Quick Fixture
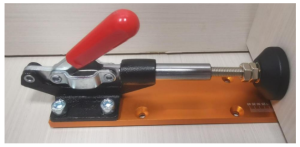
The bolt adjusts the pliers’ opening size (slightly less than the thickness of the plate and fixture combined). Pulling the trigger fixes the clamp.
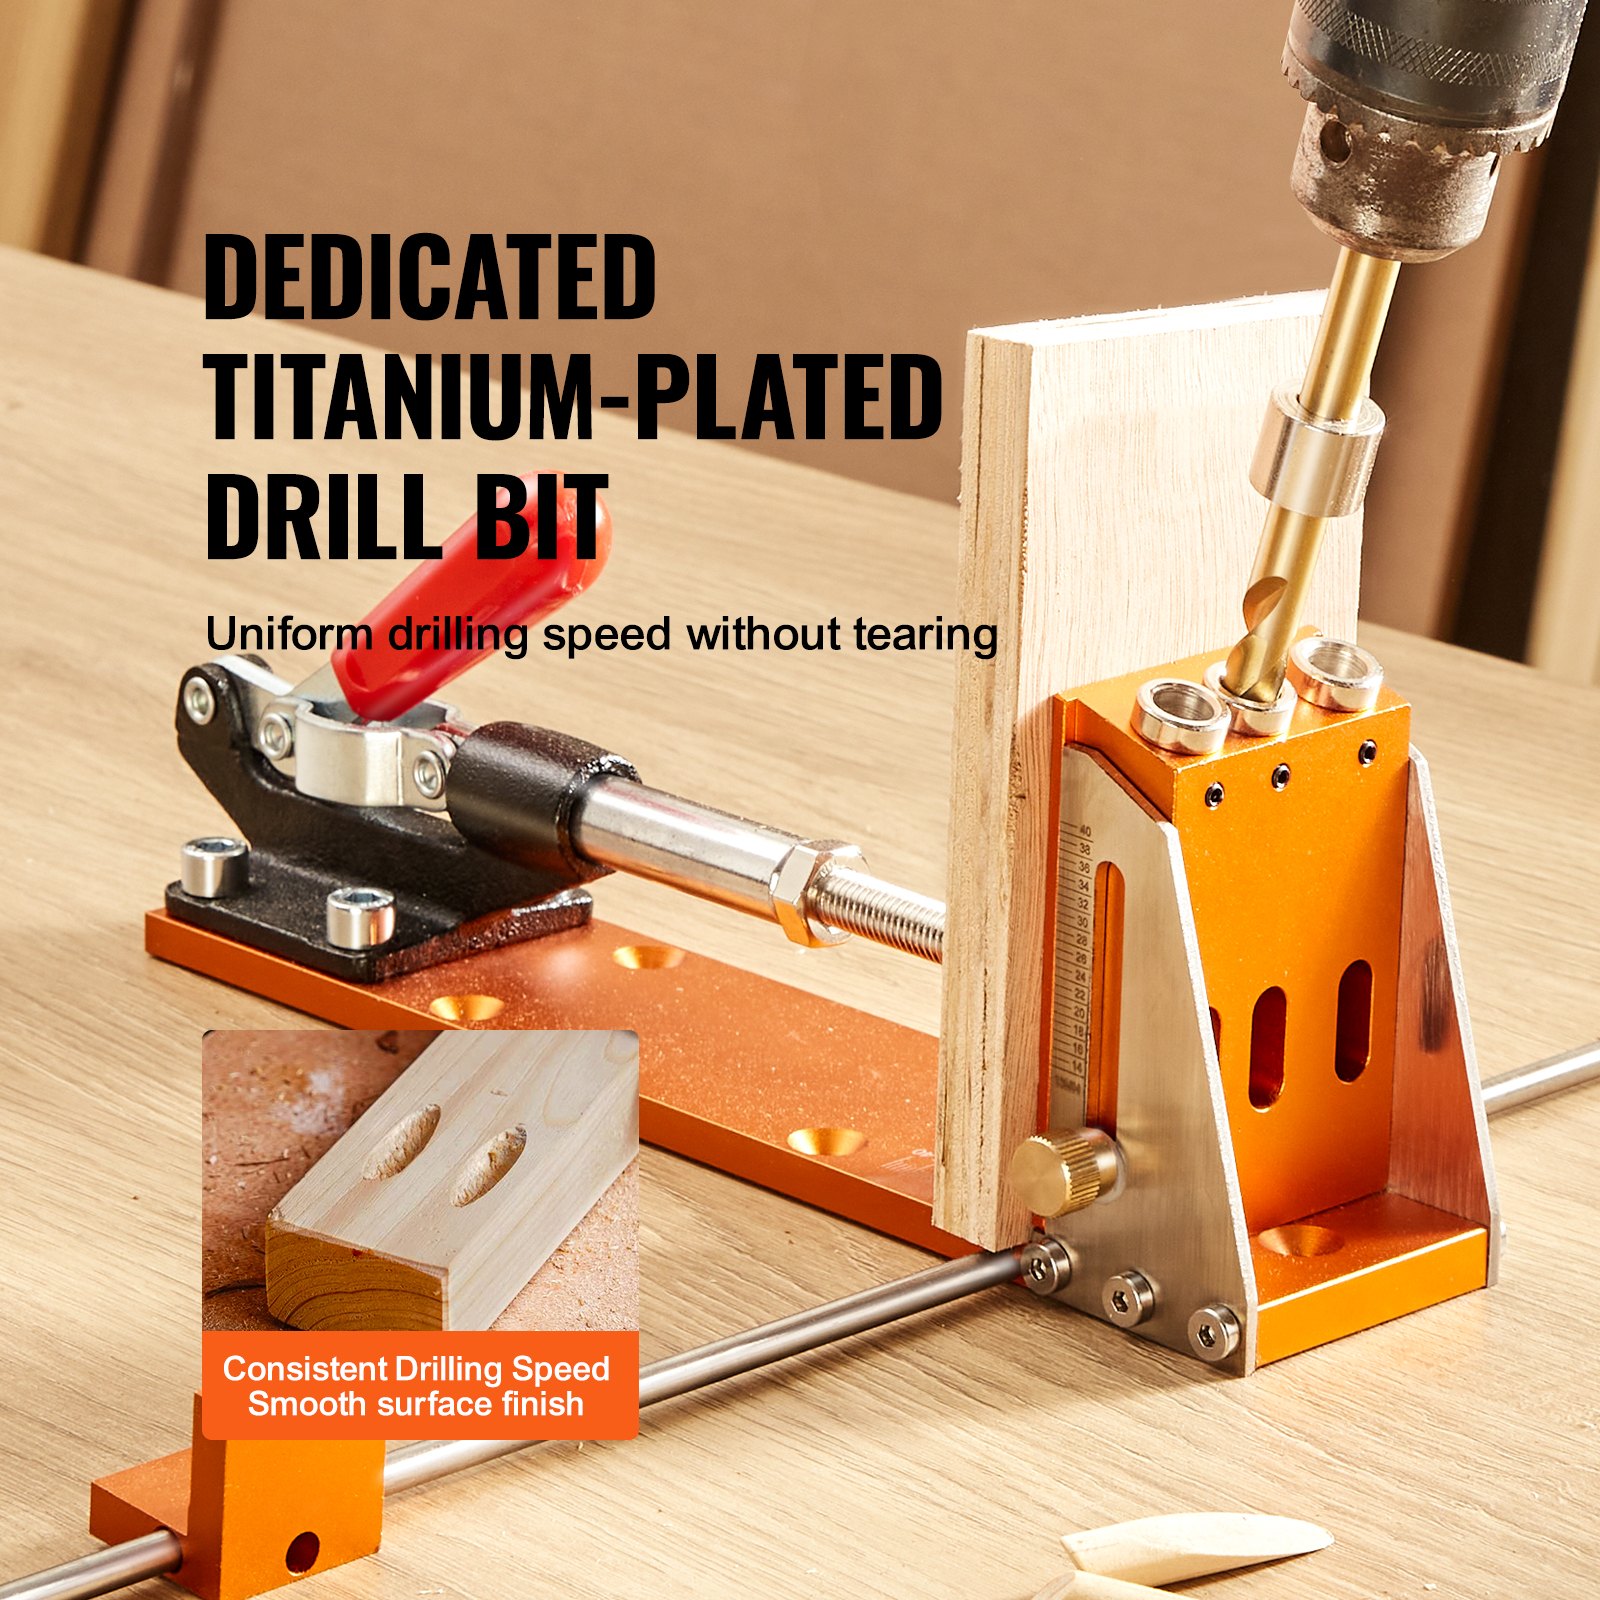
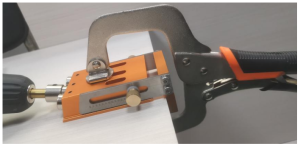
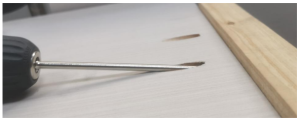
1.4 Drill hole
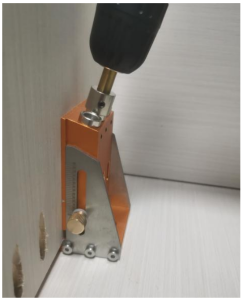
Drill the hole depth until the brake ring stops. Note that the direction of the drilling force is parallel to the pilot hole. Continuous operation for a long time will lead to the pilot hole heating and a disadvantage to the lifetime.
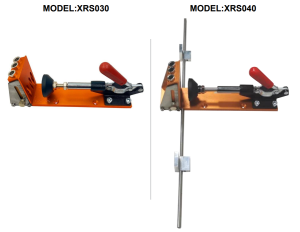
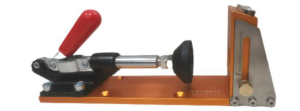
2. Hole Jig Kit (XRS030)
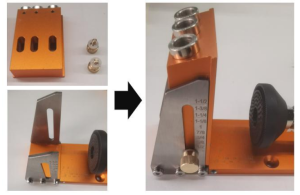
2.1 Assembly Jig Kit
Assemble the Jig kit as shown below.
2.2 Adjustable Thickness Setting
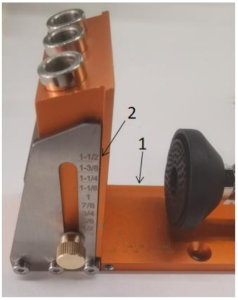
Markings are in both imperial and metric units. Adjust the length of the foot cup and press down the board, as marked in Figure 1. The thickness of the board can be measured.
As marking 2 shows, you can quickly adjust the slider’s height according to the board’s thickness by locking the screws and setting them to the appropriate thickness.
2.3 Adjust the depth of the hole
The stop collar is locked on the drill bits at a position as shown in L1.
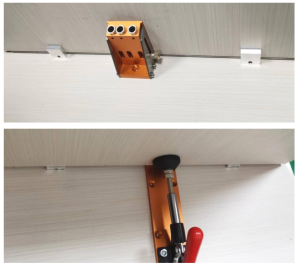
2.4 Quick Fixture
2.5 Drill hole
Drill the hole depth until the brake ring stops. Note that the direction of the drilling force is parallel to the pilot hole.
Continuous operation for a long time will lead to the pilot hole heating and a lifetime disadvantage.
2.6 Screwing
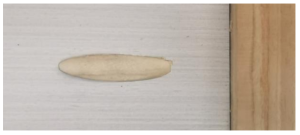
2.7 Pocket Hole Plugs
3. Hole Jig Kit (XRS040)
In addition to including the functionality of XRS030, XRS040 also adds extension capabilities.
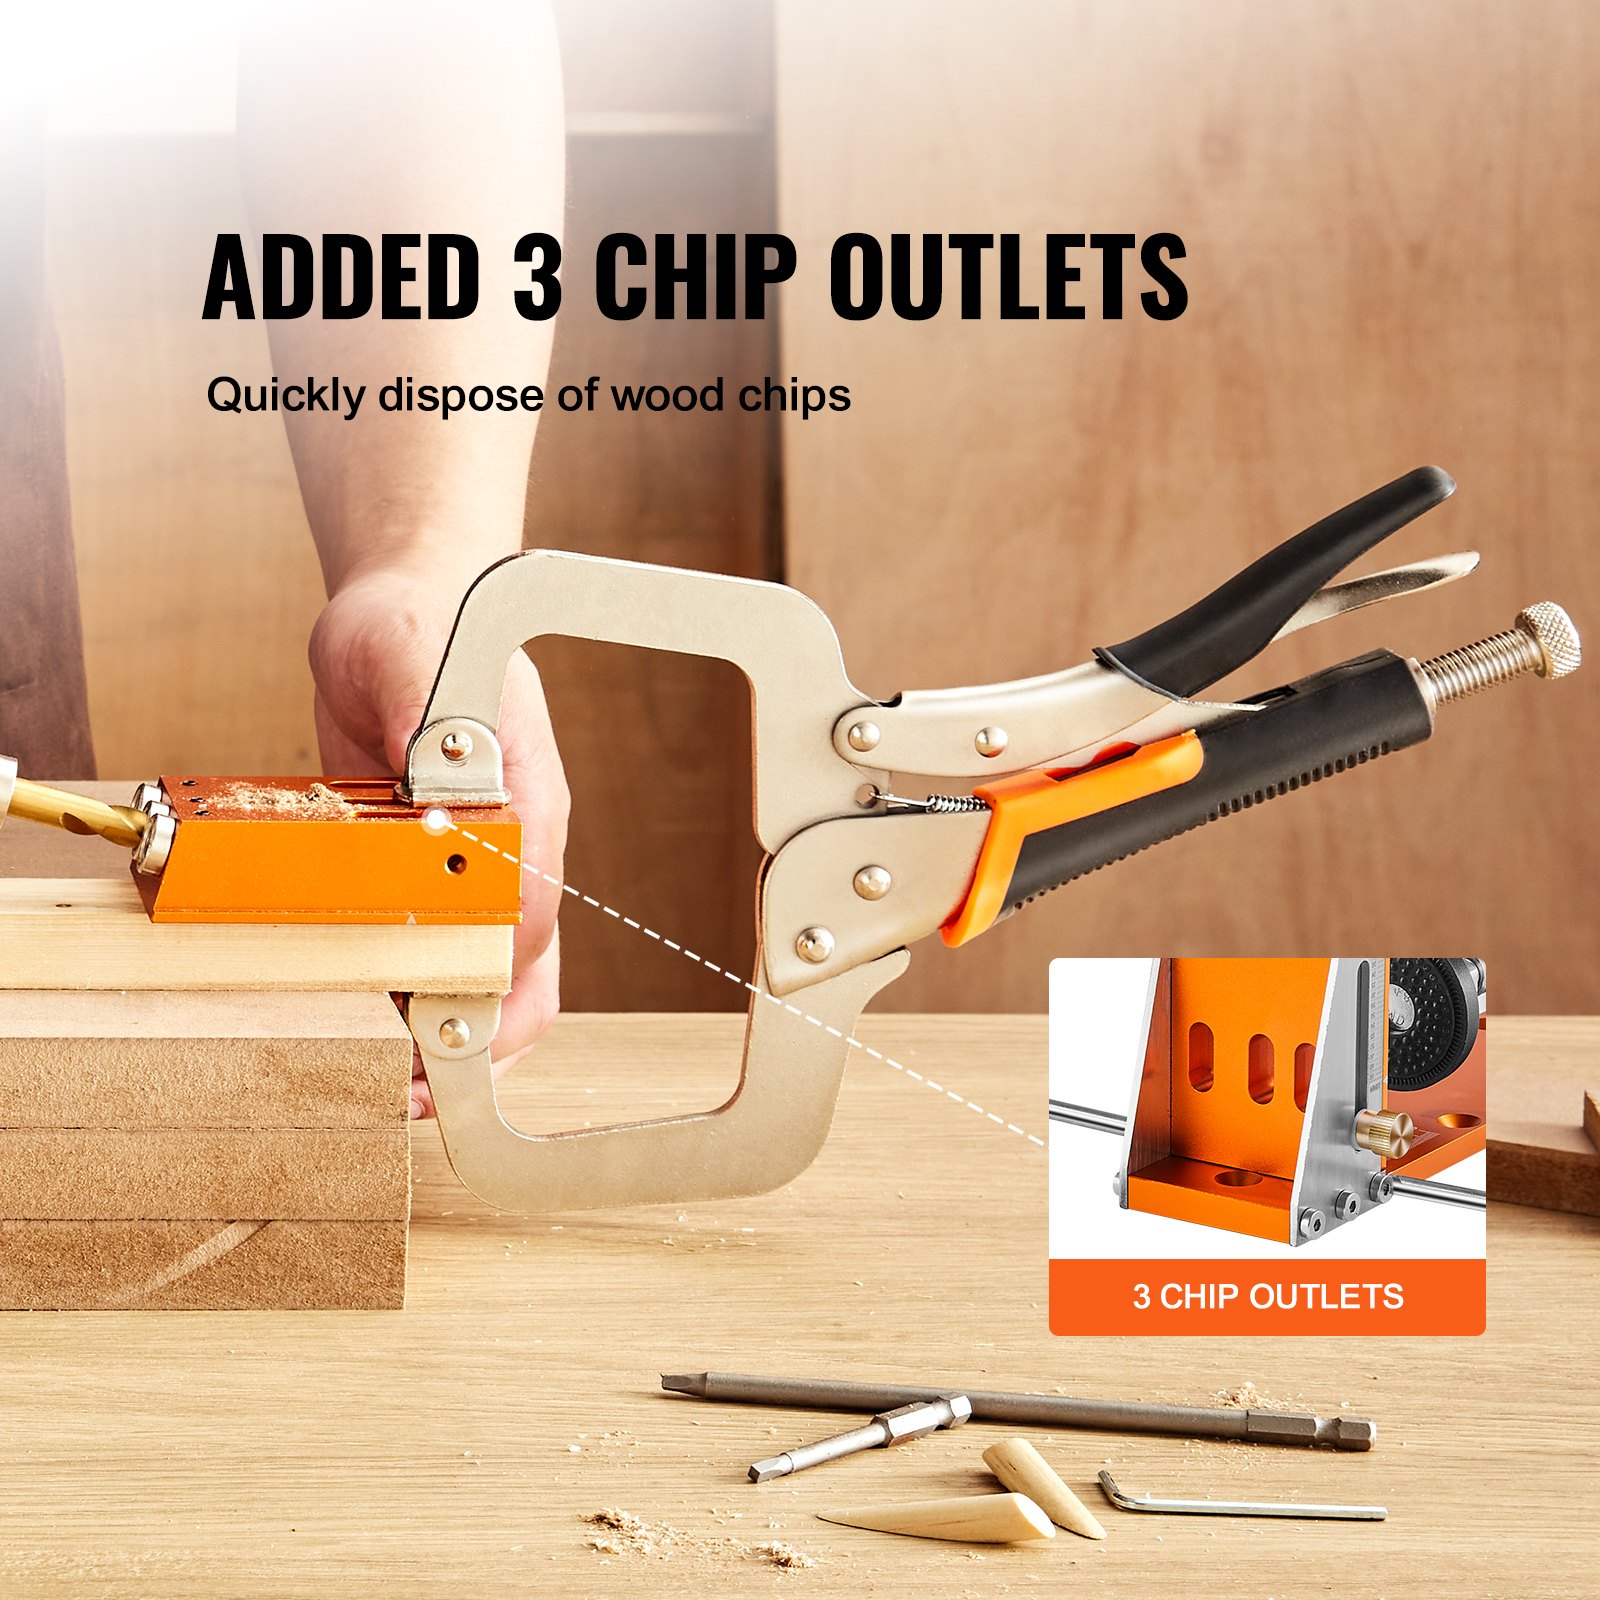
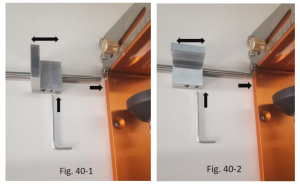
3.1 Sliding block and extended rods
Fig. 40- 1 and Fig. 40-2 show two different assemblies. The arrow→is the direction of the direction of the direction of screws. The position of the slider can be shifted horizontally according to your needs.
3.2 Drill hole
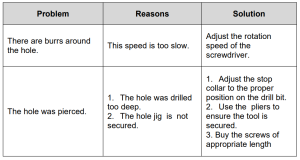
Troubleshooting Instruction
Pocket Hole Jig Kit Maintenance
- Make sure that the drilling is parallel to the direction of force, so that the hole sleeve does not easily wear.
- Wipe the anti-rust oil after using the drill to avoid rust.
Recommended For Your Project
VEVOR Pocket Hole Jig Kit, 34 Pcs Pocket Hole Jig System with 11" C-clamp Manual

Reviews
There are no reviews yet.