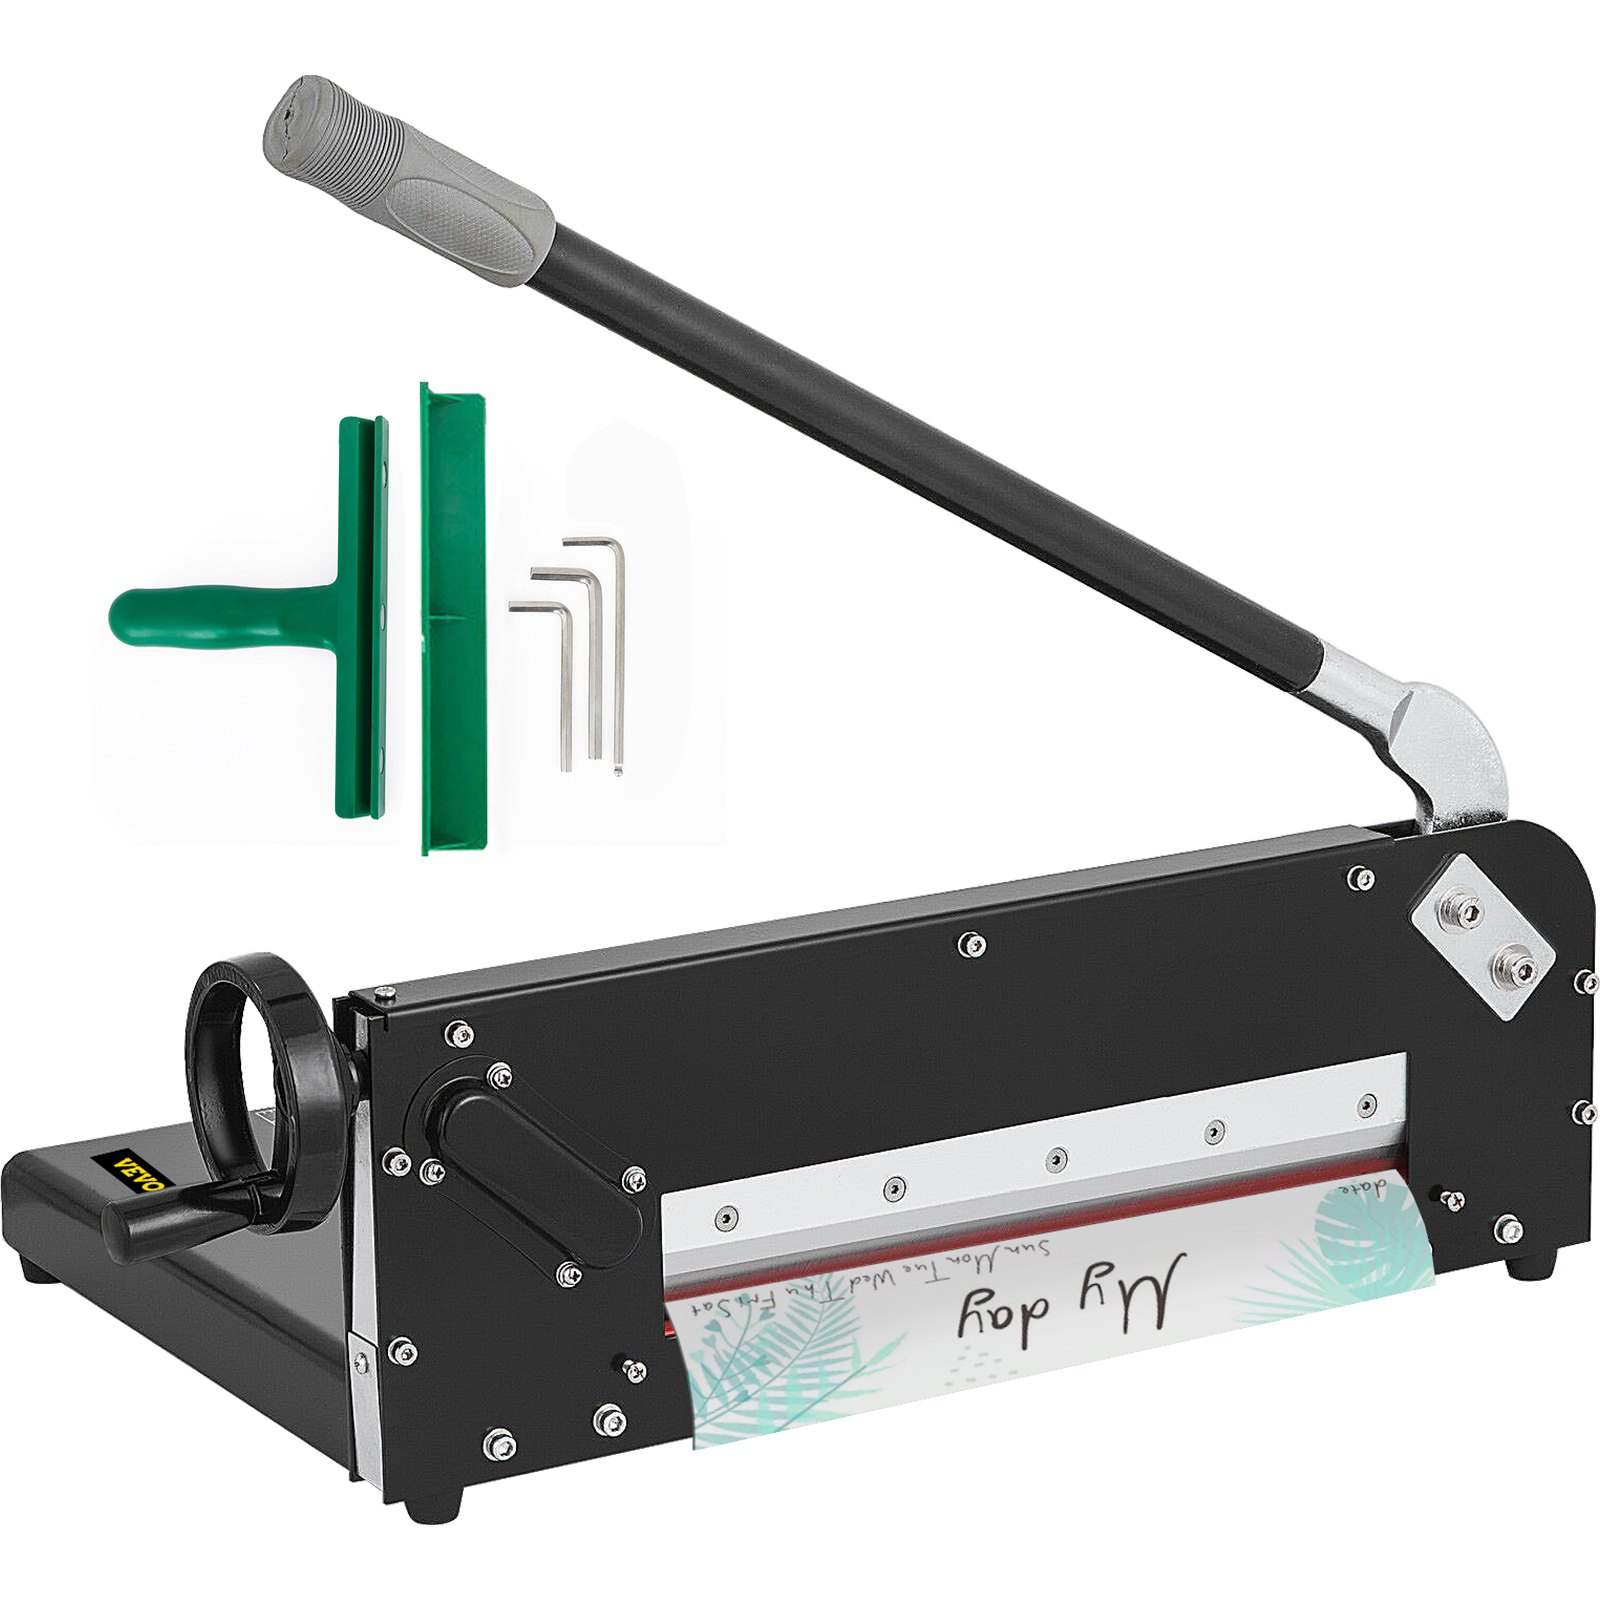
Unlock the full potential of your VEVOR Paper Cutter 12-Inch A4 Commercial Heavy Duty Paper Cutter with our comprehensive product manual. This detailed guide is designed to assist you every step of the way, from initial setup to optimal performance.
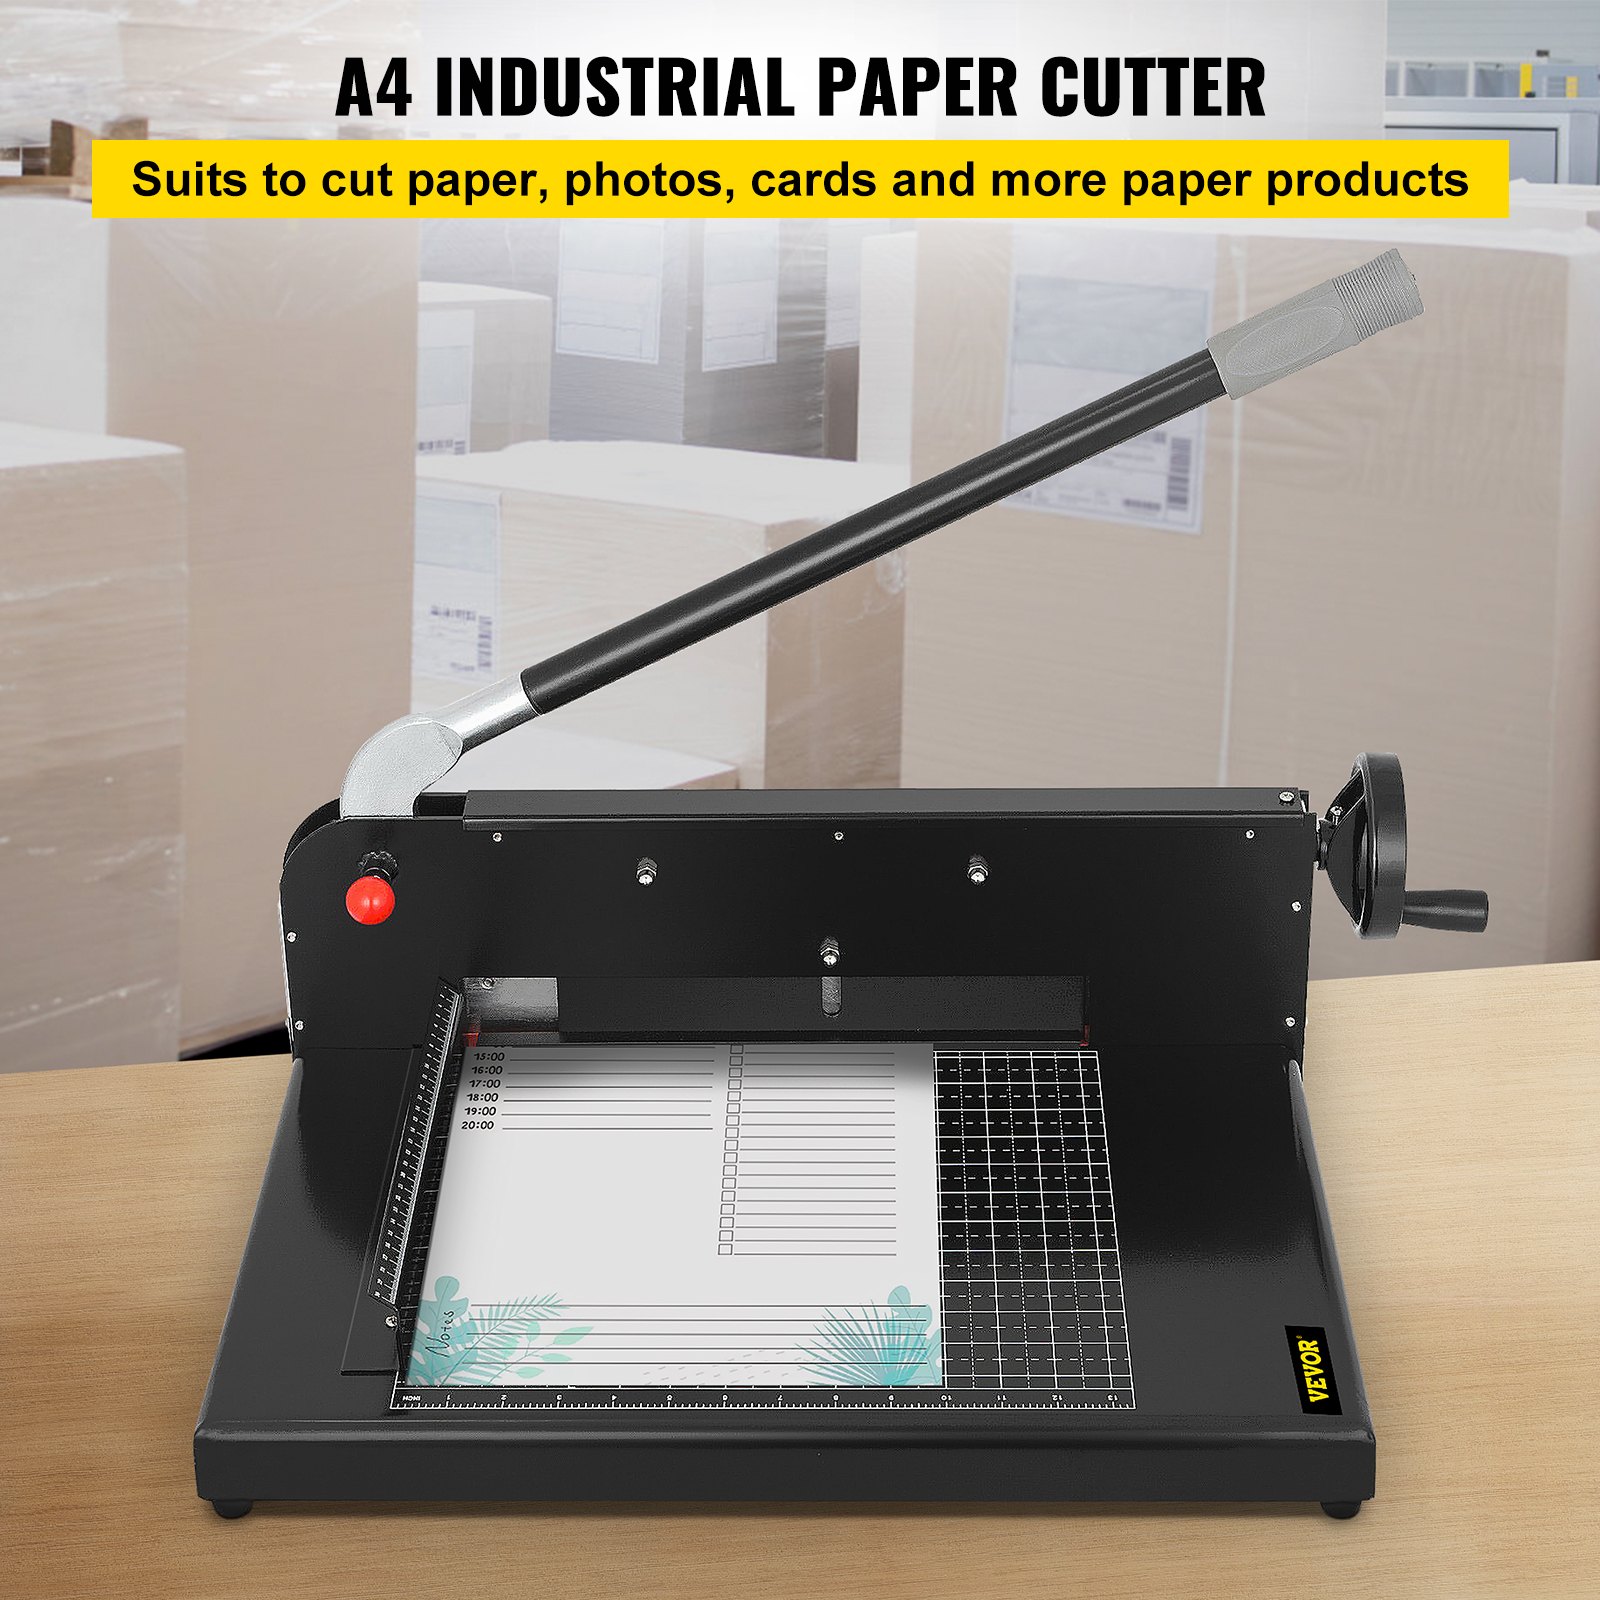
Whether you’re at home or in the office, this manual is your go-to resource for troubleshooting, maintenance, and maximizing efficiency. With clear instructions and helpful tips, you’ll easily handle up to 300 sheets with the 45HRC hardness stack cutter.
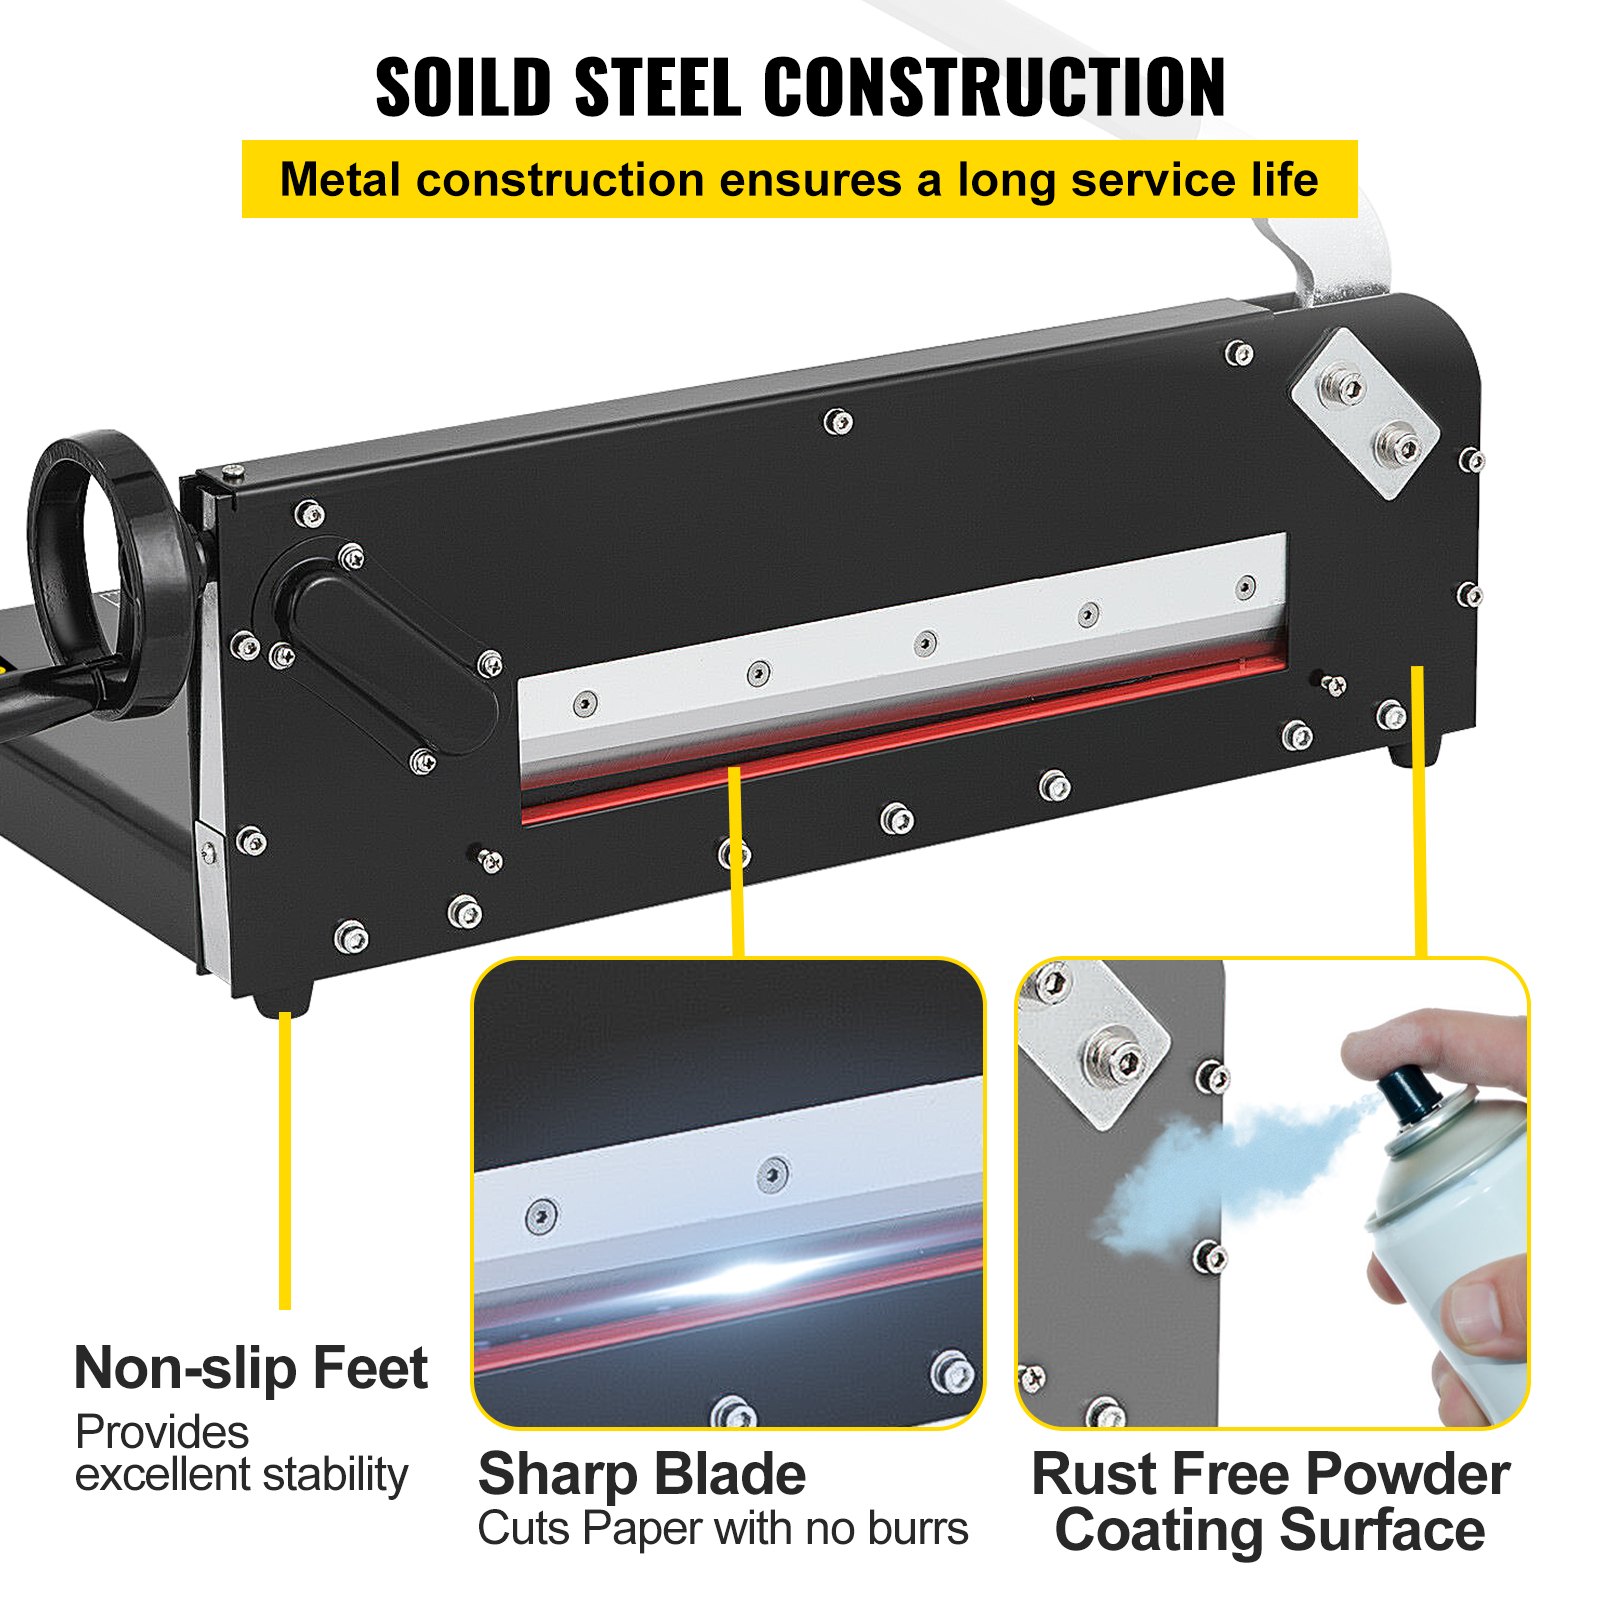
The robust metal base ensures stability and precision, making it perfect for all your paper-cutting needs. Download the manual now and streamline your paper-cutting tasks easily and confidently.
VEVOR Paper Cutter User Manual
Assembly Instruction
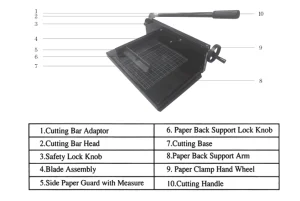
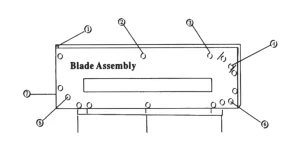
1. Installing the front cutting platform: set the blade assembly(Part #4) on a flat and sturdy surface in such a way that the red safety knob faces upwards. Then:
- Take out the cutting base and align the holes on the front cutting base with the nuts/bolts located on the bottom of the blade assembly, and attach it to the blade assembly.
- Secure the cutting base with the blade assembly using the bolts/nuts provided through Position 1, 3, and 5 as shown by the arrows in the diagram below.
2. Mount the side paper guard with measure (part #5) onto the base. Line up the holes on the side paper guard with the holes on the cutting base and then secure the side paper guard onto the base with the screws provided (do not fully tighten the screws.) When mounting the side paper guard, ensure that the standard measurements on the side paper guard align with the standard measurements.
3. Attach the paper back support arm (Part #8)to the side paper guard (Part #5) and then secure it with the paper back support lock knob (Part #6).
4. Fully tighten all the buts/bolts/screws now. In the process, make sure that:
- The cutting base is leveled with the lip/ledge of the blade assembly.
- The side paper guard with the measure is aligned with the window of the blade assembly.
- The side paper guard is squared with the blade.
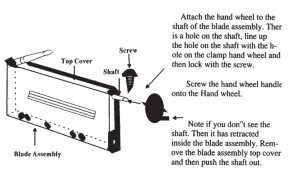
5. Mount the paper clamp hand wheel (Part #9) onto the shaft located at the end of the blade assembly with the screw provided. Please refer to the diagram below for details.
6. Attach the cutting bar adaptor (1) onto the cutting head (2) and attach the cutting handle (11) onto the cutting bar adaptor to complete the installation.
Operating Instruction
Caution: The blades are very sharp. Even a dull blade can be quite dangerous as well. Therefore, extra caution should be taken when operating paper cutters to prevent personnel injuries. Please read all instructions carefully before proceeding.
Disclaimer: We assume no responsibility for any accident or injury incurred while operating this paper cutter.
Before using your paper cutter for the first time, clean the blade and surrounding areas to remove the rustproof lubricant.
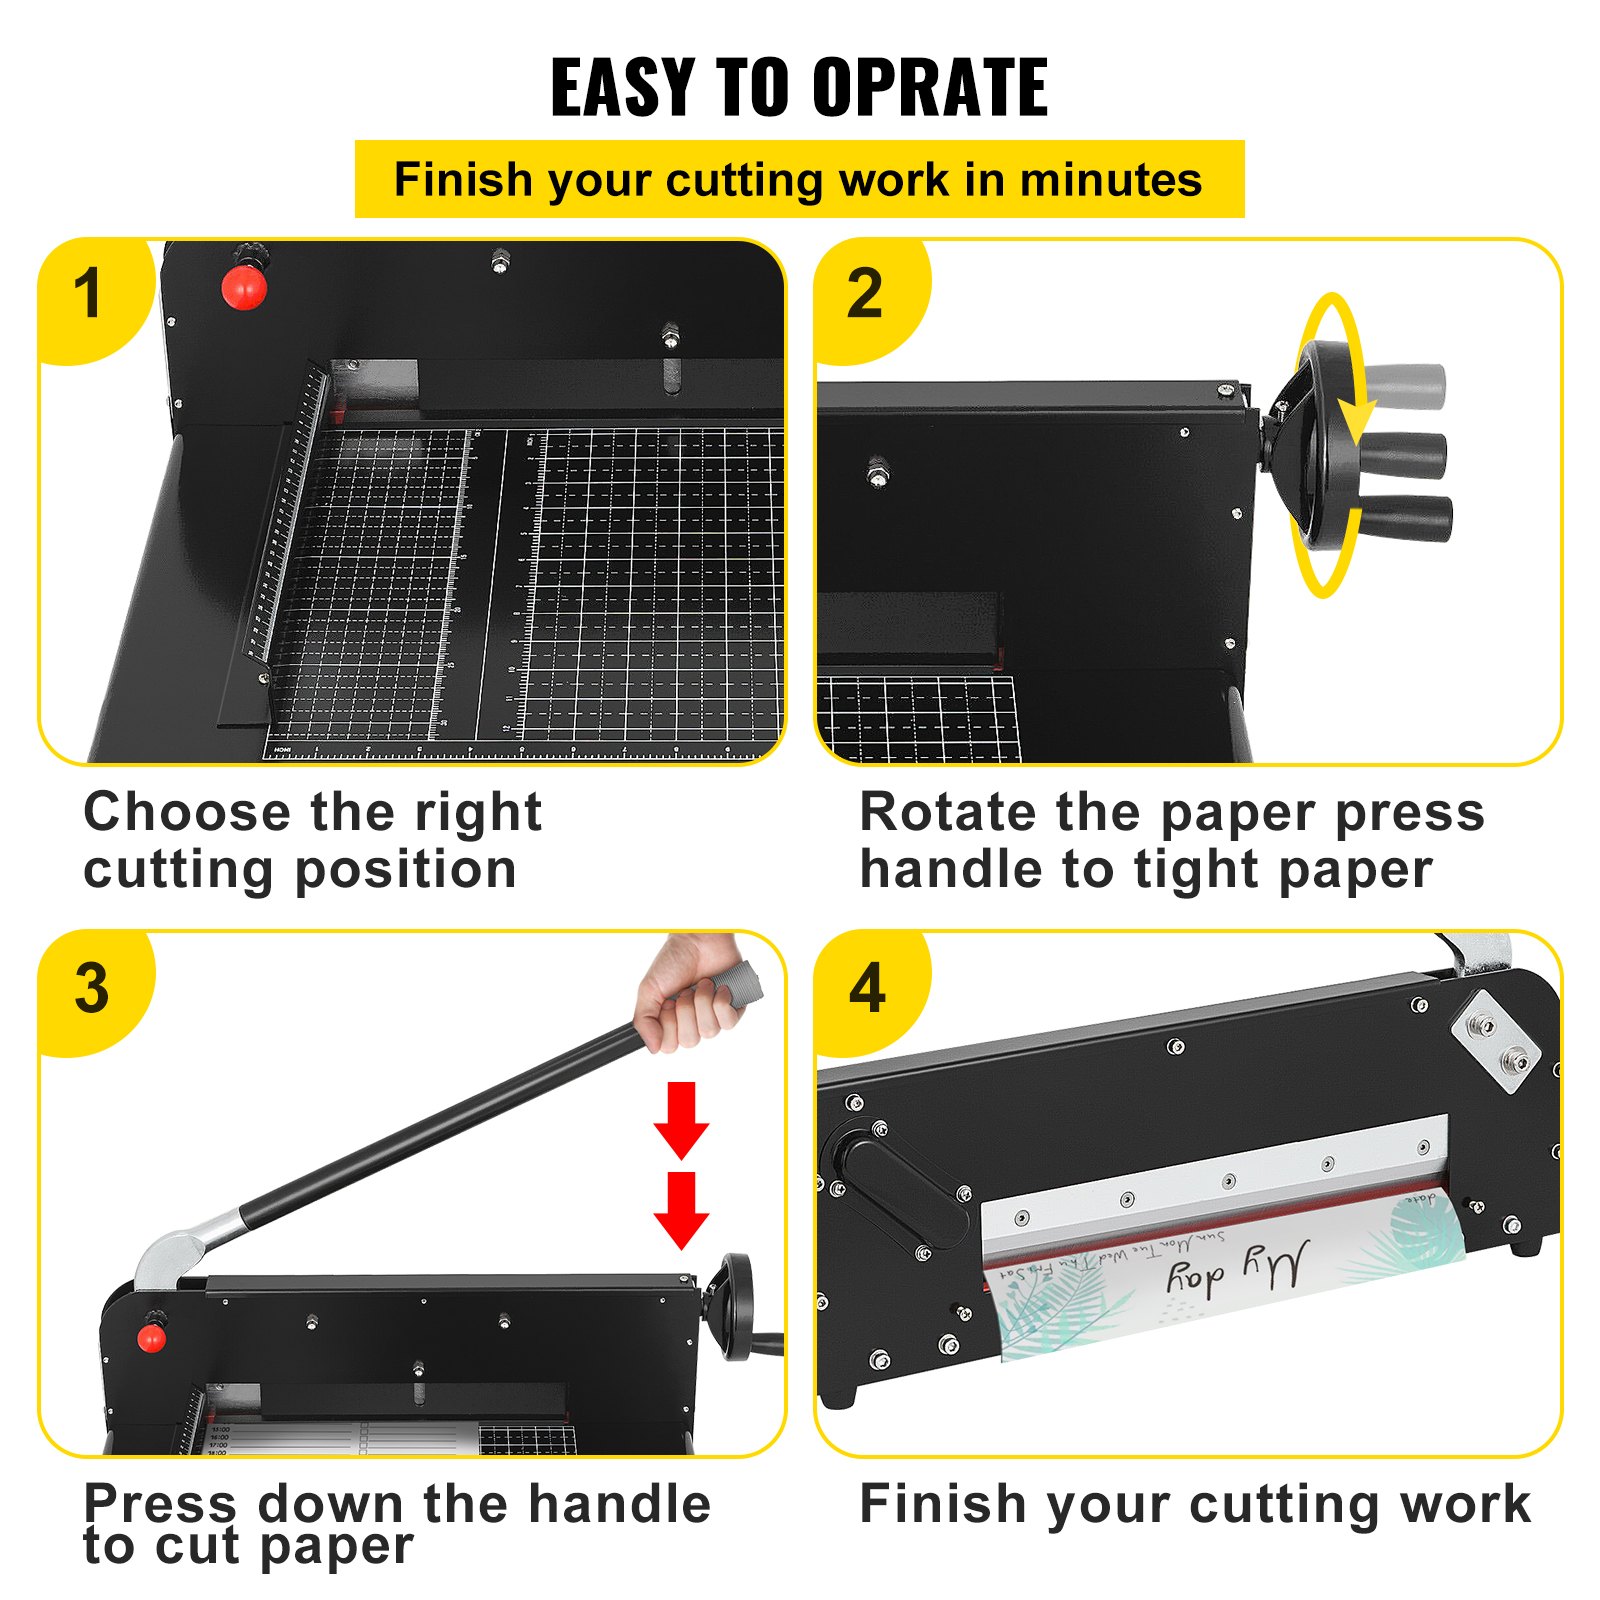
Please follow the detailed steps below to operate your VEVOR paper cutter.
- Loosen the back support arm lock and then move the back support arm to the desired position.
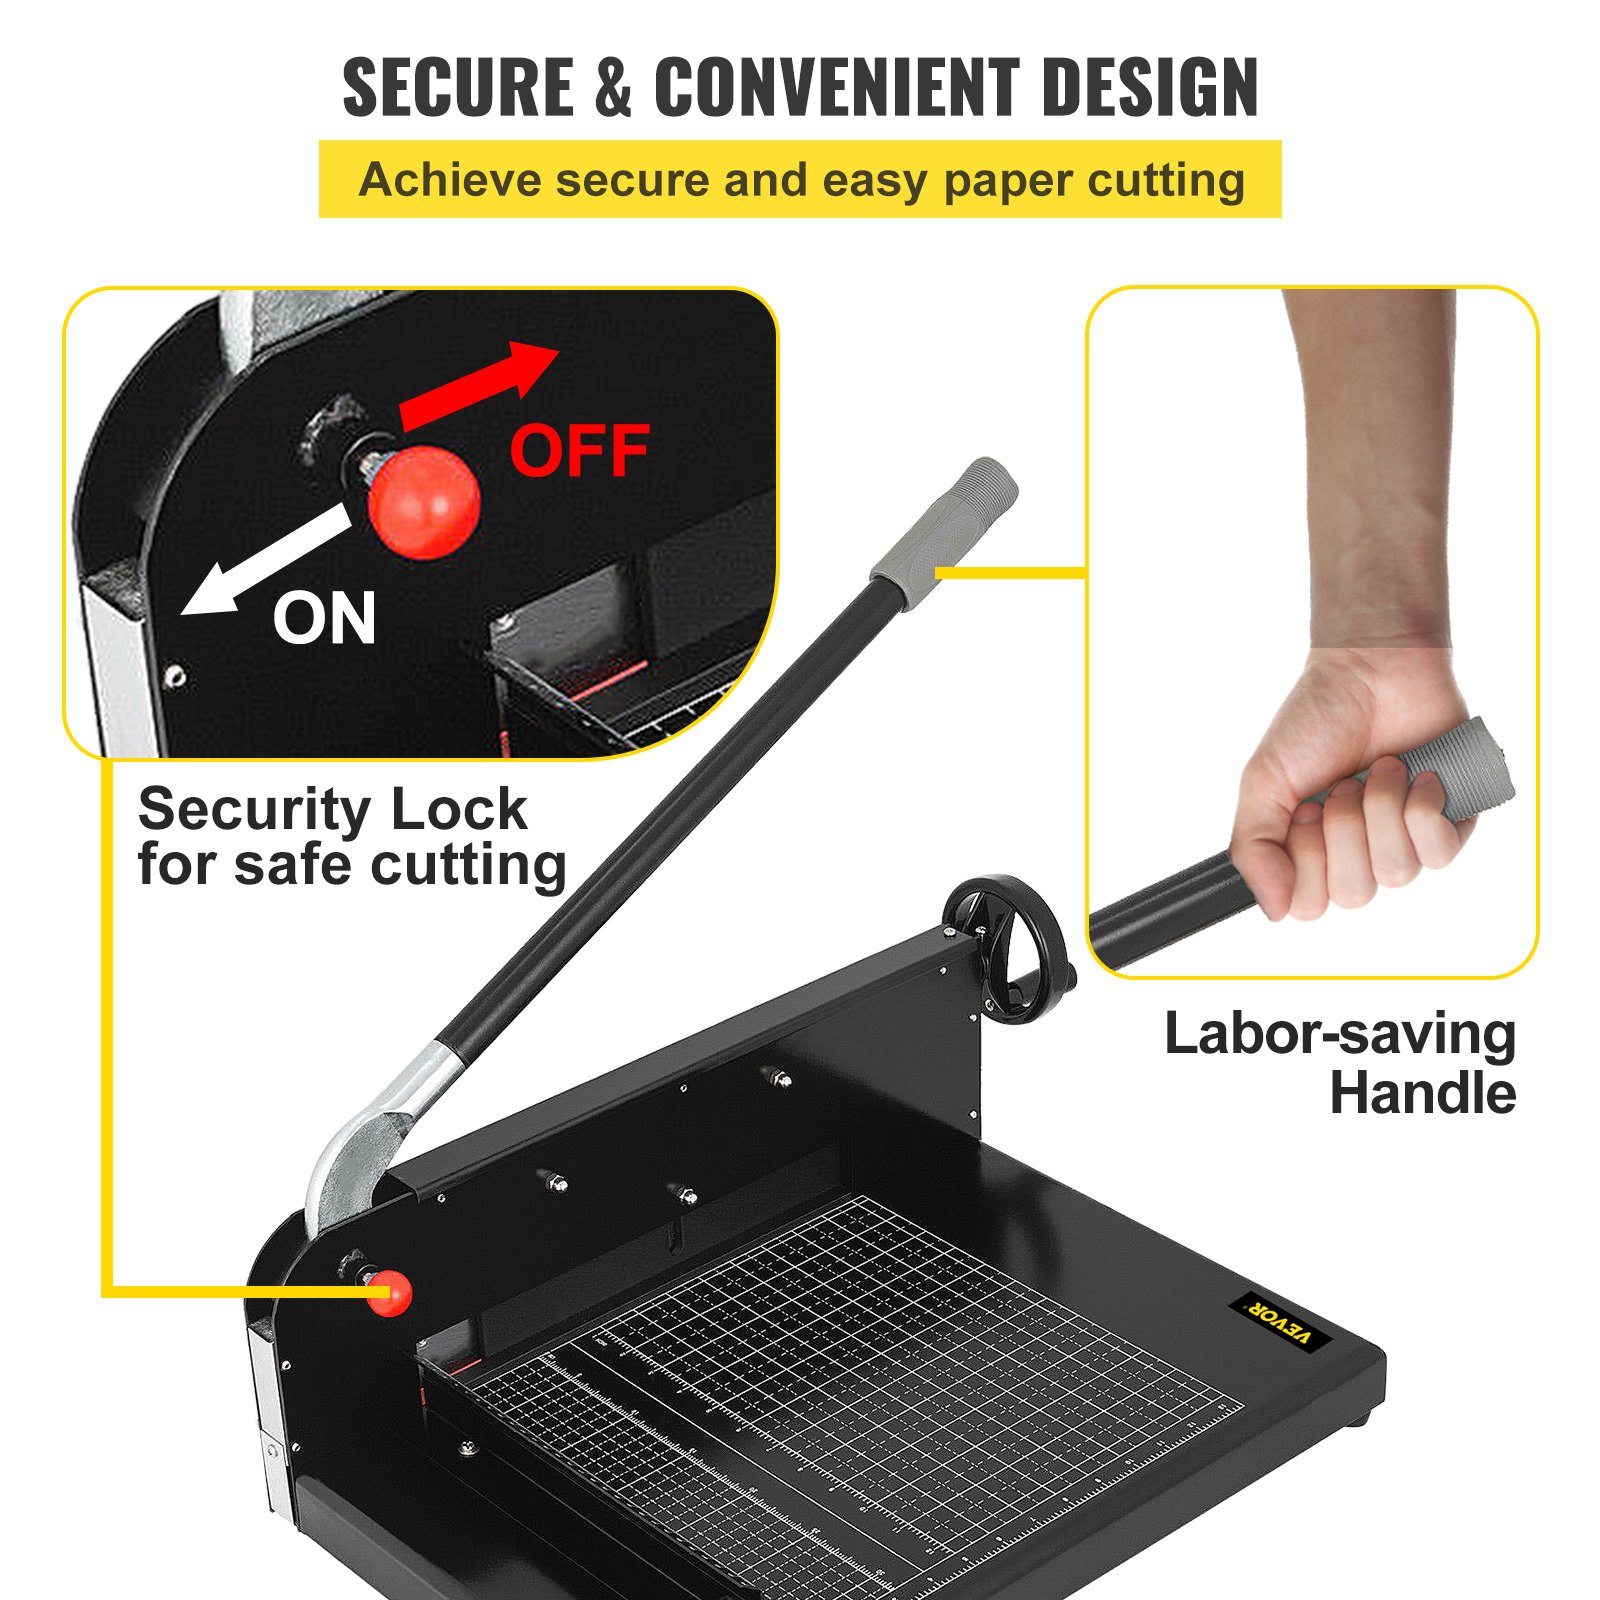
- Push the cutting bar up until the safety lock clicks to activate the blade locking device.
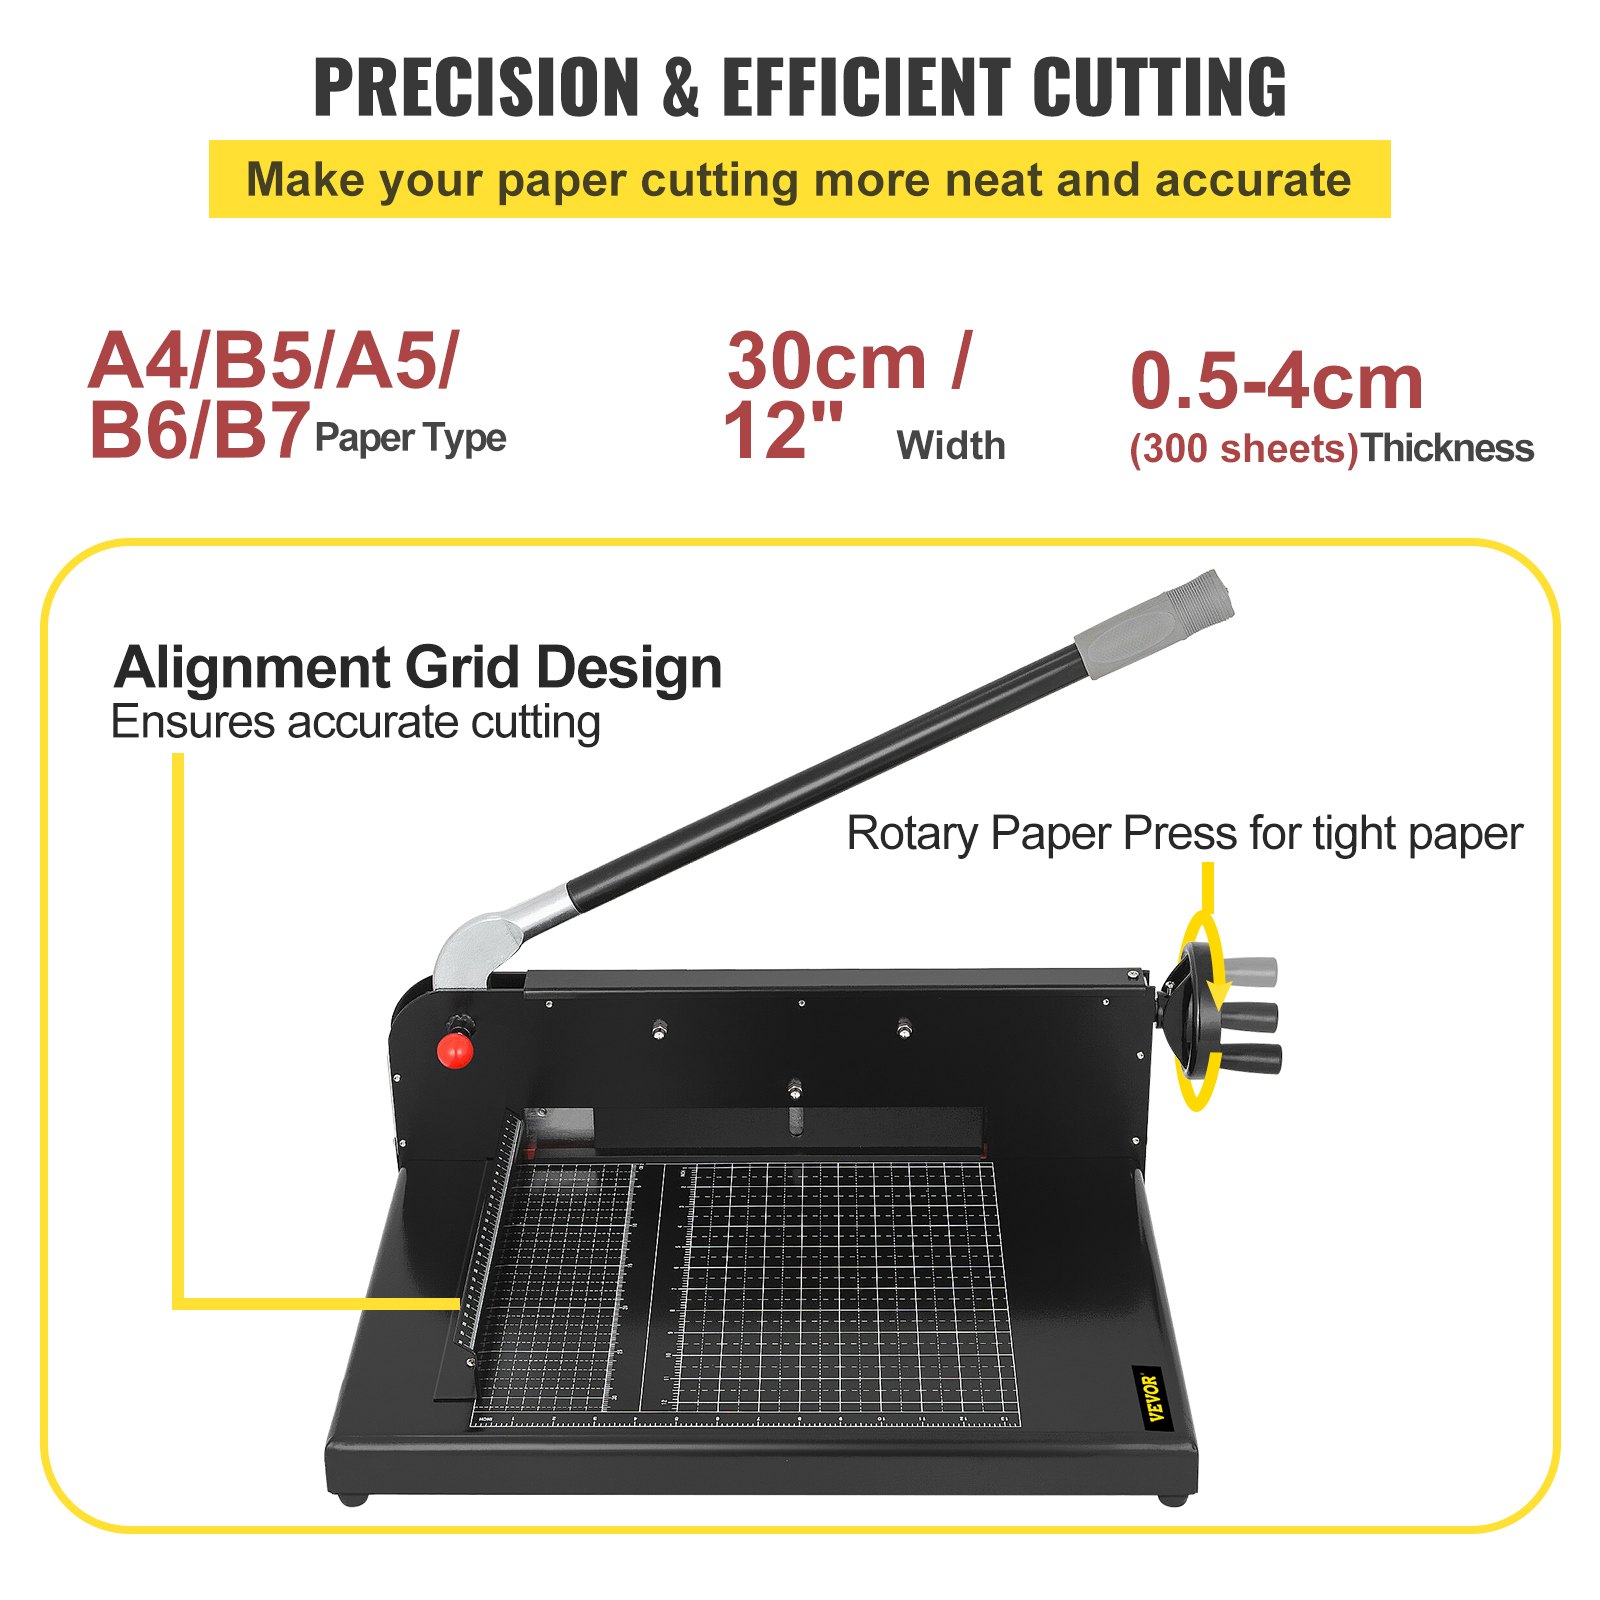
- Turn the paper clamp hand wheel counterclockwise to lift the paper clamp.
- Set the paper stack.
- Turn the paper clamp hand wheel clockwise to hold the paper stack firmly.
- Release the safety lock.
- Press the cutting bar to cut.
- Push the cutting bar up to lock the blade again.
- Turn the paper clamp hand wheel counterclockwise to lift the paper clamp and then remove the paper slack.
To prevent damage to the blade, avoid cutting hard materials with this paper cutter.
Blade Removal and Replacement Instruction
Caution: The blades are very sharp. Even a dull blade can be quite dangerous as well. Therefore, extra caution should be taken when repairing and maintaining paper cutters to prevent personnel injuries. Please read all instructions carefully before proceeding.
Disclaimer: We assume no responsibility for any accident or injury incurred while attempting to repair and maintain this paper cutter.
Please follow the steps listed below to remove/replace the blade from the blade assembly:
- Remove the cutting bar handle and adaptor from the blade assembly. Detach the blade assembly from the base.
- Place the blade assembly on a flat and sturdy surface.
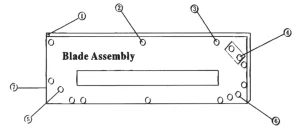
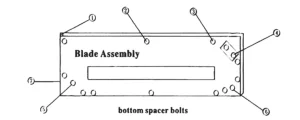
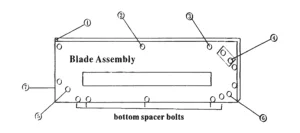
- Remove the blade cover screw (#1 as shown in the diagram above) and then slide the blade cover towards the hand wheel to remove it.
- Remove the two spacer bolts (#2 and #3 as shown in the diagram above) from the blade assembly frame.
- Remove the safety plate (#4 as shown in the diagram above) and then remove the safety plate.
- Pull the safety lock knob and the handle and then lift out the blade from between the blade assembly frames. Notice that the pin in the handle goes through the hole in the blade and secures the blade and the blade assembly together.
- Follow the above steps in reverse order to reassemble with a new or original blade after re-sharpening.
It may be necessary to level the blade (see section 4 below) and adjust the height of the blade assembly (see section 5 below) after reinstalling the blade. Rotating the cutting stick (see section 6 below) at this point is also recommended.
Blade Leveling Instruction
Caution: The blades are very sharp. Even a dull blade can be quite dangerous as well. Therefore, take extra caution when repairing and maintaining paper cutters to prevent injuries. Please read all instructions carefully before proceeding with the VEVOR Paper Cutter.
Disclaimer: We assume no responsibility for any accident or injury incurred while attempting to repair and maintain this paper cutter.
Please follow the steps listed below to level the blade:
- Slightly loosen the safety plate (#4 on the diagram above) so it can be adjusted.
- Hand-tighten the safety plate bolts.
- Press the cutting bar to level the blade tip against the cutting stick, then tighten the bolts. It may be necessary to use excessive pressure to place a groove onto the cutting stick surface the first time.
- The cutting stick can also be adjusted so it is leveled against the tip of the blade (see section 5 below)
After the blade has been leveled, test cut a paper stack to ensure it cuts through all the pages. It may be necessary to repeat the above steps to fine-tune the blade so it cuts through all the pages evenly.
Blade Assembly Height Adjustment Instruction
Caution: The blades are very sharp. Even a dull blade can be quite dangerous as well. Therefore, take extra caution when repairing and maintaining paper cutters to prevent injuries. Please read all instructions carefully before proceeding.
Disclaimer: We assume no responsibility for any accident or injury incurred while attempting to repair and maintain this paper cutter.
The blades can be re-sharpened or replaced if necessary. After each re-sharpening blades can get ever so slightly shorter; this paper cutter has built-in mechanisms to adjust the blade assembly to compensate for the slight loss of blade height after each re-sharpening. There are two alternative mechanisms for adjusting blade height:
Alternative 1:
- Raise the cutting bar up until the safety lock clicks to activate the blade locking device.
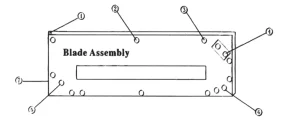
- Loosen cutting stick holding screws (#5 and #6 on the diagram above).
- Loosen the five bottom spacer bolts (please refer to the diagram above).
- Tap on the bottom of the blade assembly lightly with a hammer to move the cutting stick up. You can also tap either the left or right side of the cutting stick’s bottom to adjust specific areas of the cutting stick to level against the tip of the blade.
- You can also insert a thin strip at the bottom of the cutting stick to adjust the height (You’ll need to remove the cutting stick fender screw—— #7 on the diagram above).
- Tighter the cutting stick holding screws and bottom spacer bolts.
Alternative 2:
Please refer to Section 4 for instructions for leveling the blade.
Cutting Stick Rotation Instruction
Caution: The blades are very sharp. Even a dull blade can be quite dangerous as well. Therefore, extra caution should be taken when repairing and maintaining paper cutters to prevent personnel injuries.
Please read all instructions carefully before proceeding.
Disclaimer: We assume no responsibility for any accident or injury incurred while attempting to repair and maintain this paper cutter.
The Cutting Stick (the material on which the paper cutter blade rests when it cuts) is a rectangular strip.
Each side os the rectangular Cutting Stick can be used twice by pulling out the Cutting Stick and inserting the other and in first. Since there are four sides of the Cutting Stick, each Cutting Stick can be utilized eight times.
Please follow the steps listed below to rotate the Cutting Stick:
- Push the handle up until the safety lock clicks to engage the blade locking device.
- Loosen the two Cutting Stick holding screws (#5 and #6 on the diagram).
- Remove the Cutting Stick fender screw and then the Cutting Stick fender (#7 on the diagram above).
- Pull out the Cutting Stick.
- Place the Cutting Stick back into the assembly by inserting the other end first if the current side of the Cutting Stick has been used only once. Otherwise, rotate the Cutting Stick to a new surface or side.
- Reinstall the Cutting Stick by following the above steps in the reverse order.
Recommended For Your Project
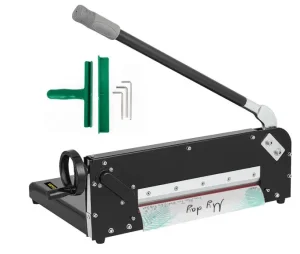
VEVOR Paper Cutter 12Inch A4 Commercial Heavy Duty Paper Cutter Manual


Reviews
There are no reviews yet.