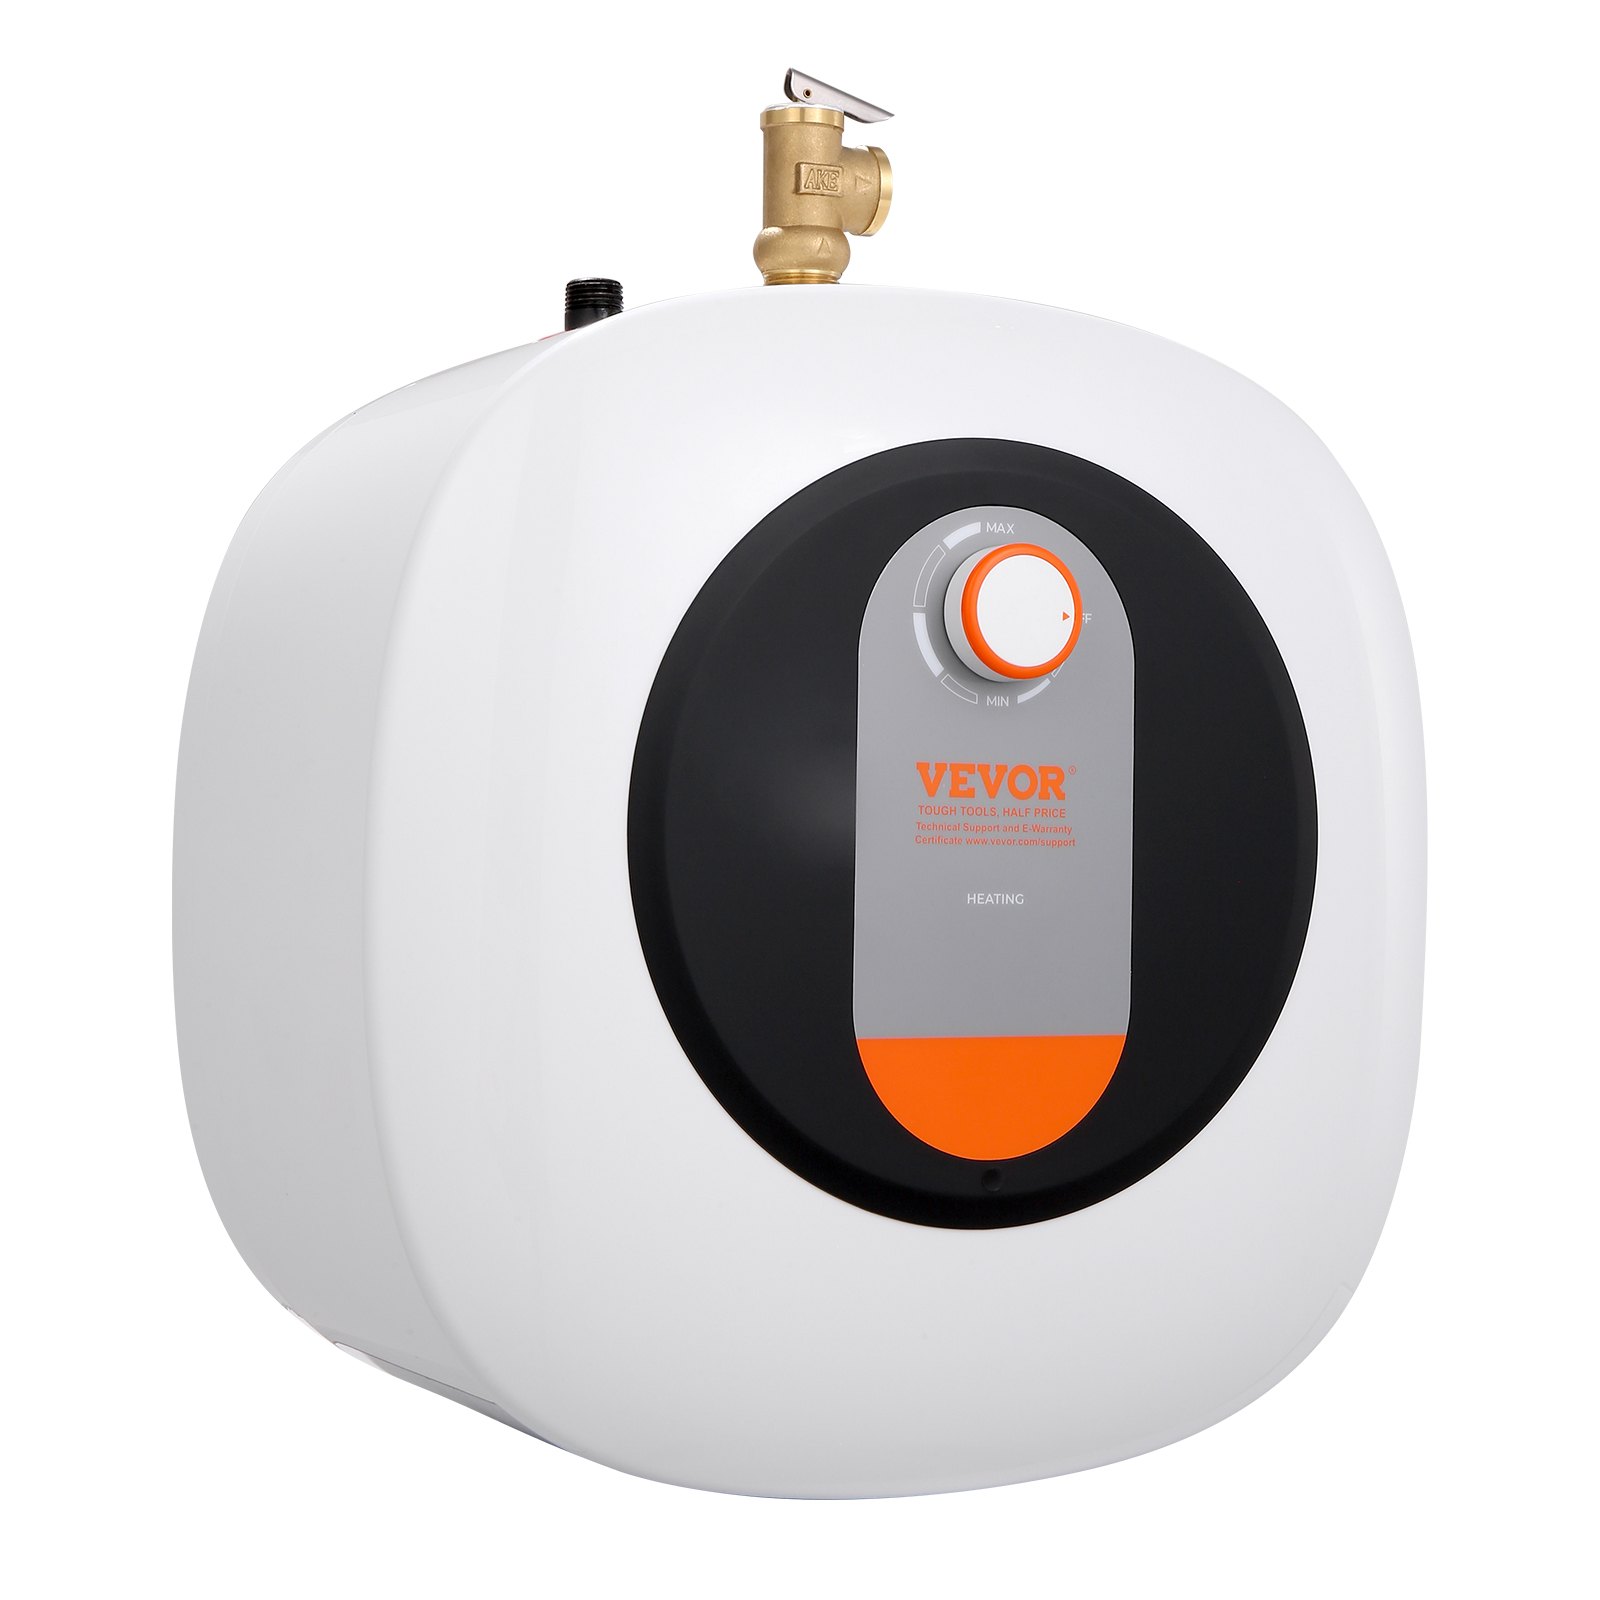
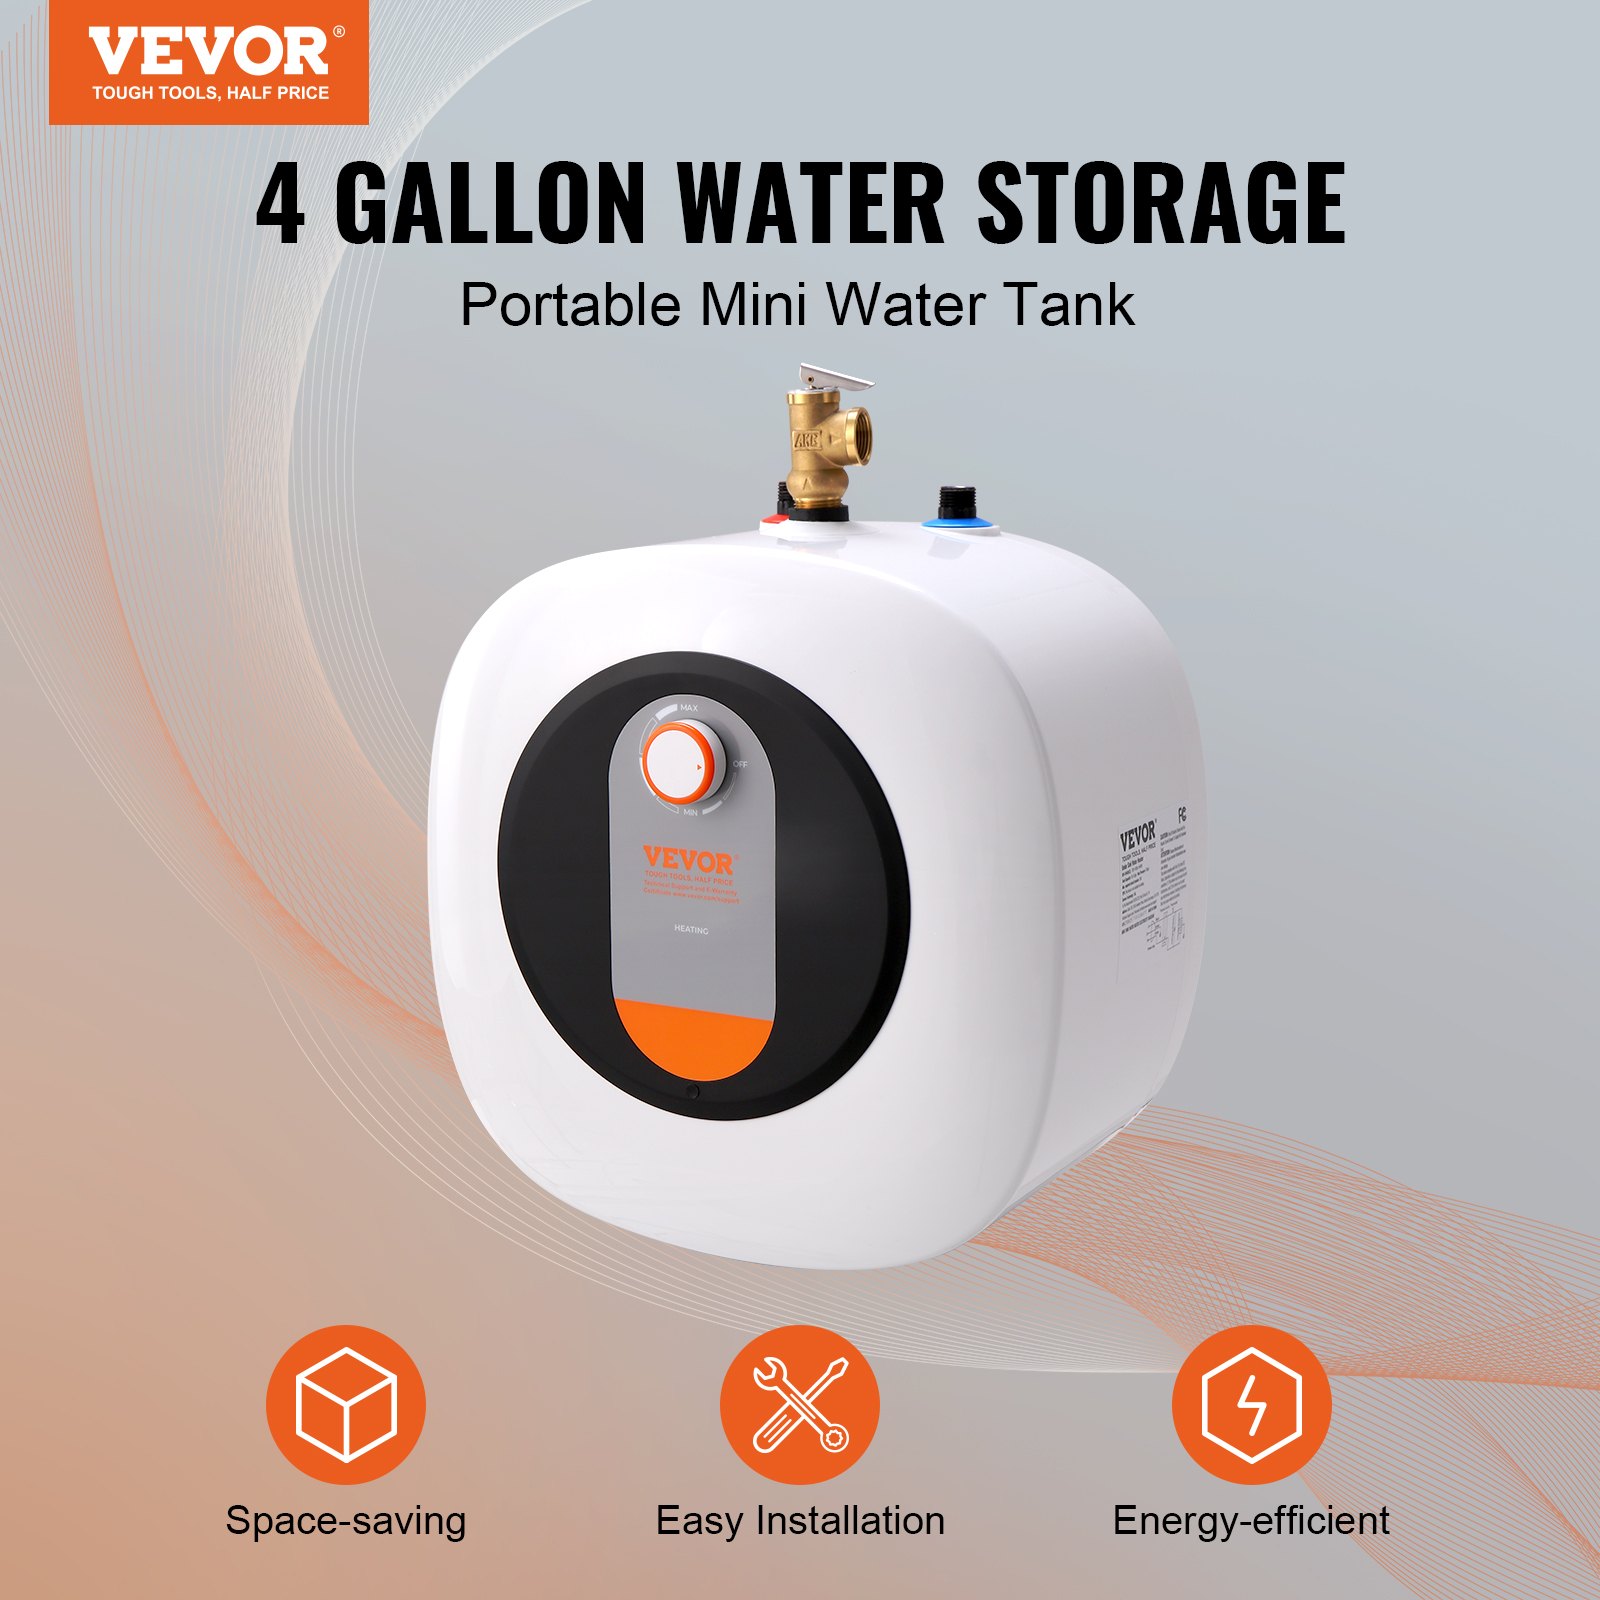

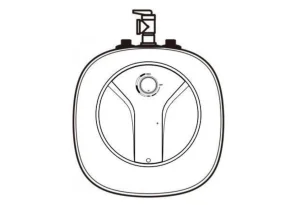
Unlock the full potential of your VEVOR Electric Mini-Tank Water Heater with our comprehensive product manual. This 4-gallon tank hot water boiler storage unit, boasting 1400W power, is a versatile addition to your kitchen, bathroom, or restaurant.
Our detailed manual provides step-by-step instructions for setup, troubleshooting, and optimization, ensuring easy installation whether shelf, wall, or floor mounted. It covers every aspect of the device, from the safety temperature pressure valve to maintenance tips, ensuring you get the most out of your appliance.
Emphasizing user-friendliness and safety, this guide is essential for both new and experienced users, providing clear, actionable information for a hassle-free experience.
MODEL: DX-14VA(M,S)
Warning
- Read all safety warnings, instructions, illustrations, and specifications provided with this electrical appliance. Failure to follow all instructions listed below may result in electric shock, fire, and/or serious injury.
- TIPS: This device is not suitable for bathing.
- The pressure relief temperature of the T/P valve may cause scalding.
- Scalding may occur if the temperature is set to more than 122°F. It must be mixed with cold water before use.
- The appliance uses a 120V~/60Hz power supply.
- Do not pull or plug the power plug with wet hands.
- Do not close the water inlet valve, and do not turn on the power supply when the appliance is not filled with water, so as not to damage the appliance.
- The safe service life is 8 years. When the product is still used after the safe service life, it may cause fire or injury due to the deterioration of quality over the years of disrepair.
- Do not allow children to operate the appliance to avoid accidental injury.
- This appliance can be used by children aged 8 years and above and persons with reduced physical, sensory, or mental capabilities or lack of experience and knowledge if given supervision or instruction concerning using the appliance safely and understanding the hazards. Children shall not play with the appliance. Children shall not do cleaning and user maintenance without supervision.
- If the supply cord is damaged, it must be replaced by the manufacturer, its service agent, or similarly qualified persons to avoid a hazard.
Caution
- Please confirm the water temperature before use to avoid too low or too high.
- Turn the thermostat to the lowest temperature before unplugging the power plug.
- Periodically pull the T/P valve handle to check whether the relief valve train is unblocked. If not, please contact us.
- In cold areas, when the appliance is not used for a long time in winter, the water should be drained to prevent it from freezing and damaging.
- When the appliance is installed under the sink, check frequently whether the sink is leaking to avoid danger to the appliance.
SAVE THESE INSTRUCTIONS
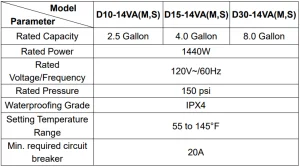
VEVOR Electric Water Heater Product Specifications
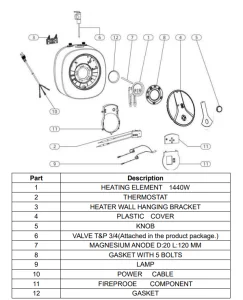
Interior Components Diagram
Installation Precautions
The wall for mounting the appliance shall withstand at least four times its total mass when filled with water. Take reliable reinforcement measures when necessary.
- Appliances should be installed near frequent water points to reduce pipeline heat loss.
- Adequate space must be left around the appliance to facilitate future maintenance. When the appliance is installed above the ceiling, the ceiling shall have a movable plate and a maintenance window for removing and installing the appliance.
- Safety drainage measures, such as floor drains, must be in place to prevent appliance leakage from damaging other facilities.
- It must be installed indoors and where the link temperature is above 32℉ so that ice does not break the tank’s water pipe.
- There should be no flammable or explosive objects around the installation appliance.
- Do not reverse the connection of the inlet and outlet water pipes. Sealing gaskets should be installed at the pipes’ interface, and the rotating force should be appropriate during installation.
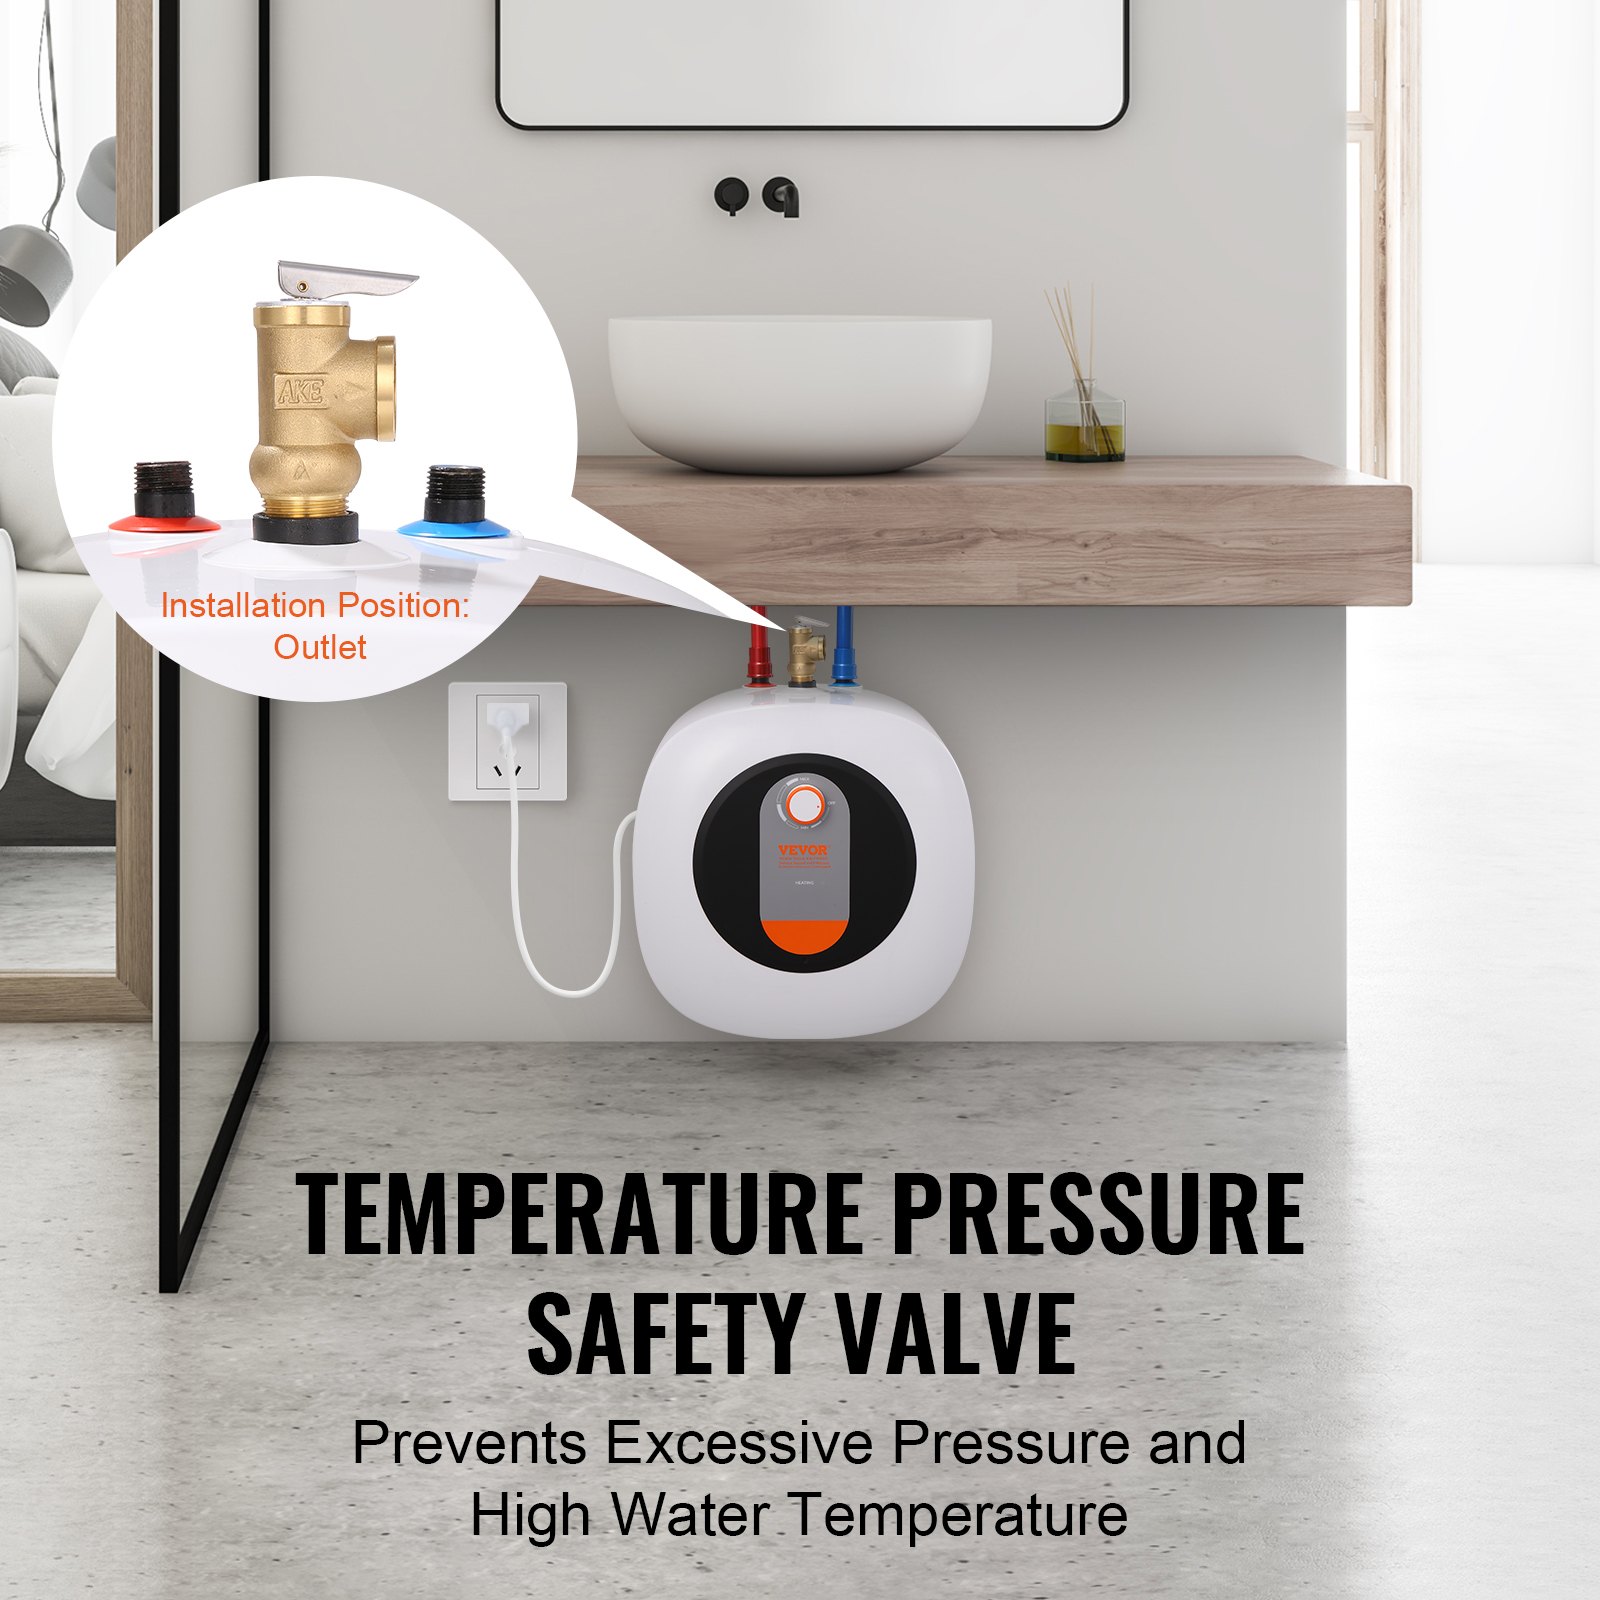
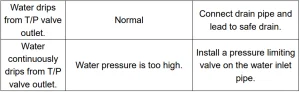
- A T/P valve (a pressure relief device) shall be installed between the appliance’s inlet and outlet, through which water may flow out of the relief valve drainpipe. The outlet of the T/P valve shall be maintained in contact with the atmosphere. The drain pipe should be securely fixed at the T/P valve.
- The attachments provided by our company must be used.
- Sockets providing power to appliances must be reliably grounded. Do not install power sockets in damp places.
- The installation must be performed by professional installation personnel.
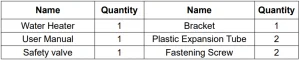
Packing List
Methods of Installing the Electric Mini-Tank Water Heater
Equipment Installation
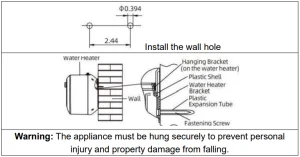
- After the water heater’s installation position is determined, drill two holes in the horizontal direction of the wall with a spacing of 2.44 inches and a diameter of φ0.394 inches according to the size shown in the following figure. The hole depth shall not be less than 2.76 inches. Insert two plastic expansion tubes into the hole, and secure the host mounting plate with fastening screws.
- Align the two hanging holes on the back of the appliance with the two hooks of the hanging plate and pull down with force to make the hanging holes hang into the hooks.
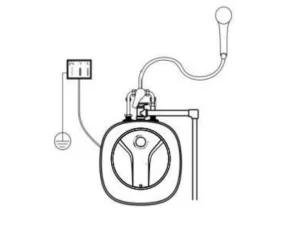
Tube Connection
The specification for this appliance’s inlet and outlet water interface is NPT1/2″.Connect pipes according to the following figure.
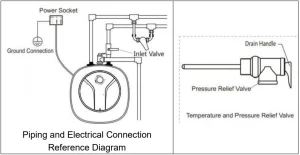
- Connect the T/P valve in the appliance’s inlet and outlet.
- Insert the drain pipe into the right side of the T/P valve outlet, the other end of the continuous down to the safe drainage (such as into the floor drain), the drain pipe should be installed unobstructed, and the/valve outlet is connected to the atmosphere.
- When the water inlet pressure exceeds 150 psi, an additional safety valve should be added to the water inlet T/P valve.
Multiple Outlet Connection
If the user wants to implement a multi-pipe supply system, please refer to the connection method shown on the drawing.
Notice
- The T/P valve’s rated pressure is 150 psi. Therefore, when the pipeline system’s pressure exceeds its rated pressure, the T/P valve will automatically drain and relieve pressure, and water flow out of the outlet will be normal.
- The drain pipe connected to the pressure relief device(T/Pvalve) must be installed continuously downward in a frost-free environment. (To prevent hot water from flowing out, Lead the other end continuously below to a safe drain (such as an in-floor drain).)
- The blue is the water inlet, and the red is the water outlet.
- If the hot water pipe is too long, it should be insulated to reduce heat loss.
- When setting a power socket, determine the installation position according to the actual length of the cable.
Test Run
- After all installation is completed, open all valves in the pipeline, open the water tap, fill the appliance with water, and close the hot water tap. Check whether the pipes are leaking. If so, reconnect the pipes.
- Unscrew the stop screw at the handle of the T/P valve, pull the handle, and check whether the water discharge of the T/P valve is smooth (continuous water outlet means normal).
- After confirming regular operation, switch on the power and run the appliance according to the operation method section. Power off and disconnect when all is well.
Method of Usage
Water Injection
When the water heater is used for the first time or again after a long time, it should inject water. Open all valves in the pipeline, then turn on the hot water tap. When the water continuously flows, it indicates that the water heater has been filled with water.
So turn off the hot water tap, keep the cold water pipe valve open, and ensure that cold water can automatically be added after hot water is used. Also, make sure the appliance is always filled with water.
Switch on Power
Insert the power plug into a reliable electric grounding outlet, switch on the power, and the power indicator will light; according to the following method to adjust the temperature control knob, the water heater immediately operates.
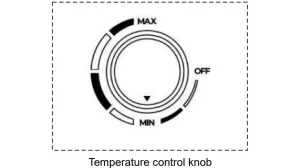
Temperature Regulation
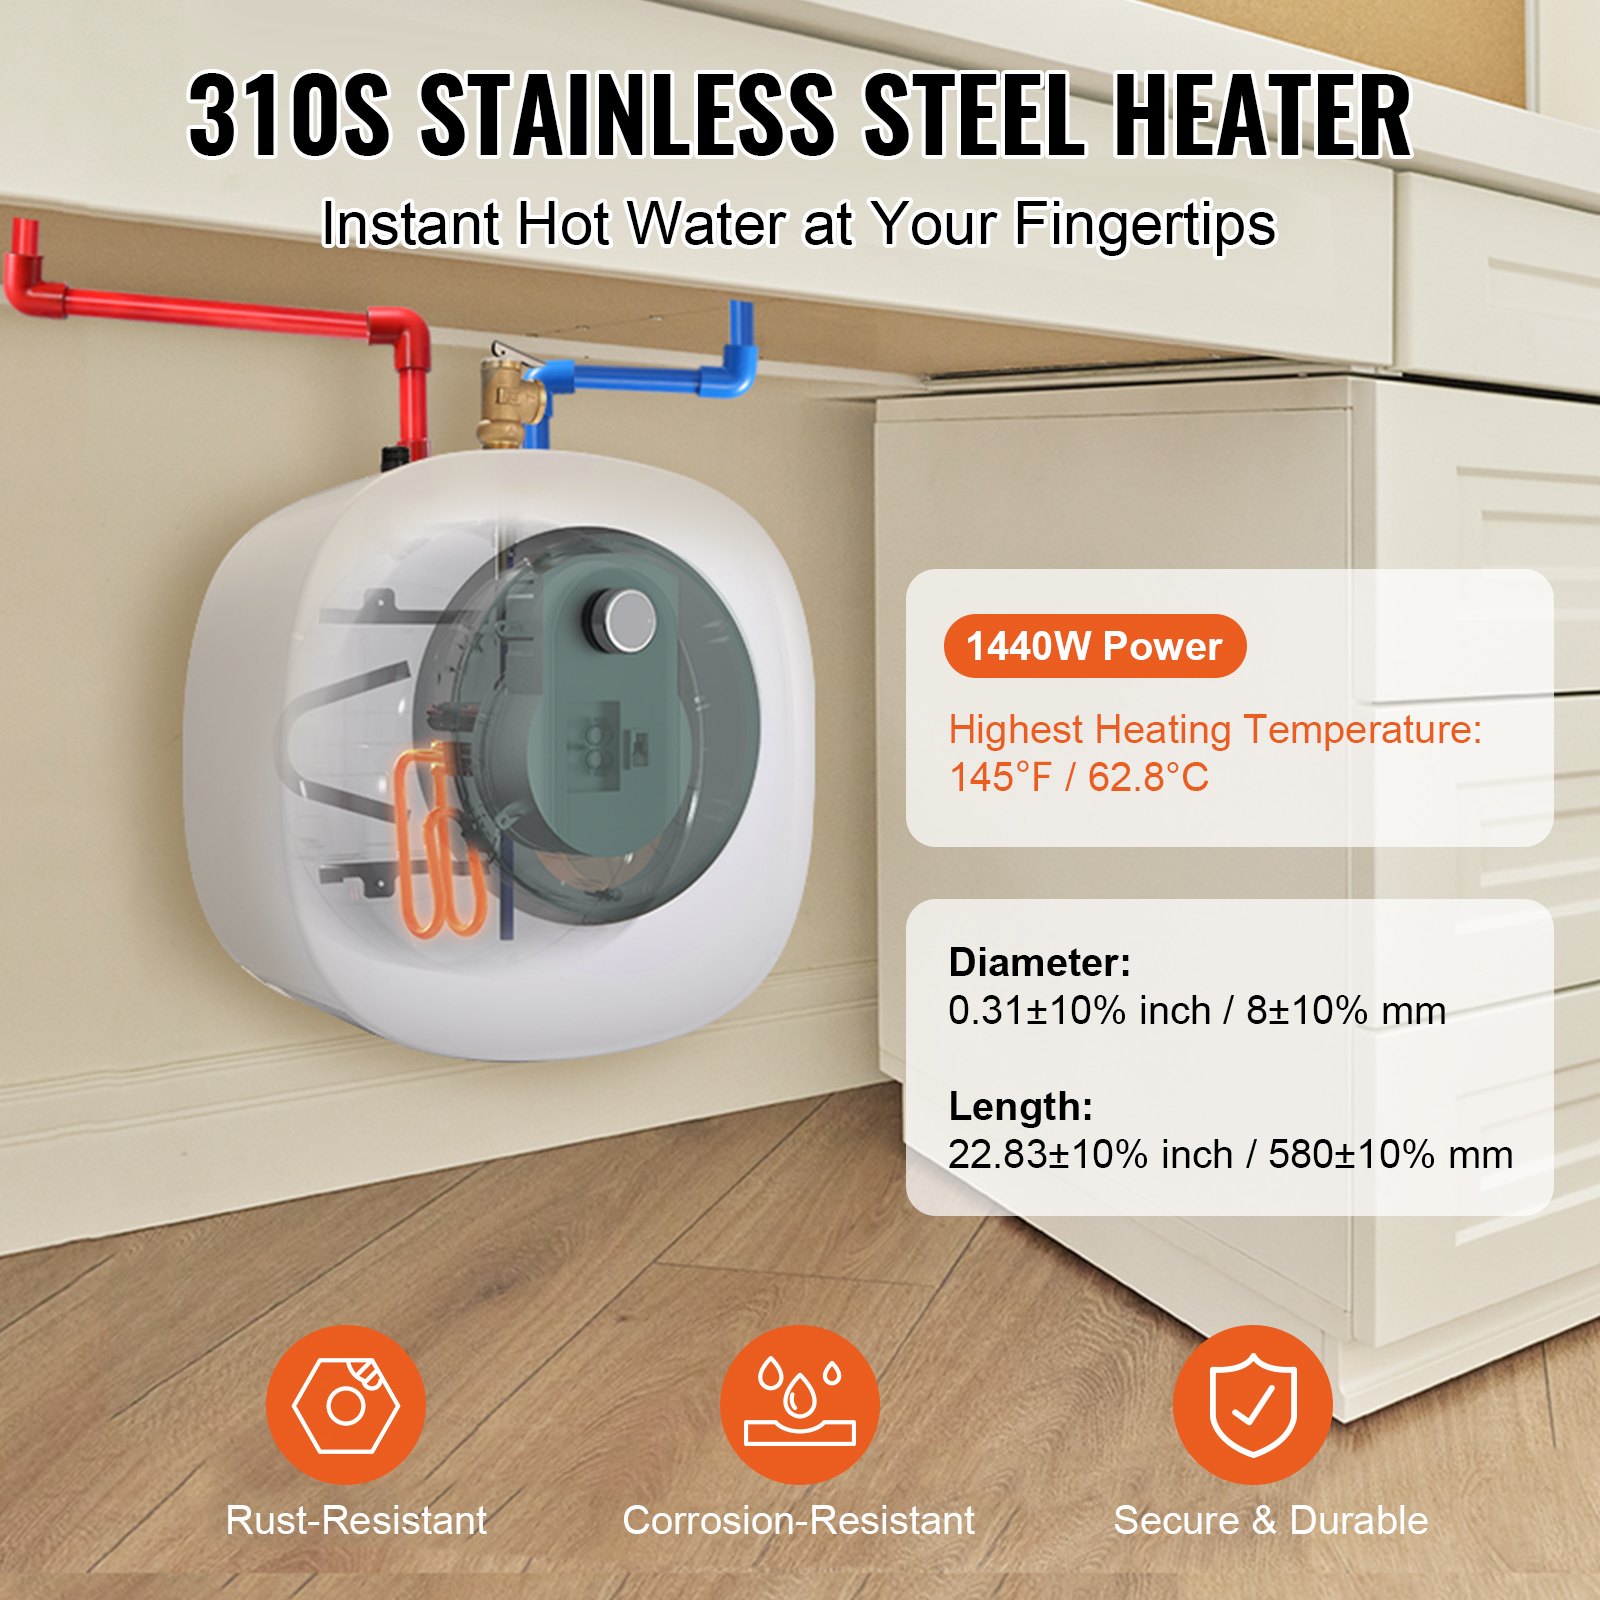
Adjust the temperature with the temperature control knob. Turn clockwise to raise the set temperature, turn anticlockwise to lower the temperature, and the temperature adjustment range is about 145°F at room temperature.
After setting the temperature, the water heater automatically works, and the heating indicator lights up. When the water temperature reaches the set temperature, the power will be cut off automatically, and the heating indicator will light out to enter the heat preservation state.
When the water temperature falls for some period, the water heater automatically turns on again, and the heating indicator lights up. When set to “OFF”, the water heater will not work.
Electric Mini-Tank Water Heater Troubleshooting
If the water heater breaks down during normal use, please immediately cut off the power and check according to the following instructions.

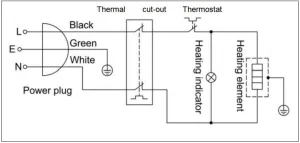
Wiring Diagram
Daily Maintenance
Cleaning
Use a dry or wet cloth to dip in a little neutral cleaner to wipe the water heater surface. Do not use gasoline or other solvents, and don’t spray water.
Descaling
According to the local water quality condition, when a water heater is using a certain time (usually 1 month), it needs to remove the dirty scale: first, turn off the water heater, close the inlet valve, separate the connection between the inlet and outlet, and empty the inner tank water. After descaling, reinstall the internal tank connection between the inlet and the outlet.
Draining
With a long-term outage or maintenance, first cut off the power supply, turn off the inlet water valve, separate the connection between the inlet and outlet water pipes, empty it upside down, and reinstall the connection between the inner tank and the connection between the inlet and outlet water pipes. When used again, the inner tank must be filled with water before connecting the power supply.
Replace Agnesium Anode
The magnesium anode prevents corrosion in the inner tank, which is a wasteful part. After installation, you need to check it once a year. Suppose the magnesium anode is about to run out or has run out. In that case, it should be replaced immediately with the same specifications to ensure the water heater’s service life.
Caution
- Pull out the power plug before maintaining.
- Non-professional maintenance personnel shall disassemble, maintain, and modify water heaters strictly forbidden.
- The T/P valve (pressure relief device) needs to be regularly taken apart to remove calcium carbonate sediment and ensure that it is not blocked. If blocked, please repair it in time.
- Drainage must be within the container under a water temperature below 104 ℉. Avoid scald.
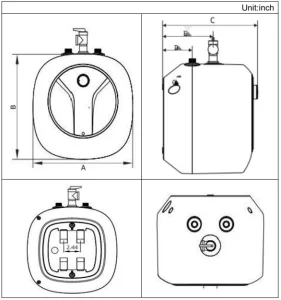
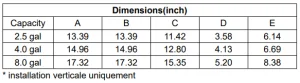
Product Dimensions
Recommended For Your Project
VEVOR Electric Mini-Tank Water Heater, 4-Gallon Tank Manual

Reviews
There are no reviews yet.