Unlock the full potential of your VEVOR Bluetooth Handheld Anemometer with our comprehensive product manual. Designed to help you easily measure wind velocity, wind temperature, air flow, and wind chill from 14℉ to 140℉, this digital wind speed meter gauge is perfect for activities like surfing, drone flying, and HVAC tasks.
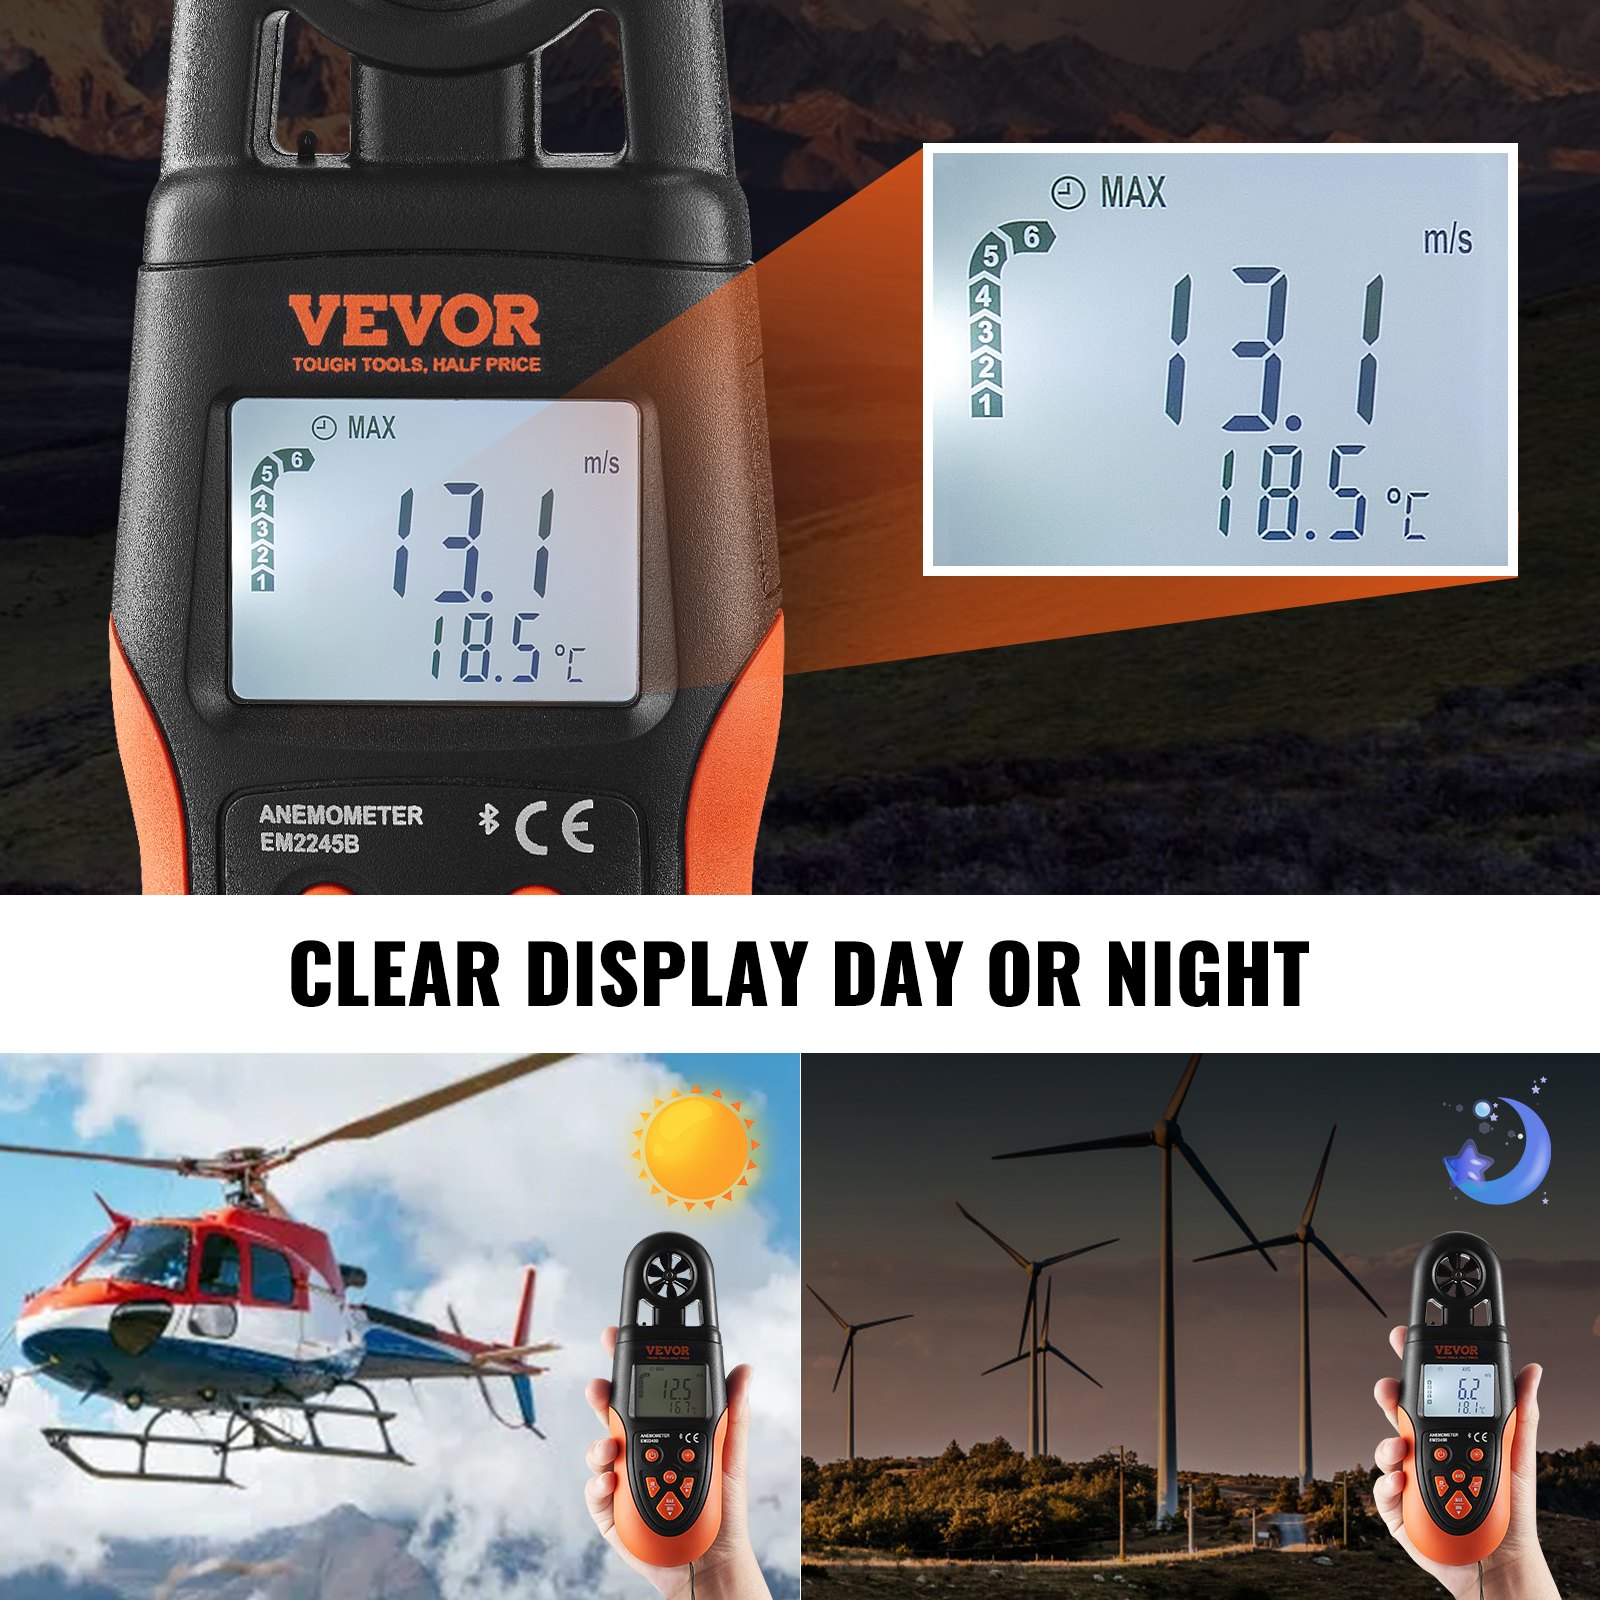
Our manual provides step-by-step setup instructions, detailed troubleshooting tips, and optimization techniques to ensure you get the most accurate readings every time. With an intuitive LED backlight screen, the VEVOR Anemometer is user-friendly and efficient.
Download our manual now and take control of your wind measurement needs with confidence and precision.
VEVOR Bluetooth Handheld Anemometer Manual
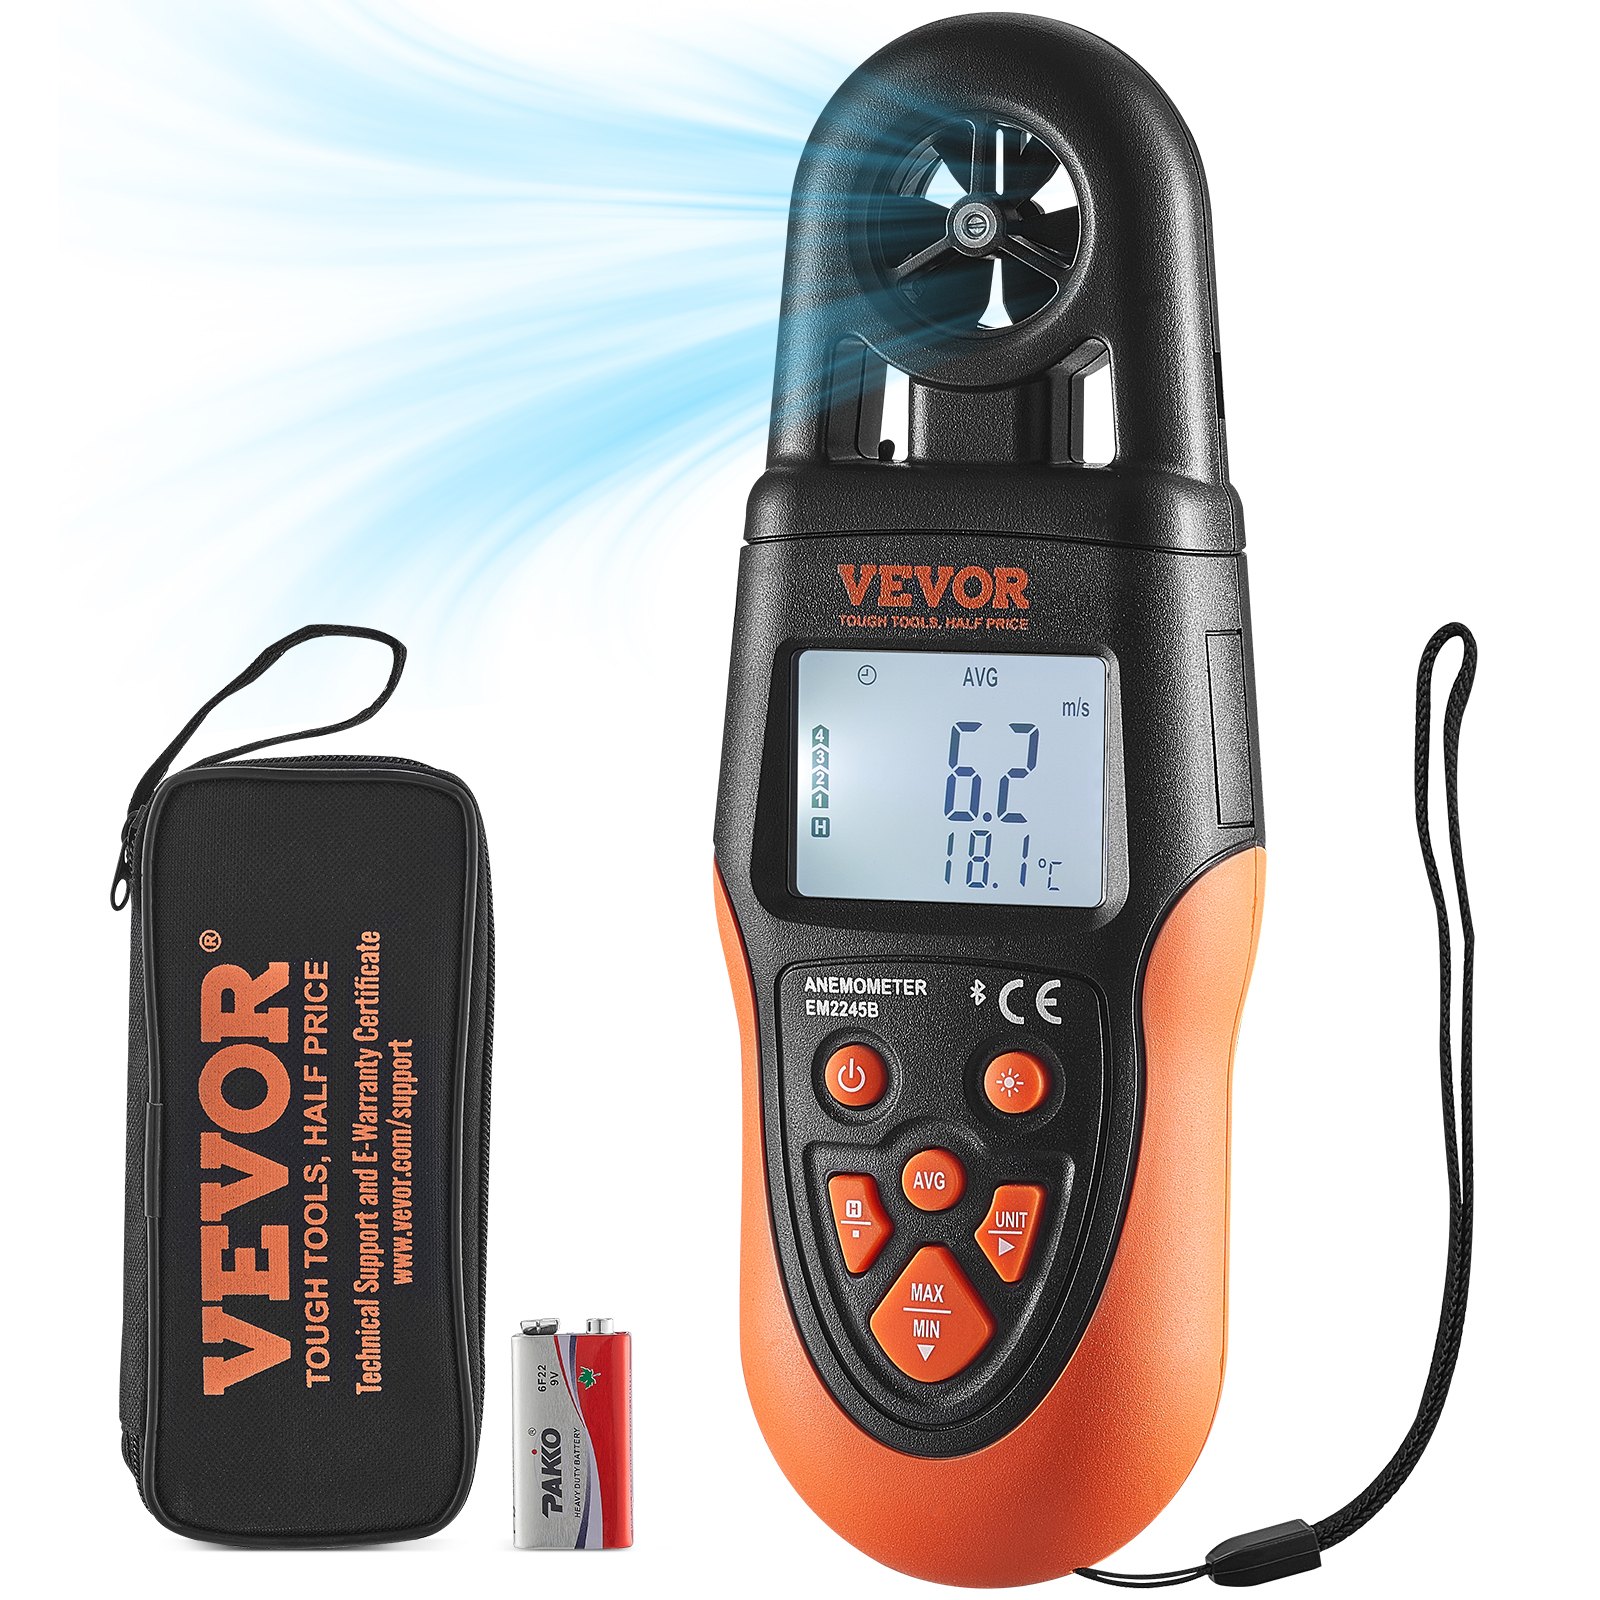
MODEL: EM2245B
Introduction
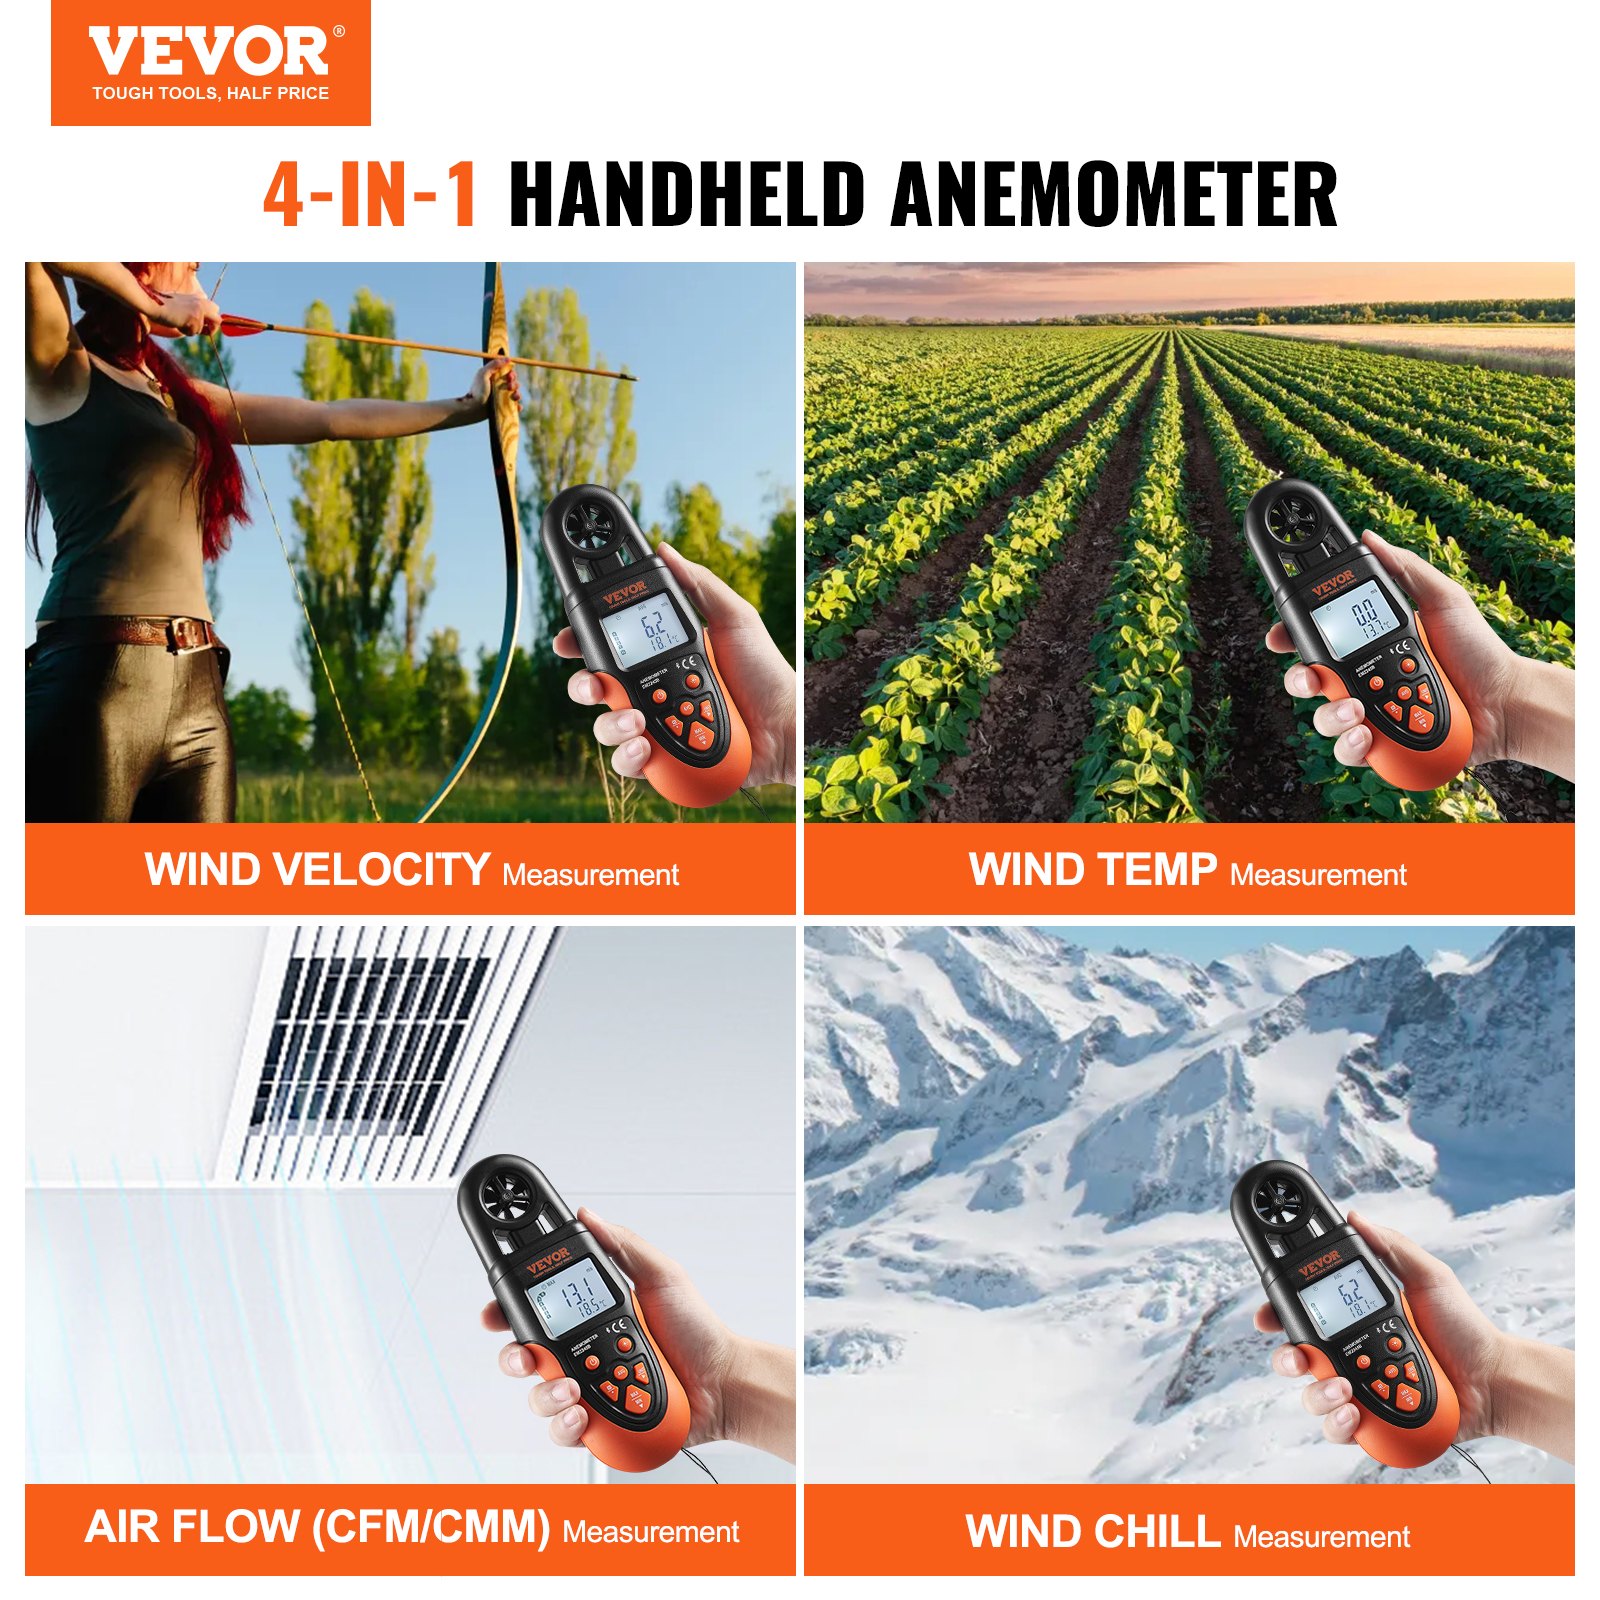
This Bluetooth Handheld Anemometer measures instantaneous, maximum, minimum, and average values of wind velocity, air flow, and temperature (wind temperature and wind chill temperature).
Features
Measurements of instantaneous, maximum, minimum, and average values of wind velocity, air flow, and temperature( wind temperature and wind chill temperature.)
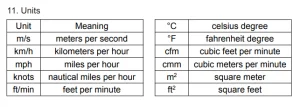
- Five kinds of wind velocity measurement units to select from.
- Two kinds of air flow measurement units to select from.
- Two kinds of temperature measurement units to select from.
- Area setting for air flow, with two unit options.
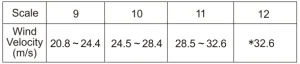
- Wind force indication.
- Wind chill temperature calculation.
- Data hold.
- Auto power off.
- Overrange indication.
- Low battery indication.
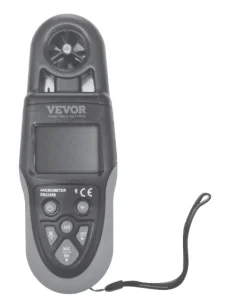
Structure
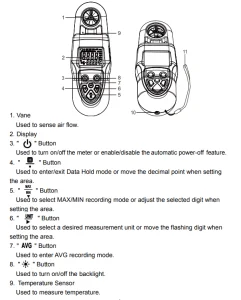
10. American standard nut, 1/4-20 UNC
11. Carrying Strap
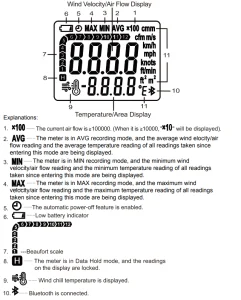
Understanding the Display
Bluetooth Handheld Anemometer Operation Instructions
1. Turning on the Meter.
Install a new battery ( 9V, 6F22, or equivalent ) into the battery compartment. The display will briefly show all segments. Press the “power” button to turn on the meter and enter the measurement mode.
2. Enabling and Disabling the Automatic Power-Off Feature.
When the meter is on, you can hold down the “power” button for about 2 secs to enable or disable the automatic power-off feature. When the automatic power-off feature is enabled, “a clock” is displayed as an indicator.
3. Turning on/off the Backlight.
Press the “brightness” button to turn on or off the backlight, if necessary.
4. Selecting a Desired Unit.
Press the “unit” button once to enter the unit setting mode, you can repeatedly press the “unit” button to scroll through the ” m/s “, ” km/h “,” mph “, ” knots “, ” ft/min “,”cmm”, “cfm” , ” °C “, ” °F “, ” ” “°C” and ” ” “°F” units.
When the desired unit appears, release the button. About 2 seconds later, the meter saves the unit automatically and exits the unit setting mode. (The setting is not saved after power loss.)
5. Measuring Wind Velocity, Air Flow and Temperature.
Hold and position the meter so that the air flow passes through the vanes from the rear of the meter. For more accurate test results, try to keep the axis of the vanes within 20° of the wind direction. Wait about 4 secs, then read the readings on the display.
6. Locking/Unlocking the Readings.
In measurement mode, briefly press the “H/.” button to enter the Data Hold mode. The present readings are locked and the symbol “H” appears on the display as an indicator. To exit the Data Hold mode, briefly press this “H/.” button again. The readings are unlocked, and the symbol “H” disappears.
7. How to Use MAX Recording Mode and MIN Recording Mode
In the instantaneous wind velocity/air flow/temperature measurement mode, press the “MAX/MIN” button once. The meter enters the MAX recording mode, and the display shows the symbol “MAX” as an indicator. In this mode, the display always shows the maximum readings of all readings taken since entering this mode.
Whenever the meter detects a new value that is higher than the currently displayed reading, it replaces the current reading with this new value. Press the “MAX/MIN” button a second time. The meter enters the MIN recording mode and shows the symbol “MIN” on the display as an indicator. In this mode, the display always shows the minimum readings of all readings taken since entering this mode.
Whenever the meter detects a new value that is lower than the current reading, it replaces the current reading with this new value.
Press the “MAX/MIN” button a third time. The meter exits the MIN recording mode, erases all recorded readings, and returns to the instantaneous wind velocity/air flow/temperature measurement mode.
8. How to Use AVG Recording Mode
Press the “AVG” button once. The meter enters the AVG recording mode and shows the symbol “AVG” on the display as an indicator. In this mode, the display always shows the average readings of all readings taken since entering this mode.
Press the “AVG” button again. The meter exits the AVG recording mode and erases all recorded readings and returns to the instantaneous wind velocity/airflow/temperature measurement mode.
Note: In MAX recording mode, MIN recording mode, or AVG recording mode, if you press the “H/.” button to lock the readings, the meter will stop measuring and detecting new readings until you unlock the readings on the display.
9. How to Switch Display Between Wind Velocity, Air Flow, Wind Temperature, and Wind Chill Temperature.
Press the “UNIT” button to select the corresponding unit, switching the display between wind velocity, air flow, wind temperature, and wind chill temperature.
10. Setting the Area for Air Flow Measurements.
When the meter is off, simultaneously press and hold the “UNIT” and “POWER” buttons to turn on the meter and display the area setting interface( with a default value of 1.000).
You can press the “UNIT” button to move the flashing digit; press the “MODE” button to adjust the value of the selected digit or change the unit; and press the “H/.” button to move the decimal point.
After setting the area, press the “POWER” button to turn off the meter and exit the setting mode. When the meter is turned on, it can be used to measure air flow. (Settings are not saved after power loss.)
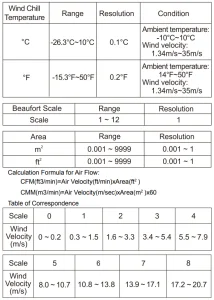
11. Instruction for Wind Chill Temperature.
After selecting the unit for wind chill temperature, the symbol” ” will be displayed. When the wind velocity is >1.34m/s, and the wind temperature is ≤ 10°C, the wind chill temperature is calculated; when the wind velocity is ≤ 1.34m/s, and the wind temperature is ≤10°C, the wind chill temperature is equal to the wind temperature; when the wind temperature is >10°C, the display shows “Hi”.
12. Instruction for Air Flow.
When the air flow exceeds 9999, the display will show the first four digits of the air flow value. The multiplier “x10 ” will be displayed when the air flow is ≥10000; and when it is ≥100000, the multiplier “x100″ will be shown.
Note: The area should be set before measuring air flow.
13. Turning off the Meter
If you have not pressed any button for about 5 minutes, the meter will turn off automatically if the automatic power-off feature is enabled. You can manually turn off the meter at any time by briefly pressing the”POWER” button.
14. Establishing the Bluetooth Connection.
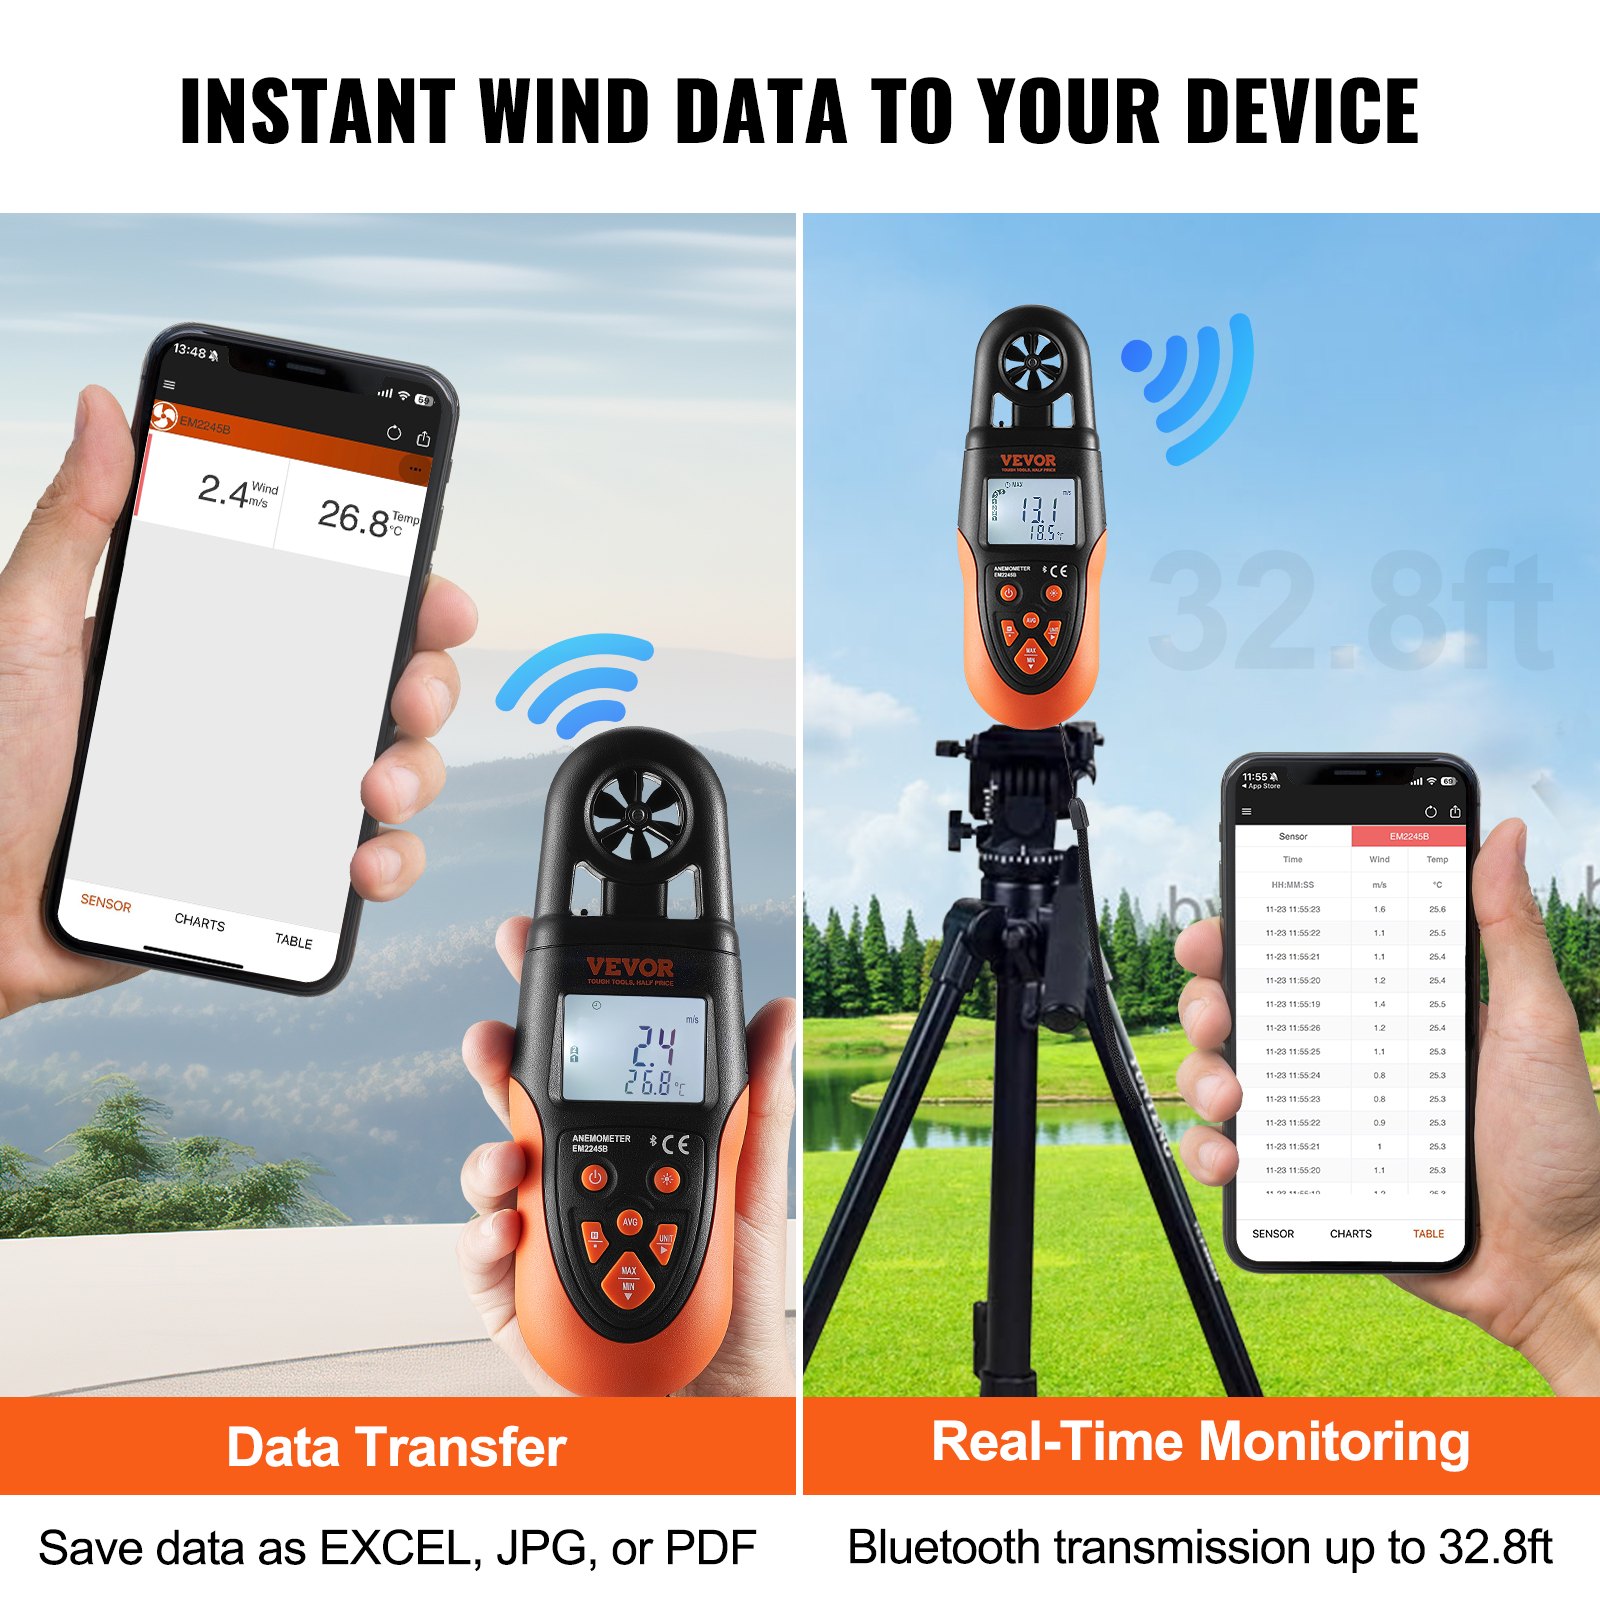
This meter can transmit instantaneous wind velocity and wind temperature values through a Bluetooth connection. To establish a Bluetooth connection, you need an intelligent device ( such as a tablet PC or smartphone) with a VSensor app already installed on it. After you install the app on the intelligent device and turn on Bluetooth, you can monitor the meter measurements, view a graphical plot of measurement readings, and more through this app. The recorded data can be saved as an EXCEL, JPG, or PDF file.
Note: Bluetooth connectivity works over a range of about 10 meters in an area without obstacles and intense electromagnetic interference. The range can vary depending on the signal-receiving capacity of the intelligent device you use.
System Requirements
- Android or iOS device with Bluetooth connectivity
- Android 7.0 or later, or iOS 9 or later
How to Install the App

- If you want to connect an Android device to the meter, download the free VSensor app for the Android operating system from the Google Play Store.
Or you can download this free app from the specified website (https://bit.ly/47AgQg3 )
or by scanning QR Codes with your Android device.
If you want to connect an iOS device to the meter, search for the VSensor app in the App Store and download it.
- Install the downloaded app on your device.
How to Establish the Bluetooth Connection
- After you install the VSensor app on your Android or iOS device, locate and tap the VSensor icon on the device’s Home screen or Apps screen to run this app. Then, turn on Bluetooth on the device.
- Turn on the meter, and it will automatically search for the Bluetooth signal. Establishing the Bluetooth connection takes about 2 to 5 seconds.
- After the Bluetooth connection has been established, the data ( readings ) of present measurement results will be automatically transferred to the intelligent device and displayed on the relevant interfaces of the VSensor app.
Bluetooth Handheld Anemometer Specifications

 General Specifications
1. Overrange Indication:
- When the measured wind velocity exceeds 35m/s (126km/h,6890ft/min, 78.4mph, or 68.04 knots), the display shows “OL.”
- When the wind temperature is below -10 °C(14°F), the display shows “Lo”; when it is above 60°C(140°F), it shows “Hi.”
- When the air flow exceeds the display range(9999 × 100), the display shows “OL”.
- When the wind chill temperature is below -26.3°C(-15.3°F), the display shows “Lo”; when it is above 10°C(50°F), it shows “Hi.”
2. Auto Power Off:
The meter will turn off automatically if there is no button press for about 5 minutes.
3. Low Battery Indicator: ” Battery icon” shown on the display.
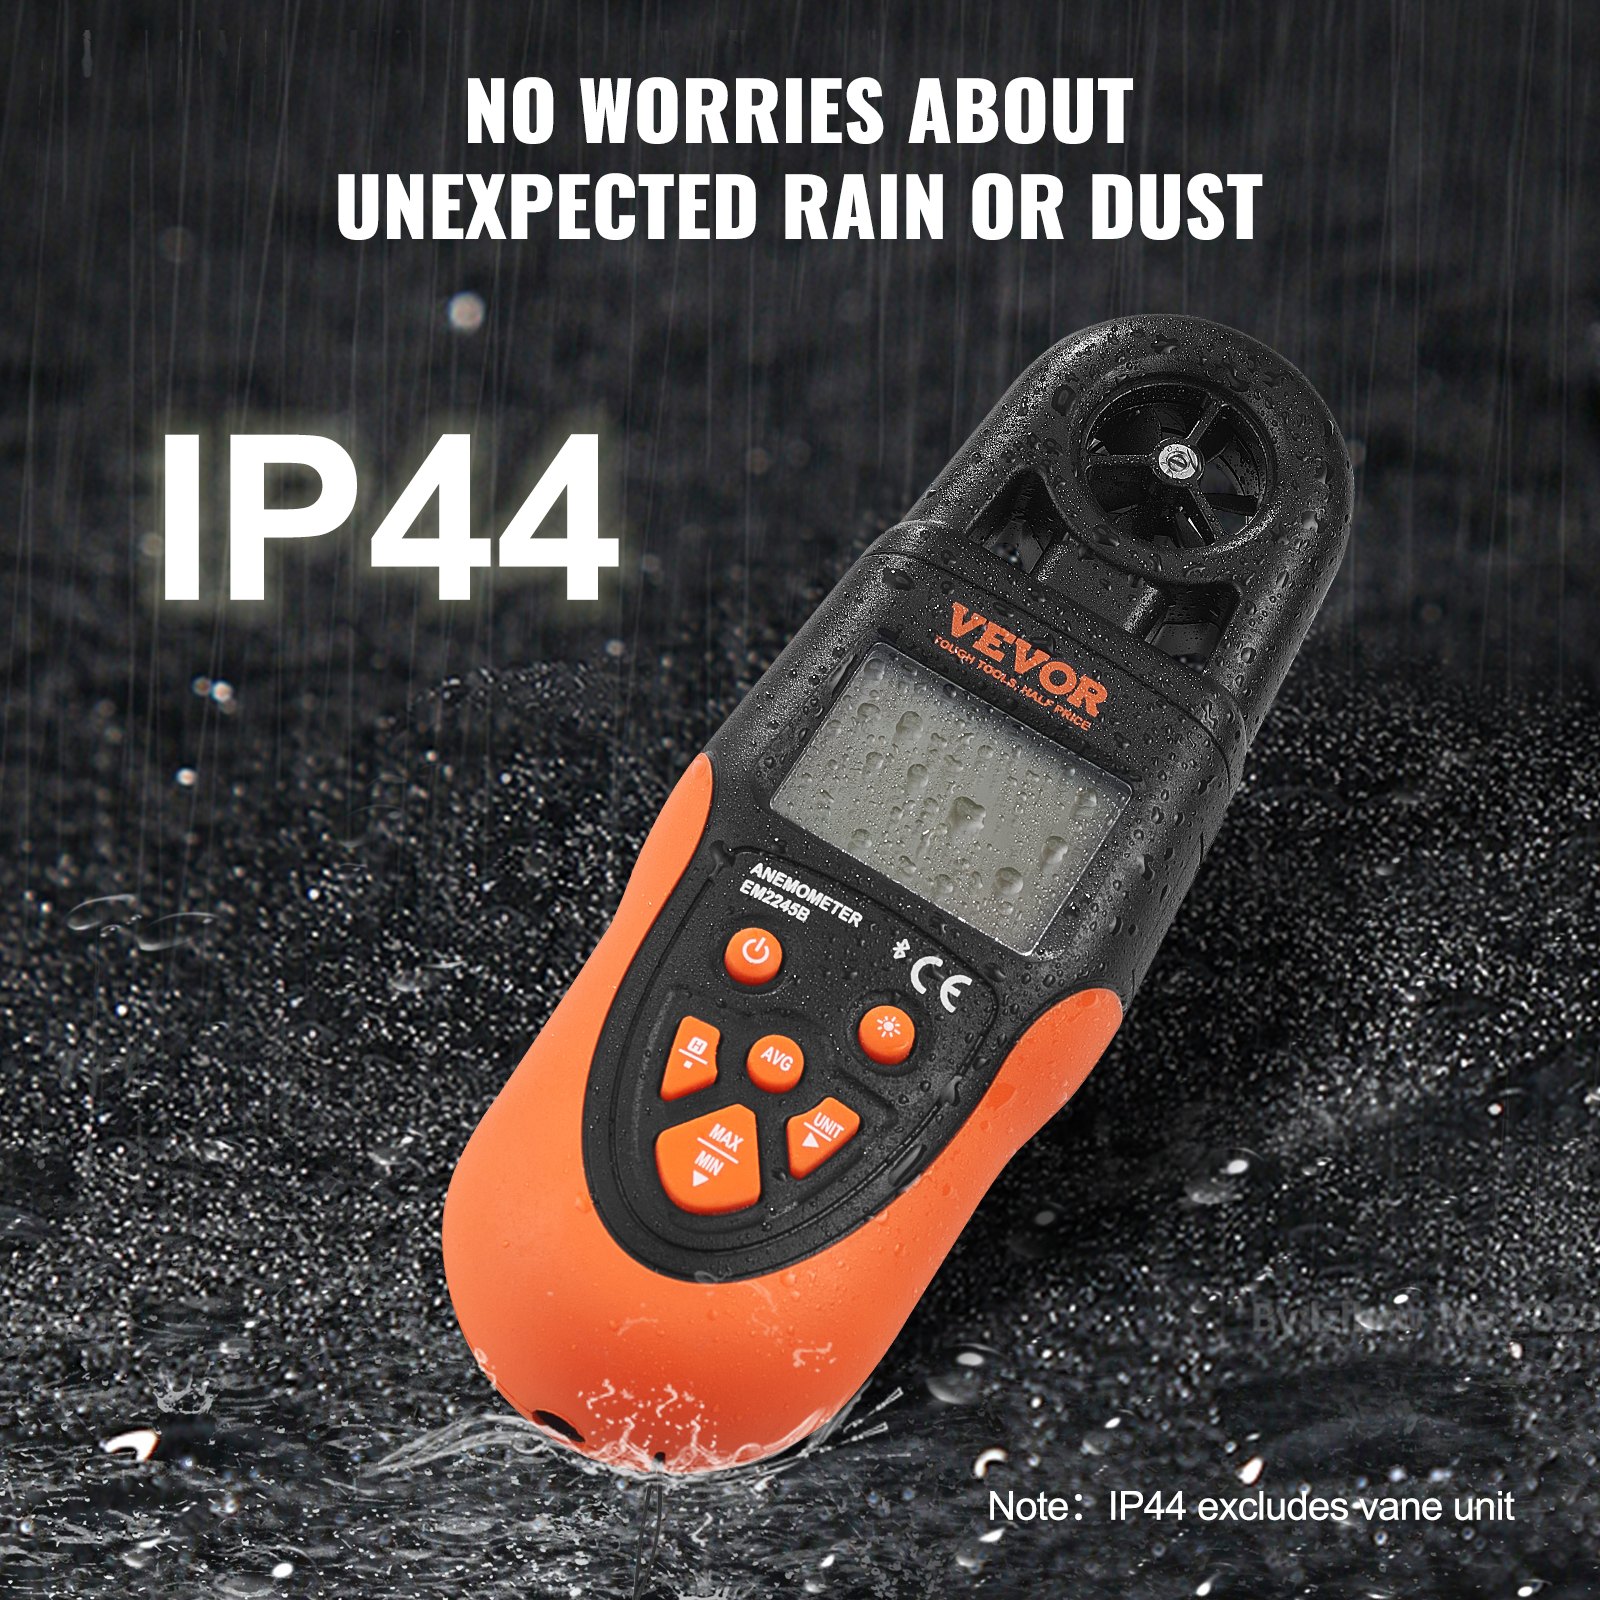
4. IP Degree: IP40 (excluding the vane unit)
5. Battery: 9V battery, 6F22 or equivalent, 1 piece
6. Operating Environment: Temperature: 0°C ~ 40°C Relative Humidity: < 80%
7. Storage Environment: Temperature: -20°C ~ 60°C Relative Humidity: < 90%
8. Dimensions: 190mm x 67mm x 43mm
9. Weight: About 193g (including batteries)
Battery Replacement
- When the display shows “battery icon”, the batteries are low and must be replaced immediately.
- Before replacing the battery, ensure the meter has been turned off. Remove the battery cover on the back of the meter to replace the batteries. Then, replace the old batteries with new ones of the same type, making sure that the polarity connections are correct. Reinstall the battery cover.
Cleaning the Bluetooth Handheld Anemometer
Periodically wipe the case with a damp cloth and a little mild detergent. Do not use abrasives or solvents.
Note
- This Instruction Sheet is subject to change without notice.
- Our company will not take on any other responsibilities for any loss.
- The contents of this Instruction Sheet can not be used as the reason to use the meter for any special application.
List of Accessories
- Operating instructions * 1
- Product lanyard * 1
- Storage bags * 1
- Carbon batteries(6F22) * 1
Recommended For Your Project
VEVOR Bluetooth Handheld Anemometer, 14℉-140℉ Manual

Reviews
There are no reviews yet.