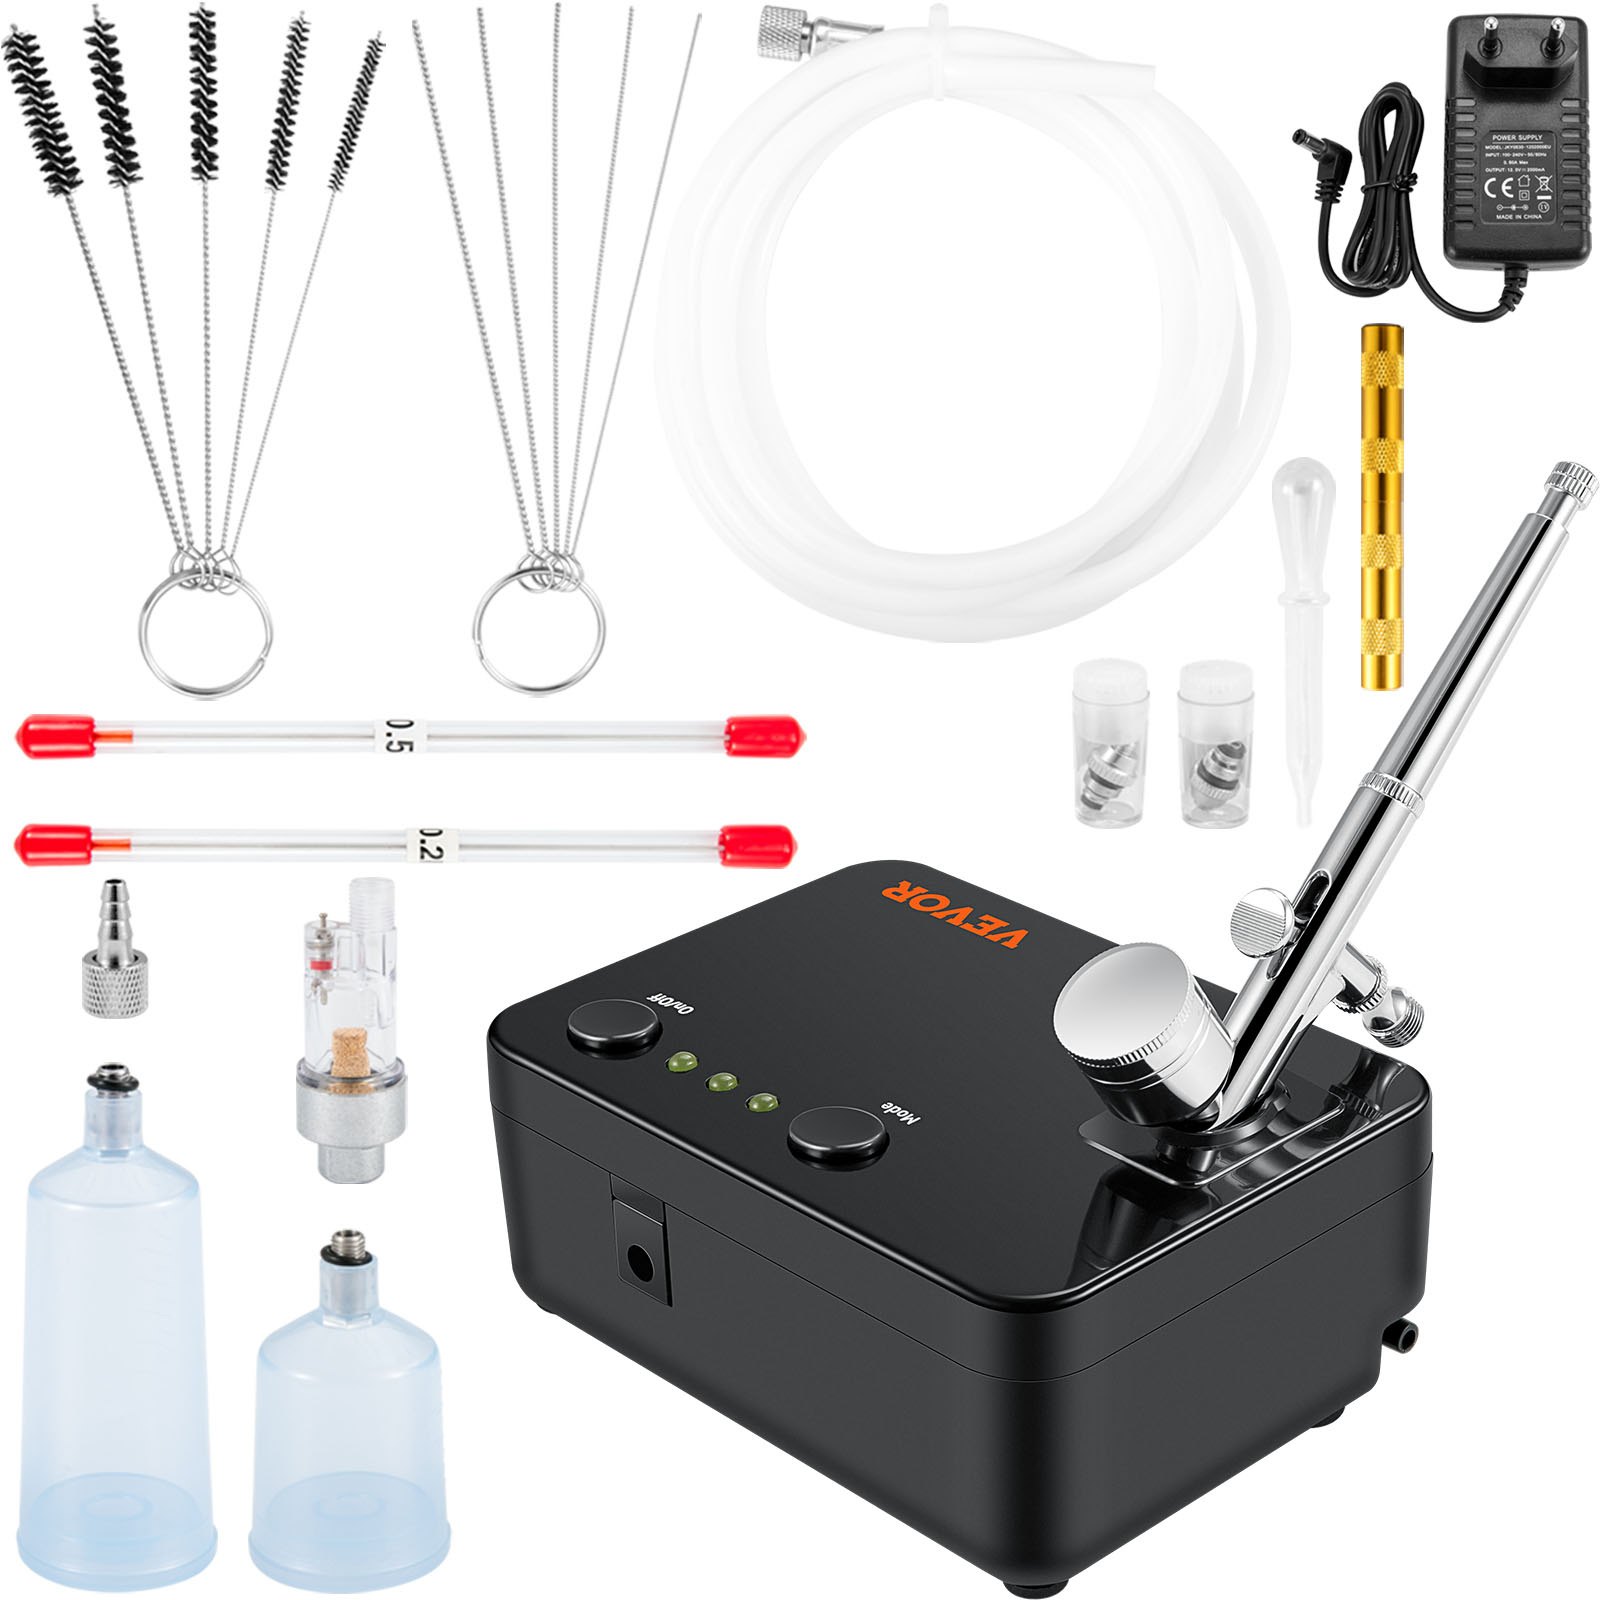

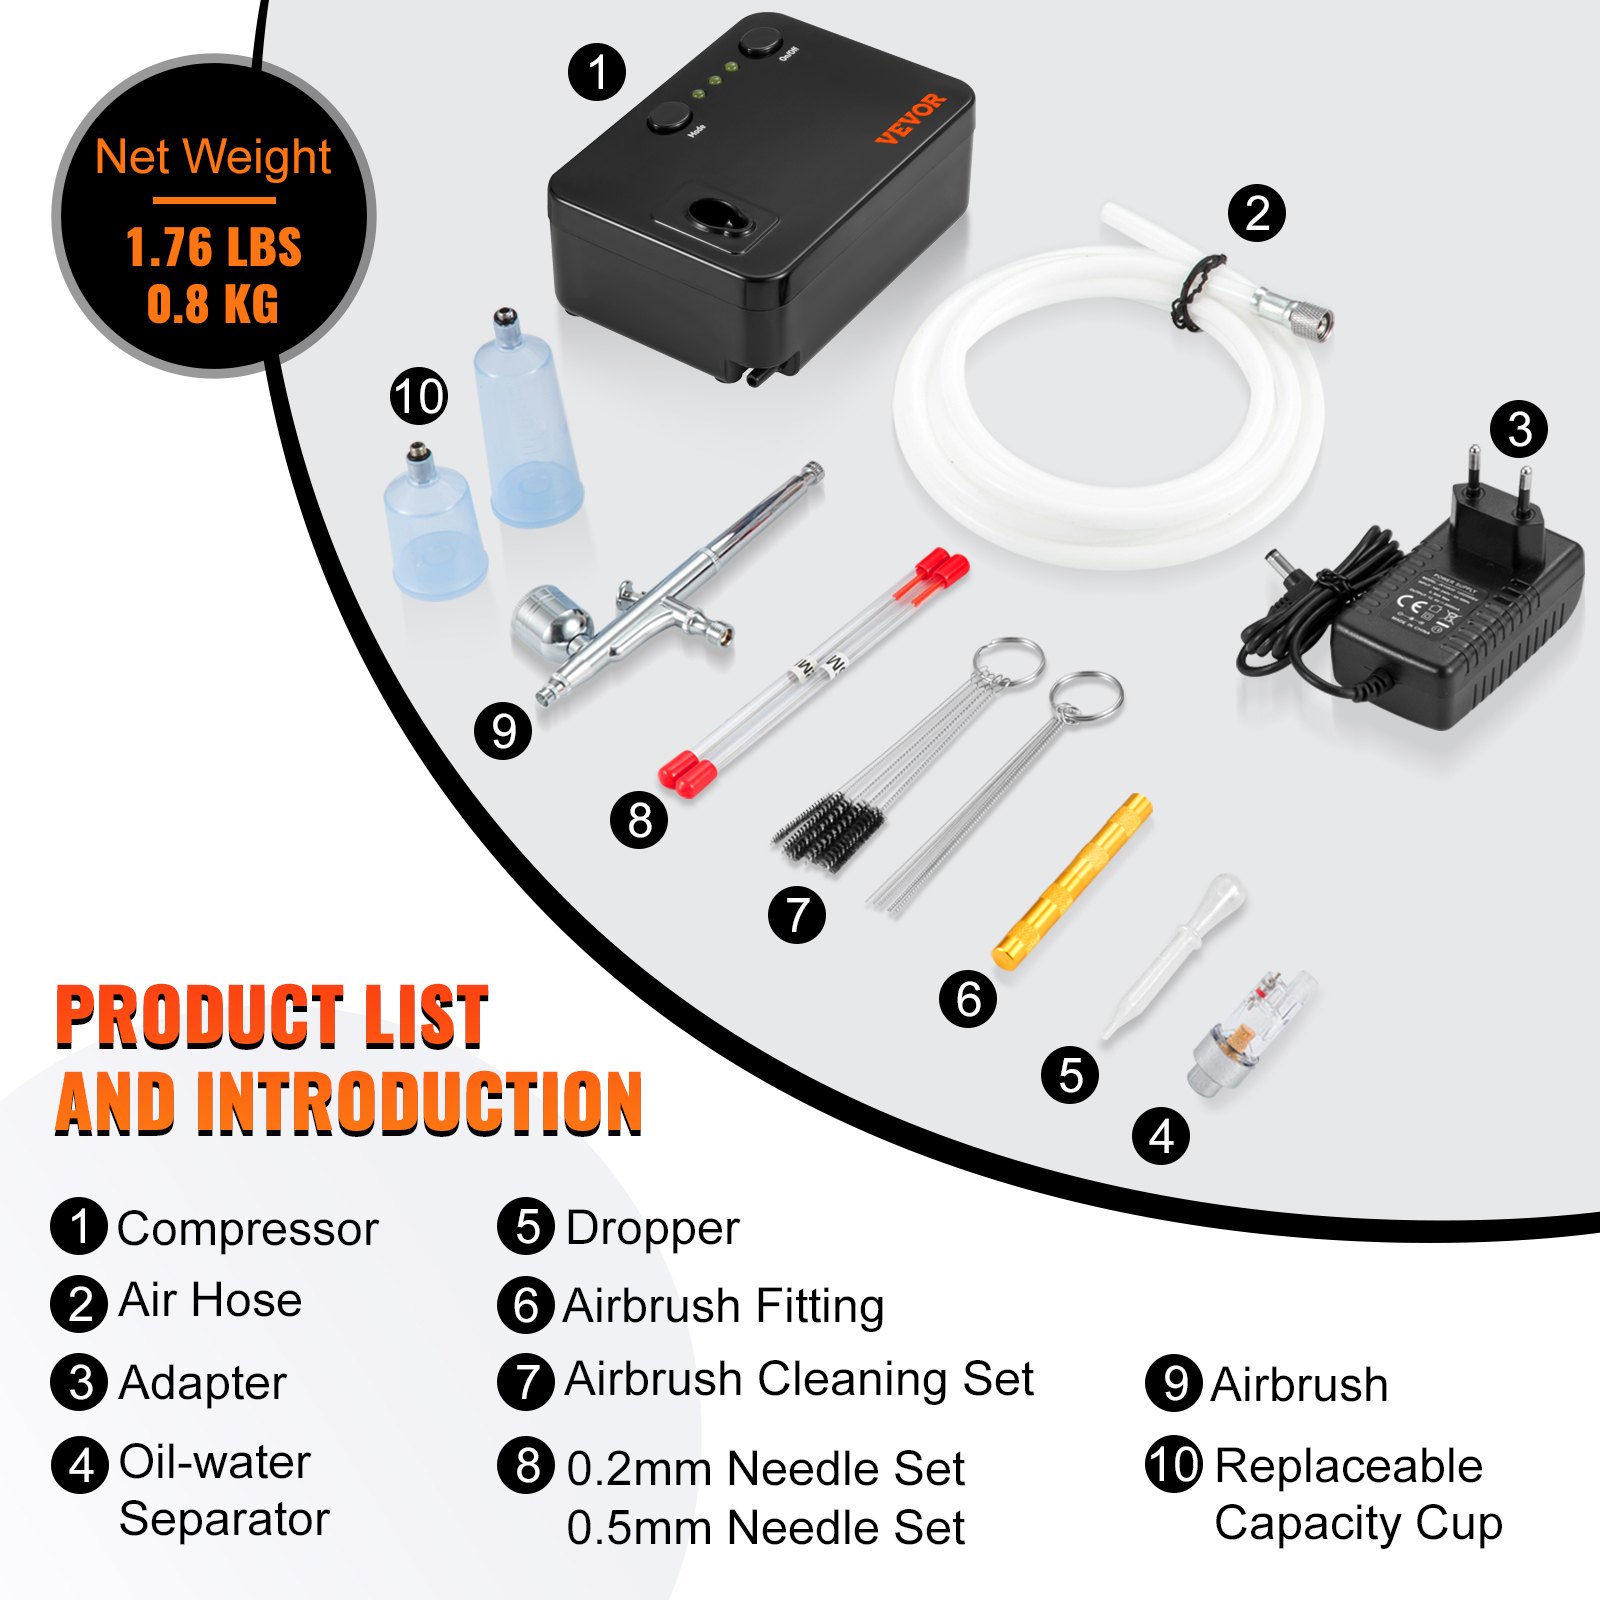
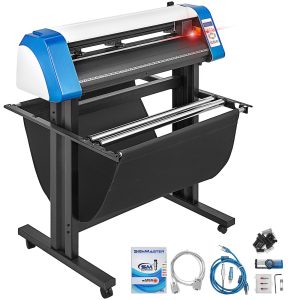
Unlock the full potential of your VEVOR Airbrush Kit with our comprehensive product manual download. This Portable Airbrush Set with Compressor Manual is tailored to ensure you maximize your airbrushing experience. Whether you’re a beginner or a seasoned artist, our manual covers every aspect of your Airbrushing System Kit, featuring Multi-Purpose Dual-Action Gravity Feed Airbrushes.
Dive into detailed instructions for setup, troubleshooting, and optimization, making your art, nail designs, cookie decorations, tattoos, and makeup projects a breeze.
The manual is designed to be user-friendly, guiding you step-by-step through each process. With clear illustrations and expert tips, you’ll find it easy to achieve professional results. Download your VEVOR Airbrush Kit Manual today and elevate your creative projects.
VEVOR Airbrush Kit User Manual
MODEL: TC-101A
Thanks for purchasing our airbrush kit. To receive optimum results, please read this Instruction Manual carefully and thoroughly before operating the airbrush.
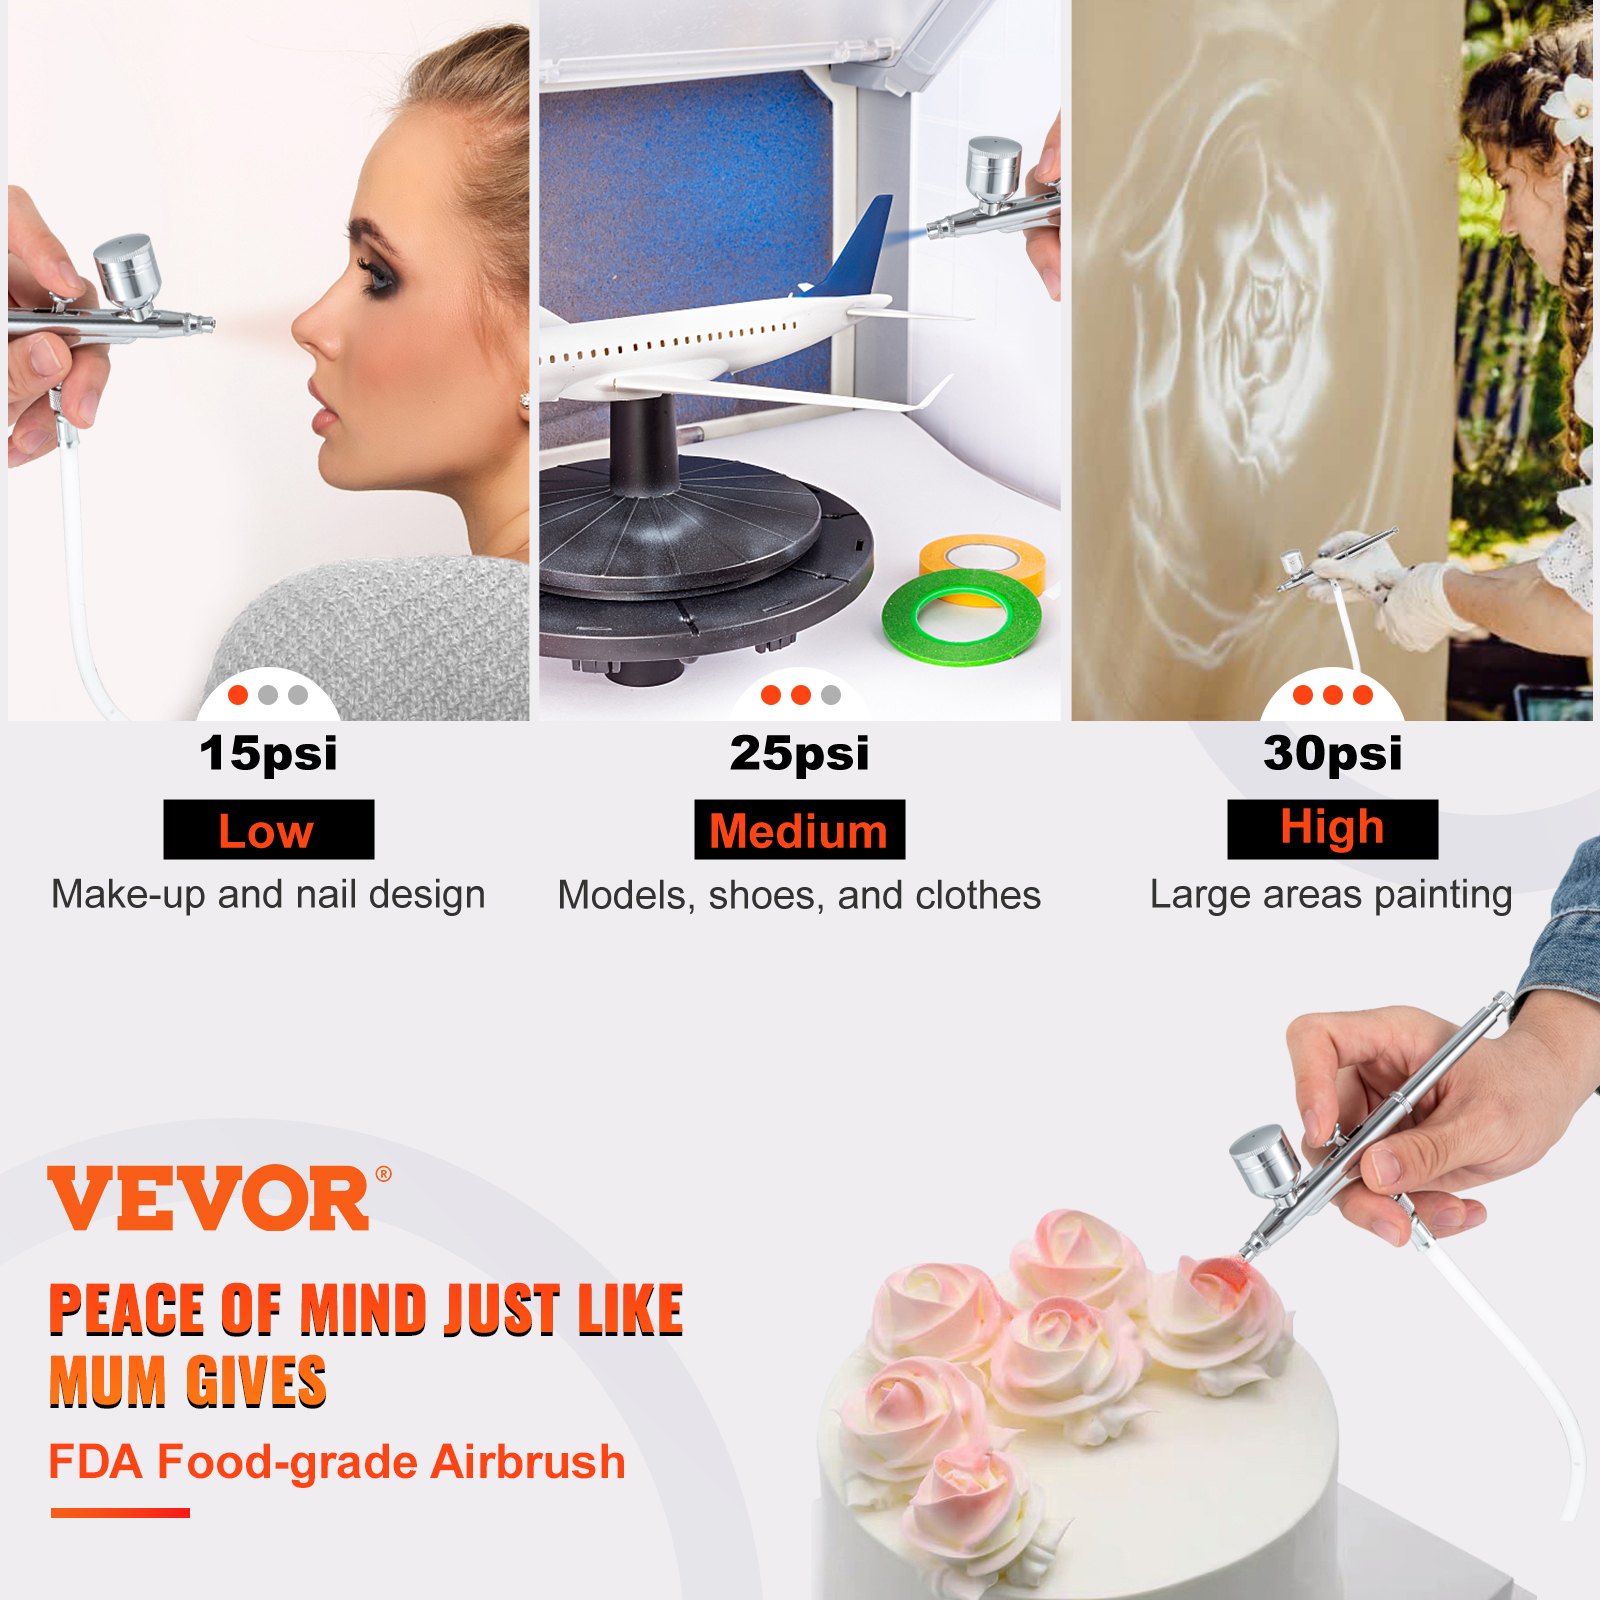
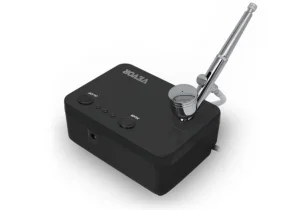
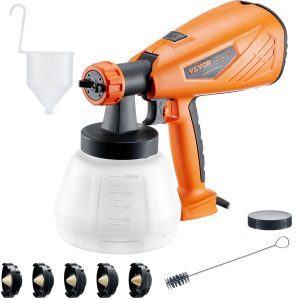
This mini compressor uses a special non-oil design, which promises that the transmission medium will not be depolluted. Its output fluid is steady, with a pressure range of 15 to 25 psi. Because of its non-oil design and continuous work, it is very suitable for airbrush makeup, airbrush nail, spray flowers, Cake decorating, and other similar uses.
NOTICE
Clean the Airbrush IMMEDIATELY after use. Delayed or inadequate cleaning will permanently clog the Airbrush.
AIRBRUSH KIT SPECIFICATIONS

SAFETY
- Do not use the Compressor for a purpose other than the one it has been designed for.
- Do not process fluid other than air.
- Do not operate the compressor in explosive atmospheres, such as in the presence of flammable liquids, gases or dust.
- Always ensure the unit is unplugged from the electrical line before performing any service, maintenance or cleaning.
- Do not expose this unit to rain or moisture.
- Do not allow children and other untrained people to use or play with the compressor.
- To avoid the risk of burning, be aware that some parts can be very hot after extensive compressor use. Allow the compressor to cool down before touching it.
- Do not leave the compressor unattended while running.
INSTALLATION
- After taking the compressor out of its packaging, please check it carefully for any damage caused by shipping.
- Install the compressor on a flat surface in a suitable-sized, dry room with good ventilation, where the temperature is not likely to rise above 94 degrees Farenheits (35 degrees Centigrades).
- Insert the power cord into a grounded outlet.
Be sure the electrical line rating is proper for the appliance (refer to the data label) and that the electrical line is protected and equipped with a ground line. - Connect one end of the air hose to the compressor’s air outlet.
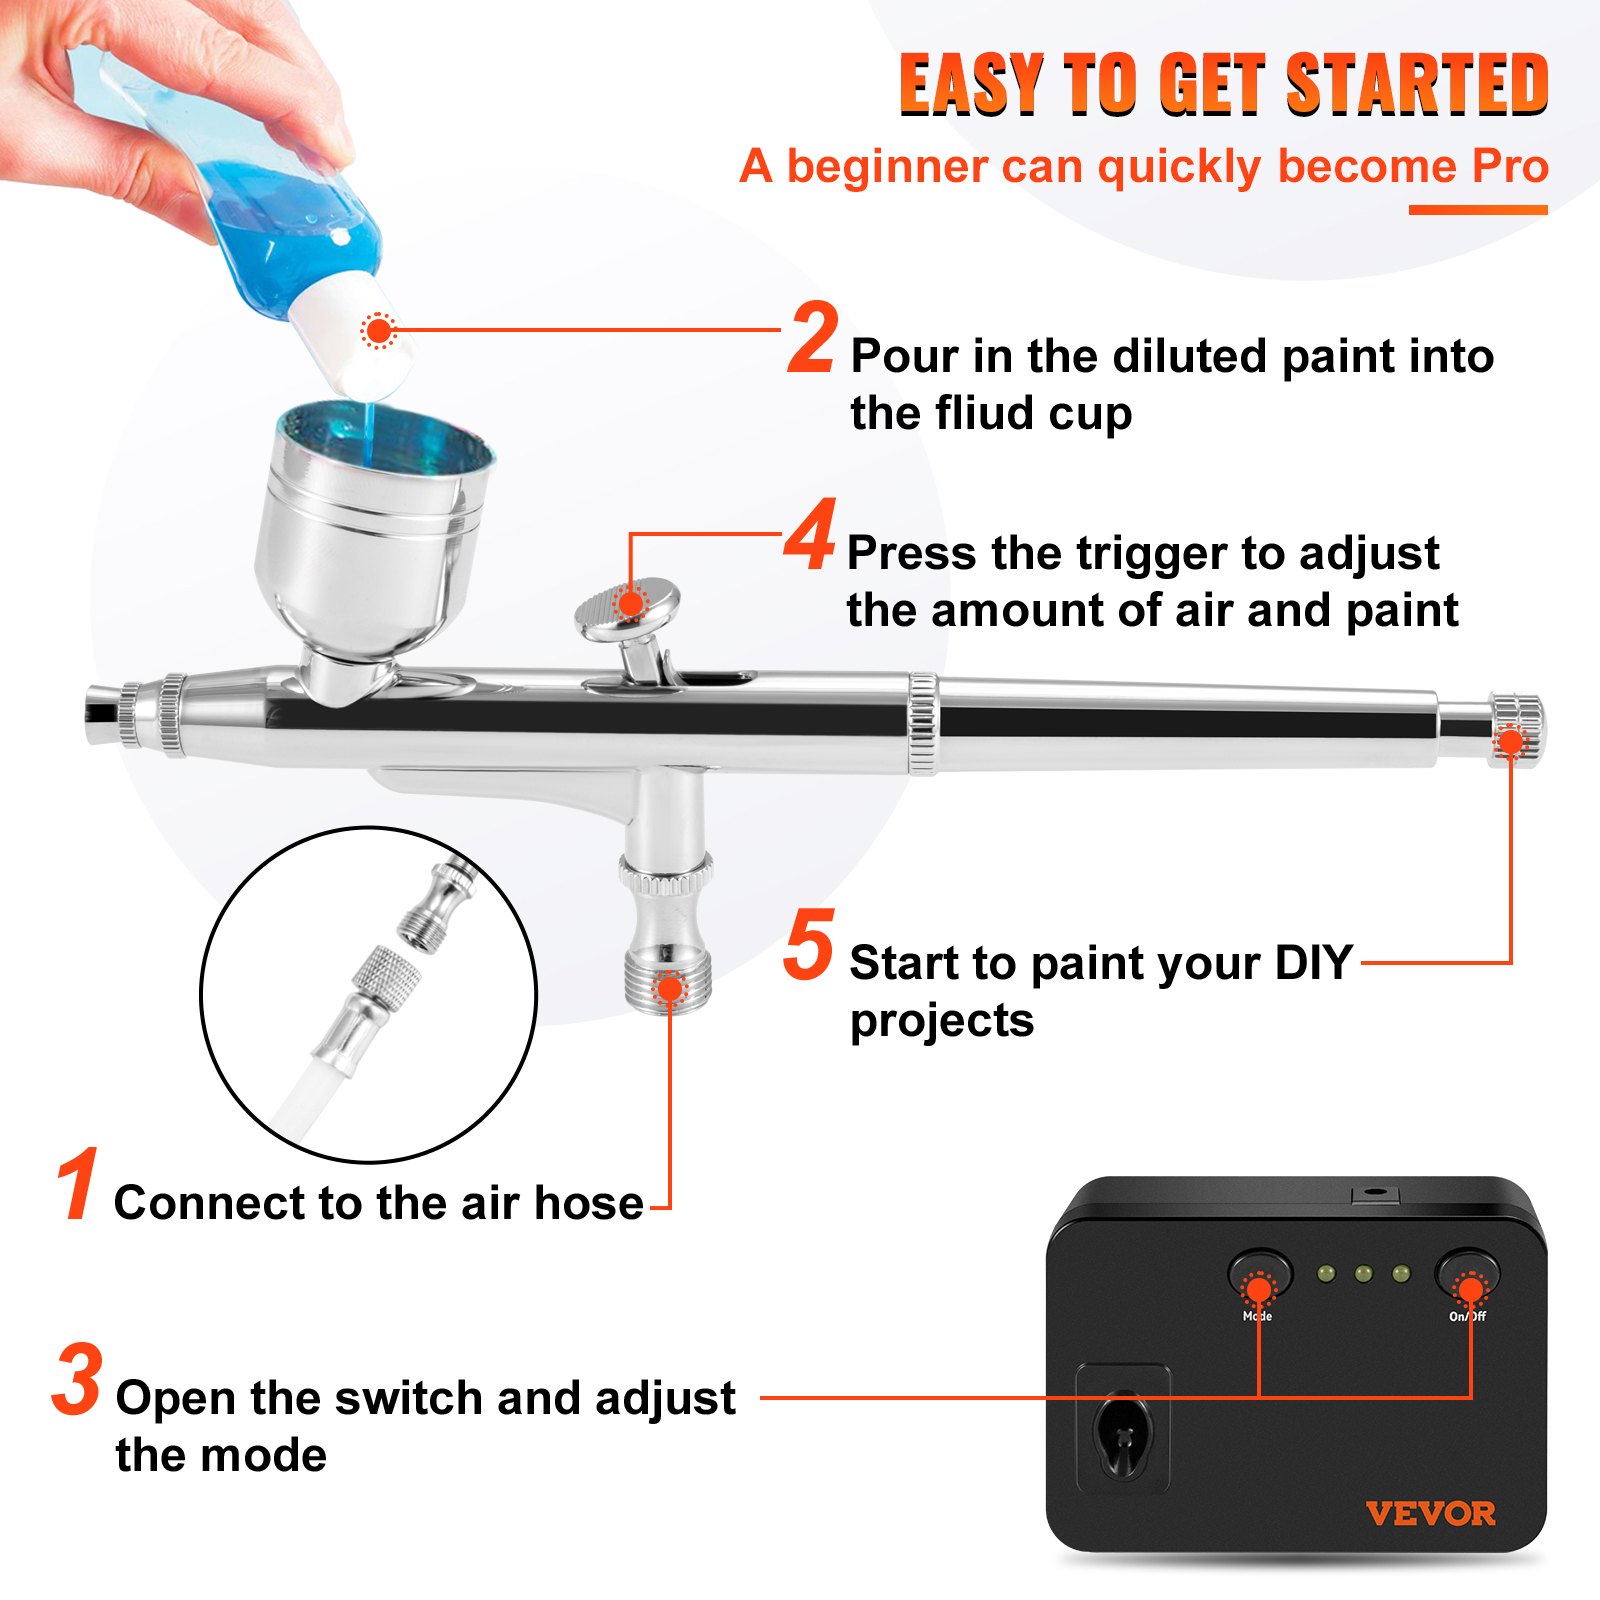
HOW TO SPRAY
- Turn on the compressor.
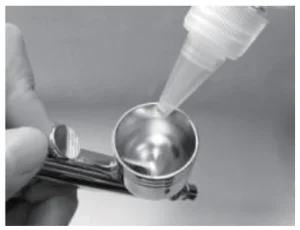
- Fill the fluid in the cup after thinning appropriately.
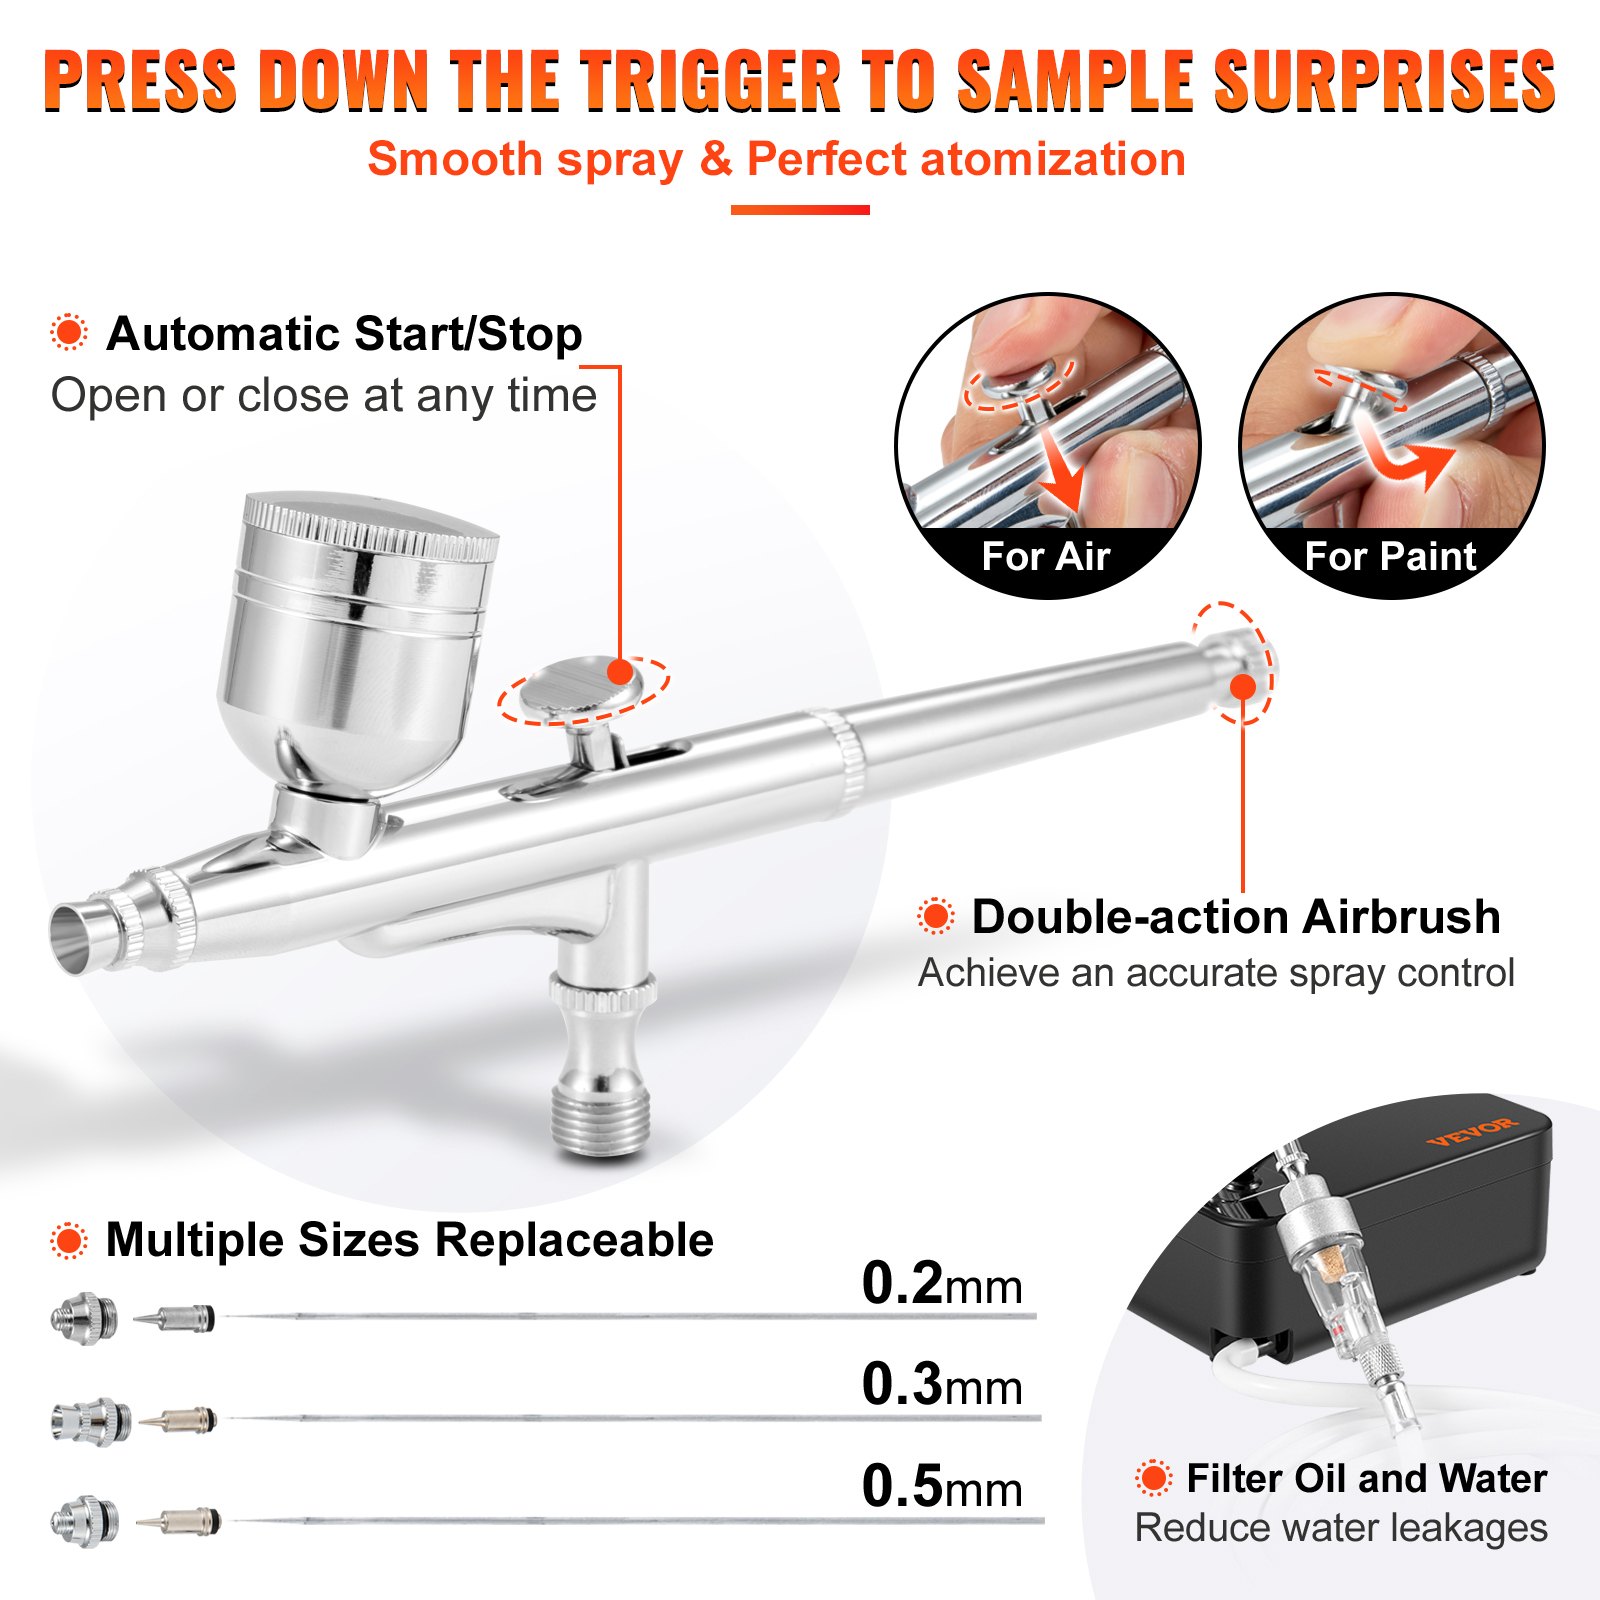
- Press down on the airbrush trigger to release air from the nozzle. Slowly and gently draw back on the trigger to release paint from the needle. The air will atomize the paint and create a fine spray.
- Move the trigger back slowly to achieve the consistency you need for your spray technique.
- The spray pattern is based on the distance between a work surface and an airbrush. Depending on the air flow and paint type, keep the distance between 3” and 5” from the workpiece. For delicate work, you may reduce the distance to 1”.
- To avoid paint buildup, start moving the airbrush before pressing the trigger. After the stroke, release the trigger while still moving the airbrush. Doing this will produce a smoother finish. Do not stop moving the airbrush while spraying. If the airbrush stops even briefly while spraying, paint can build up and run down the workpiece.
- When finished using the compressor, turn its power switch off and release any remaining air. The air hose fittings and compressor body may get hot. Allow fittings to cool before disconnecting, or wear gloves to prevent burns.
- Perform maintenance on the compressor according to the instructions on the following pages.
- Clean the airbrush thoroughly IMMEDIATELY after EVERY use, according to instructions on the following pages.
Note: Do not use the compressor continuously for longer than 20 minutes. After every 20-minute working cycle, allow the compressor to cool down for 15 minutes. The motor is equipped with a thermal protector that can be automatically reset.
HOW TO MIX PAINT FROM AN AIRBRUSH
Warning: The airbrush shall be filled with special paint and diluted accordingly. Do not use regular paint like lacquer and nail polish directly, or the nozzle will be blocked and you cannot use it anymore. We suggest thinning the paint according to the manufacturer’s directions and mixing thoroughly. Or refer to the following steps:
Step 1. Choose your paint. Different projects require different paint, so select the right paint for the job.
Step 2. Match the thinner/reducer to your paint.
Tip: Watercolors, Tempera, and acrylic paints can usually be thinned with distilled water. Enamel paints are solvent-based and are generally thinned with mineral spirits. Lacquer paints are solvent-based and are thinned with lacquer thinner.
Step 3. Pour the needed amount of paint into a mixing cup.
Step 4. Determine the mixing ratio. The ratio of thinner to paint depends on the brand of paint and the surface you’re painting. Most paints have thinning instructions on the can, including the recommended ratio.
Step 5. Add the proper thinner ratio to the paint in the mixing cup. If the paint you are using has no instructions, generally, you want to start with a ratio of two parts paint to one part thinner. If the paint is too thick, add thinner until you achieve the desired consistency. Conversely, if the paint is too thin, add more paint to thicken it up, then thin it to a watery consistency, until it flows like milk.
Step 6. Slowly stir the mixture with a stick until the paint is thoroughly mixed.
Step 7. Pour the thinned paint through a paint strainer into a second mixing cup. This step is optional, but it ensures that the paint is free of dirt or debris.
Tip: Test the mixture on a scrap piece of material before spraying your project area
Warning: Follow any manufacturer’s safety instructions that may be included with the paint and use a little common sense. Solvent-based paints and thinners/reducers are flammable, so keep them away from open flames. Use solvent-based paints in a well-ventilated area and wear a respirator if needed.
HOW TO CLEAN AN AIRBRUSH
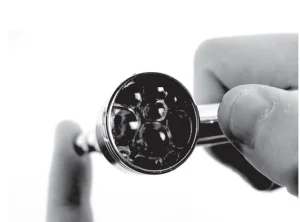
- Empty the jar and clean it with solvent.
- Turn on the compressor and connect the airbrush.
- Refill the cup with water or solvent, block the needle cover with a finger, and press the operation lever. The air flows backward into the nozzle to clean the paint remaining in the airbrush.
- Disconnect the airbrush from the compressor.
- Remove the nozzle and needle and soak them in solvent until clean. Use a brush, an old toothbrush, or toothpicks to remove any paint.
- CAUTION: Do not immerse the airbrush.
- Note: Do not use metal objects to clean the nozzle to prevent damage to passages. If the needle is bent, have it replaced by a qualified technician.
- Use solvent to wipe down the airbrush body.
- Lubricate the airbrush after cleaning. Before storing, use non-silicon oil or a light lubricant on threaded connections.
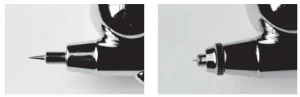
HOW TO CHANGE NEEDLE AND NOZZLE
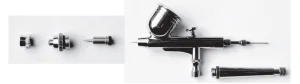
1. First, ensure the replacement nozzle and needle are the same in size.
Unscrew / Remove the airbrush casing. Unscrew / Remove the Needle Cap & Nozzle located at the nose of the airbrush
2. Loosen The Needle Lock Chucking Net
Note that you don’t need to remove it completely. Just loosen it(2-3 turns). This will free up the needle and allow you to pull it out of the airbrush cavity.
3. Removal Strategy
- If Needle Tip Is Straight & Nozzle Is Free From Damage:
Slowly remove the needle by pulling the tail of the needle through and out of the tail of the airbrush. (If you feel any sudden, unusual resistance, stop and resort to step 4.2 below.)
- (Removal Strategy 2) If the Needle Tip Is Bent & the Nozzle Is Damaged
Push the airbrush needle from the tail, through and out the front (nose) of the airbrush. (with the nozzle resting on the tip of the needle & removed from the airbrush itself)
4. Insert New Needle Through The Tail End Of The Airbrush (Carefully)
Carefully slide the needle tip into the tail end of the airbrush (at the needle locking chuck) and through the internal cavity of the airbrush until the tip of the needle exits the nozzle at the nose of the airbrush.
Important: If you feel any sudden resistance, stop and reassess the needle passageway (otherwise, you could bend the new needle). Otherwise, you could damage the needle.
5. Install New Nozzle (Carefully)
- Begin by inspecting the nozzle and needle for any damage or imperfections. As well, ensure the nozzle has the necessary O-ring.
- Place the airbrush nozzle through the needle.
- Re-installing the Nozzle & Needle cap.
- Tighten up the needle locking chuck and begin reassembling the airbrush. (Careful not to use too much force when tightening)
6. Finish Re-Assembling The Rest Of The Airbrush
Test the airbrush using distilled water to ensure it is operating correctly.
INSPECTION AND MAINTENANCE
Airbrush
Note: These procedures are in addition to the regular checks and maintenance required to operate the compressor and other air-operated tools.
- BEFORE EVERY USE, inspect the general condition of the tool. Check for:
- Bent needles.
- Loose screws.
- Misalignment or bending of moving parts.
- Clogged nozzle.
- Cracked or broken parts.
- Any other condition that may affect its safe operation.
- AFTER EVERY USE, clean the airbrush according to the following instructions
TROUBLESHOOTING THE AIRBRUSH KIT

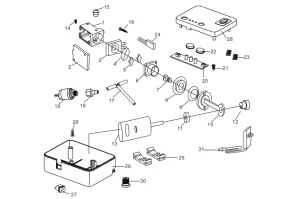
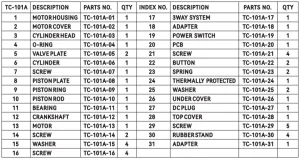
AIRBRUSH KIT SPARE PARTS LIST
Recommended For Your Project
VEVOR Airbrush Kit, Portable Airbrush Set Manual
Reviews
There are no reviews yet.