


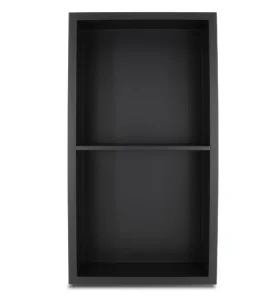
Unlock the full potential of your VEVOR 13″x25″ No Tile Shower Niche with our comprehensive product manual download. This detailed guide provides step-by-step instructions for the setup, optimization, and troubleshooting of your 304 Stainless Steel Wall-Inserted Niche.
Our manual is designed to be user-friendly, ensuring that even first-time installers can easily achieve professional results.
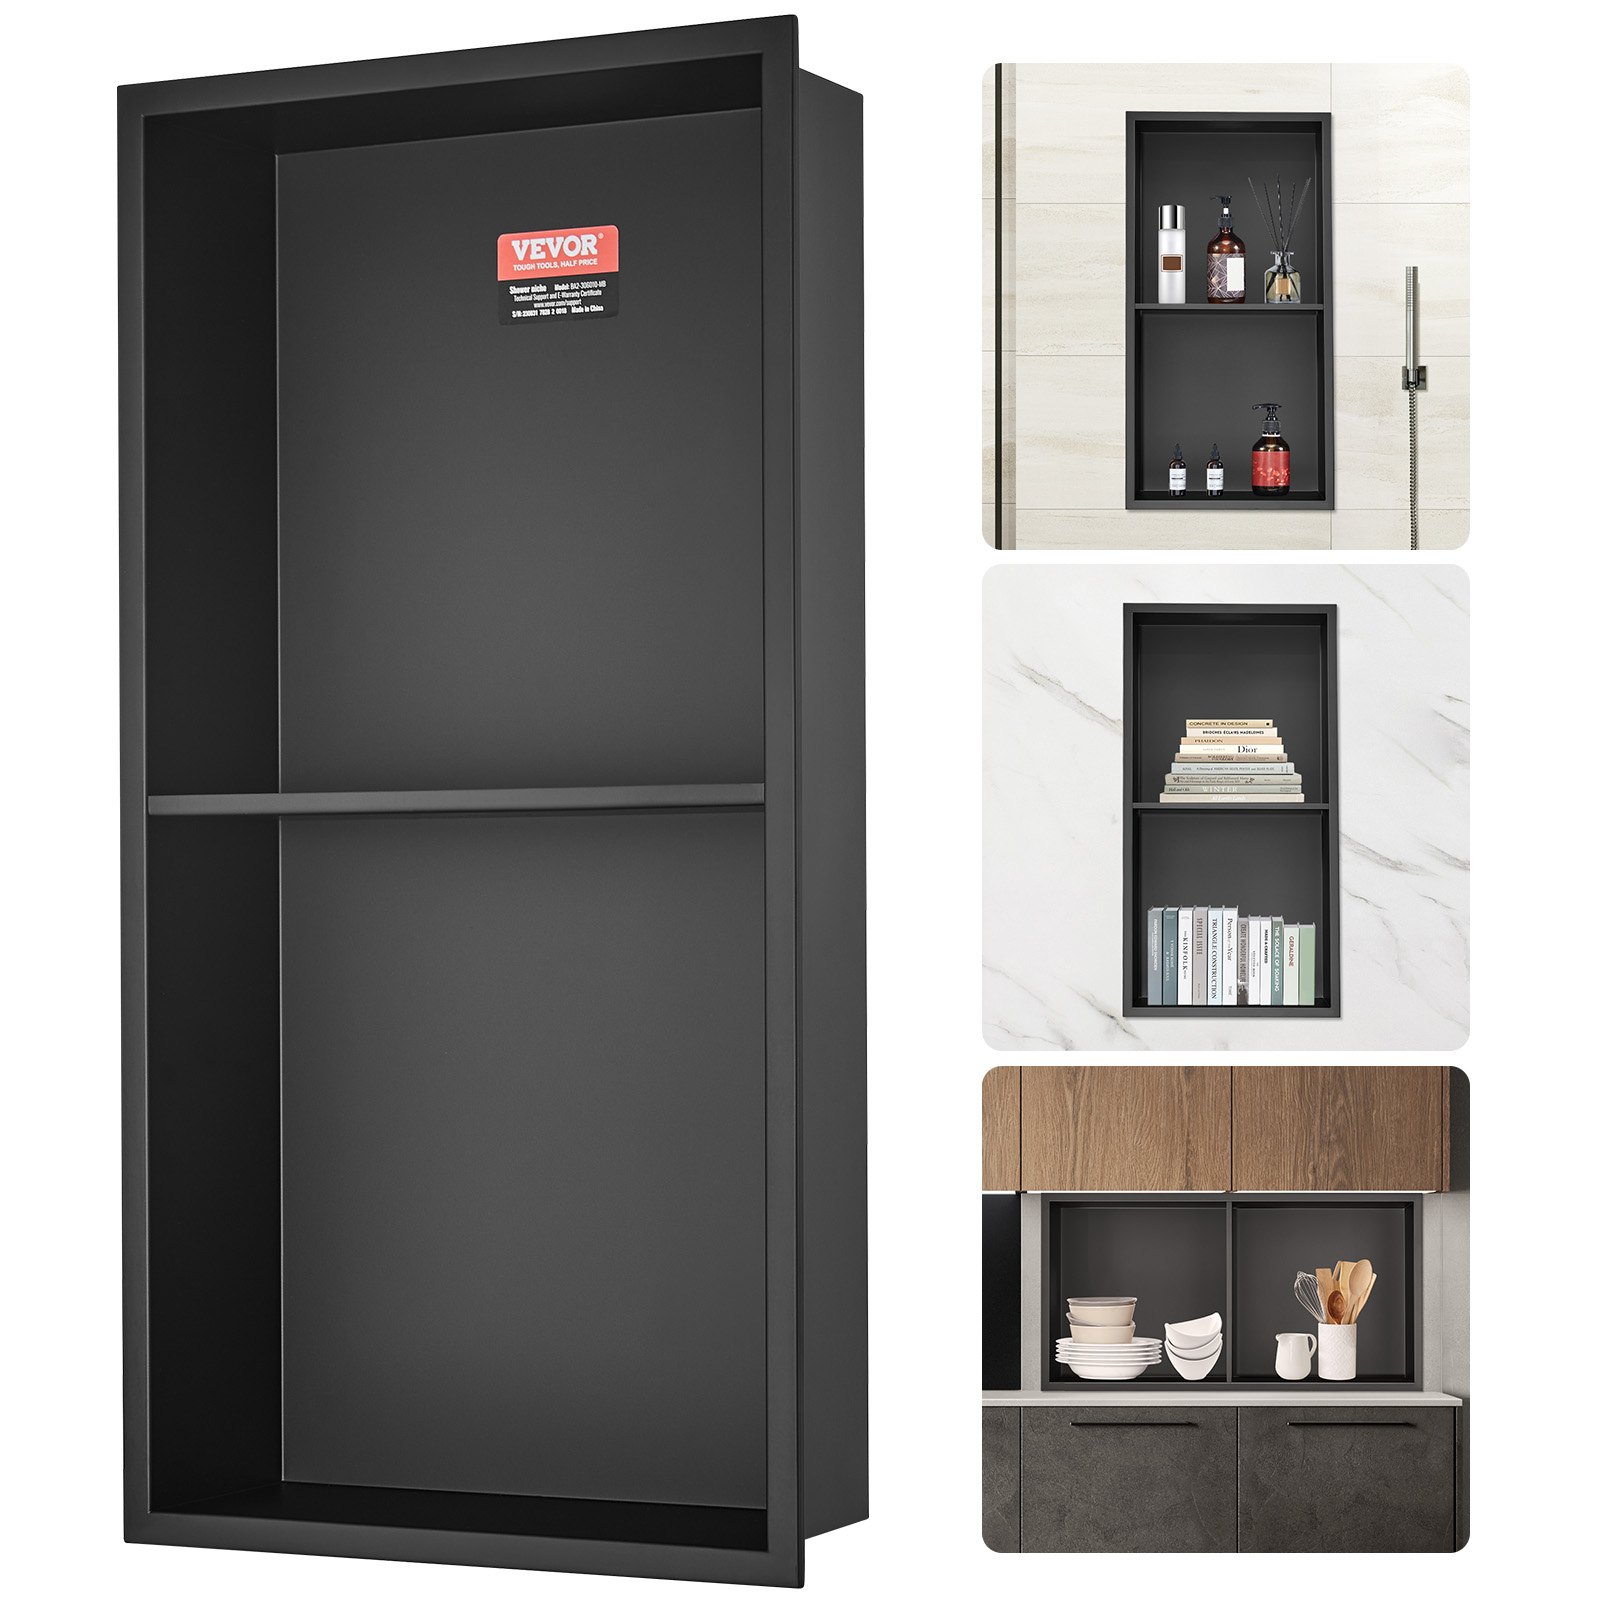
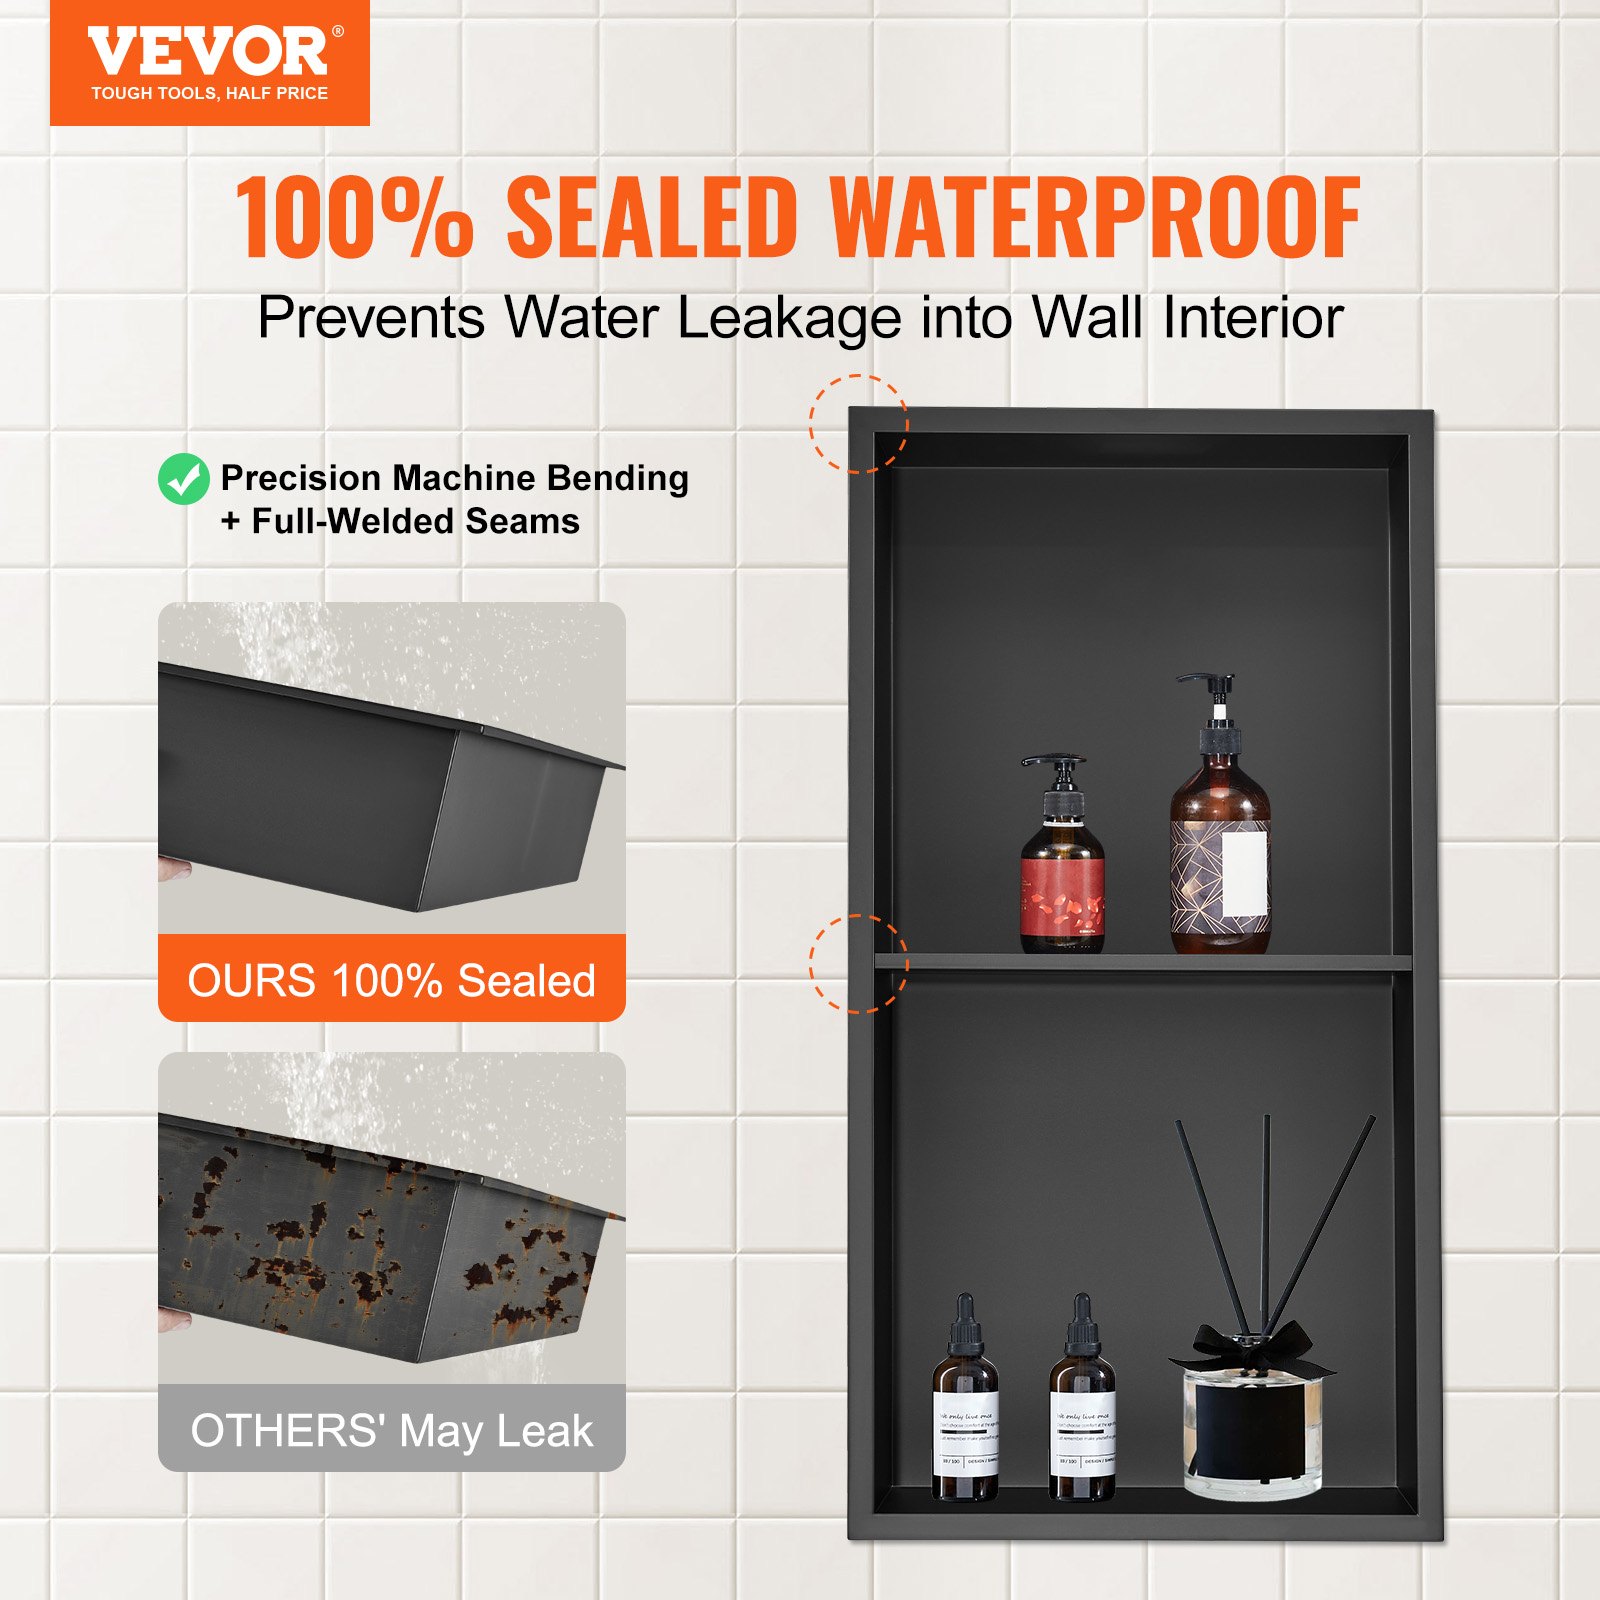
The manual covers everything from sealing and waterproofing to maintenance tips, guaranteeing that your rust-resistant, easy-to-clean modern niche remains a functional and stylish addition to your bathroom for years to come. Whether you’re using it for soap storage or as a decorative feature, our manual ensures you get the most out of your VEVOR shower niche.
VEVOR No Tile Shower Niche User Manual
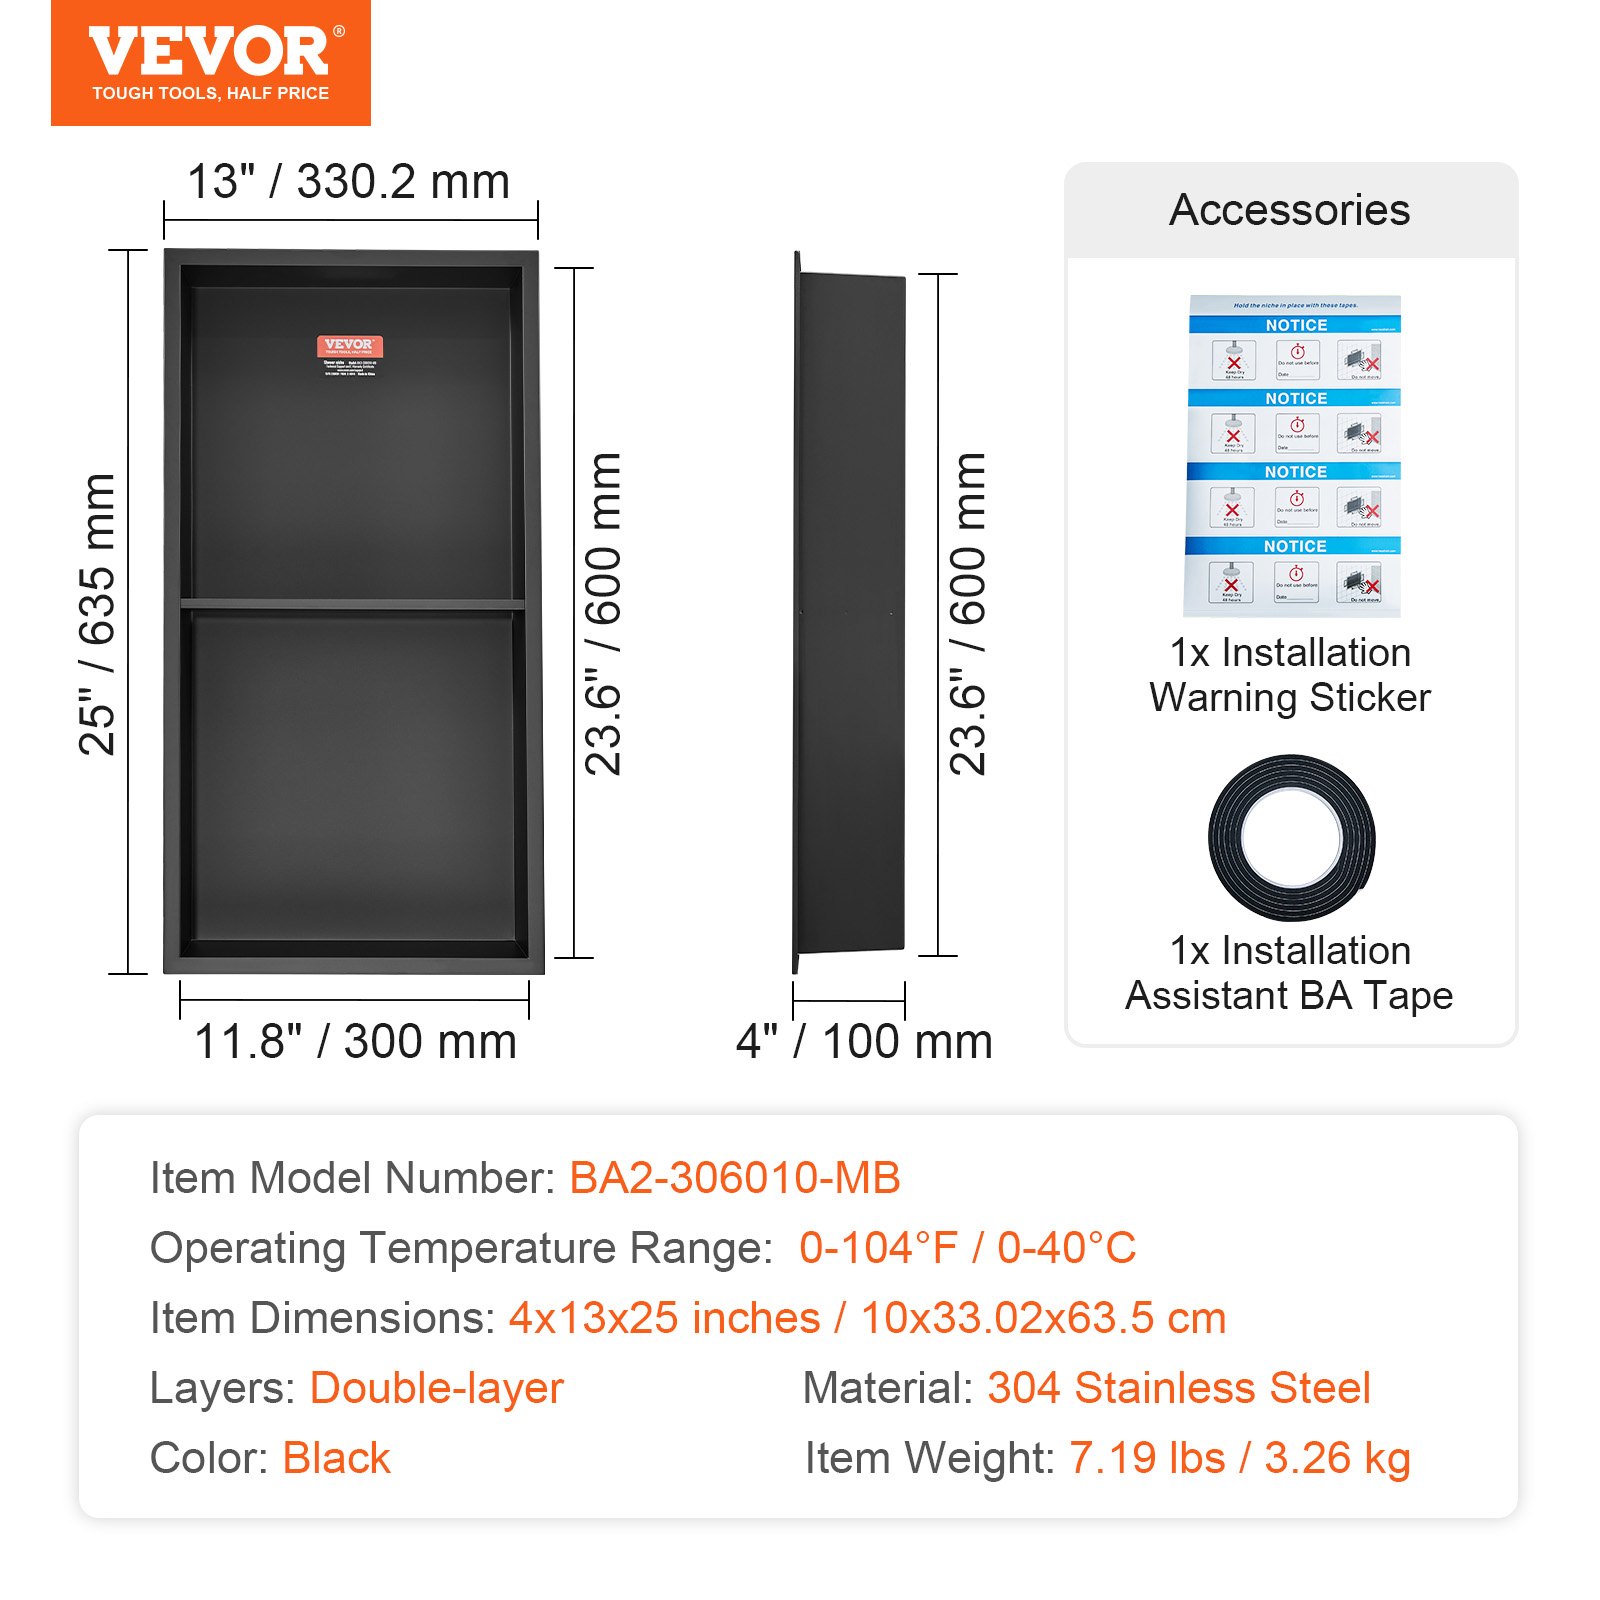
MODEL: BA-303010-BR/BA2-306010-MB
WARNING: Please read this manual carefully before using the product. Failure to do so may result in serious injury.
WARNING: Read this material before using this product. Failure to do so can result in serious injury.
Assembly precautions
- Assemble only according to these instructions. Improper assembly can create hazards.
- Wear ANSI-approved safety goggles and heavy-duty work gloves during assembly.
- Keep the assembly area clean and well lit.
- Keep bystanders out of the area during assembly.
- Do not assemble when tired or when under the influence of alcohol, drugs or medication.
- Weight capacity and other product capabilities apply to a properly and completely assembled product only.
- For additional information regarding the parts listed in the following pages, please refer to the Assembly Diagram of this manual. Unwrap and separate all parts in a clean work area.
SAVE THIS MANUAL
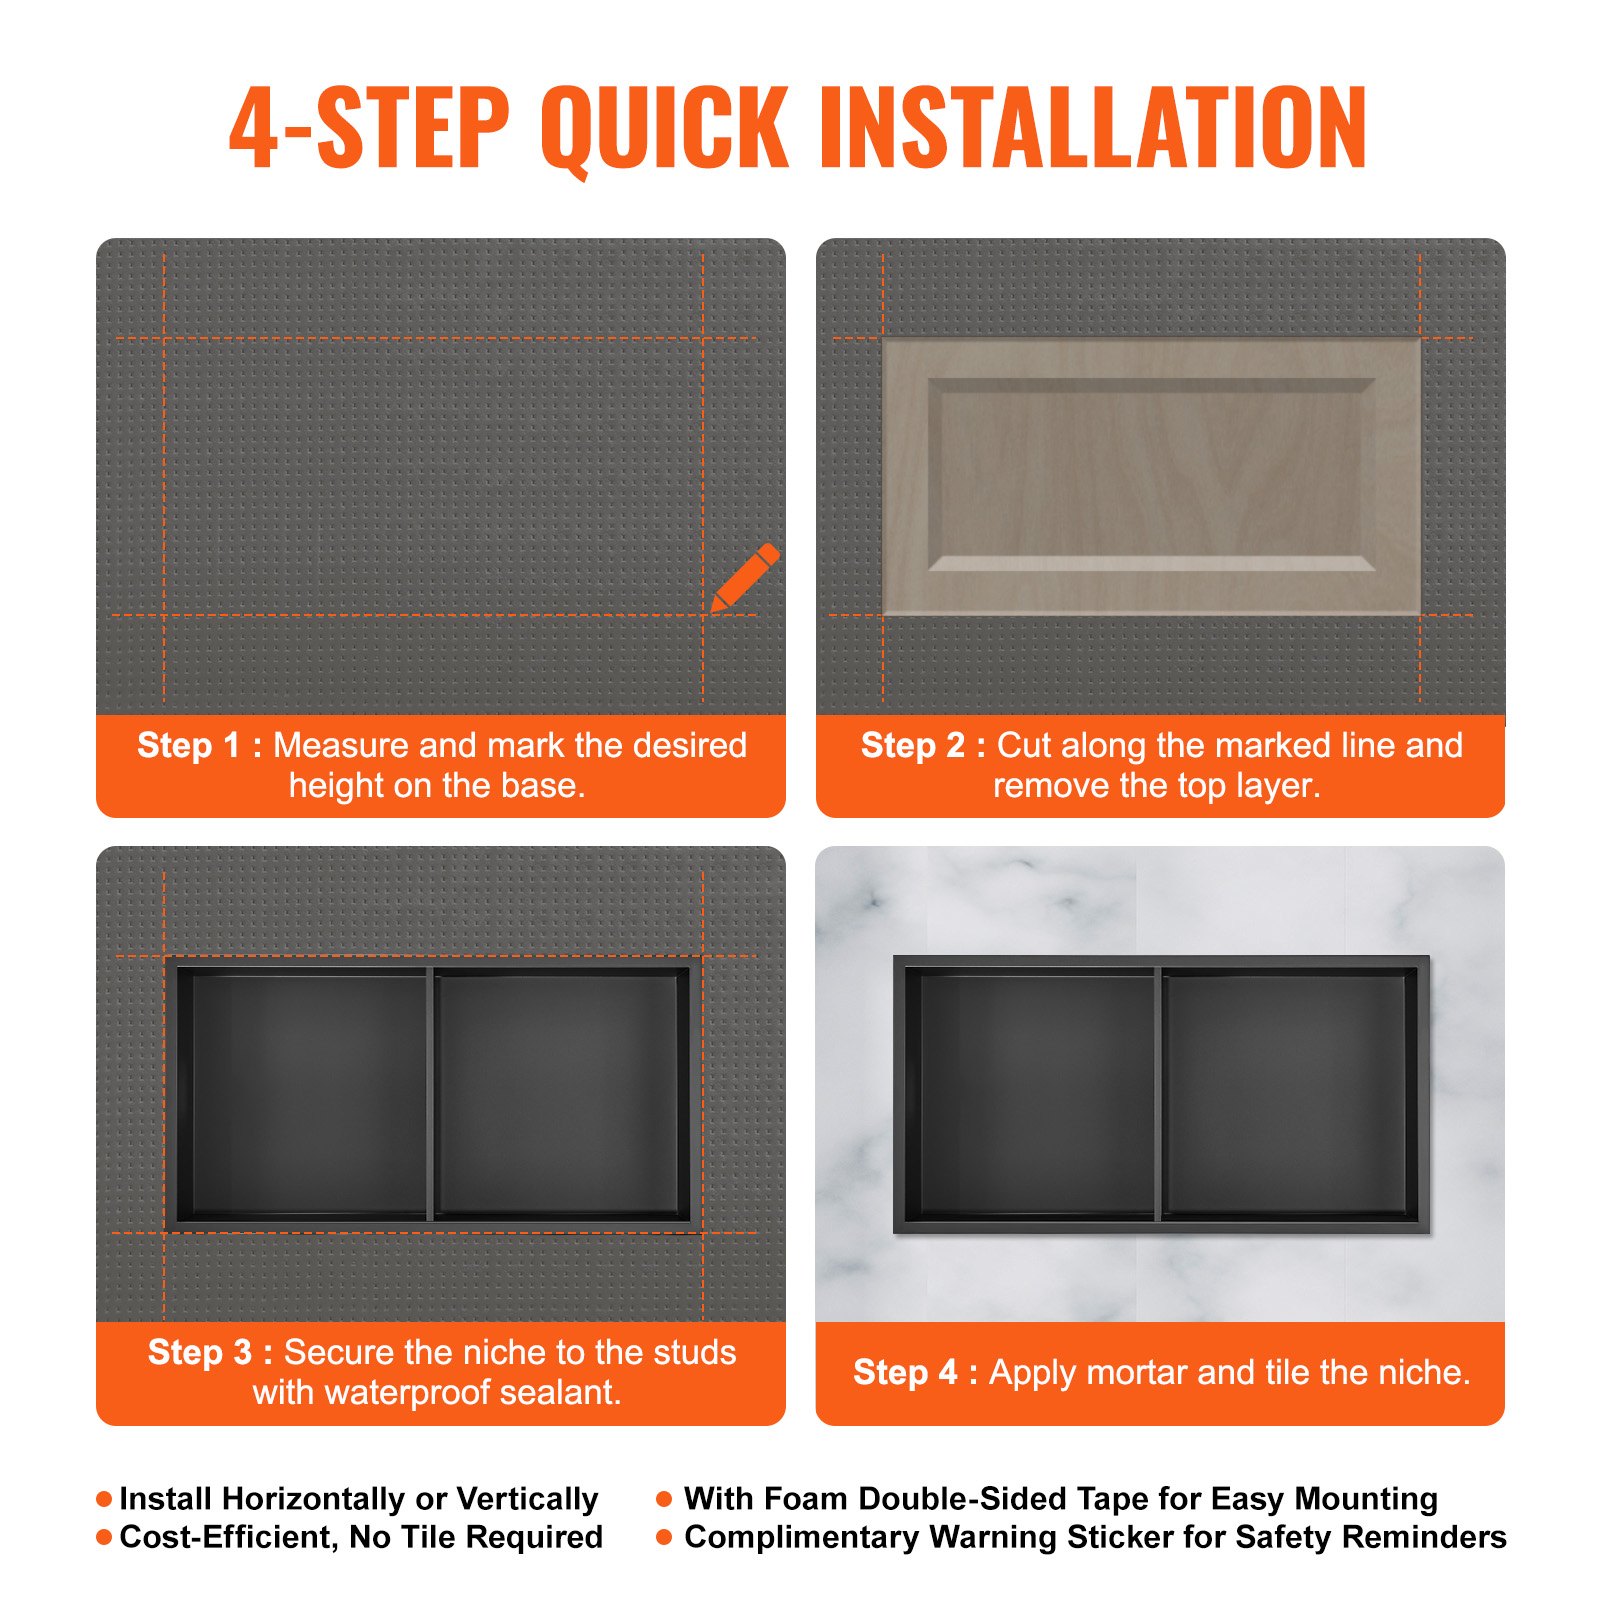
The following installation details apply to existing walls before tiling and do not cover every possible situation. Always consult with a licenced professional during preparation and installation.
1. Locate and mark the center lines of adjacent framing studs using a stud finder or by tapping the wall. Draw a level line between the two wall studs at your desired niche height.
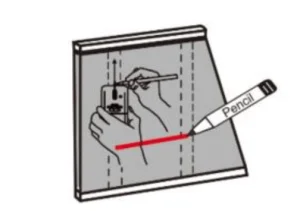
2. Trace the cut line with a pencil above the center line. Cut out a cavity on the wallboard along the traced line. Be sure the top and bottom lines are level.
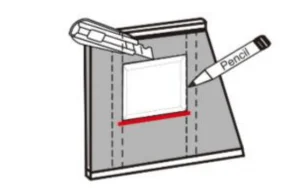
3. Level and fasten the surrounding framing to the adjacent vertical studs, making the dimension match the niche flange.
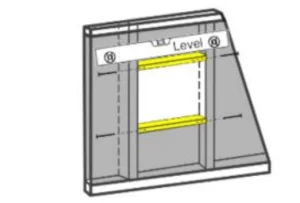
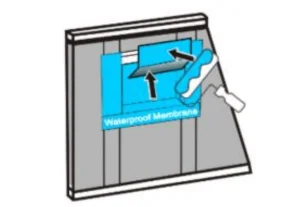
4. Glue the waterproofing membrane inside to seal the whole cave and extend 6 inches to the four sides of the surrounding wall. Creating a watertight seal in the cave is very important.
5. Apply your setting material and set your tile, marble, or stone directly to the shower wall. It is best for the tile to be symmetric around the cave. The tile line can end right on the niche for a very clean look.

6. Remove the tape’s protective film and apply an uninterrupted bead of silicone sealant from the inside corner of the niche to the edge. Ensure the sealant is applied thickly.
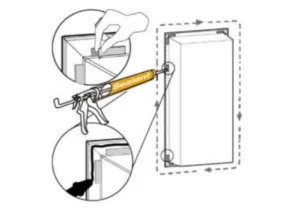
7. Insert the niche fixture into the cave. Press the flange tightly to ensure the niche is plumb and level. Wipe off the excess sealant along the perimeter edges.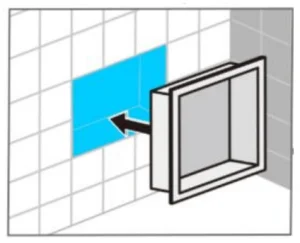
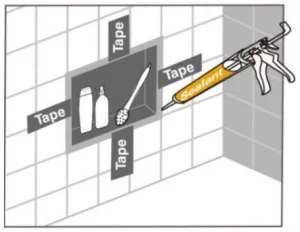
8. Tape the flanges to the wall to hold the niche until the sealant cures.

Recommended For Your Project
VEVOR 13"x25" No Tile Shower Niche 304 Stainless Steel Manual

Reviews
There are no reviews yet.