

Unlock the full potential of your VEVOR Vinyl Cutter 53 Inch Plotter Machine with our comprehensive product manual download. Designed with user-friendliness in mind, this detailed guide covers every aspect of your vinyl cutter plotter, from initial setup to advanced troubleshooting and optimization.
Our manual ensures you can maximize your machine’s capabilities, featuring step-by-step instructions, detailed diagrams, and expert tips.
Whether you are a beginner or an experienced user, this manual will help you effortlessly navigate the automatic paper feed, adjust cutting speeds, and utilize the Signmaster Software to its fullest. Download now and transform your sign-cutting projects with ease and precision.
VEVOR Vinyl Cutter Plotter Machine User Manual
Precautions
- Protective material must be removed before turning on the cutting plotter.
- Check the label on the back side of the plotter to confirm that the rated voltage required by the plotter matches the voltage of the power base.
- First, ensure the power switch is off, then plug the power supply into a grounded power outlet.
- Please do not touch the power cord with wet hands to avoid electric shock.
- Please only use this product’s power cord, data cable, or manufacturer-approved replacements.
- Please do not drop metal objects and liquids into the machine to avoid malfunction.
- After shutting down, you must wait another 5 seconds to turn on the cutting plotter again; otherwise, it will be damaged.
- In thunderstorms, turn the power switch to OFF and unplug the power cord.
- Please do not privately change the manufacturer’s components.
- The manufacturer reserves the right to change product specifications without prior notice.
- The manufacturer only bears the legal obligations of the product itself sold to the users and does not bear other losses caused by the product’s malfunction.
- Without our company’s permission, no part of this manual can be copied or transmitted under any name.
- Do NOT drag the carriage by hand.
- If the Vinyl Cutter Plotter Machine makes an abnormal sound after being powered on, please turn off the power immediately and contact the after-sales department for feedback.
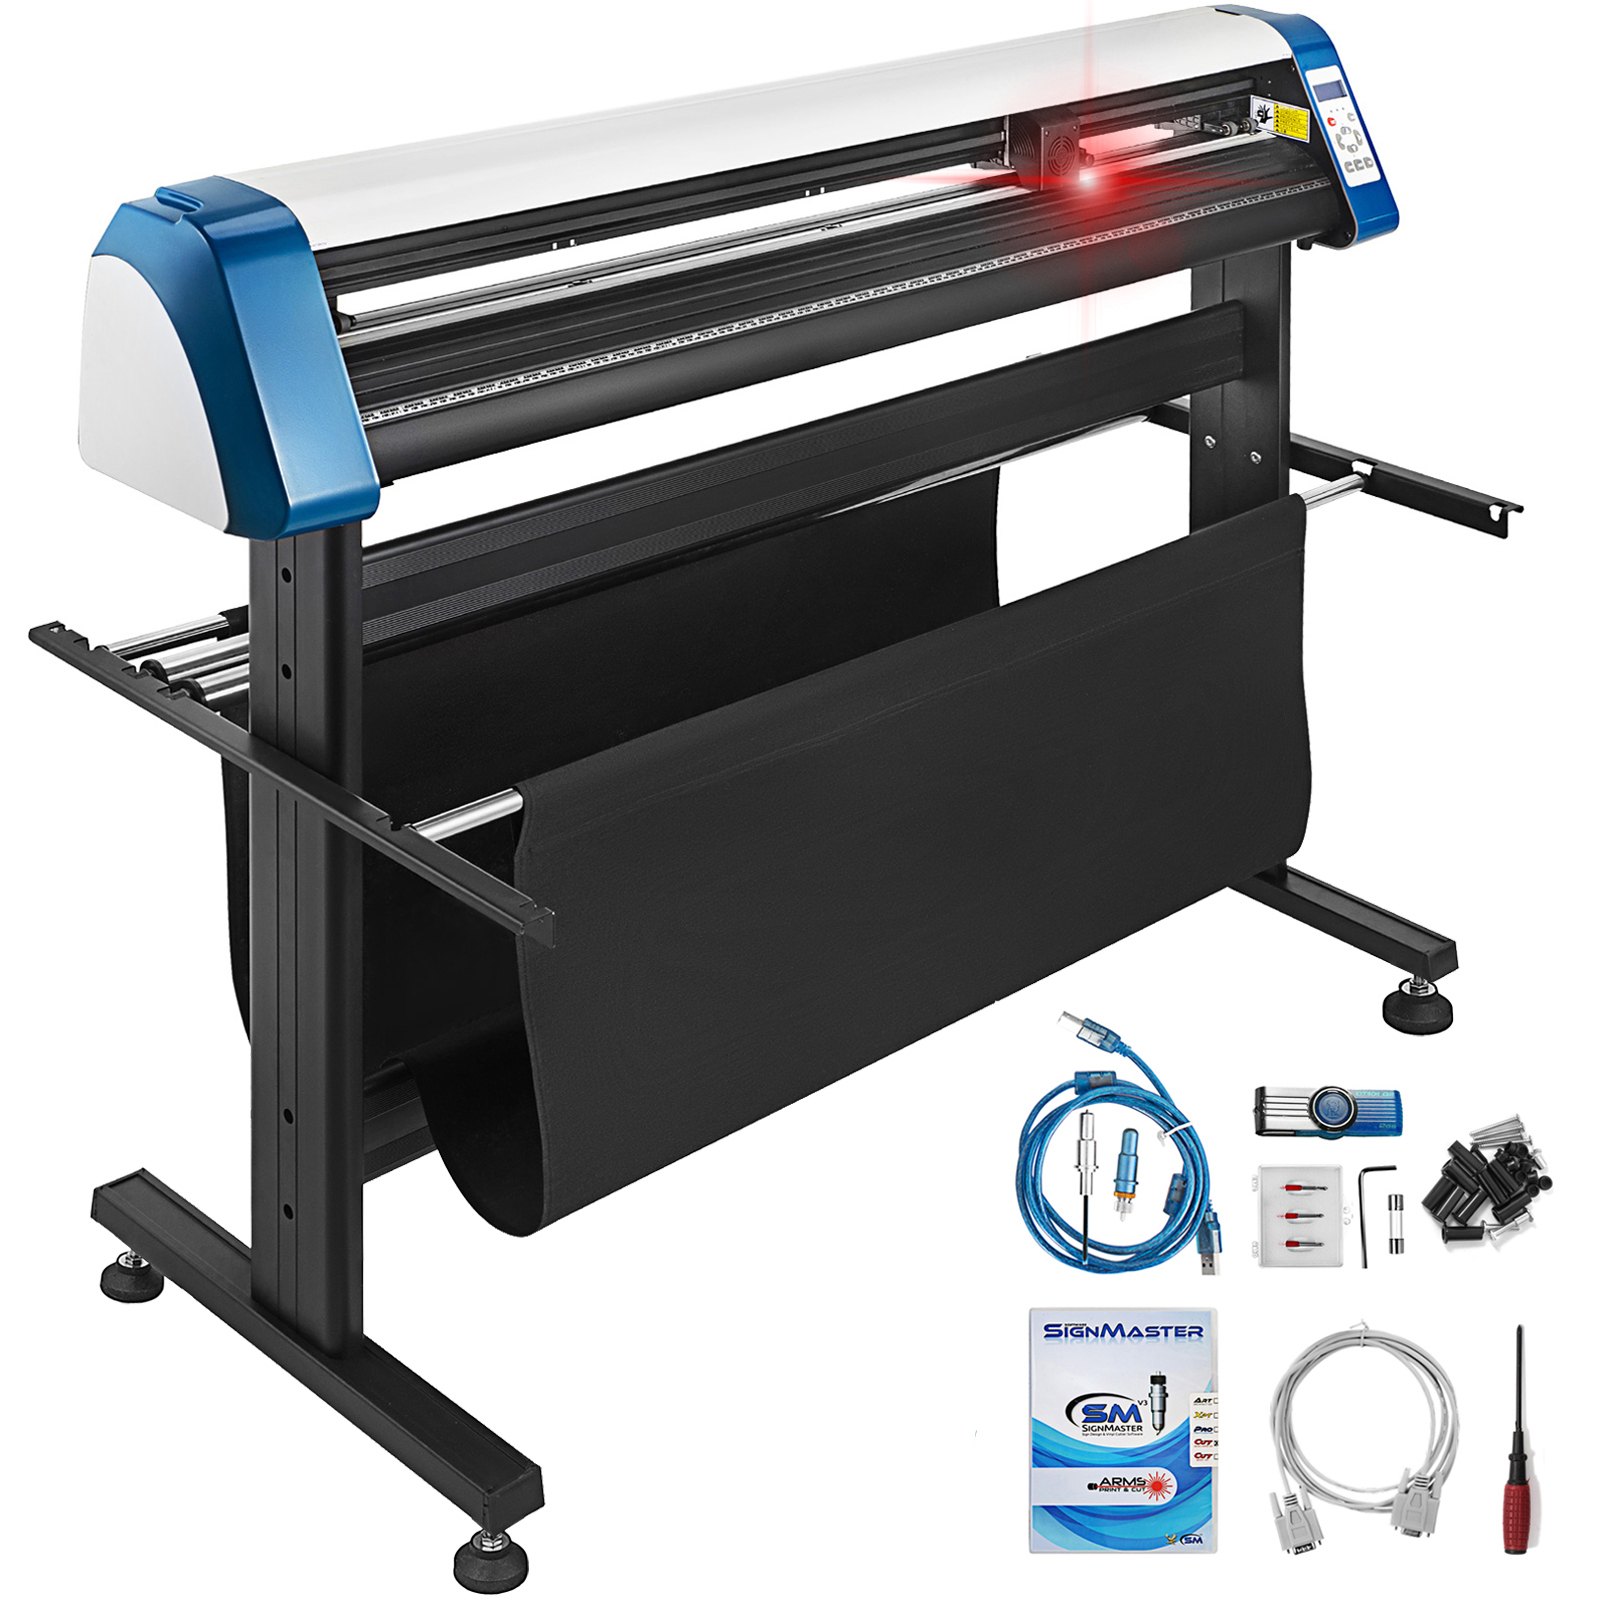
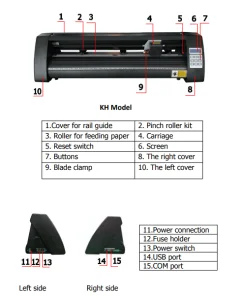
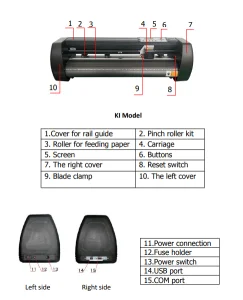
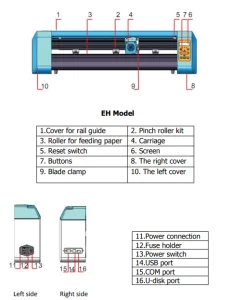
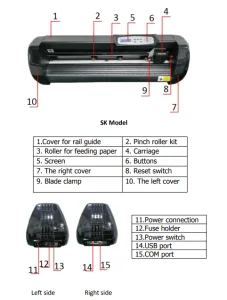
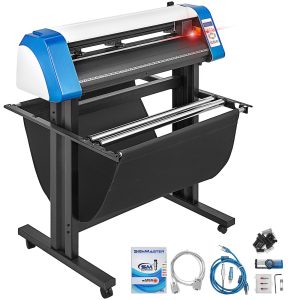
VEVOR Vinyl Cutter Plotter Main Parts
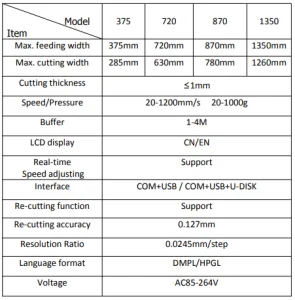
Vinyl Cutter Plotter Machine Technical Parameters
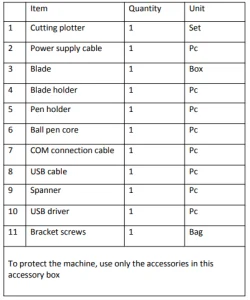
53 Inch Vinyl Cutter Plotter Machine Accessory Box
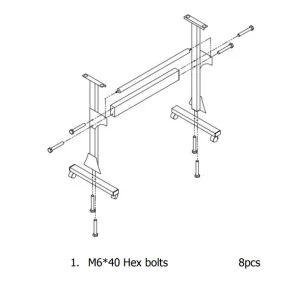
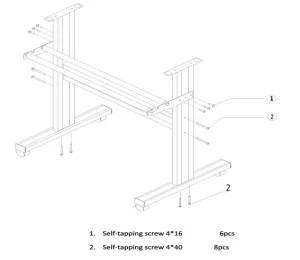
Vinyl Cutter Plotter Machine Bracket assembly
Iron bracket assembly diagram
Al bracket assembly diagram
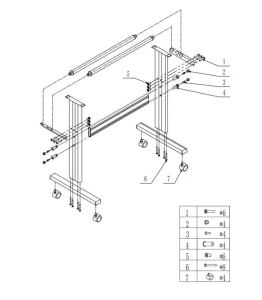
Sheet Metal Racket Assembly Diagram
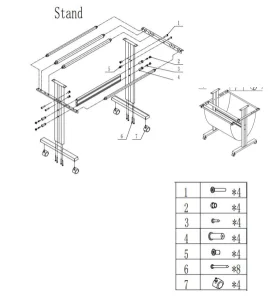
AI bracket Assembly Diagram
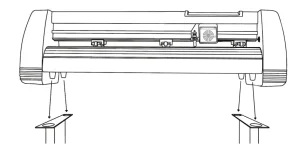
Install the machine on the bracket
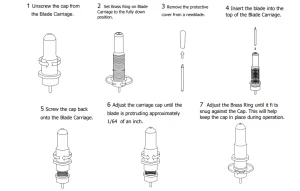
Blade Assembly
Blades should be replaced every 6 months. They may need to be replaced more often if you are cutting thicker material such as foam, glitter, or reflectives.
Assemble the blade into the holder, see below:
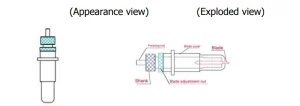
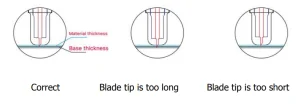
Loosen the blade adjustment nut and rotate the shank to adjust the length of the exposed blade tip. The tip length should be determined according to the thickness of the material.
Press the pressing rod when you want to change the blade; remove the blade when it is exposed.

How to use the product
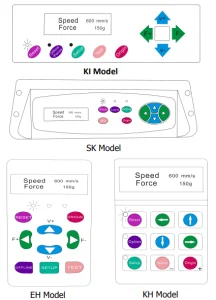
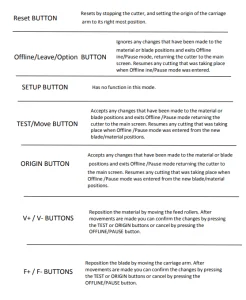
The cutter’s main screen allows you to set its settings, including the cutting speed and cutting force options. It also allows you to cut a test pattern or check the amount of force that is currently set.
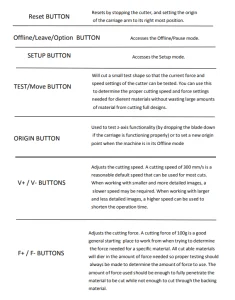

Offline mode is used to reposition the cutting material and blades so that a new starting position can be set for the next design. Offline mode can also be accessed while the cutter is in operation and will pause the current cutting process.
Although changes can be made to the material and blade positions if Offline /Pause mode is accessed during cutting, making changes to either setting is not normally recommended.

If the cutter is not already on, turn it on now.
If you would like to change the position of where the cut will be made:
- Press the OFFLINE/PAUSE button to enter offline mode.
- Adjust the vinyl to where you want to make your cut to start by using the Up and Down arrow keys on the control panel.
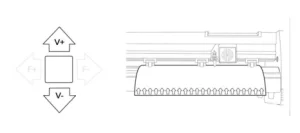
- Now, use the left and right arrow keys to adjust the blade to where you want your cut to start.
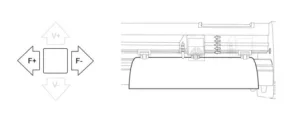
- Now press the Origin button to tell the cutter that this is the location where you would like the cut to begin.

Note:
When choosing a starting location for your design, remember that the process will start in the bottom right area of the design. Please leave enough room to the left of and behind the starting location to finish your cut. If you would like to make other adjustments to the pressure, speed, or other settings, you can do so now.
If you are setting up for your first cut with the machine, then the default values should be a good starting point. If you make any adjustments to your cutter, make sure that you return to the main screen before you attempt to cut.
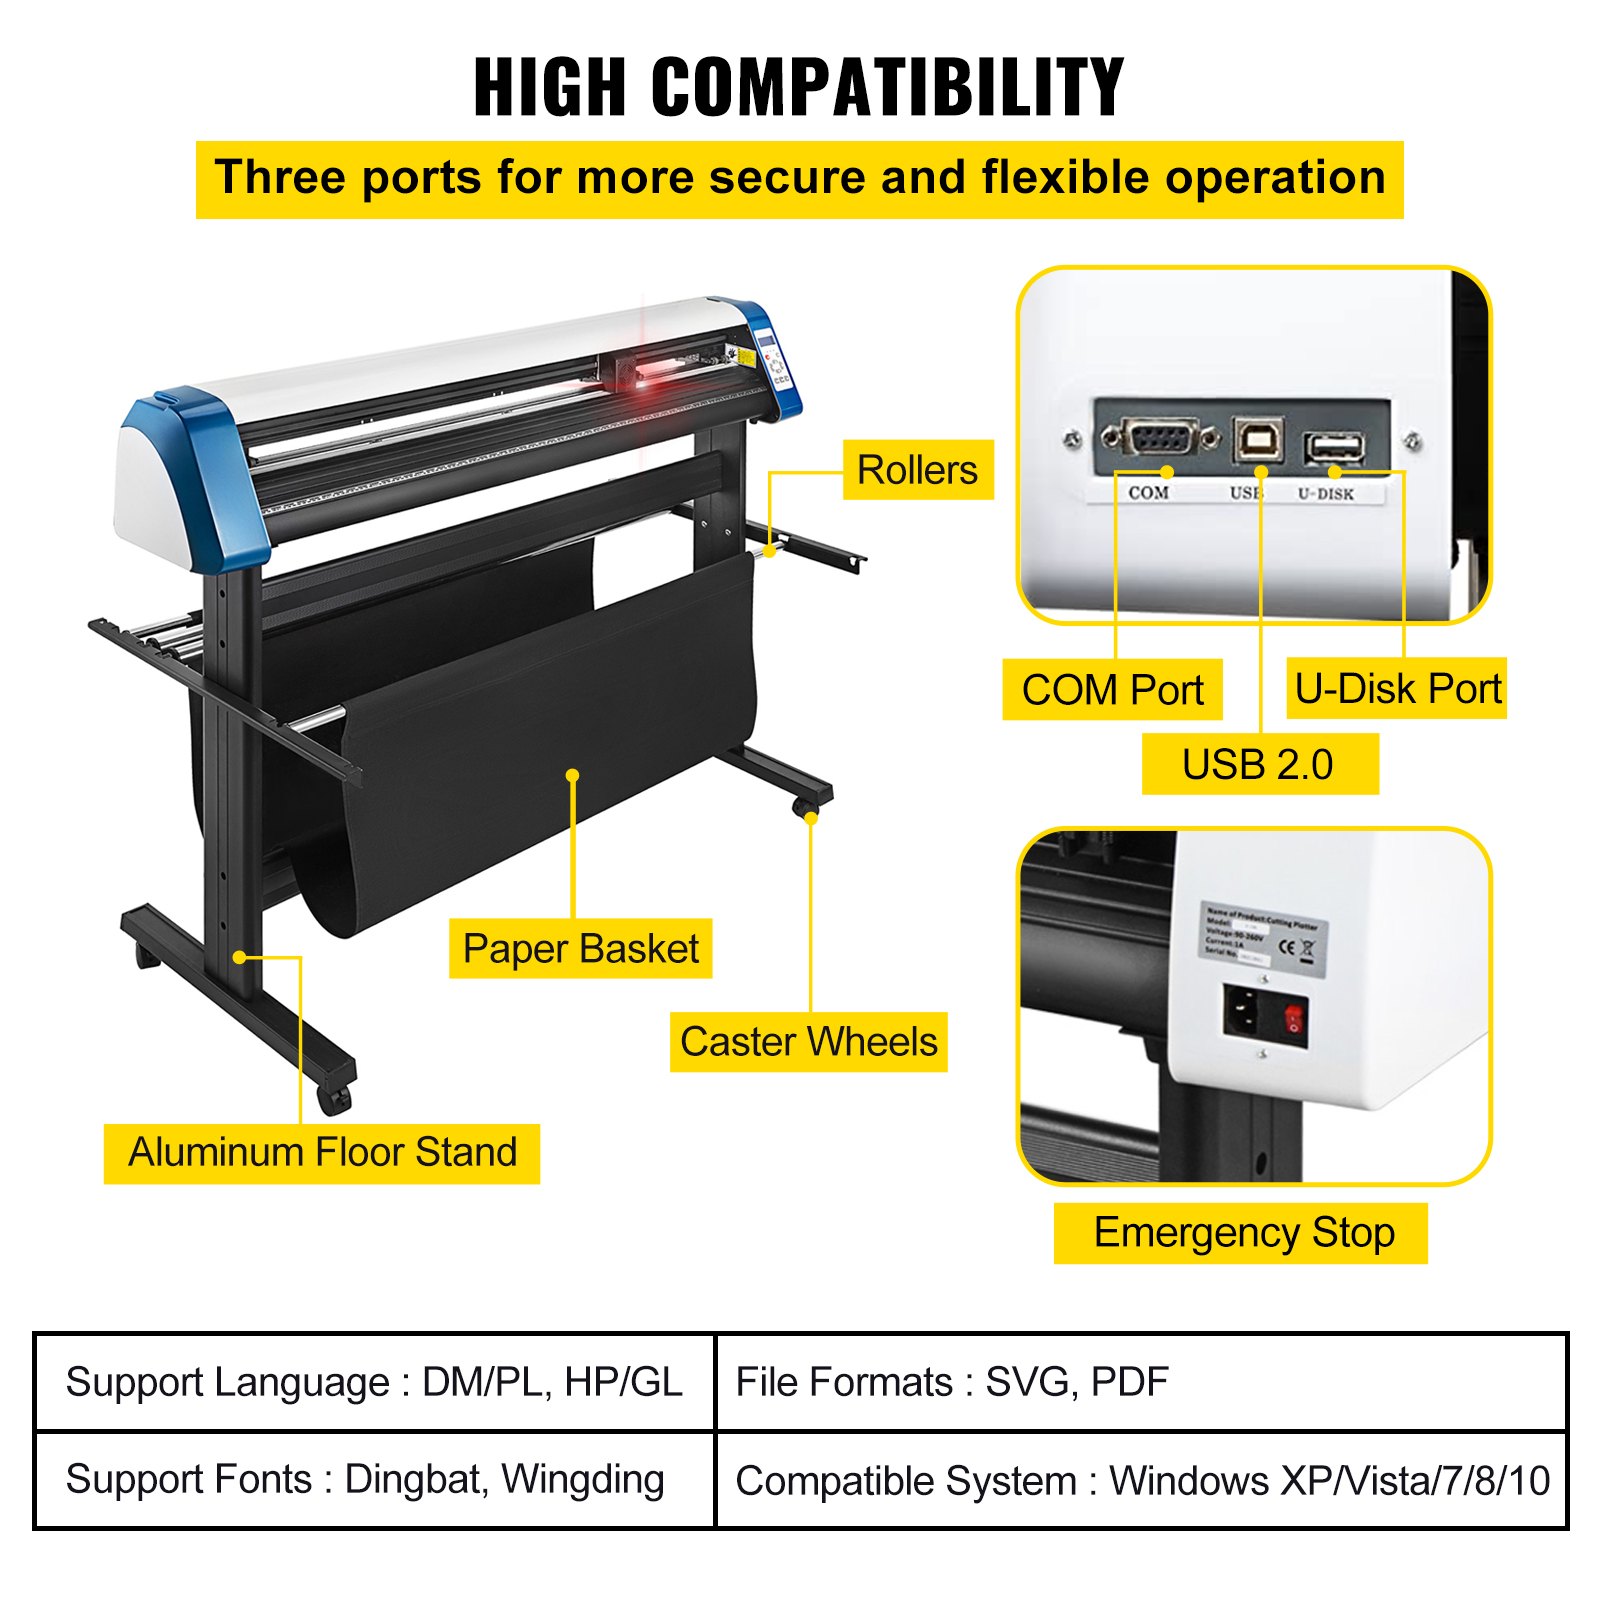
How to Connect Products to Software
Attach the power cord to the cutter, plug it into the unit, and turn on the power.
Note:
If you are using a Serial Cable to connect your cutter to a computer, then no further setup is necessary. Connect one end of the cable to the cutter and the other end to a computer, and the setup is complete.
Suppose you have more than one serial connection on your computer or are experiencing communication issues between your cutter and computer. In that case, you may wish to verify that the correct COM port is being used in your software setup. For most users, the COM port will be COM1.
Installing Vinyl Master Software
Your comes bundled with SignMaster software, an easy-to-use software with tools to help you take your projects from concept to a ready-to-cut computer image file.
The driver is automatically installed during software installation; you do not need to install the driver separately.
Software and Driver Installation
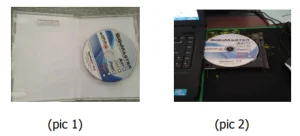
Open the software box (pic 1), take the disk and put it into the CD optical drive (pic 2)
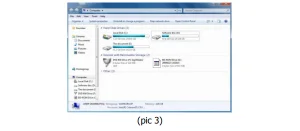
Open the computer, double-click or right-click the optical drive to install the software. (pic 3)
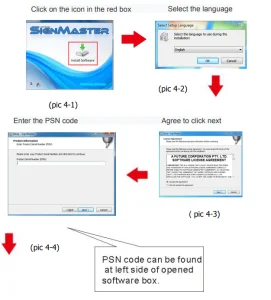
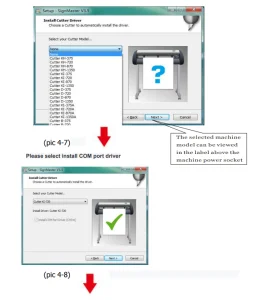
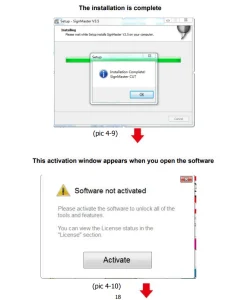
After opening the optical drive, click Install Software (pic4)


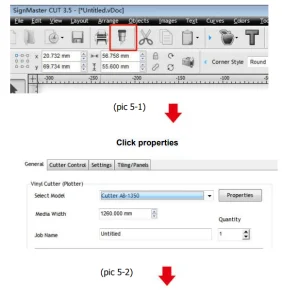
Connection of Software and Machine
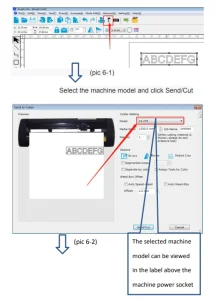
Open the software, select cut content, and click send to the cutting plotter.
Click the carving knife icon in the red box.
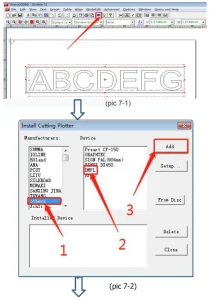
Graph-cut software operation instructions: select the cut file and click Cut
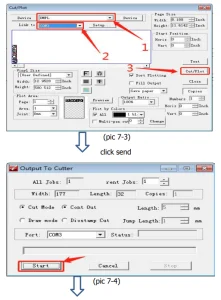
Artcut software operation instructions: select the cut file and click Cut
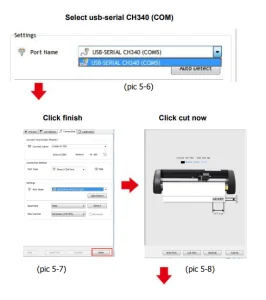
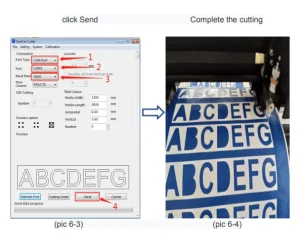
Please click cut after following the settings below
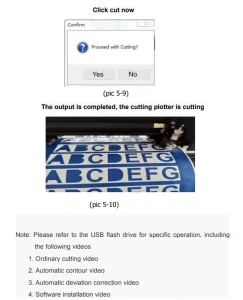
Complete the Cutting
Troubleshooting the VEVOR Vinyl Plotter Machine
1. The computer does not have a CD drive and cannot load the CD installation software. What should I do?
Solution: The software installation package is included in the USB flash drive. You can also download the software from the following link:https://fcws6.com/downloads/signmaster/SignMaster_UniverDSR_35_GW.exe
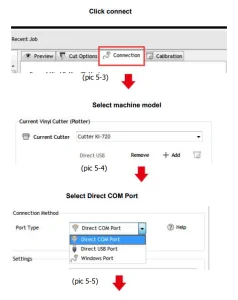
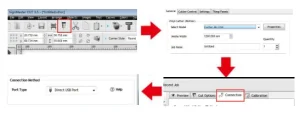
2. The product cannot connect to the software.
Solution: Software port Settings, as shown below:
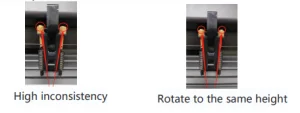
3. Paper deviation occurred during cutting.
Solution: Because the tension of the paper press is inconsistent, rotate the two yellow copper nuts on each paper press to the same height, then the pressure is balanced, as shown below:
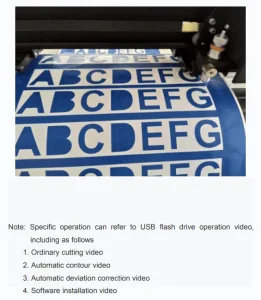
4. The effect of small graphics cutting is not ideal.
Solution: When the cutting height is 3-5 mm letters, the software compensation value is set to 0.45, and the speed is adjusted to 400mm/s.
When the cutting height is more than 5 mm, the software compensation value is set to 0.3, and the speed is adjusted to 600mm/s or more.
5. The cutting process stops and does not return to the origin.
Solution: Do not use any data conversion connector. Data may be lost, and the cutting process may stop. Please plug the data directly into the computer interface.
Recommended For Your Project
VEVOR Vinyl Cutter 53 Inch Plotter Machine Automatic Paper Feed Vinyl Cutter Plotter Manual


Reviews
There are no reviews yet.