首页 » 主页 » 如何安装壁挂式通风扇:DIY 安装分步指南

如何安装壁挂式通风扇:DIY 安装分步指南

wall mount vent fan​

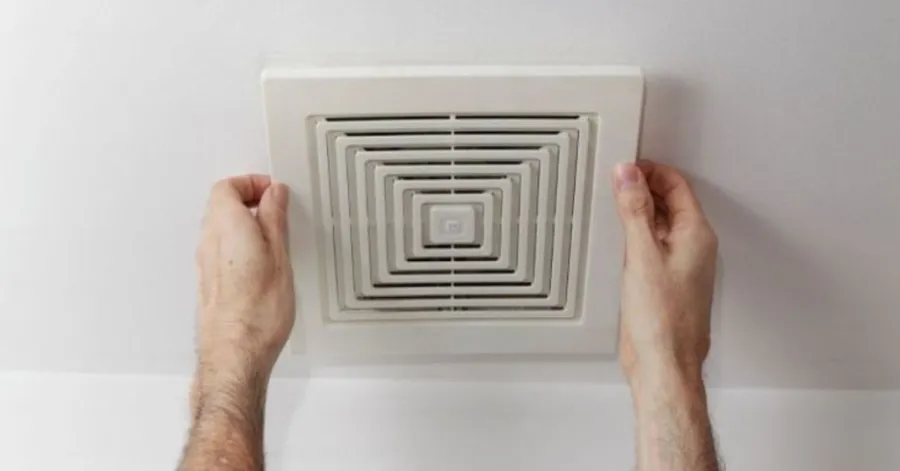
你可以安装一个 wall-mount vent fan​ yourself with the right tools and preparation. When working with a wall-mount vent fan​, safety is the top priority, especially when dealing with electrical wiring. Take time to plan your project and gather everything you need for your wall-mount vent fan​ installation. Always read every step before you begin installing your wall-mount vent fan​. This helps you avoid mistakes and keeps your work safe.

  • Wear protective gear to stay safe while installing the wall-mounted vent fan.
  • Double-check measurements before cutting or drilling for the wall-mount vent fan​.
  • Ask for help if you feel unsure about any part of the wall-mount vent fan​ installation.

安装所需的工具和材料 Wall Mount Vent Fan

Install a Wall Mount Vent Fan

Essential Installation Tools

You need the right tools to install a wall-mount vent fan. Gather these items before you start:

  • 卷尺
  • 铅笔或记号笔
  • 梭哈找到
  • 水平
  • 用钻头钻
  • Jigsaw or reciprocating saw
  • 螺丝刀套装
  • 剥线钳和刀具

Use a tape measure to mark the exact spot for your fan. Use a stud finder so you don’t cut into a wall stud. A level keeps the exhaust fan level. You will need a saw and a drill to carve the opening for the fan. Wire strippers help you make electrical connections easier.

所需材料

You must have all of these items on hand to ensure a smooth installation. An external exhaust hood might let the air from your exhaust escape your area. Both anchors and screws help secure the fan in place. Caulk is used to seal air leaks and to stop moisture from entering the area.

您应该使用的安全设备

Safety matters when you install an exhaust fan. Protect yourself with these items:

  • 护目镜 
  • 工作手套 
  • 防尘口罩
  • 听力保护

It is important to protect your eyes from dust and particles by wearing safety glasses. If you are going to cut something or handle something sharp, you should wear gloves. By wearing a dust mask, you prevent particulates from entering your lungs. Wearing hearing protection is beneficial when working with loud tools.

如何选择合适的 Wall Mount Vent Fan

How to Choose the Right Wall Mount Vent Fan

Determining the Correct Fan Size and Airflow (CFM)

You need to pick the right size for your wall-mount vent fan​. Size is a function of the room and the amount of air you wish to move. Look for the CFM (cubic feet per minute) rating. CFM indicates how much air the fan can move. Most bathrooms need a fan that moves 50 to 100 CFM. Kitchens or laundry areas require more CFM. Measure your room and see the manufacturer’s advice for the optimum fit.

Energy-Efficient Vent Fan Features to Look For

If you can find a fan with smart features, you can save money and energy. You should look for models that have earned the ENERGY STAR certification. These fans use less power and are quieter. Fans may have timers or motion sensors. These skills provide you with the ability to change the timing of the fan. Some come with LED lights that provide better illumination.

Indoor vs. Outdoor Rated Vent Fans

You are required to determine whether the wall-mounted exhaust fan is rated for indoor or outdoor use. Bathrooms, kitchens, and laundry rooms are the ideal locations for installing indoor fans. Outdoor fans can withstand both weather and damp conditions. For garages or sheds, use outdoor fans. Before making a purchase, you should always read the label.

There are tons of various exhaust fans for you to pick from. Some fans include lights installed directly within the fan. Some of the others have sensors that measure humidity. Fans with remote controllers already fitted can be bought. Select a fan that is appropriate for the space you have available and your needs.

  • Standard exhaust fan
  • Fan with light
  • Humidity-sensing fan
  • Remote-controlled fan

如何安装 Wall Mount Vent Fan: Step-by-Step Instructions

Benefits of wall-mount vent fan

Step 1: Mark the Vent Fan Installation Area

Start by choosing the best spot for your wall-mount vent fan. Use a tape measure and a pencil to mark the outline where you want to install the exhaust fan in a wall. Make sure the area is clear of wires and pipes. Check for studs with a stud finder. This step helps you avoid mistakes later.

Step 2: Cut the Opening in the Wall

Gloves and safety glasses are a must. Don’t forget yours! It is recommended that you drill starting holes at the corners of your layout outline. Use a jigsaw to cut along the lines. Cut off the part that was cut. At this stage, you have room for the exhaust fan.

Step 3: Install the Exterior Vent Hood

The outdoor vent hood should be placed over the aperture once you have gone outside. The outer square exhaust housing should be screwed to the wall securely. Exhaust air is allowed to escape your room through this vent. Check that the vent hood is flush with the wall before installing it.

Step 4: Position and Secure the Wall Mount Vent Fan

Enter the building once more. When the housing is ready, the fan should be fitted into it. Use screws to fasten the fan securely in place. Make certain that the fan is positioned on a level surface. This step is vital for mounting an exhaust fan securely and properly.

第 5 步:连接电线

Turn off the power at the breaker. Use wire strippers to prepare the cables. The cables from the fan are connected to the house wiring using wire nuts. Follow the directions provided by the manufacturer. This is one of the most important steps in installing an exhaust fan, so do this step.

Step 6: Seal Around the Fan and Exterior Vent

It is recommended that caulk or sealant be put all the way around the vent hood and the fan unit’s external perimeter. Because of this, there is no possibility of exhaust air escaping, and no possibility of moisture getting in. The sealant needs to be allowed to dry.

Step 7: Restore Power and Test the Fan

Restore the system’s access to the electrical supply. Include the fan cover with the item. It is recommended that the fan be tested by turning it on. It is important to listen for smooth operation in addition to ensuring that the exhaust air is properly flowing outdoors. If everything works as it should, the installation process has been completed successfully without any problems. 

接线一 Wall Mount Vent Fan 安然

Wiring a Wall Mount Vent Fan Safely

Basic Electrical Requirements

You need to check your electrical setup before wiring a wall-mount vent fan. Make sure the circuit can handle the new load. Most exhaust fans use a standard 120-volt circuit. You should use 14-gauge wire for most installations. Always turn off the power at the breaker box. Use a voltage tester to confirm the circuit is off. Safety comes first when you work with electricity.

Connecting the Fan to a Switch

You can connect the exhaust fan to a wall switch for easy control. Run the wires from the fan to the switch box. Strip the ends of the wires and join them with wire nuts. Attach the ground wire to the grounding screw. Secure the switch in the box and cover it with a plate. Turn the power back on and test the switch. The fan should start and stop with the switch.

应避免的常见接线错误

You should avoid these mistakes when wiring an exhaust fan:

  • Forgetting to turn off the power
  • Using the wrong wire gauge
  • Not securing wire nuts tightly
  • Mixing up hot and neutral wires
  • Leaving exposed wires

何时致电持牌电工

If you are uncertain about any of the steps, you should contact a certified electrician. Working with electricity can always be risky. If your wiring appears damaged or outdated, you should seek professional assistance. A visit to an electrician is also recommended if your exhaust fan requires a dedicated circuit or if you discover cables that are not expected behind the wall.

结语

You learned how to install a wall-mount vent fan​ step by step. Before you finish the project, you have to get your dimensions, wiring, and seals tested for accuracy. If you are dealing with wires, you must have safety gear AND have the power source turned off while you are working on it. In situations where you are not sure about something, it is better to seek the help of an electrician who is an expert in the area of the problem.

  • Review each step before you start.
  • Test the fan after you finish.
  • Enjoy fresh air and better ventilation.

Safety comes first. Double-check your work for the best results.

常见问题解答

How long does it take to install a wall-mount vent fan?

Most installations take two to four hours. You can finish faster if you have experience and all the tools are ready. Plan extra time for electrical work and sealing.

Can you install a vent fan without professional help?

You can install a vent fan yourself if you follow instructions and use safety gear. Ask an electrician for help if you feel unsure about wiring.

What should you do if the fan makes noise?

Check for loose screws or debris. Tighten all fasteners. Clean the fan blades. If noise continues, review the manufacturer’s troubleshooting guide.

Do you need a permit to install a wall-mount vent fan?

Some cities require permits for electrical work. Check local building codes before you start. You can call your city office for details.

发表评论

您的电邮地址不会被公开。 必填项 *

滚动到顶部