
It is natural to feel nervous when working on drill repair, especially as a novice. Most people fear making a mistake or damaging their tools, yet most issues can be resolved easily with simple, easy-to-follow instructions and proper safety equipment. Begin with simple, minor fixes to gradually build confidence and learn how your wiercić functions. Every effort will make you become better and less afraid with time. Be patient, take orders, and have faith in your learning. This guide explains common drill problems and how to fix them easily, helping beginners understand practical solutions.
Understanding Drill Types, Parts, And Basic Function
It is important to clearly understand the type of drill that you are using and how its main parts operate before you begin any repair work. This makes drill repair easy since each drill has its own structure and power system. As soon as you have identified the type and constituents, you will be in a position to quickly understand the problem and prevent further harm. It is also easier to follow a guide on troubleshooting a drill that is not functioning properly, especially for beginners.
Common Types Of Drills And How They Are Used
Different drills are designed for different tasks, and knowing them helps you choose the appropriate repair method. Every type works in its own way, and the problems you have can also vary according to the design.
- Wiertarki przewodowe: They run on mains power from a wall socket and deliver steady power for long work sessions.
- Cordless Drills: These have rechargeable batteries and are portable for use at home and outdoors.
- The Hammer Drills: These combine spinning and hammering actions and are therefore suitable for hard materials such as concrete.
- Prasy wiertnicze: Fixed machines used to cut straight, precise holes in materials.
Each type behaves differently when it forms a fault. As an illustration, cordless model products and corded drill products may experience battery-related problems and switch or wiring problems, respectively. This is particularly useful knowledge when you are following a cordless drill repair guide to repair your cordless drill at home step by step.
@beckenholdt Wiertarka magnetyczna Vevor #zachęcam #narzędziavevor #sklepvevortt #wiertarka magnetyczna #wiertłomagnetyczne
♬ oryginalny dźwięk – Becken
Main Parts Of A Drill And Their Functions
The basic parts of a drill help you find problems faster and repair them more efficiently. All drills, regardless of type, share basic parts that govern their operation.
- Chuck: Holds the drill bit firmly in place during use.
- wyzwalania: Controls the starting and stopping of the drill.
- Battery or Power Cord: Provides power to operate the drill.
- Silnik: Transforms power into rotation.
- Uchwyt: Provides grip and control while working.
- Gear Switch: Allows adjustment of speed and direction for different tasks.
Also, drill bits play an important role, as various types are used for wood, metal, or concrete. Never forget to unplug the drill or remove the battery before checking any internal part. This is a simple step, but it is important for safety when carrying out drill repair and helps prevent accidents during maintenance or troubleshooting.
Basic Drill Safety Rules Before Starting Any Repair Work
Prior to commencing any drill repair, one must have a clear understanding of basic safety rules. An exercise is a potent tool, and even a slight error can cause severe harm or loss. By observing safety protocols correctly, you reduce risk and make the repair process much smoother. These guidelines can also be applied to troubleshooting a drill that is not working or to following a guide on how to fix a cordless drill for beginners.
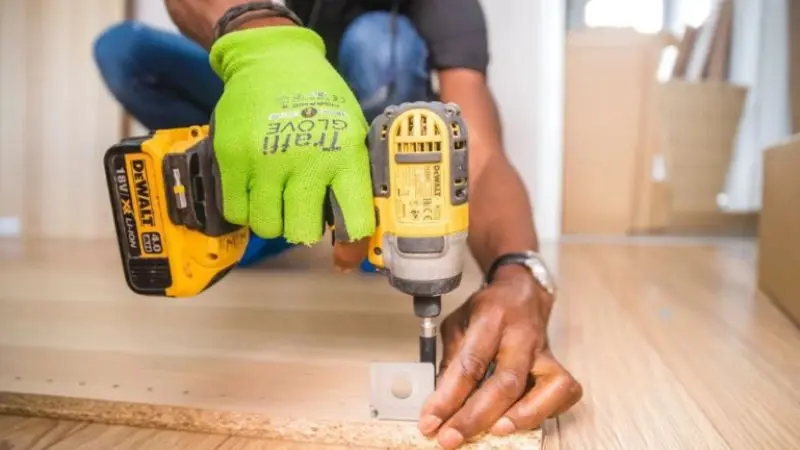
Safety Equipment You Should Always Use When Working With A Drill
The initial step in this process is to use safety equipment to safeguard yourself in any drill work. It avoids injuries due to dust, noise, or other sharp moving parts. The right gear can also help you focus on the repair rather than fear accidents. Safety glasses will protect your eyes from flying dust and tiny debris, and work gloves will keep your hands safe from sharp edges and heat. Ear protection is important because over time, the drills can produce a lot of noise, which can be very harmful to your health, and a dust mask helps you avoid inhaling fine particles, which may cause serious illnesses like cancer and other health-related diseases.
It is important to be sure that your safety equipment is in place before you begin. If anything is spoiled or old, replace it as soon as possible to ensure you are fully protected during the repair of drills.
Safe Ways To Handle A Drill And Common Mistakes To Avoid
How a drill is handled is highly important not only for safety but also for proper repair work. It is important to always hold the drill firmly with both hands so it does not slip during use. Keep your fingers away from moving parts, and make sure the drill bit is securely tightened in the chuck before you begin. Having a stable surface enables you to be more balanced and in control, particularly when undertaking longer jobs or when handling heavier material, especially when using a wiertarka magnetyczna that relies on a secure base for accurate results.
Take precautions against some of the most common mistakes that can lead to accidents or damage. Avoid loose clothing and jewelry, as they may get caught during the drill. Always avoid forcing a drill when it gets stuck, as this may damage the motor or internal components. Instead, pause and examine the issue at hand. Also, do not use a tool that is in poor condition, as it is risky, makes drill repair more difficult, and reduces the overall safety of its use.
Common Drill Problems And Step-by-Step Fixes
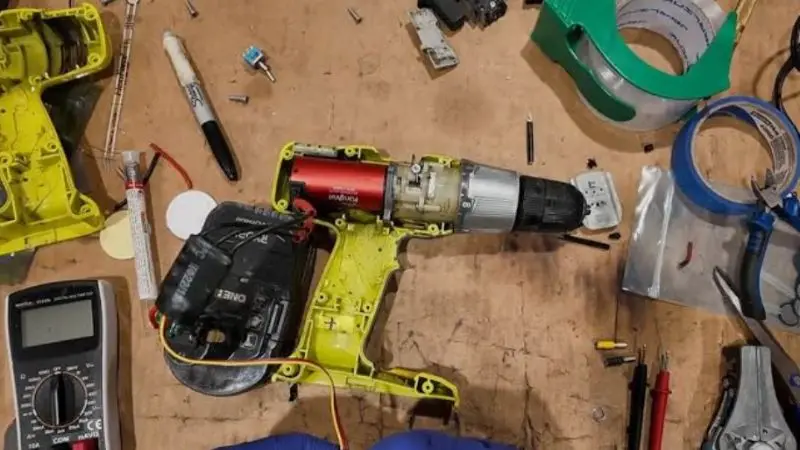
Here you will learn about common drill problems and how to fix them easily, with simple solutions that beginners can understand and follow. The majority of drill problems are simple to resolve when you are clear on their cause. These issues are typically related to power outage, battery problems, stuck components, overheating, or mishandling. These are the basics, which also help when troubleshooting a drill that is not working as expected or when following a cordless drill repair guide designed to help beginners learn the ropes of drill repair.
Drill Not Starting Or Power Not Working
If a drill fails to start, it is usually a power issue. The first is to ensure the battery is charged in cordless drills or the plug is securely attached in corded drills. Often, the issue is simply a loose connection or a drained battery.
If the drill fails to start, even though the power and trigger are fine, check the power switch and trigger. Blockage of proper contact may be caused by dust or internal wear. Also, check the fuse or circuit breaker on corded models. When nothing helps, the problem could be internal, so it is important to refer to the manual, which provides safe steps for repairing the drill and model-specific instructions.
Drill Losing Power Or Weak Performance
When the drill is activated but soon terminates or feels weak, this is normally an indication of a power problem. Where possible, test the battery in a different compatible tool. When it functions there, it is a problem within your drill, and not the battery.
Wipe the battery contacts with a dry cloth, as dirt can block power. In the case of an old battery, the most viable option is to replace it. For corded drills, examine the wire for any cuts or damage that could disrupt the electrical supply. These straightforward checks fix numerous typical drill repair power issues.
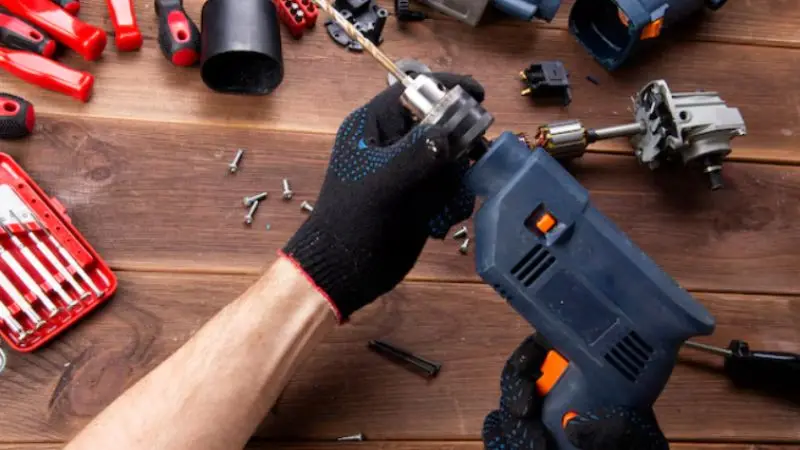
Drill Bit Stuck Or Chuck Not Opening
A stuck drill bit may bring your work to a halt. First of all, shut off the drill, and remove the battery or disconnect it. Then attempt to loosen the chuck with your hand.
Should it not move, then loosen it with a wrench. Do not force, as this may harm the chuck or bit. Light tapping can be of assistance in certain instances, but it must be done with caution. Always remove any rust or dirt from the area around the chuck, if present. The proper bit size will also help prevent sticking, a key aspect of safe drill repair.
Drill Getting Hot Or Making Strange Sounds
When your drill overheats or produces strange sounds, you should cease using it. This is normally a sign of internal stress or friction. Allow the drill to cool off before verifying anything.
Cooling: Check after cooling for dust accumulation, vents blocked, or loose parts. Overheating issues can be solved by cleaning the drill. In other instances, moving parts can be lightly lubricated to minimize friction and noise. It is easy to get into a lot of trouble by overlooking this kind of sign, so when it comes to drill repair, it is important to act swiftly.
Drill Not Drilling Straight Or Shaking
Should your drill saw crooked holes or shake, the trouble is most likely the bit or handling. Determine whether the drill bit is bent or worn and change it when necessary.
Ensure the chuck is firmly supported so the bit does not move. When using the drill, hold it firmly with both hands and maintain a stable position. The cause of inaccuracy is often due to poor grip or positioning. This is especially important in tools like a wiertarka magnetyczna, where strong holding helps keep the drill steady and working correctly. Corrective actions to these problems enhance control and are a significant element of effective drill repair, particularly among beginners.
Simple Drill Maintenance Tips For Long Lasting Performance
Maintenance is a significant component of drill repair, as it helps your tool remain safe, strong, and efficient over time. You can minimize breakdowns and maximize performance by maintaining your drill in proper condition. Even simple routines such as cleaning, part inspection, and secure storage can help prevent the most common issues. The tips are also useful for beginners learning to repair a drill machine at home, step by step, or for those using a cordless drill repair guide for beginners.
How To Clean And Lubricate Your Drill Properly
The first step towards good maintenance is to keep your drill clean. Wipe the exterior with a dry cloth after use to remove dust and dirt. In confined areas, a brush or compressed air should be used to keep debris out of the tool.
Lubrication also plays a role in smooth performance. Rub a little machine oil on moving parts, such as the chuck and gears. This makes it less frictional and prevents rust. Never use too much oil, as it may cause dust to accumulate and future issues when repairing the drills. The habit of cleaning before storing is simple and helps keep your drill in excellent condition.
How To Take Care Of Drill Bits And Keep Them Sharp
Drill bits are particularly significant in performance, and, therefore, they should be well-maintained as well. Clean the bits after each use to remove dust, wood chips, or metal debris. This helps prevent rust and keeps them in good condition. Ensure that they are thoroughly dry before storing them.
Keep all the drill bits in an appropriate case or holder to keep them organized and safe. The sharpness should also be checked regularly, as dulled portions can result in more difficult, less precise drilling. Replacement of aged bits or sharpening worn-out bits enhances safety and efficiency. Bit Care is a bit of the general repair and maintenance of drills.
Best Way To Store Your Drill And Accessories Safely
Proper storage will ensure your drill is not damaged and lasts longer. It is always advisable to store your drill in a dry place, as moisture can cause rust and electrical faults. The most appropriate method of safe storage is a toolbox or a padded case.
Do not leave the drill in direct sunlight or in hot areas. To preserve the performance of store batteries, they should be kept in cool, dry places. Cords are to be well wrapped to avoid tangling or internal damage. Storing well will decrease the chances of drills needing repairs more frequently and having your tools ready when you need them.
When You Should Ask For Professional Help
There are some problems within drills that should not be practiced at home. When you see sparks, smell burning, or hear unusually loud sounds, cease using the drill. Such signs typically signify severe internal injuries.
It is always best to get a professional in such cases or refer to your drill manual. In the case of more advanced tools like a wiertarka magnetyczna, professional repair is even more important because of its electrical and holding systems. Some helpful advice can also be found in online communities, but electrical repairs should only be performed by professionals if you are not sure. The most significant aspect of drill repair is safety, and knowledge of how to repair things is less important than knowledge of when to stop.
Zamotać
Drill repair will be far simpler to manage when you follow a clear process rather than speculating about the issue. The majority of the drill problems, such as power outage, stuck bits, overheating, or poor performance, are easily resolved at home with some simple checks and handling. It is important to first diagnose the problem and then implement the appropriate solution, one step at a time, not in a hurry.
Proper maintenance is also a major factor in preventing a breakdown. Care in cleaning your drill, keeping drill bits in good condition, proper storage, and safe use practices can greatly increase the life of your tool. By combining those troubleshooting skills and good maintenance, your drill will be a reliable long-time serving and will work much better in every project.
FAQ
What is the frequency of cleaning your drill?
After each use, you should clean your drill. Clean the surface by wiping it off. Wipe out the vents and chuck using a brush. Regular cleaning is the key to keeping your drill in good condition.
What is the course of action when your drill is burning?
Discontinue the use of the drill immediately. Disconnect it or take out the battery. Let it cool down. See dust or broken parts. If the smell persists, seek assistance from a professional.
Is it possible to use any battery with your cordless drill?
No, you merely need to use those batteries that fit your model of drill. Using an inappropriate battery may damage your tool or pose safety risks. Review your manual to get the appropriate battery type.
And why is your drill bit slipping?
Slipping is usually caused by a loose chuck. Before you begin, tighten the chuck. Also, ensure that you have the appropriate size bit. In case the problem persists, ensure that the chuck or bit is not worn.
Finding more assistance on repairing drills?
To get step-by-step instructions on how to use your drill, read the manual that comes with your drill. There are numerous online communities and forums with advice. Or you can also watch repair videos or request assistance at a hardware shop.


