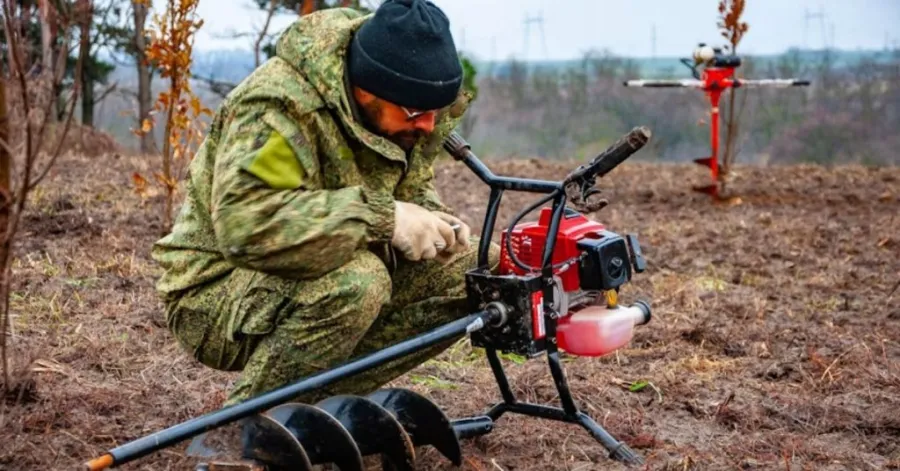
לימוד שימוש בבור עמודים הוא פשוט כשמבצעים את השלבים הנכונים ומשתמשים בכלים המתאימים. אתם רוצים לדעת איך להשתמש ב... חופר בורות עמודים. התחילו באחיזה בידיות של מחפר העמודים הידני שלכם. דחפו את הלהבים לתוך האדמה, לחצו על הידיות ומשכו החוצה את האדמה. חזרו על שלבים אלה עבור כל חור. הכינו תמיד את האתר שלכם וחבשו ציוד בטיחות.
בדקו את הקרקע לאיתור מכשולים לפני שאתם חופרים. זה עוזר לכם להשתמש במחפר עמודים בצורה בטוחה ויעילה. בעזרת טכניקה נכונה, תוכלו לשלוט כיצד להשתמש במחפר עמודים ידני לכל פרויקט. תרגול יעזור לכם ללמוד כיצד להשתמש במחפר עמודים בביטחון. זכרו, שימוש במחפר עמודים פירושו הפעלת לחץ קבוע וסבלנות. התמקדו בבטיחות, ותראו כיצד השימוש במחפר עמודים הופך לקל יותר בכל פעם.
תוכן העניינים
כלים וציוד בטיחות שאתם צריכים לפני חפירה
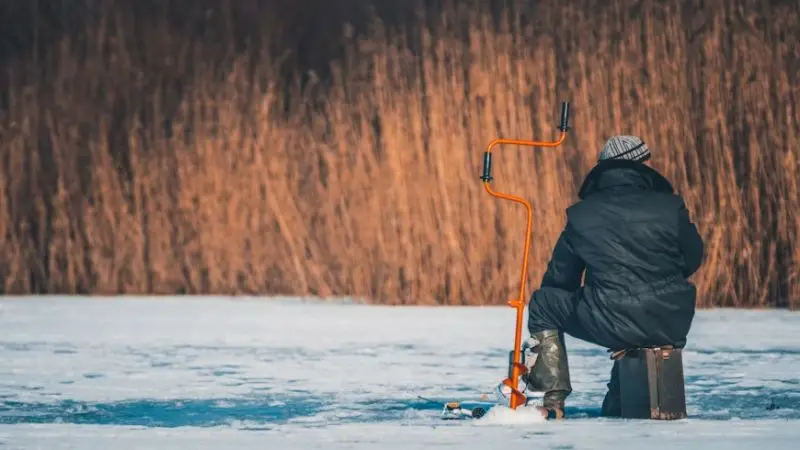
הצעד הראשון בדרך להצלחה פרויקט חפירה היא להחזיק בכלים וציוד הבטיחות המתאימים. כדי להקל על החפירה ולהפוך אותה למדויקת יותר, אספו את הכלים הדרושים, כגון חופר עמודים ידני, את חפירה, סרט מדידה ופלס. יש ללבוש תמיד ביגוד מגן כגון כפפות, מגפיים ומשקפי מגן; והתקשרו למיקום שירותי שירות תת-קרקעיים לפני החפירה כדי להבטיח חפירה בטוחה ויעילה.
כלים חיוניים
כשמגיע הזמן לחפור, אספו את כל הכלים הדרושים. זה יקל עליכם לעבוד ובטוח יותר. כיצד להשתמש במחפר עמודים המונע על ידי בנזין? הכלים הנכונים חשובים לא פחות מהטכניקה הנכונה לחפירה. הכלים הנכונים הופכים את העבודה שלכם למהירה, קלה, בטוחה ומדויקת יותר. אפילו עבודת חפירה בסיסית יכולה להיות מאתגרת בלעדיהם ולגזול הרבה זמן. אם צפויה אדמה קשה או סלעית, ייתכן שתזדקקו גם למוט חפירה. כל אחד מהכלים הללו עוזר לכם לעבוד מהר יותר ולהישאר ממוקדים בפרויקט שלכם.
מומלץ לפרויקט שלך
אלו הם הכלים הבסיסיים הדרושים להפעלת חופר בורות עמודים:
-
- חור העמוד מכונת חפירה
-
- סרט מדידה
-
- סימון בצבע או בגיר
-
- את חפירה
-
- כלי להזזת אדמה עם גלגל ודלי לנשיאת אדמה.
ציוד בטיחות מומלץ
עליכם לנקוט באמצעי זהירות לפני חפירה. כיצד להשתמש בחופר עמודים ידני? אפילו טעות פשוטה עלולה לגרום לחתכים, חבורות, פגיעות עיניים או החלקות אם האדם אינו לובש את המיגון המתאים. שימוש בציוד בטיחות מתאים יאפשר לכם לעבוד בביטחון רב יותר עם פחות סיכוי לתאונות. ציוד מגן אישי עוזר להגן עליכם מפני חתכים, שריטות ופסולת. אל תחמיצו את זה!
יש ללבוש תמיד ציוד בטיחות מתאים. זה כולל:
-
- יש ללבוש כפפות עבודה כדי למנוע פגיעה בידיים.
-
- מגפיים חזקים עם אחיזה טובה
-
- משקפי בטיחות למניעת לכלוך עף מהעיניים.
-
- מכנסיים ארוכים וחולצה ארוכת שרוולים
בדוק תחילה קווי שירות תת-קרקעיים
לפני חופר, אתה חובה להתקשר ל-811 כדי לבדוק אם יש קווי שירות תת-קרקעיים. צרו קשר עם חברת השירות המקומית או התקשרו לשירות הארצי "התקשרו לפני שאתם חופרים". שרטטו קווים על כל קו שתמצאו. זהו אמצעי למניעת תאונות ולהבטחת בטיחות. כיצד להשתמש בחופר עמודים המונע על ידי בנזין? קווי שירות תת-קרקעיים עשויים להיות בעומק של כמה מטרים מתחת לפני השטח. גם אם החצר שלכם נראית נקייה, צינורות חשמל, גז או מים עשויים להימצא מתחתיה. ההשלכות של פגיעה באחד מהקווים הללו עם חופר העמודים עלולות להיות חמורות. לפני שאתם מתחילים, עיינו בטיפים לשימוש בטוח במקדח. הטיפים הבאים יעזרו לכם להימנע מפציעות ולעבוד בצורה חכמה יותר. תוכלו להקל על תהליך החפירה שלכם אם תכינו את הכלים וציוד הבטיחות שלכם.
כיצד להשתמש בבור חפירה שלב אחר שלב
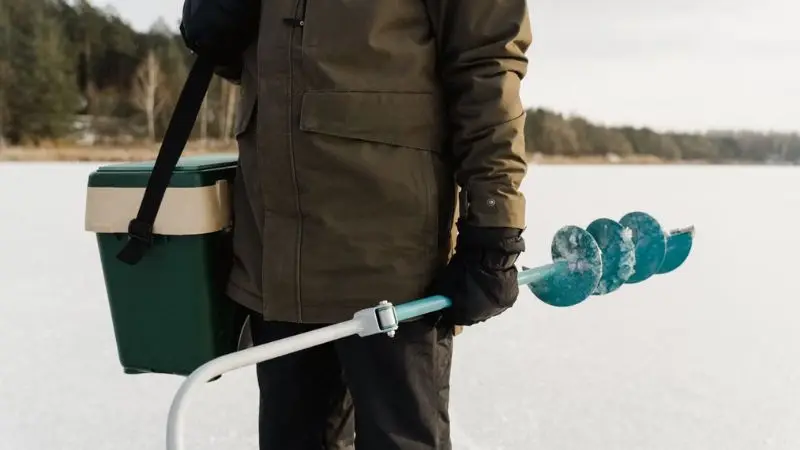
השימוש הנכון ב- חפירת בור עמודמתחיל בסימון מיקום הבור, ריכוך האדמה והצבת המחפר במיקום הנכון לפני משיכת האדמה החוצה בשלבים עוקבים. חפרו לעומק הרצוי, לאחר מכן נקו ובדקו את דיוק הבור. סבלנות, טכניקה טובה והפסקות בעת הצורך יעזרו לכם לחפור בצורה נקייה, ישרה ויעילה יותר.
סמן את מיקום החור
הצעד הראשון הוא לציין היכן ברצונכם לחפור בור עמוד. השתמשו בצבע סימון או בגיר כדי לסמן את המקום. זה יעזור לכם לנהל את מבנה הפרויקט. על ידי סימון כל חור לפני השימוש במכונת חפירת עמודים ידנית, תמנעו מטעויות. כיצד להשתמש במכונת חפירת עמודים ידנית? המטרה העיקרית של מיקום חור היא להבטיח שכל חור נחפר במיקום הנכון. עם זאת, ברגע שמתחילים לחפור, קשה ליצור את החור אם מגלים שמיקמתם אותו בצורה שגויה. הערכה מהירה וכמה דקות לסימון האזור יקלו על קבלת הפריסה הנכונה לפני שתמשיכו עם כל פעולות חפירהבעת התקנת מספר עמודי גדר, אם אתם יודעים מראש לאן הם מוצבים, תוכלו לוודא את המרווחים והיישור ביניהם לפני שאתם מכניסים את העמוד הראשון לאדמה. זה יבטיח את היושרות והמרווחים האחידים של הגדר שלכם.
שחררו את האדמה
השתמשו באת חפירה או במוט חפירה. מהי הדרך הטובה ביותר לחפור חורים בסלע? שחררו בעדינות את האדמה במיקום המסומן. חופר ידני לחפירת עמודים יחתוך דרך אדמה רכה ביתר קלות. נסו לשבור סלעים בעזרת המקדח אם תמצאו אותם. זוהי דרך חוסכת זמן. שיטת חפירההמטרה העיקרית של ריפוי האדמה היא לפרק את שכבת פני השטח הקשה. גשם, תנועת הולכי רגל, מכוניות ומזג אוויר משתנה ידחסו את האדמה לאורך זמן. כאשר האדמה דחוסה, חלקיקי הלכלוך נדחסים יחד, ויהיה קשה מאוד לחפור דרכה. ניסיון לדחוף מחפר עמודים דרך סוג זה של אדמה קשה עלול להקשות על הלהבים לחתוך לתוך האדמה ובוודאי יגרום לעייפות מהירה.
מקם את חופר העמוד בצורה נכונה
סמנו את המיקום והניחו את להבי חופר העמודים הידני שלכם ישר על המיקום המסומן. אחזו בידיות ואחזו בחוזקה. ודאו שהמקדחה אנכית. מיקום נכון מביא לחפירה יעילה. חור אנכי גם מקל על התקנת עמודים מבלי לבצע התאמות לאחר מכן. מיקום נכון גם ממזער את השימוש באנרגיה של הגוף. כאשר הכלי מכוון היטב, הקצוות החדים יוצרים חתכים עמוקים יותר באדמה. אינכם נלחמים עד הקרקע - תנו ללהבים לעשות את עבודתם. זה מפחית את כמות האנרגיה המושקעת בעת החפירה ומאפשר לסיים את התהליך מהר יותר. המיקום הנכון גם מבטיח דיוק לאורך כל הפרויקט.
דחפו את הידיות יחד
"דחפו" את ידיות חופר העמודים יחד. הלהבים עוטפים את האדמה. המקדח שואב את הלכלוך. השתמשו בכוח קבוע לקבלת התוצאות הטובות ביותר. כיצד להשתמש בחופר עמודים ידני? ידני חופרת חור פוסט מורכב משתי ידיות ארוכות עם שני להבי חפירה חדים. הפרידו את הידיות, תוך שמירה על הלהבים פתוחים. לאחר שהלהבים נמצאים באדמה, קירבו את הידיות זו לזו, וסגרו את הלהבים כדי ללכוד את האדמה בפנים. לאחר מכן ניתן לשלוף את הכלי מהחור, ולנקות את הלכלוך לפני חזרה על התהליך. זוהי תכונה שימושית מאוד להסרת אדמה בצורה יעילה הרבה יותר מאשר את חפירה רגילה. את חפירה נוטה לדחוף את האדמה הצידה ולא לאפשר חפירת בורות קטנים ועמוקים.
הרם את האדמה
הפרידו את הגדמים והסירו את הלכלוך. הניחו את האדמה במריצה. חזרו על שלב זה. המקדח מסייע לחפור בור עמוד מהר יותר. האדמה יוצאת מעל פני הקרקע, והידיות נפתחות, מה ששופך את האדמה למריצה או לערימה בקרבת מקום. תכונה זו מאפשרת לכם להיפטר מהאדמה בצורה יעילה הרבה יותר מאשר באמצעות את חפירה רגילה. כשעובדים עם את חפירה, לכלוך רופף נוטה לנוע בתוך הבור, מה שמקשה על חפירה עמוקה יותר. כיצד לחפור בורות עמודים באדמה קשה? מחפר עמודים הוא כלי המשמש להסרת אדמה מתחתית החורים ולהבאתה החוצה מהבור. זה ישמור על ניקיון הבור ויבטיח שתוכלו להמשיך לחפור מבלי שתצטרכו להמשיך להסיר לכלוך רופף מהבור.
חזור על הפעולה עד שתגיע לעומק הרצוי
המשיכו להשתמש במקדחת ובחופר עמודים (ביד). צרו בור באדמה לעומק הנדרש. השתמשו בסרט מדידה כדי לעקוב אחר המרחק שעברתם. סוג זה של חפירה ישמור על הבור ישר. היתרון הבולט ביותר של חפירה חוזרת ונשנית הוא שהיא מאפשרת הסרת אדמה בצורה מבוקרת. לא חופרים את כל הבור בפעולה אחת, אלא מסירים מעט אדמה בכל פעולה. זה מקל על העבודה על הגוף ומאפשר שליטה רבה יותר על צורת הבור ועומקו. ככל שנחפרים יותר, כך תילקח יותר אדמה שכבה אחר שכבה. הבור צריך להיות צר וישר, וניתן לבצעו בשלבים.
נקו ובדקו את החור
השתמשו במקדחה כדי להסיר אדמה רופפת. ישרו את הצדדים בעזרת פלס. ודאו שבור העמוד נקי ומוכן לפרויקט שלכם. לאחר החפירה, האדמה בבור בדרך כלל מכוסה באדמה רופפת, סלעים קטנים או חומרים אחרים. כאשר חומר זה בפנים, הוא יכול לגרום לעמוד לא לשבת על קרקע מוצקה. עמוד המונח על גבי האדמה עלול לזוז עם הזמן, במיוחד בתקופות של גשם כבד או רוחות חזקות. על ידי ניקוי הבור, חומרים רופפים אלה מוסרים, ונוצר בסיס יציב לעמוד. סדרו מחדש ולקחו הפסקות כשאתם עייפים. ידני חפירת בורות פוסט וחפירה במקדחה יכולה להיות קשה. זה דורש תרגול וחפירה יעילה לקבלת תוצאות טובות יותר.
מדריך מומלץ לעומק ולרוחב חור העמוד
עמדות גדר
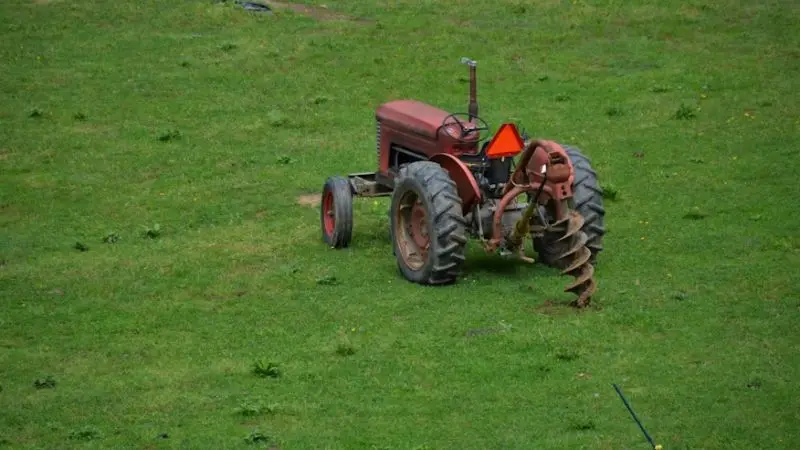
יש ליצור את החורים לעמודי גדר בעזרת מקדחת אדמה כדי לשמור על העמודים זקופים. בדרך כלל, חורים באדמה לגדר צריכים להיות באורך שליש מאורך עמודי הגדר. כדי לחפור בור לעמוד גדר בגובה שני מטרים, השתמשו במקדחת שלכם כדי ליצור בור בעומק של 60 ס"מ. כיצד להשתמש במחפר בורות עמודים המונע על ידי בנזין? אם אתם משתמשים במקדחת אדמה, תוכלו ליצור את החור ישר ונקי. סוג הקרקע חשוב. אדמה חולית תדרוש חורים עמוקים יותר. עמודים יציבים יותר באדמת חרסית. המקדחת שלכם עוזרת לכם להסתגל לתנאים אלה. היתרון הגדול ביותר של מחפר בורות עמודים לעמודי גדר הוא שהוא מספק חורים עמוקים, צרים ונקיים. חופרת חור פוסט משמש להסרת אדמה רק במקומות הנדרשים לעמוד, בניגוד לאת חפירה רגילה, אשר מסירה אדמה משטח רחב. זה חוסך זמן, מפחית חפירה מיותרת סביב העמוד ומספק בסיס טוב יותר מכיוון שיש פחות אדמה רופפת סביב העמוד.
עמודי סיפון
עמודי המרפסת מסוגלים לשאת משקל. תצטרכו להשתמש במקדחת עפר כדי לחפור חורים עמוקים יותר. עמוד מרפסת טיפוסי דורש עומק של לפחות מטר אחד. בדקו את העומק באמצעות המקדחת בזמן החפירה. מקדחת העפר מקלה על העבודה. מהי הדרך הטובה ביותר להפעיל מחפר עמודים לאדם אחד? עמודי המרפסת צריכים להיות מתחת לקו הכפור. זה מונע תזוזה. ניתן לשלוט בעומק בעזרת המקדחת או מקדחת העפר. עמודי מרפסת צפויים לשאת עומסים כבדים מדי יום, בניגוד לעמודי גדר או עמודי תיבות דואר. חורים שאינם עמוקים מספיק עלולים לגרום לעמודים להישען, לזוז ולשקוע עם הזמן. זה יכול לגרום למרפסת להפוך לא אחידה ולא ראויה לשימוש. כאשר היא נחפרת עמוק מספיק, היא תיצור בסיס יציב ש... מחזיק כל אחד עמוד יציב. בסיס יציב מספק משטח ישר ויציב ולא יזוז עם שימוש במשך מספר שנים.
הודעות תיבת דואר
אין צורך לחפור חורים עמוקים עבור עמודי תיבות דואר. כיצד להפעיל מקדחת לשני אנשים? ניתן ליצור חורים בעזרת המקדחת או מקדחת אדמה בעומק של כ-18-24 ס"מ. מקדחת האדמה מאפשרת לך לשמור על חור קטן. עמוד תיבת הדואר צריך להיות זקוף. שחררו את האדמה באמצעות המקדחת ומדדו את העומק. בדרך כלל, עמודי תיבות דואר אינם זקוקים לחור עמוק מדי.
ברוב המקרים, חור בעומק של כ-18-24 אינץ' יספיק, בהתאם לתקנות הבנייה המקומיות ולתנאי הקרקע. מחפר עמודים משמש ליצירת חור צר וישר בקלות מבלי לחפור יותר מדי אדמה. זה קל יותר וחוסך זמן מאשר שימוש באת חפירה רגילה. יתרון נוסף הוא יציבות משופרת. חור שנחפר היטב יתמוך בעמוד תיבת הדואר.
כלל כללי לעומק ורוחב חור
עבור רוב הפרויקטים, יש כלל פשוט שיש לפעול לפיו. כיצד לחפור בורות לעמודים בסלע? חפרו בור באורך שליש מאורך העמוד בעזרת מקדחת האדמה שלכם. הרוחב צריך להיות פי שלושה מקוטר העמוד. המקדחת או מקדחת האדמה שלכם משמשים למדידת... וחפירהבצעו בדיקות תכופות עם המקדח או מקדח האדמה שלכם. זה שומר על דיוק החורים. השתמשו במקדח או מקדח האדמה שלכם עבור כל השלבים. העמודים שלכם יבלטו לאורך זמן רב יותר כאשר הם יהיו בדיוק באורך וברוחב הנכונים.
-
- חפרו בור בעומק של 2 ס"מ וברוחב של 9 ס"מ עבור עמודי גדר.
-
- עמודי סיפון: החור צריך להיות בעומק של כ-3 ס"מ וברוחב של כ-12 ס"מ.
-
- עמודי תיבת דואר: חור בקוטר 6 ס"מ ועומק 18-24 ס"מ.
טעויות נפוצות שיש להימנע מהן בעת שימוש בבור חפירה
חפירת בור רחב מדי
בעת בניית עמוד, ייתכן שתתפתו ליצור חור רחב ככל האפשר, אך פעולה זו תחליש את העמוד. כדי לשמור על חור רחב מספיק עבור העמוד, השתמשו במחפר עמודים או במקדחה. אל תחפרו עד שתמדדו. אם החור גדול מדי, העמוד עלול לנטות או להיסחף בשנים הבאות. כיצד להשתמש במחפר עמודים המונע על ידי בנזין? עמוד נשאר זקוף מכיוון שהקרקע או הבטון התומכים בו מחזיקים אותו. אם החור גדול מדי, יש פחות אדמה טבעית שתקבע את העמוד במקומו. אם הוא לא נדחס כראוי סביב העמוד, הוא עלול לזוז עם הזמן גם אם החלל הנוסף מלא בבטון. חור בגודל הנכון יספק תמיכה מוגברת לעמוד ויעזור לו להישאר זקוף במשך שנים רבות. היתרון של חפירה קטנה ככל הנדרש הוא שלא תבזבזו חומר ותישארו במסגרת התקציב. מדי פעם מדדו את הרוחב. באמצעות המקדחה שלך. זה יעזור לך לשמור על גודל החור הנכון.
התעלמות מאדמה סלעית או רטובה
אדמה סלעית או רטובה עשויה להיות קשה לעיבוד. השתמשו במקדחה כדי לשבור סלעים או להסיר סלעים אם תפגעו בהם! אדמה רטובה יכולה להקל על דפנות הבור ליפול פנימה. אפשרו לאדמה להתייבש, או חפרו לאט עם מחפר העמוד שלכם. התאימו תמיד את האדמה שלכם. טכניקת חפירה בהתאם לסוג הקרקע. להבי חופר עמודים ידני עלולים לא לחתוך את האדמה אם ישנם סלעים גדולים החוסמים את הדרך. השתמשו במוט חפירה או באת חפירה כדי להסיר את הסלעים במקום לכפות את הכלי פנימה, שכן זוהי הדרך הטובה ביותר לחפור בורות לעמודי גדר. זה יגן על החופר מכל נזק מיותר ויקל על החפירה. ישנם אתגרים נוספים כאשר האדמה רטובה. בעוד שקרקע רכה עשויה להיראות קלה יותר לחפירה, יותר מדי מים באדמה עלולים לגרום לה להיות לא יציבה. בזמן העבודה, הבור עלול לקרוס ולמלא אותו באדמה רופפת.
לא בודק את עומק החור
יש לבדוק את העומק תוך כדי החפירה. בעזרת המקדח, יש לוודא שמדדים את החור כדי לוודא שהוא בעומק הנכון. אם אין לכם חור עמוק מספיק, העמוד לא יישאר במקומו. כיצד להשתמש בחופר עמודים ידני? חופר עמודים שימושי כדי להבטיח את העומק הנכון, אך תצטרכו לבדוק לעתים קרובות. יש לדחוס כל עמוד לעומק הנכון כדי להתחשב במשקל שמעליו. החור רדוד מדי, מה שגורם לעמוד להישען, לזוז או להתהפך לאחר גשם, רוח או שימוש קבוע. לעמוד בעומק הנכון יש סבירות נמוכה מאוד לזוז עם הזמן. בעת בניית גדר, התקנת תיבת דואר או יצירת דק, יסוד עמוק ויציב יבטיח שהוא יישאר ישר. חשוב למדוד את עומק החור באופן קבוע במהלך החפירה כדי למנוע מהחורים להיות לא אחידים ולמנוע בעיות במהלך ההתקנה.
אמצעי בטיחות לדילוג
יש לנקוט תמיד באמצעי בטיחות. יש ללבוש תמיד כפפות, מגפיים ומשקפי מגן בעת שימוש בבור או במקדחת. זה מגן עליך מפני פציעות ומגביר את הביטחון שלך בעבודה. על ידי ביצוע קפדני של כל שלב, תוכל לבצע זאת בבטחה וביעילות. לחפור חורי עמודים. תמיד תכננו את האתר שלכם, לבשו ציוד בטיחות והשתמשו בטכניקה נכונה. קחו את הזמן, היו בטוחים. ככל שתתרגלו יותר, כך תשתפרו.
-
- סמן את מקומך
-
- לשחרר את האדמה
-
- בדקו את העומק לעתים קרובות
לעטוף
ישנם צעדים נכונים שיש לנקוט והכנה לפני שמתחילים כדי להפוך את לימוד השימוש בבור עמודים להרבה יותר קל. נוהלי עבודה בטוחים, הכלים הנכונים, ציוד בטיחות ואפילו המידע הנכון על מיקומי תשתיות תת-קרקעיות תורמים רבות לבטיחות בעבודה ולמניעת טעויות. ידיעת המיקום המדויק של הבור, עומקו ורוחבו, והימנעות מטעויות נפוצות יעזרו לכם לבסס טוב יותר את העמודים עבור הגדר, המרפסת ותיבת הדואר. לאחר שתשתמשו בבור עמודים או במקדחת, תוכלו לחפור בור בפחות מאמץ ובבור נקי וישר יותר אם תהיו סבלניים ותשתמשו בטכניקה נכונה. ביצוע בדיקות התקדמות סדירות והתאמה לתנאי קרקע שונים עוזרים לשפר את התוצאות שלכם. על ידי תרגול וביצוע כמה טיפים פשוטים, תוכלו להשיג את התוצאות שלכם. פרויקטים של חפירה נעשה בביטחון, בטיחות ויעילות בכל פעם.
שאלות נפוצות
איך יוצרים חור לעמוד ישר?
השתמש בפלס לאחר כל חפירה. שמור את החפירהישר. בדוק את ההתקדמות שלך באופן קבוע. זה עוזר לשמור על החור ישר ולהכין אותו לעמוד.
אם נתקלים באבנים בזמן חפירה, מה עושים?
תפסיקו לחפור.
השתמש במוט חפירה או באת חפירה כדי לשחרר סלעים.
סלק סלעים אם יש. זה ימנע ממך נזק לחופר עמודים.
האם ניתן לבצע חפירת בורות לעמודים באדמה לחה?
כן, אבל אדמה יכולה לשקוע כשהיא רטובה. חפרו לאט. אפשרו לאדמה להתייבש, אם אפשר. ליתר ביטחון, נעלו מגפיים.