
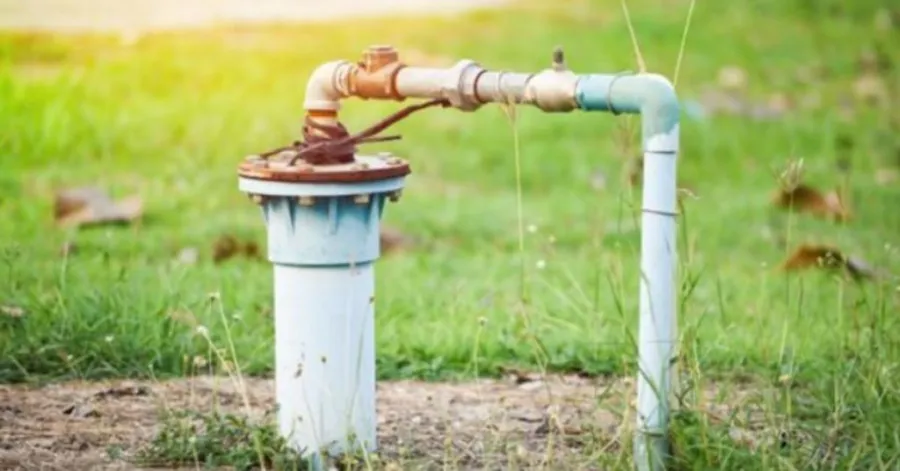
La domanda più comune che molti proprietari di casa si pongono quando il loro sistema idrico si interrompe improvvisamente è come innescare un pozzo profondo bene pompaL'idea alla base dell'adescamento è quella di rimuovere l'aria dalla pompa e sostituirla con acqua, in modo che possa funzionare di nuovo. Se non viene adescata correttamente, la pompa potrebbe non erogare acqua o perdere pressione. L'aspetto positivo è che si tratta in genere di una procedura semplice che può essere eseguita con attrezzi di base. Con le procedure corrette, la prevenzione delle perdite e le misure precauzionali, potrete avere di nuovo acqua che scorre e il vostro sistema di pozzo che funziona in modo efficiente anche dopo molti anni.
Perché una pompa per pozzi profondi perde l'adescamento e come si può risolvere il problema?
Una pompa per pozzi profondi è progettata per fornire acqua in modo continuo. Tuttavia, la pompa potrebbe smettere di erogare acqua correttamente quando perde l'adescamento. Questo problema può essere esasperante, soprattutto se si verifica ripetutamente.
Capire perché una pompa per pozzi profondi perde l'adescamento e come individuare la causa del problema può aiutarti a risolverlo rapidamente. Di seguito vengono illustrate le cause più comuni della perdita di adescamento di una pompa per pozzi profondi e le relative soluzioni.
Perdite d'aria nel sistema
Una delle cause più frequenti di perdita di adescamento in una pompa per pozzi profondi è la presenza di perdite d'aria. Giunti, raccordi, guarnizioni o connettori dei tubi possono presentare piccole perdite. Anche la minima perdita permette all'aria di entrare nel sistema, interrompendo il flusso d'acqua e impedendo alla pompa di mantenere la pressione adeguata.
Per controllare il sistema, ascolta se si sentono sibili, cerca gocce d'acqua o verifica se i raccordi sono usurati o danneggiati. Le perdite possono essere individuate anche applicando acqua saponata intorno alle giunture, poiché l'aria che fuoriesce forma bolle. Ripara eventuali perdite d'aria prima di tentare di capire come innescare una pompa per pozzi profondi che si è bloccata. Un innescamento e un funzionamento ottimali delle pompe richiedono un sistema sigillato.
Valvola di fondo o valvola di ritegno difettosa
La valvola di fondo, o valvola di non ritorno, è importante per garantire che l'acqua rimanga nella pompa e nelle tubature durante i periodi di inattività. Quando questa valvola si usura, si ostruisce o si danneggia, l'acqua rifluisce nel pozzo e la pompa perde l'adescamento.
Controllate frequentemente la valvola e assicuratevi che non sia sporca, corrosa o usurata. Nella maggior parte dei casi, la pulizia della valvola può risolvere il problema. Tuttavia, quando la valvola non è più in grado di sigillare correttamente, la soluzione migliore è sostituirla. In una guida passo passo per l'adescamento di una pompa per pozzi profondi, la valvola di fondo dovrebbe sempre essere inclusa nel processo, poiché una valvola difettosa può causare ripetuti fallimenti dell'adescamento.
Livello dell'acqua basso nel pozzo
I problemi di adescamento possono verificarsi anche a causa di un basso livello dell'acqua nel pozzo. Quando il livello dell'acqua scende al di sotto della presa della pompa, quest'ultima inizia ad aspirare aria anziché acqua. Di conseguenza, il sistema perde l'adescamento e la pressione dell'acqua si riduce notevolmente.
Con un metro a nastro appesantito o con l'aiuto di uno specialista di pozzi, è possibile controllare il livello dell'acqua nel pozzo. Quando il livello della falda freatica rimane basso per periodi prolungati, potrebbe essere necessario ridurre il consumo di acqua o potenziare l'impianto del pozzo. È opportuno verificare che ci sia acqua a sufficienza nel pozzo prima di imparare come innescare una pompa per pozzi profondi. L'utilizzo di una pompa con acqua insufficiente può danneggiare i componenti interni e ridurne la durata.
Tubi incrinati o danneggiati
Tubature incrinate, rotte o usurate possono causare perdite d'aria nell'impianto, con conseguente perdita di adescamento della pompa. Possibili indicatori di tubature rotte includono macchie di umidità in giardino, rumori insoliti, una diminuzione del flusso d'acqua o usura visibile delle tubature.
In caso di problemi di adescamento ricorrenti, ispezionare le tubazioni fuori terra e interrate. Le piccole perdite possono essere occasionalmente sigillate con materiale sigillante appropriato, mentre le parti danneggiate o gravemente lacerate devono essere sostituite il prima possibile. Saranno necessarie tubazioni robuste e a tenuta stagna, soprattutto durante la fase di apprendimento delle tecniche di adescamento di una pompa a getto per pozzi profondi con serbatoio a pressione. Anche la manutenzione del sistema di tubazioni è fondamentale per ridurre al minimo i tempi di ripristino del funzionamento e migliorarne l'efficienza.
È una domanda che molti proprietari di casa si pongono: quanto tempo ci vuole per innescare una pompa per pozzi profondi? L'innesco può essere completato in un paio di minuti, anche se il tempo varia a seconda del tipo di pompa, della profondità del pozzo e se sono stati risolti eventuali problemi preesistenti come perdite o componenti rotti.
Strumenti necessari prima di innescare una pompa per pozzi profondi
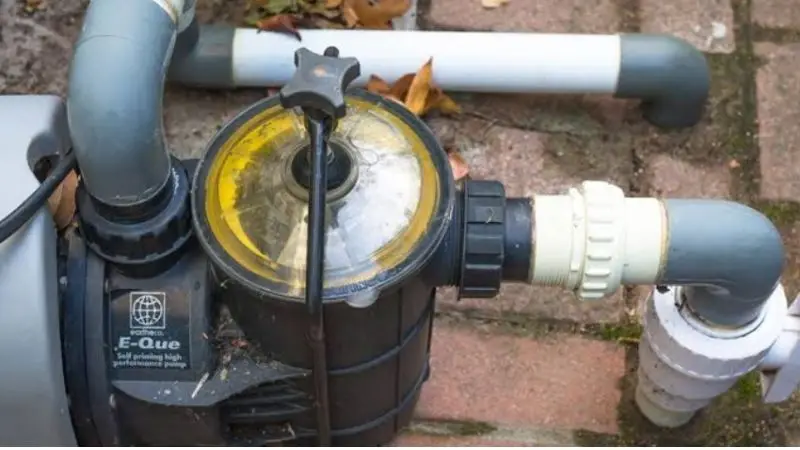
Tutti gli strumenti e i materiali devono essere preparati prima di iniziare il processo di adescamento. È inoltre consigliabile avere tutto pronto in anticipo per evitare interruzioni. Potrebbe essere la prima volta che si impara ad adescare una pompa per pozzi profondi, oppure potrebbe trattarsi dello stesso problema di pressione, ma in ogni caso, con una preparazione adeguata, si possono risparmiare tempo e fatica.
È inoltre possibile utilizzare l'attrezzatura appropriata per ridurre al minimo il rischio di danneggiare la pompa. Uno spazio di lavoro adeguato è essenziale per garantire che l'intero processo di adescamento si svolga in modo fluido e sicuro.
Strumenti e materiali di base necessari
ponte pompe per pozzi profondi È possibile avviare la pompa con pochi semplici attrezzi domestici. Questi strumenti vi aiuteranno ad aprire la pompa, riempirla d'acqua e controllare che non presenti perdite o danni.
Durante il processo di preparazione del terreno si utilizzano comunemente i seguenti strumenti:
- Utilizzare una chiave inglese regolabile o una pinza per allentare e stringere i raccordi.
- Cacciavite (a taglio o a croce) per rimuovere il tappo di adescamento o i pannelli di accesso.
- Un secchio o un contenitore pulito con acqua per riempire la pompa.
- Un imbuto per versare l'acqua nella pompa senza versamenti.
- Utilizzare nastro di teflon o sigillante per tubi per risigillare i collegamenti filettati, se necessario.
- Stracci o asciugamani per asciugare l'acqua e la superficie di lavoro.
- Una torcia per esaminare le pompe nei punti bui.
Durante l'adescamento, utilizzare sempre acqua pulita e un contenitore pulito. Detriti o sporcizia che entrano nel sistema possono ostruire i componenti e compromettere il funzionamento della pompa. Si consiglia inoltre di tenere a portata di mano un manometro, che permetterà di controllare la pressione del sistema dopo l'adescamento.
@dwscustoms Pompa per pozzo profondo da 1 CV 115 V Vevor #vevor #pompapozzo #pozzoprofondo #dwscustoms #kingscoot21
♬ suono originale - King Scoot
Importanti precauzioni di sicurezza prima di iniziare
Quando si effettua la manutenzione di una pompa per pozzi profondi, la sicurezza deve essere sempre la priorità. Poiché il sistema utilizza elettricità e acqua, è fondamentale adottare le dovute precauzioni.
Prima di iniziare l'adescamento di una pompa per pozzi profondi che ha perso pressione, verificare le seguenti misure di sicurezza:
- Interrompere l'alimentazione elettrica della pompa tramite l'interruttore automatico del quadro elettrico.
- Indossa guanti per proteggere le mani durante il lavoro.
- Assicurarsi che l'area circostante la pompa sia asciutta.
- Evitate di toccare i collegamenti elettrici con le mani bagnate.
- Non tenere bambini e animali domestici nell'area di lavoro.
Una volta interrotta l'alimentazione, assicurarsi che la pompa non si avvii improvvisamente. In caso di cablaggio danneggiato, connessioni elettriche allentate o segni di corrosione, interrompere il lavoro e chiamare un tecnico qualificato. Queste precauzioni contribuiranno a rendere la procedura di adescamento di una pompa per pozzi profondi sicura ed efficace.
Guida passo passo all'adescamento di una pompa per pozzi profondi
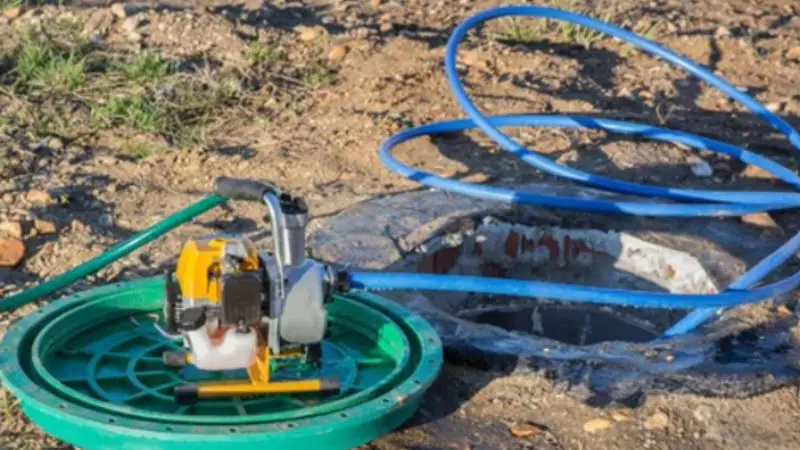
L'adescamento iniziale di una pompa per pozzi profondi può essere difficile, ma seguendo i passaggi corretti può diventare semplice. Un adescamento adeguato eliminerà l'aria intrappolata nel sistema e consentirà alla pompa di pompare nuovamente acqua in modo efficiente.
Le seguenti istruzioni illustrano come effettuare l'adescamento di una pompa per pozzi profondi. Di seguito viene descritta una procedura dettagliata su come adescare una pompa per pozzi profondi e ripristinare il normale flusso e la pressione dell'acqua.
Passaggio 1: spegnere l'alimentazione
Quando si lavora su un impianto di pozzo, è fondamentale prestare sempre attenzione alla sicurezza. A casa, prima di toccare la pompa, spegnete l'interruttore generale e il circuito che alimenta la pompa del pozzo. Questo accorgimento vi proteggerà da scosse elettriche e dall'avvio accidentale della pompa durante i lavori.
Prima di procedere con il passaggio successivo, assicurarsi che l'alimentazione sia completamente disattivata. La mancata osservanza di questa misura di sicurezza può causare gravi incidenti. Che si tratti di imparare come innescare una pompa per pozzi profondi dopo una perdita di pressione o semplicemente di eseguire una manutenzione ordinaria, è fondamentale iniziare sempre disattivando l'alimentazione elettrica.
Passaggio 2: Individuare e rimuovere il tappo di adescamento
Dopo aver spento l'alimentazione, individuare il tappo di adescamento sull'alloggiamento della pompa. Nella maggior parte delle pompe per pozzi profondi, questo tappo è montato sulla parte superiore o laterale dell'unità. Potrebbe essere necessario un cacciavite o una chiave regolabile per rimuoverlo.
Dopodiché, rimuovere il tappo, ma riporlo in un luogo sicuro per evitare di perderlo durante l'operazione. L'apertura di adescamento consente l'accesso alla camera della pompa, dove è possibile aggiungere acqua ed eliminare l'aria intrappolata. L'accesso corretto a questa apertura è necessario quando si segue una guida passo passo per l'adescamento di una pompa per pozzi profondi.
Fase 3: Riempire la pompa con acqua pulita
Utilizzando un secchio pulito e un imbuto, versare lentamente acqua nell'apertura di adescamento fino a riempire completamente la camera della pompa. L'aggiunta di acqua sostituisce l'aria intrappolata nel sistema e prepara la pompa ad entrare in funzione.
Continuare ad aggiungere acqua fino a quando il livello non si stabilizza e non si formano più bolle. È fondamentale utilizzare acqua pulita, poiché sporco e detriti possono danneggiare le parti interne della pompa. Questa è una delle fasi più critiche nell'apprendimento della corretta procedura di adescamento di una pompa per pozzi profondi; non riempire completamente il serbatoio potrebbe impedire alla pompa di riavviare il processo di adescamento.
Passaggio 4: Reinstallare saldamente il tappo di adescamento
Una volta riempita la pompa, rimontare il tappo di adescamento e avvitarlo saldamente. Assicurarsi che il tappo sia filettato correttamente e crei una tenuta ermetica. Un tappo installato in modo errato o allentato può consentire all'aria di entrare nel sistema, causando la perdita di adescamento della pompa.
Prima di avvitare il tappo, controllate attentamente la presenza di guarnizioni usurate o filettature danneggiate. È fondamentale garantire una tenuta ermetica, soprattutto durante la fase di apprendimento delle procedure di adescamento di una pompa a getto per pozzi profondi con serbatoio a pressione, poiché le perdite d'aria possono influire sulla pressione e sulle prestazioni del sistema.
Passaggio 5: Ripristinare l'alimentazione alla pompa
Una volta che tutto è a posto, torna al quadro elettrico e riattiva l'alimentazione. L'avvio della pompa dovrebbe richiedere poco tempo. Osserva e ascolta i normali rumori di funzionamento e monitora la pompa durante l'avvio.
Se si notano rumori strani come stridii, borbottii o vibrazioni eccessive, spegnere l'alimentazione e controllare il sistema per individuare eventuali perdite d'aria o altri problemi. Nella maggior parte dei casi, il flusso d'acqua viene ripristinato quasi istantaneamente grazie a un corretto adescamento.
Fase 6: Verifica del flusso d'acqua e della pressione del sistema
L'ultima cosa da fare è verificare che la pompa funzioni correttamente. Aprite un rubinetto nelle vicinanze e osservate il flusso d'acqua. Una pressione e un flusso d'acqua costanti sono segnali positivi che indicano che la procedura di adescamento è andata a buon fine.
La domanda che molti proprietari di casa si pongono è: cosa serve per preparare una casa? pompa per pozzi profondiNella maggior parte dei casi, bastano pochi minuti prima che la pompa inizi a pompare acqua. Tuttavia, in pozzi più profondi o in impianti con perdite d'aria, potrebbe essere necessario più tempo. Se l'acqua non scorre correttamente, ripetere la procedura di adescamento e verificare la presenza di perdite, valvole danneggiate o altri problemi.
Pazienza e attenzione ai dettagli vi permetteranno di riparare la vostra pompa per pozzi profondi e di garantire un approvvigionamento idrico stabile.
Problemi comuni durante l'adescamento di una pompa per pozzi profondi
Anche eseguendo la procedura di adescamento con la massima cura, potrebbero comunque verificarsi alcuni problemi. Nella maggior parte dei casi, questi problemi possono essere risolti non appena se ne individua la causa. Conoscere i problemi più comuni relativi all'adescamento vi farà risparmiare tempo e vi permetterà di ripristinare più rapidamente l'erogazione dell'acqua.
Quando si impara ad avviare una pompa per pozzi profondi, ad esempio in caso di perdita di pressione, questa procedura di risoluzione dei problemi vi guiderà attraverso le problematiche più comuni che possono essere riscontrate dai proprietari di casa.
La pompa non si innesca ancora
A volte, anche dopo aver eseguito tutte le procedure, la pompa potrebbe non riuscire ad avviarsi. Una delle cause più comuni è la presenza di aria intrappolata nell'impianto. Le bolle d'aria possono impedire alla pompa e alle tubature di far circolare l'acqua in modo adeguato.
Qualora ciò si verificasse, ripetere la procedura di adescamento e assicurarsi che la camera della pompa sia completamente riempita con acqua pulita. Prestare attenzione a controllare che il tappo di adescamento, i raccordi e i collegamenti dei tubi non presentino perdite, poiché anche una piccola perdita d'aria può impedire alla pompa di generare l'aspirazione adeguata. Il problema si risolve solitamente seguendo una guida passo passo per l'adescamento di una pompa per pozzi profondi. Nel caso in cui la pompa non funzioni, è possibile che vi sia un problema meccanico più grave che necessita di essere verificato da un professionista.
La pompa continua a perdere l'adescamento
La perdita ripetuta di adescamento di una pompa è in genere un segno di un problema di sistema. Nella maggior parte dei casi, il problema è determinato da una valvola di fondo difettosa, una valvola di ritegno rotta o perdite d'aria nella rete di tubazioni.
Verificare che la valvola di non ritorno si chiuda correttamente e non permetta all'acqua di rifluire nel pozzo. Inoltre, controllare tutti i giunti e i raccordi delle tubazioni, verificando la presenza di crepe, connessioni allentate o guarnizioni usurate. È fondamentale capire perché una pompa per pozzi profondi perde l'adescamento e come risolvere il problema, poiché la perdita ricorrente di adescamento può sovraccaricare inutilmente la pompa e ridurne la durata. Se il problema persiste anche dopo la riparazione, potrebbe essere necessario contattare un tecnico specializzato in pozzi.
Dal rubinetto non esce acqua.
Una volta innescata la pompa, l'acqua dovrebbe scorrere normalmente. Tuttavia, se dal rubinetto non esce acqua, le cause possono essere diverse. La quantità d'acqua nel pozzo potrebbe essere insufficiente, la pompa potrebbe essere piena d'aria che non viene espulsa, oppure potrebbe esserci un'ostruzione da qualche parte nell'impianto.
La prima cosa da fare è assicurarsi che la pompa sia accesa e funzioni correttamente. In secondo luogo, osservare il livello dell'acqua nel pozzo per accertarsi che ce ne sia a sufficienza. Nel caso in cui tutto sembri a posto, ripetere con cautela la procedura di adescamento. La domanda che i proprietari di casa si porrebbero è come adescare un pozzo. pompa per pozzi profondi quando non c'è flusso d'acqua; tuttavia, un'adescamento efficace richiede un metodo appropriato e un'adeguata fornitura d'acqua.
Strani rumori dopo l'innesco
Rumori anomali dopo l'adescamento possono indicare un problema nel sistema. Rumori di sfregamento, sferragliamento, ronzio o vibrazione possono segnalare la presenza di aria intrappolata, componenti danneggiati o detriti all'interno della pompa.
Non appena si avverte un rumore strano, è necessario interrompere immediatamente l'alimentazione della pompa. Controllare l'unità per verificare la presenza di componenti allentati, detriti o usura. In alcuni casi, il ri-adescamento del sistema elimina l'aria residua e ripristina il funzionamento silenzioso. Tuttavia, se i rumori persistono, potrebbe essere necessario sostituire componenti interni come cuscinetti o giranti. Questi problemi possono essere risolti tempestivamente per evitare riparazioni costose e garantire un funzionamento affidabile della pompa.
La maggior parte dei problemi di innesco può essere individuata e risolta con pazienza e un'attenta analisi, prima che si traducano in gravi conseguenze.
Incartare
Imparare ad innescare una pompa per pozzi profondi è un'abilità utile che può aiutarti a ripristinare il flusso d'acqua e a garantire il corretto funzionamento del tuo impianto. La maggior parte dei problemi della pompa può essere risolta autonomamente seguendo le corrette procedure di innescamento, individuando eventuali perdite e caricando la pompa con acqua pulita. È anche possibile controllare tubi, valvole e raccordi per garantirne la manutenzione futura. Ricorda sempre di interrompere l'alimentazione elettrica prima di intervenire sulla pompa per garantire la tua sicurezza. Se la pompa continua a perdere l'innesco o se i problemi persistono, è consigliabile contattare un professionista qualificato.
FAQ
Con quale frequenza è necessario innescare la pompa per pozzi profondi?
È necessario adescare la pompa solo quando perde l'adescamento o dopo una riparazione. A meno che il sistema non presenti problemi, l'adescamento regolare non è necessario.
È possibile innescare la pompa con acqua di rubinetto?
Sì, puoi usare l'acqua del rubinetto. Assicurati che l'acqua sia limpida e pulita. L'acqua sporca può danneggiare la pompa.
Cosa succederebbe se lasciassi la corrente accesa?
Rischi di prendere la scossa o di farti male. Spegni sempre l'alimentazione prima di iniziare. La sicurezza prima di tutto.
Perché la pompa fa rumore durante l'adescamento?
- C'è aria intrappolata nella pompa.
- Parti sciolte
- L'intasamento del sistema.
Ed è per questo che dobbiamo verificare e correggere questi problemi per prevenire il rumore.




