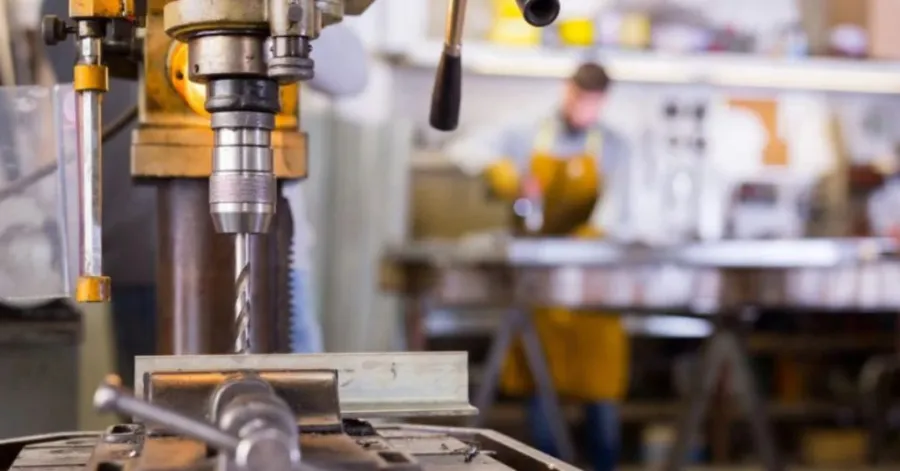
Yksi tehokkaimmista työkaluista siistien, suorien ja tarkkojen reikien tekemiseen puuhun, metalliin, muoviin ja muihin materiaaleihin on porakone. Olipa kyseessä sitten tee-se-itse-projekti tai työpajan perusteiden opettelu, porakoneen käytön tunteminen... pylväsporakone oikein tehtynä voi parantaa sekä turvallisuutta että tarkkuutta. Tässä käyttöoppaassa kuvataan jokainen prosessi yksinkertaisesti, mukaan lukien koneen valmistelu, poraaminen ja huolto. Tämä vaiheittainen opas porakoneen käyttöön auttaa aloittelijoita saamaan itseluottamusta, välttämään yleisiä virheitä ja luomaan ammattimaisen näköisiä projekteja työskennellen turvallisesti ja tehokkaasti.
Valmistele porakoneesi turvalliseen ja tarkkaan poraamiseen
Sinun tulee asettaa porakone käyttökuntoon ennen poraamisen aloittamista. Muutaman minuutin valmistelu voi parantaa tarkkuutta, suojata sisältöä ja minimoida virheiden mahdollisuuden. Porakoneen käytön turvallisuus opitaan valmistautumalla ensin, mikä tekee jokaisesta poraustoimenpiteestä helpomman ja hallitumman.
Olennaiset turvallisuusvinkit, jotka jokaisen aloittelijan tulisi tietää
Porakonetta käytettäessä turvallisuuden tulee aina olla etusijalla. Käytä suojalaseja suojataksesi silmiäsi lentäviltä puulastuilta tai metallilastuilta. Käytä tiukkoja vaatteita äläkä käytä koruja tai mitään, mikä voi tarttua pyörivään poranterään. Pitkät hiukset tulee vetää taakse ja pitää kädet poissa liikkuvista osista koneen ollessa liikkeessä. Käytä puristinta työkappaleen pitämiseen käsien sijaan. Näiden porakoneen turvallisuusvinkkien ja -tekniikoiden avulla on mahdollista välttää onnettomuuksia ja tehdä mistä tahansa projektista turvallisempi. Nämä yksinkertaiset turvatoimenpiteet muodostavat myös hyviä tapoja kaikille porakoneen käyttöä aloitteleville.
Kerää tarvitsemasi työkalut ja tarvikkeet
On hyvä, että asianmukaiset työkalut ovat valmiina aloittaessasi, jotta koko porausprosessi sujuu helposti. Tarvitset poranteriä, puristimia, mittanauhan, viivaimen, pistepuikon ja lyijykynän, jotka kannattaa pitää käsillä porakoneen kanssa. Jopa puupalasta voi olla hyötyä työkappaleen repeämisen estämiseksi. On parempi järjestää kaikki ennen aloittamista ajan säästämiseksi ja keskeytysten välttämiseksi. Tämä perusvalmistelu on tärkeä porakoneen käytössä, koska se antaa sinulle mahdollisuuden keskittyä poraamiseen työkalujen etsimisen sijaan projektin aikana.
Valitse projektiisi sopiva poranterä
Eri materiaalit vaativat erilaisia poranteriä parhaan tuloksen saavuttamiseksi. Kierreporat sopivat hyvin yleiseen poraamiseen, ja Forstner-poranterät tuottavat puhtaita, tasapohjaisia reikiä puuhun. Suuremmat reiät voidaan porata lapioporanterillä ja betoniin ja tiileen muurausporanterillä. Ennen poranterän asentamista varmista aina, että se on terävä ja ehjä. Oikein valittu poranterä parantaa leikkaustehoa ja minimoi koneen rasituksen. Se myös yksinkertaistaa huomattavasti oikeiden reikien poraamista porakoneella, koska terä on sovitettu materiaaliin ja jättää puhtaampia ja tarkempia reikiä.
Aseta oikea porakoneen nopeus
Sinun korkosi pylväsporakone tulisi säätää materiaalin ja poranterän koon mukaan. Suuremmilla terillä on tyypillisesti alhaisemmat nopeudet ja ne vaativat hitaampia nopeuksia paremman hallinnan takaamiseksi, kun taas pienet poranterät toimivat yleensä paremmin suurilla nopeuksilla. Metalli ja muut kovat materiaalit vaativat myös alhaisempia nopeuksia kuin pehmeä puu. Useimmissa porakoneissa on nopeustaulukko, mikä helpottaa oikean asetuksen valitsemista. Sopiva nopeus minimoi lämmön, estää poranterän liiallista kulumista ja luo puhtaampia reikiä. Se on tärkeä osa porakoneen turvallisuutta, koska se auttaa suojaamaan sekä työkalua että materiaalia.
@chris_lynn_guads #vevor #vevortyökalut #tiktokshop #hitsaus #hitsaustiktok #hitsausliike #teollinen #tiktokshop #porata #porakone
♬ alkuperäinen ääni - chris_lynn_guads
Säädä porakone ennen aloittamista
Kun kytket koneen päälle, varmista, että kaikki säädöt on tehty. Säädä pöytä oikeaan korkeuteen ja kulmaan projektissasi säätämällä kaikkia säätökahvoja tiukasti. Ennen moottorin käynnistämistä asenna poranterä oikein istukkaan ja poista istukan avain. Aseta aita tai pysäytin, jos projektissasi porataan usein reikiä. Lopuksi pidä työkappaleesta kiinni estääksesi sen liikkumisen porauksen aikana. Nämä ovat viimeiset tarkistukset, jotka on tehtävä vaiheittaisessa oppaassa porakoneen käyttöön; ne auttavat sinua työskentelemään luottavaisemmin, turvallisemmin ja tarkemmin.
Porakoneen käyttö vaihe vaiheelta
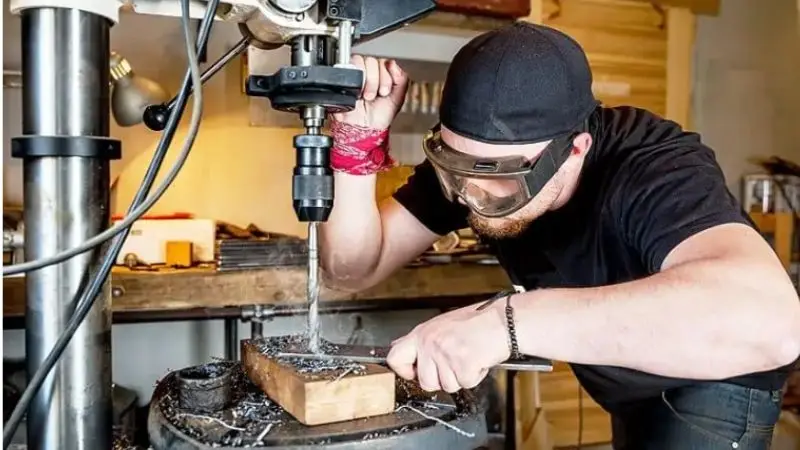
Kun porakone on valmis, voit olla varma, että voit aloittaa poraamisen. Oikea vaihejärjestys auttaa sinua pysymään turvassa, tekemään puhtaampia reikiä ja välttämään yleisiä virheitä. Tämä vaiheittainen opetusohjelma on helppo seurata ja ihanteellinen opettamaan jollekulle porakoneen käyttöä.
Vaihe 1: Merkitse kohta, johon haluat porata
Aloita mittaamalla työkappale ja merkitse kohta, johon reikä on tarkoitus porata. Varmista, että saat tarkat mitat käyttämällä viivainta tai mittanauhaa ja merkitsemällä sen jälkeen selkeästi (lyijykynällä tai tussilla). Jos poraat metallia, tee pieni reikä pistepuikolla, jotta poranterä ei liuku. On myös parempi käyttää aikaa porauskohdan merkitsemiseen oikeaan kohtaan, mikä parantaa tarkkuutta ja helpottaa työtä huomattavasti. Tämä on ensimmäinen perusaskel porakoneella poraamisen prosessissa.
Vaihe 2: Kiinnitä materiaali puristimella tai ruuvipenkillä
Älä käytä käsiäsi materiaalin pitämiseen porakoneen ollessasi. Aseta sen sijaan työkappale porakoneen pöydälle ja pidä se paikallaan joko puristimilla tai porakoneen ruuvipenkillä. Tämä pitää materiaalin paikallaan antamatta sen liikkua tai pyöriä kosketuksissa poranterään. Vakaa työkappale tuottaa puhtaampia reikiä ja vähentää onnettomuusvaaraa. Ennen koneen käynnistämistä varmista, että kaikki osat ovat tiukasti kiinni. Yksi tärkeimmistä porakoneen turvallisuusvinkeistä ja -tekniikoista on materiaalin asianmukainen kiinnitys, koska se suojaa sinua ja projektiasi.
Vaihe 3: Asenna ja kohdista poranterä
Valitse materiaalillesi sopiva poranterä ja aseta se kokonaan poraistukkaan. Kiristä istukka paikalleen varmistaaksesi, että terä pysyy paikallaan. Poista aina istukan avain ennen porakoneen käynnistämistä kiristämisen jälkeen. Käännä poranterää varovasti alas käynnistämättä konetta varmistaaksesi, että se on keskitetty merkittyyn porauskohtaan. Esiporaus tekee mahdolliset pienet muutokset. Se on tärkeä osa porakoneen käyttöä aloittelijana, koska sen oikea sijoittelu johtaa siistimpään ja tarkempaan lopputulokseen.
Vaihe 4: Säädä pöydän korkeutta ja poraussyvyyttä
Säädä porakoneen pöytä sopivalle korkeudelle, jotta työkappale on kokonaan kiinnitetty. Lukitse pöytä paikalleen, jotta se ei liiku porauksen aikana. Jos porakoneessasi on syvyysrajoitin, aseta se projektisi vaatimaan syvyyteen. Tämä on erityisen hyödyllistä, jos porataan useita saman syvyisiä reikiä. On suositeltavaa testata asetukset ennen aloittamista ajan säästämiseksi. Nämä muutokset muodostavat merkittävän osan turvallisesta... pylväsporakone käyttöä, sillä ne parantavat hallintaa ja minimoivat liian syvälle poraamisen riskin.
Vaihe 5: Poraa reikä turvallisesti ja tarkasti
Käynnistä porakone ja anna sen olla päällä, kunnes se on saavuttanut maksiminopeuden, laske sitten poranterä. Vedä syöttökahvasta hitaasti ja käytä tasaista painetta sen sijaan, että työntäisit terää materiaalin läpi. Anna poranterän suorittaa leikkaus ja pidä kätesi poissa liikkuvista osista. Kun poraat syvää reikää, nosta terää säännöllisesti kaapiaksesi lastut pois ja jäähdyttääksesi sitä. Kärsivällisyys johtaa tasaisempiin tuloksiin ja on sopivin tapa harjoitella tarkkojen reikien poraamista porakoneella säilyttäen samalla prosessin hyvän hallinnan.
Vaihe 6: Sammuta kone ja tarkista reikä
Kun reikä on porattu, nosta poranterää vähitellen ja sammuta sitten kone. Älä poista työkappaletta tai tee mitään säätöjä, ennen kuin poranterä on pysähtynyt kokonaan. Tarkista, että reikä on puhdas, suora ja että se on porattu oikeaan syvyyteen. Puhdista työtilasi poistamalla pöly tai lastut pöydältä ja sen ympäriltä. Jokaisen työn suorittaminen on osa porakoneen turvallista käyttöä, ja tämä voi auttaa pitämään laitteesi valmiina seuraavaa projektia varten.
Vältä yleisiä virheitä ja pidä porakoneesi hyvässä kunnossa
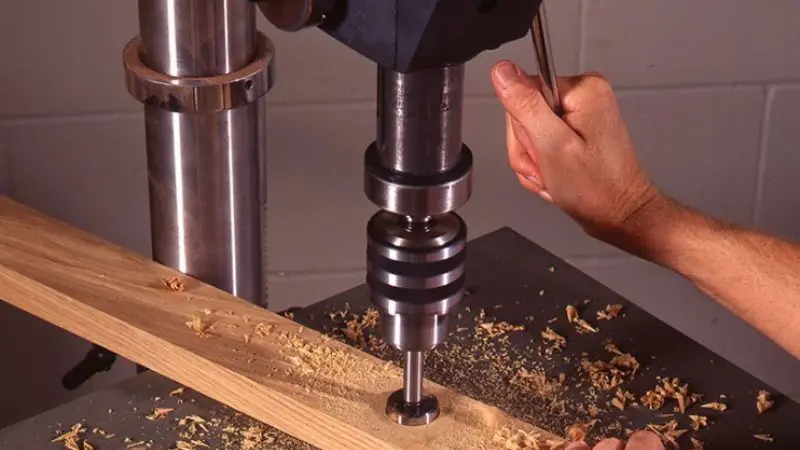
Pieniä virheitä voi silti tapahtua perusvaiheiden oppimisen jälkeen, ja ne voivat vaikuttaa työsi laatuun ja lyhentää porakoneesi käyttöikää. Tietoisuus siitä, mitä ei pidä tehdä ja miten voit pitää koneesi parhaassa mahdollisessa kunnossa, auttaa sinua saavuttamaan parempia tuloksia joka kerta. Oikeat tavat tekevät porakoneen käytöstä helpompaa, turvallisempaa ja nautinnollisempaa jokaisessa projektissa.
Yleisiä porakoneen virheitä, joita aloittelijoiden tulisi välttää
Aloittelijan virheet ovat usein yksinkertaisia ja voivat johtaa huonoon suorituskykyyn tai vaarallisiin työolosuhteisiin. Yleisin virhe on poraaminen ilman työkappaleen kiinnittämistä, jolloin se voi liikkua tai pyöriä arvaamattomasti. Väärä poranterä tai väärä nopeuden valinta voi myös vahingoittaa materiaalia ja polttaa terän nopeasti loppuun. Jotkut käyttäjät käyttävät liiallista painetta sen sijaan, että antaisivat poranterän leikata omalla nopeudellaan. Porakoneen turvallisuusvinkkien ja -tekniikoiden noudattaminen sekä ajan ottaminen jokaisessa vaiheessa auttaa ehkäisemään näitä ongelmia ja luomaan itseluottamusta koneen kanssa työskennellessä.
Yksinkertaisia vinkkejä porakoneen puhtaampaan ja tarkempiin reikiin
Valmistelu ja tasainen poraus alkavat puhtaista ja tarkoista rei'istä. Varmista aina, että käytät terävää poranterää, joka sopii työstettävään materiaaliin. Merkitse porauskohta ja kiinnitä työkappale ennen koneen käyttöä. Vähennä poranterän painetta vähitellen ja pidä painetta samana koko porausprosessin ajan. Syvien reikien kohdalla nosta terää ajoittain poistaaksesi lastut ja lämmön. Nämä muutamat vinkit yksinkertaistavat oikeiden reikien poraamista porakoneella ja parantavat puuntyöstöprojektisi yleisilmettä.
Kuinka puhdistaa ja huoltaa porakonetta
Säännöllinen huolto varmistaa, että pylväsporakone on hyvässä toimintakunnossa ja pidentää sen käyttöikää. Pyyhi jokaisen projektin jälkeen pöytä ja liikkuvat osat pölystä, puulastuista tai metallilastuista. Puhdista kone puhtaalla liinalla lian ja kosteuden poistamiseksi, sillä ne voivat aiheuttaa ruostumista. Tarkista säännöllisesti poranistukka, hihnat ja kiinnikkeet varmistaaksesi, että ne ovat turvallisia ja toimivat oikein. Voitele liikkuvat osat valmistajan suositusten mukaisesti varmistaaksesi, että kone toimii hyvin. Säännöllinen huolto on tärkeä osa porakoneen turvallista käyttöä, koska hyvässä kunnossa oleva kone toimii tehokkaammin ja turvallisemmin.
Nopeita ratkaisuja yleisiin porakoneongelmiin
Porakone ei aina toimi tarkoitetulla tavalla, vaikka monet ongelmat ovat helposti ratkaistavissa. Jos poranterä lipsahtaa, ruuvaa istukka kiinni tai vaihda kulunut terä. Jos poraus ei ole suora, varmista, että pöytä on tasainen ja työkappale on kiinnitetty. Kun kone tärisee liikaa, tarkista poranterä, hihnat ja kiinnityspultit löysien osien varalta. Terä voi myös olla tylsä ja joutua vaihtamaan heikon leikkaustehon vuoksi. Nämä yksinkertaiset testit ovat käteviä aina, kun joku käyttää vaiheittaista käyttöohjetta porakoneen käyttöön, ja ne voivat auttaa varmistamaan, että kaikki projektit sujuvat hyvin.
Paketoida
Porakoneen turvallinen käyttötaito on arvokas taito kaikille puuntyöstöstä, metallintyöstöstä tai kodinparannusprojekteista kiinnostuneille. Koneen asianmukaisella valmistelulla, sopivan poranterän valinnalla, materiaalin kiinnityksellä ja oikealla poraustekniikalla on mahdollista saavuttaa puhtaat ja tarkat tulokset joka kerta. Säännöllisellä huollolla porakoneesi voi kestää useita vuosia erinomaisessa toimintakunnossa. Olitpa sitten aloittelija tai keskitason korjaamokäyttäjä, näiden tekniikoiden avulla opit pian käyttämään porakonetta kuin aloittelija ja viimeistelemään jokaisen projektin itsevarmemmin, tarkemmin ja turvallisemmin.
FAQ
Voivatko aloittelijat käyttää porakonetta?
Kyllä. Oikein käytettynä porakone voi olla käyttäjäystävällinen. Ennen työn aloittamista tutustu ohjaimiin, kiinnitä työkappale, käytä turvavarusteita ja noudata oikeita porausmenetelmiä.
Mitä voin porata porakoneella?
Puuta, metallia, muovia, akryyliä ja muita materiaaleja voidaan porata porakoneella. Varmista aina, että käytät oikeaa poranterää ja nopeusasetusta käytettävälle materiaalille.
Mikä on työkappaleen kiinnittämisen syy?
Kiinnitys pitää materiaalin paikallaan eikä anna sen liikkua tai pyöriä porauksen aikana. Tämä parantaa tarkkuutta, tuottaa puhtaampia reikiä ja minimoi merkittävästi onnettomuuksien mahdollisuuden porauksen aikana.
Kuinka usein porakoneeni pitää huoltaa?
Puhdista porakone aina ja tarkista hihnat, istukka ja liikkuvat osat. Säännöllinen huolto parantaa suorituskykyä, pidentää koneiden käyttöikää ja tekee käytöstä turvallista.
Mitä voin tehdä tehdäkseni tarkempia reikiä porakoneella?
Hyvän tuloksen saavuttamiseksi merkitse porauskohta, valitse terävä poranterä, kiinnitä materiaali tukevasti, valitse oikea nopeus ja käytä tasaista painetta koko porausprosessin ajan.