
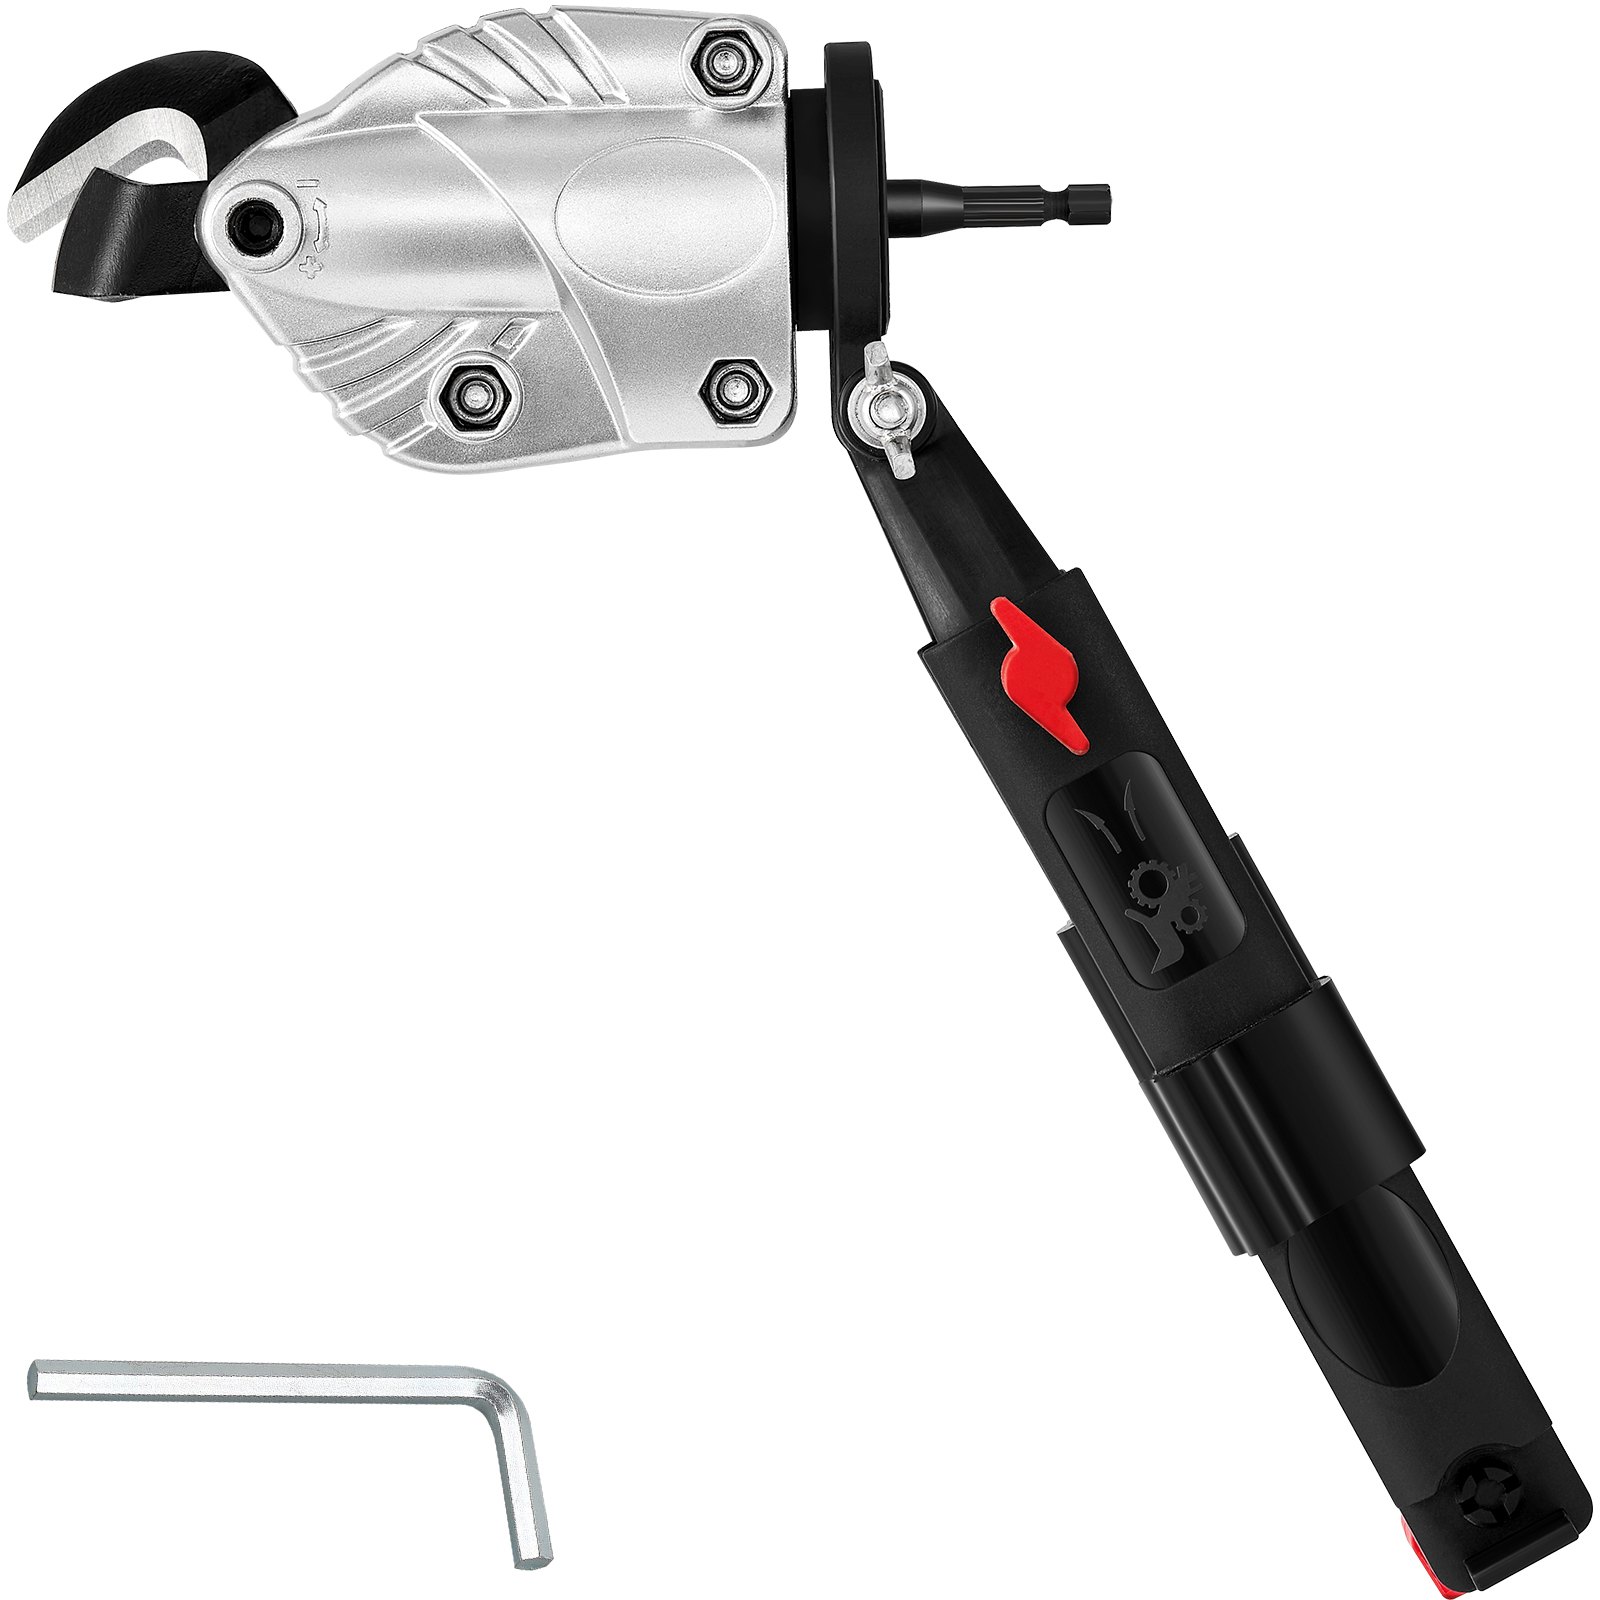
Unlock the full potential of your VEVOR Metal Cutter Drill Attachment with our comprehensive product manual download. Designed for both novice and experienced users, this manual covers every aspect of using the Metal Shears Attachment with a 360-degree pivoting head.
Whether you’re cutting through 21 GA stainless steel, 14 GA aluminum metal sheets, or 18 GA galvanized steel, our manual provides detailed instructions and troubleshooting tips to ensure optimal performance.
From initial setup to advanced techniques, you’ll find everything you need to maximize efficiency and precision. Download the manual now to streamline your projects and easily achieve professional-grade results.
VEVOR Metal Cutter Drill Attachment User Manual
Model: DR12
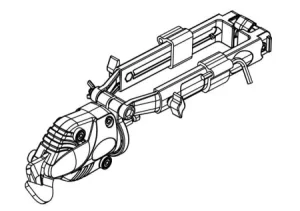
Product Specifications
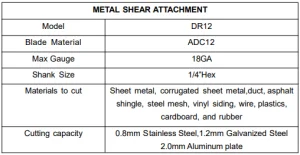
General Instructions
READ AND UNDERSTAND THESE INSTRUCTIONS AND THE INSTRUCTIONS FOR THE POWER TOOL USED WITH THIS PRODUCT. FAILURE TO FOLLOW ALL INSTRUCTIONS MAY RESULT IN electric shock, fire, and/OR serious personal injury.
CUTHAZARD-Never have any part of your body near the blades or moving parts of the power tool—serious personal injury may occur.
- Before use, ensure the shear attachment is adequately attached to the tool.
- Turn the tool off and/or disconnect the battery pack before installing and removing accessories, adjusting, or repairing.
- To prevent accidental operation, lock the trigger switch in the OFF position when the tool is not in use or when it is being stored.
- DO NOT sharpen blades. DO NOT use the shear with any accessory or attachment.
- Wear gloves when handling sheet metal. The edges are sharp and can cause serious personal injury. For best results, always clamp or anchor the material to be cut.
- DO NOT use under wet conditions or in flammable liquids or gases.
- DO NOT let children come into contact with the shear. Supervise the inexperienced operators.
- DO NOT hold the shear attachment as a primary gripping surface.
- Make sure the power tool is set to the“forward”(clockwise) direction before use.
- Hold the power tool on insulated gripping surfaces (if a drill uses both hands). The shear contacting a live wire may make exposed metal parts of the shear and the power tool“live” and could give the operator an electric shock.
- AVOID body contact with earthed or grounded surfaces, such as pipes and appliances. There is an increased risk of electric shock if your body is earthed or grounded.
- DO NOT use solvents or other harsh chemicals to clean the shear’s non-metallic parts. These chemicals may weaken the plastic materials used in these parts. Use the cloth dampened only with water and mild soap.
- DO NOT let any liquid get inside the shear or immerse any part of the shear into a liquid.
Installing and Operating
- Insert the shank end of the shears into the nose of the impact driver, or chuck, if using a drill. Tighten the chuck securely.
- Pivot the telescoping clamp toward the back of the tool and adjust the clamp (both width and length) to fit securely on the tool.
a. Adjust the width by turning the nut(1) on the left side of the clamp. Rotate the nut clockwise/ counter-clockwise to reduce/increase the width.
b. Rotate the knobs(3)on both sides to loosen the clamp. Then adjust the length of the clamp by pulling or pushing on the length-adjusting lever (4) of the telescoping clamp.
c. Lock at the desired length/width by pushing the lock(2) located at the end of the telescoping clamp.
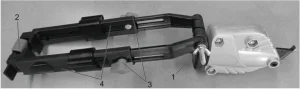
3. Ensure the shear is secure on the tool.
Replacing Blades
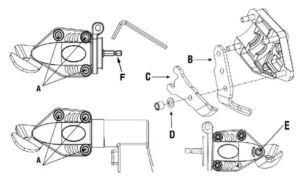
- Use the 5mm hex key provided to remove the three hexagon screws(A)holding the casing together.
- Separate the casings.
NOTE: There is grease in casing
- Remove the blades. Be sure to keep the reusable washer(D).
- Place the new lower blade(B)onto the casing as shown in the drawing above.
- Apply a thin layer of grease (not provided) on the side of the lower blade(B).
- Place the new upper blade(C)into the casing. NOTE: When replacing the washer(D), reinstall convex up and under upperblade(C)
Apply a liberal amount of grease(not supplied) to the space between the driveshaft(F)and upper blade(C). - Reassemble casings and screws(E).
- Use the 5mm hex key provided to tighten the hexagon screws to ensure proper cutting performance.
Note when cutting
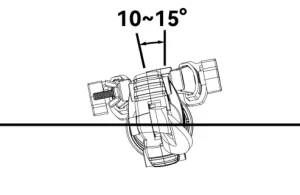
- Adjust your shear within 10-15 degrees for a smoother cut.
- To better protect your blade, try to keep the item stable instead of twisting it constantly; otherwise, the blade may break easily. Please see the figure below.
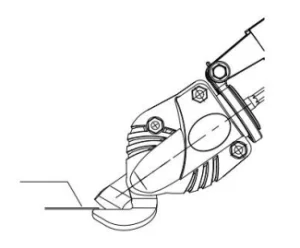
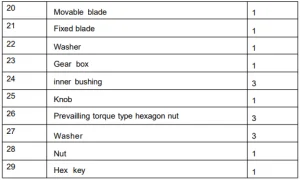
- When cutting, try to parallel the material to be cut with the fixed blade(No.21 in the diagram)
Exploded View
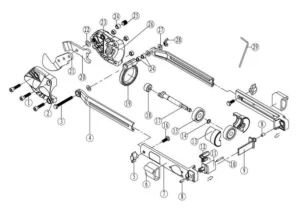
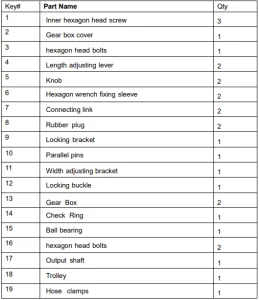
Metal Cutter Drill Attachment Parts List
Recommended For Your Project
VEVOR Metal Cutter Drill Attachment, with Metal Shears Attachment Manual
Reviews
There are no reviews yet.