
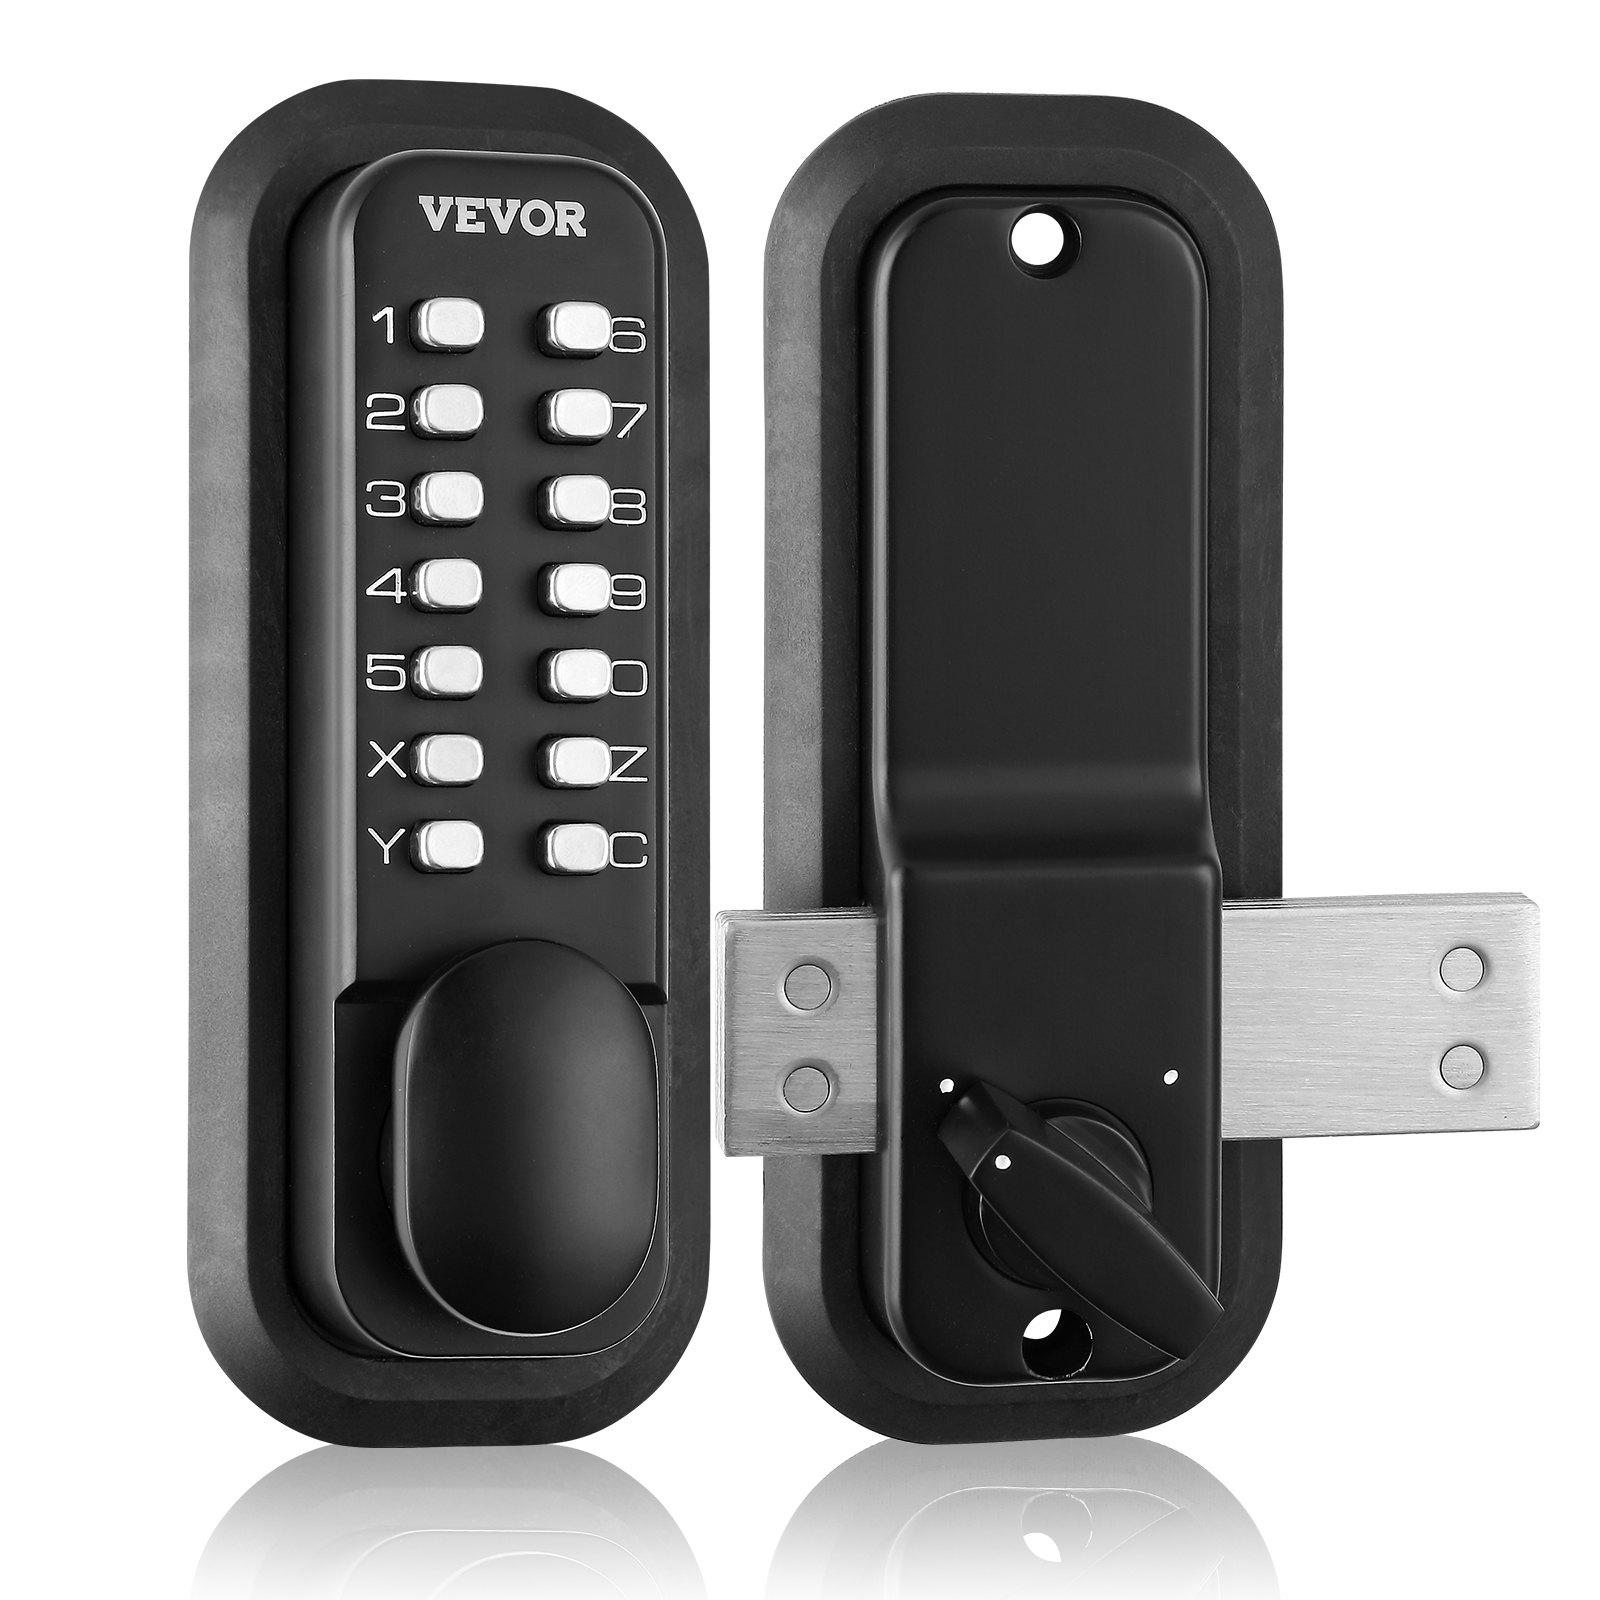
Unlock the full potential of your VEVOR Mechanical Keyless Entry Door Lock with our comprehensive product manual. Designed specifically for the 14 14-digit keypad Outdoor Gate Door lock set, this manual offers step-by-step instructions for a seamless installation process. Crafted from waterproof zinc alloy, this door lock is perfect for gardens, garages, and yards, providing a secure and convenient solution for your outdoor spaces. Whether you’re troubleshooting common issues, setting up the lock for the first time, or optimizing its features, our detailed guide covers everything you need.
This user-friendly manual provides clear diagrams, comprehensive explanations, and expert tips to ensure your door lock is functioning at its best. The surface-mounted latch system and intuitive keypad design make it easy to customize your security preferences without needing professional help.
Download the VEVOR Mechanical Keyless Entry Door Lock manual today and take the first step towards enhanced security and convenience for your property.
VEVOR MECHANICAL KEYLESS DOOR LOCK USER MANUAL
MODEL: OL601HD2-B-01
WARNING:
Read this material before using this product. Failure to do so can result in serious injury.
Assembly precautions:
- Assemble only according to these instructions. Improper assembly can create hazards.
- Wear ANSI-approved safety goggles and heavy-duty work gloves during assembly.
- Keep assembly area clean and well lit.
- Keep bystanders out of the area during assembly.
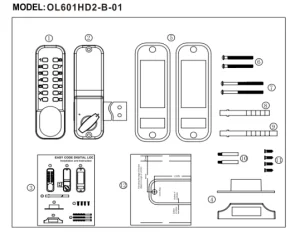
- Front Panel x 1
- Back Panel x 1
- Instruction x 1
- Door Striker Plate x 1 set
- Widen protective rubber mat (160x65mm) x 2 pieces
- Screws M4x40mm x 2pcs
- Screws M4x50mm x 2pcs
- The flat bar 80mm x 1
- The flat bar 95mm x 1
- Hollow stud (M5xM4x40mm) x 2
- Cross slotted flat head self-tapping screws (wood tooth screws) x 4
- Auxiliary installation drilling sticker x 1
Installing the Keyless Entry Door Lock
- Ensure all parts work properly.
- Choose and set a code following the Instructions “Setting/Changing the Entry Code”. All or part of the push-buttons can be chosen with no order In the numbering is requested. Codes with 4-6 digits are recommended.
- According to the door’s opening direction, check and determine the opening direction of the front lock and the left and right direction of the lock bolt on the back lock. If you need to exchange it, follow the corresponding instructions.
- Take the back lock as a benchmark, coordinate the opening template, and drill the hole in the door.
- Install the lock, check the front and rear lock switches, and determine whether they are normal.
Setting/Changing the entry code
- Install the Keyless Entry Door Lock on the front of the door, set the password, and remember it.
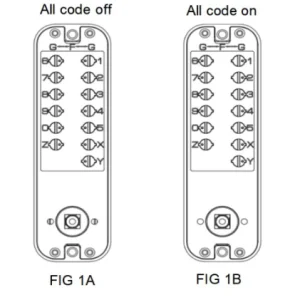
- On the back of the front door code lock, you can see buttons, each with a concave dot, used to set the password.
- Set the password: use a word screwdriver into the button word slot, press into the lock a little, and then turn 180 degrees, so that the button on the dot near the number or letter, the number or letter is the password. The password is not in sequence; the C key is the reset key, and the remaining numbers and letters are the password key.
- To remove the password, turn the button so that the dots are away from the numbers or letters.
Determine Door Handling
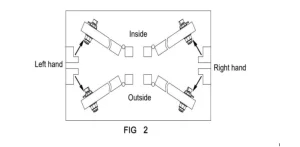
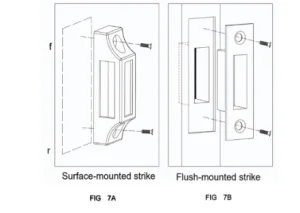
The right diagram can help you determine whether right-handed or left-handed doors open inwards or outwards. For a door that opens outward, use the flush-mounted strike.
Change the Lock Direction
The default direction of the Keyless Entry Door Lock’s factory setting is for a right-handed door; when the door is left-handed, the direction of the unlocked state should be changed.
Use the small-head cross screwdriver to completely loosen the screws in the drive shaft hole on the back of the lock. Pay attention not to use the electric screwdriver and the large-head screwdriver(FIG. 3A). Put the live shaft into the live shaft hole, turn the live shaft clockwise, let the live shaft hole parts rotate 180 °(FIG 3B), and then use the screwdriver to lighten the inside screw. The direction of the lock is changed.
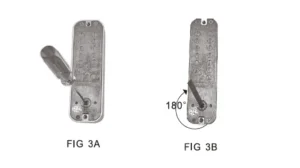
Change Lock Bolt Direction
Remove the 4 screws and cover plate on the back of the inner lock. Remove the bolt and turn it over (on the left or right, side drive slot down). Fix the cover plate with screws, turn the knob, and check the lock bolt to see if it is normal.
Positioning Hole
Press the back door lock vertically on the back of the door and align one side of the lock bolt with the edge of the door to mark the lock position accordingly.
Use the template to mark the previous position and the position of the screw hole and the drive shaft hole. Drill a 10mm hole to the pull screw hole and a 10mm hole to the drive shaft hole. If the door seam is too large, when positioning the lock, you can also make the end face of the lock bolt over the door flank to ensure that the lock bolt and lock button combination is more secure.
- Installation and debugging
Important tip: Do not close the door until the code is confirmed to open the door correctly.
- Please screw the hollow stud into the screw holes of the front panel of the door lock. (FIG 5A)
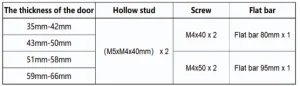
- According to the thickness of the door please choose the corresponding size of the flat bar and mounting screws. (Chart 1)
- The flat bar default design is suitable for doors with a thickness of 35 to 65mm. Therefore, if necessary, cut the flat bar to fit the thickness of the door.
- The front and back door lock is connected through the live shaft, and then the front and rear lock is fixed to the door with the pull screw. (FIG 5B)
- Check whether the lock and unlock functions are working normally. When it is unlocking, the front lock does not need to press the password; the C key is a clear and reset key. Press the correct password and then turn the button toward the opening door to unlock the lock. When you press the password, you cannot turn the button. Check that the password settings are correct or that you have pressed the C key before pressing the key.
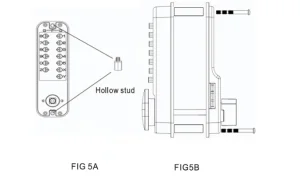
Chart 1
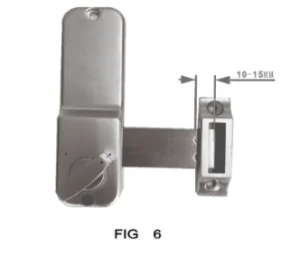
Fixing the Strike Plate
When locking, the positioning of the strike plate must allow the latch to engage with it. The distance of the latch entering the strike plate is about 10 mm—15 mm (FIG. 6).
Determine the correct installation position, then outline the flat door frame installation to ensure the lock latch can be fully extended to provide the lock’s anti-theft function. Use a screw to fix the strike plate, then check the lock bolt expansion to see if it is normal or not. If there is a problem, you can adjust it and then tighten it with two screws.
Keyless Entry Door Lock: Unlock and lock
Tips: The C key is clear, and the reset key. The default button direction to unlock the door is clockwise. If you change the lock to left-handed, the direction to unlock the door is counterclockwise.
- Press the correct password, then turn the button toward the opening door to unlock the lock. If you are unable to turn the button when you press the password, check that the password settings are correct and that you have pressed the C key before pressing the key.
- And turn the button in the other direction to re-lock the door.
- Only from outside is a code necessary to turn the knob for opening. From inside, the bolt can go in and out freely with the internal button.
Recommended For Your Project
VEVOR Mechanical Keyless Entry Door Lock, 14 Digit Keypad Water-proof Zinc Alloy Manual
Reviews
There are no reviews yet.