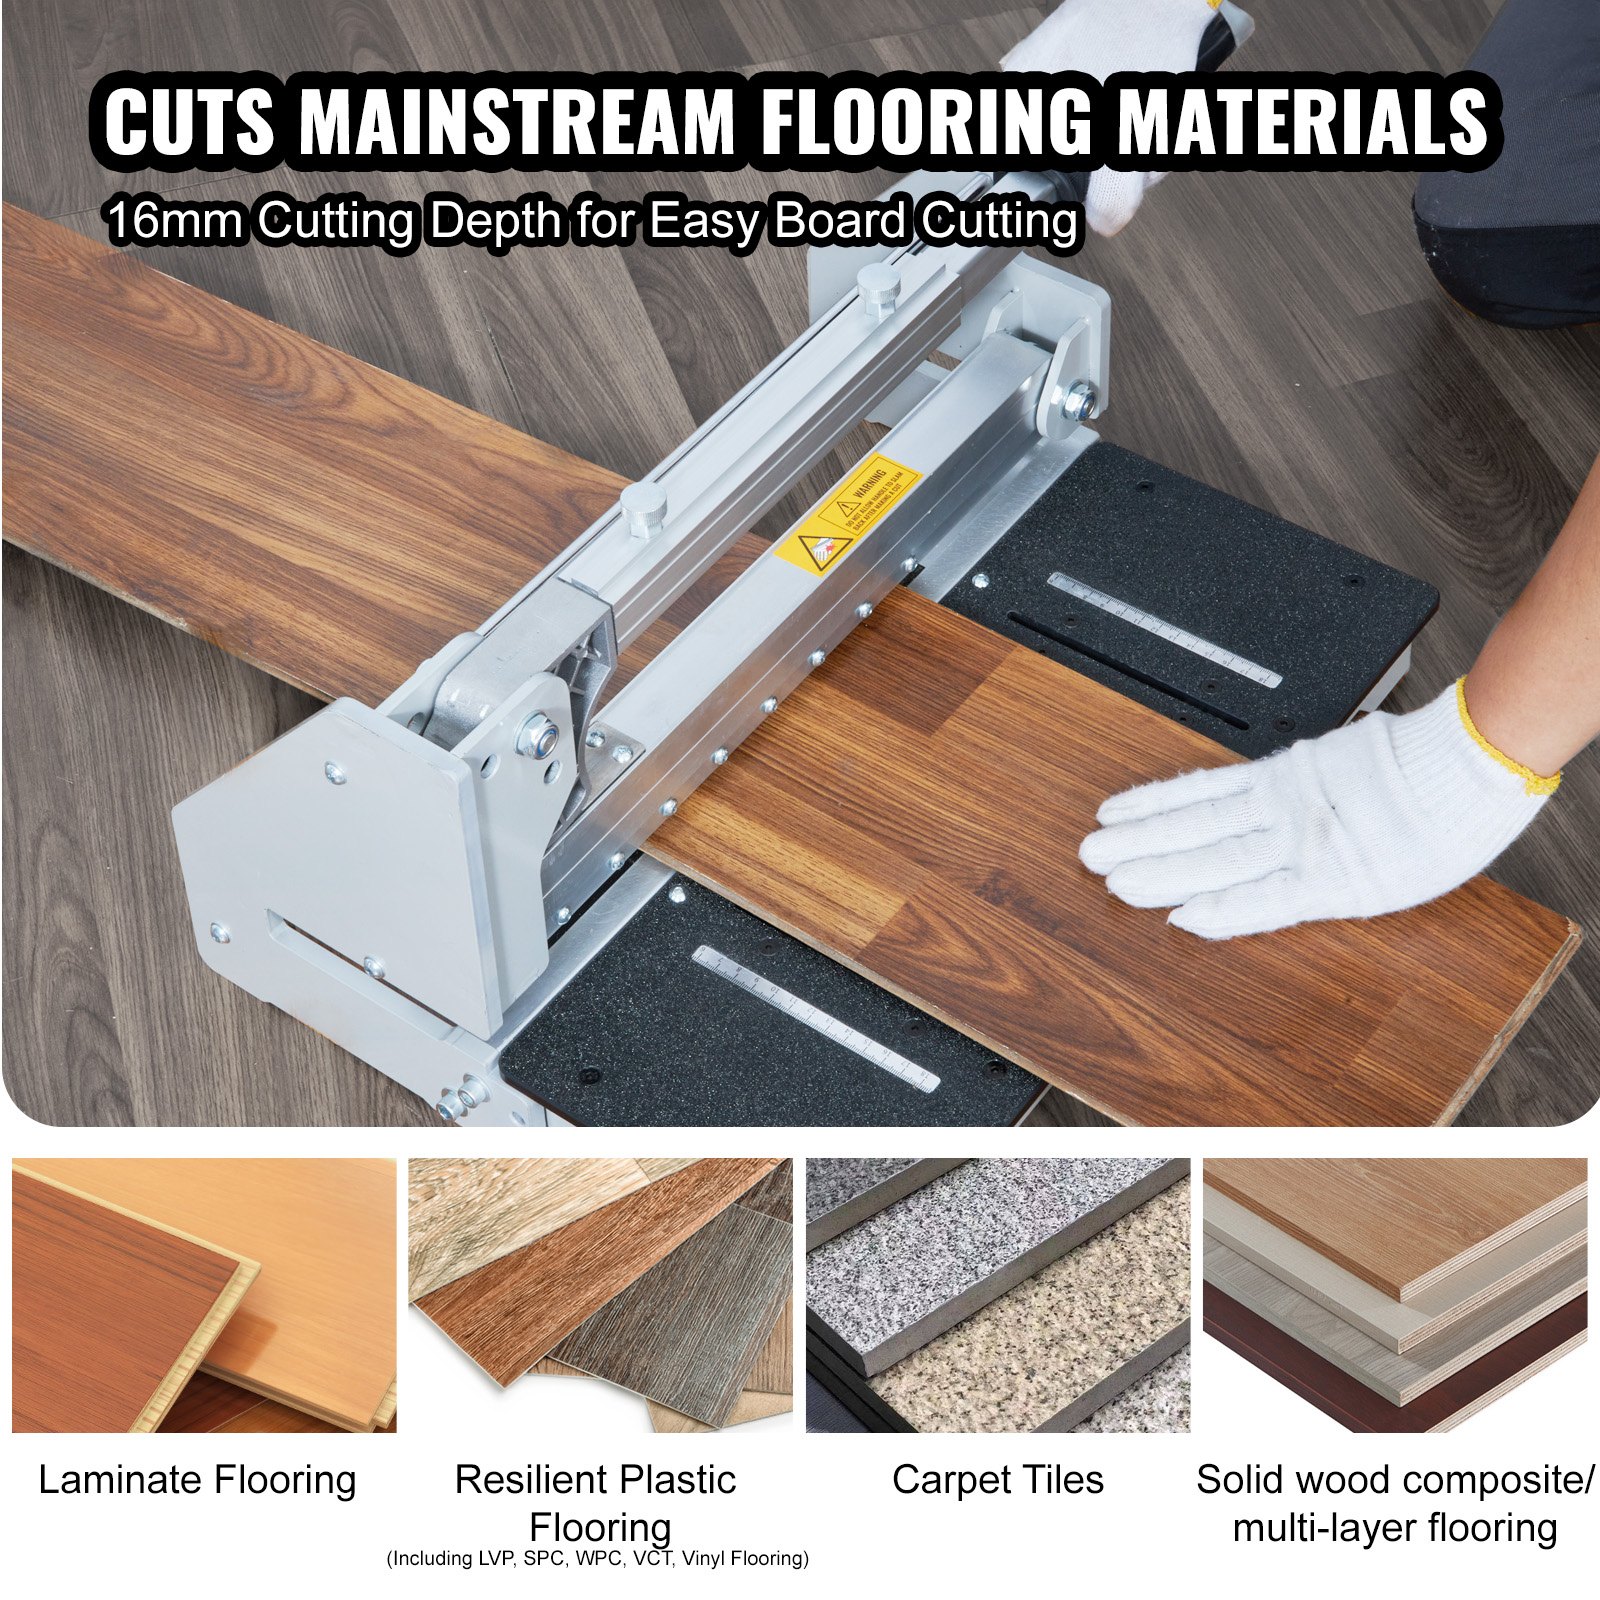
Unlock the full potential of your VEVOR Floor Cutter 13-inch with our comprehensive product manual download. Designed to make your setup and troubleshooting effortless, our manual covers every aspect of your cutter’s usage, from cutting vinyl plank, laminate, and solid wood composite to multi-layer flooring and siding. With a 0.63-inch cutting depth, this versatile tool makes cutting LVP, WPC, SPC, LVT, VCT, PVC, and more a breeze.
Our detailed guide is designed to be user-friendly and professional, ensuring you can easily optimize your cutting experience.
Whether you’re a DIY enthusiast or a seasoned professional, our manual provides step-by-step instructions, troubleshooting tips, and optimization techniques to help you get the most out of your VEVOR Floor Cutter. Download now to ensure your projects are always precise and efficient.
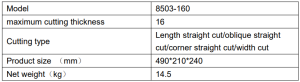
Technical Parameters
Safety Rules For The Flooring Cutter
READ AND UNDERSTAND THIS INSTRUCTION MANUAL BEFORE OPERATING THE MULTI-FLOORING CUTTERS.
- Stay alert. Do not operate under the influence of drugs, alcohol, or medication.
- Always wear safety-approved eye protection with side shields(ANSI Z87.1)
- Keep the work area free of debris.
- Keep children and unauthorized persons away from the Multi-flooring Cutter and the work area.
- Make sure the tool is secure. Operate only on a firm substrate or solid stand.
- Use the right tool. Please do not force the Multi-flooring Cutter or use it for a job for which it was not designed; use it only on approved materials.
- Keep the blade sharp. A dull blade will not perform properly.
- Always keep your hands away from the blade while operating or carrying the cutter.
- Do not alter or misuse this tool. The Multi-flooring Cutter is precision-built; modifications not specified in this manual may result in a dangerous and unsafe environment.
- Maintain the Multi-flooring Cutter with care. Keep the blade sharp and clean. Follow instructions for changing accessories.
- Use only recommended accessories. The use of improper accessories may be hazardous and cause injuries.
- Never leave the Multi-flooring Cutter unattended. Secure the handle with the lock chain when not in use.
- Warning – To reduce the risk of injury, wear ANSI-approved safety goggles and heavy-duty work gloves when using.
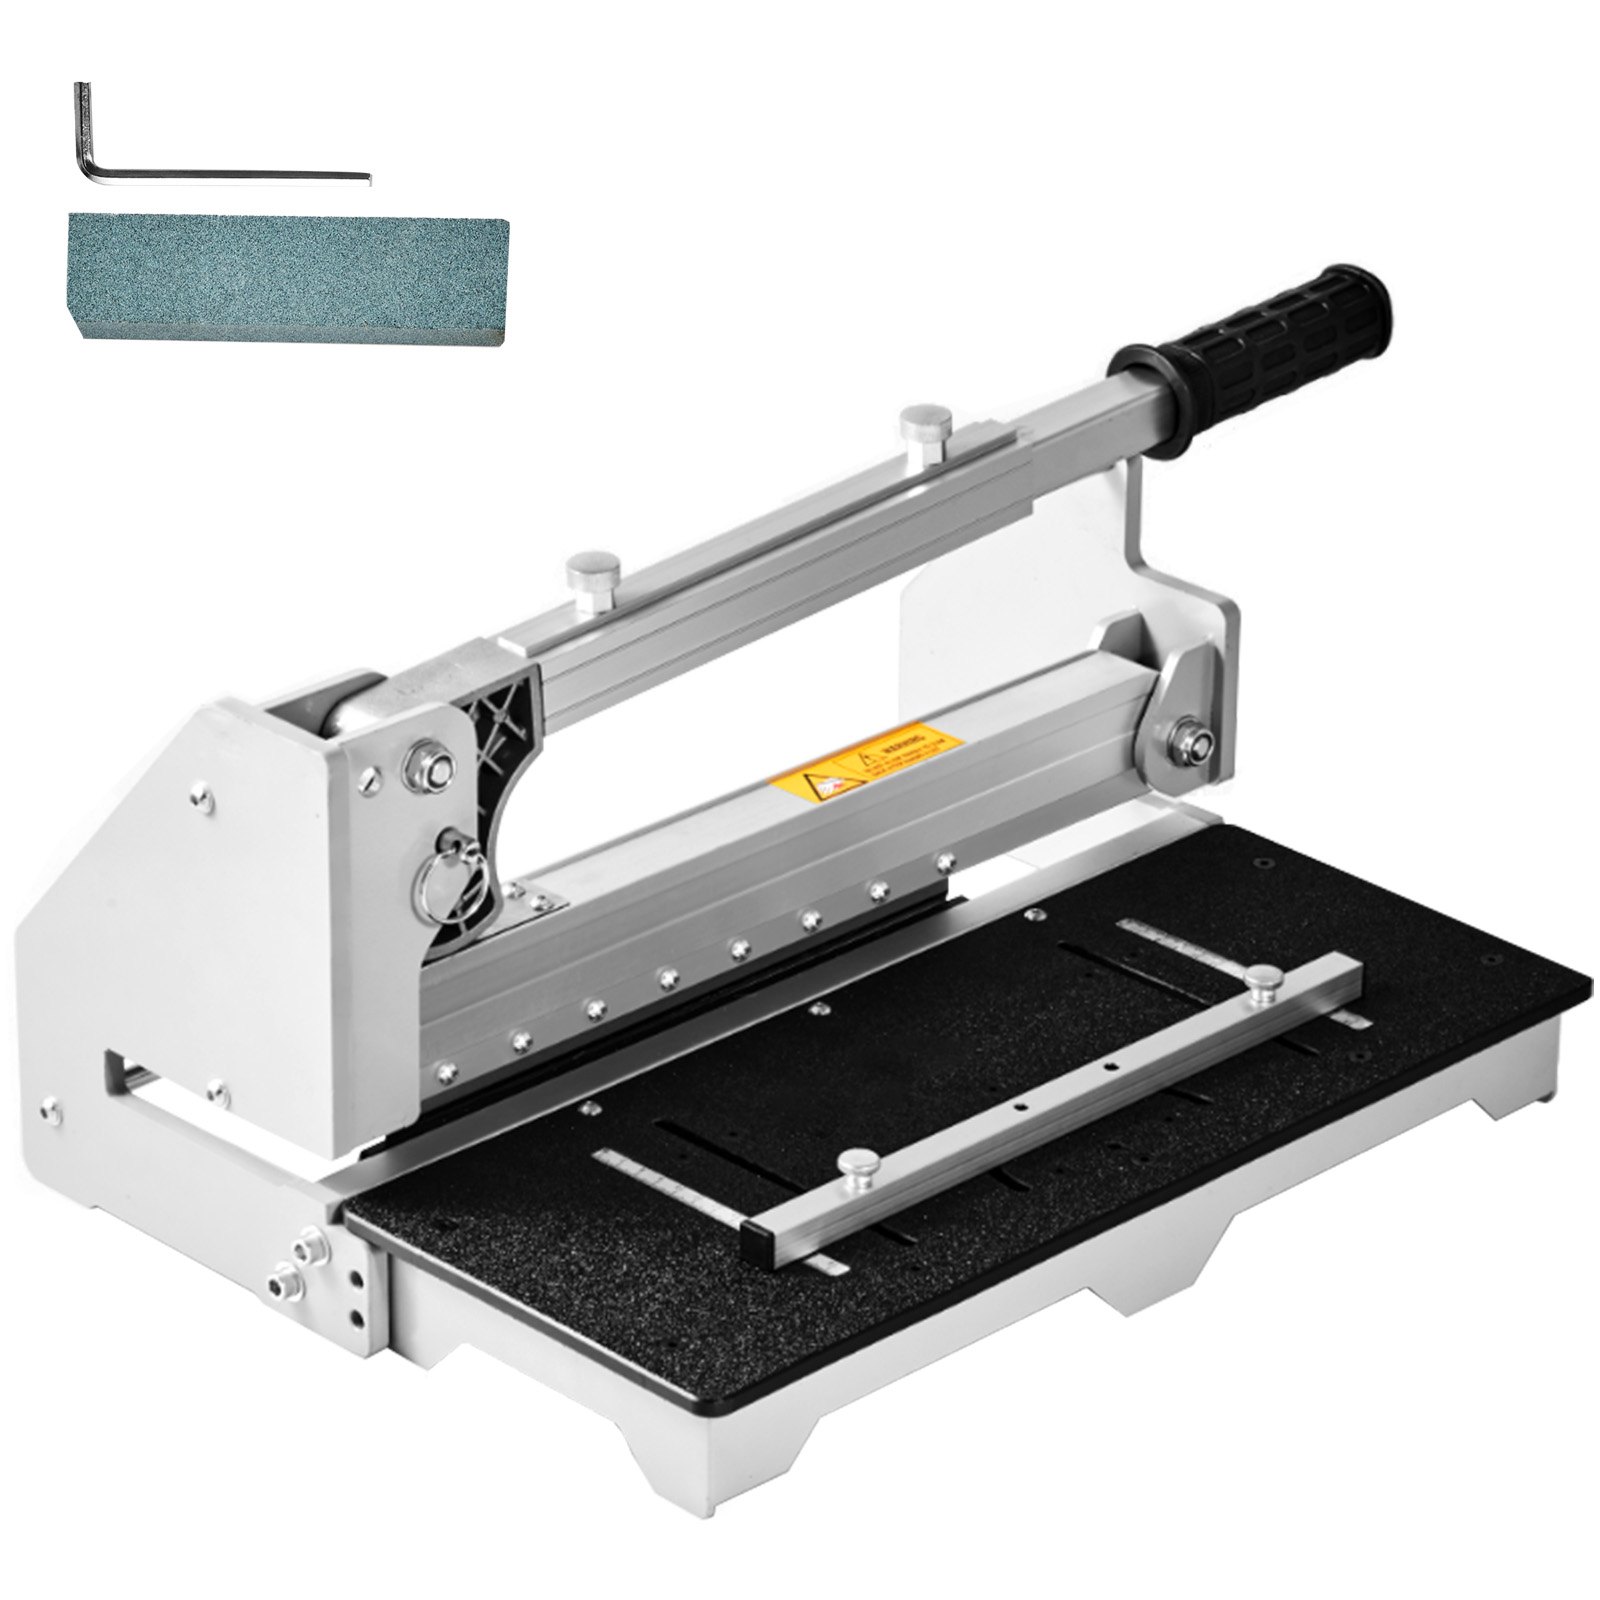
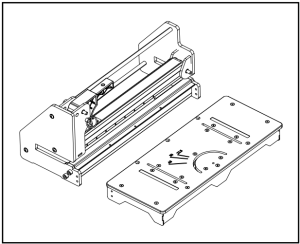
Set-Up
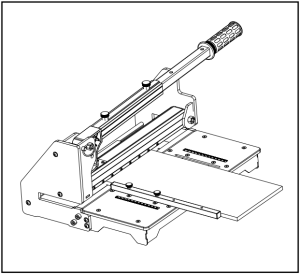
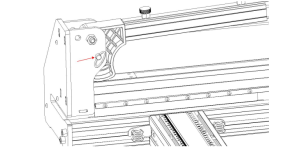
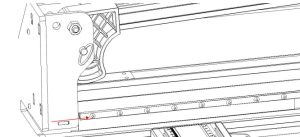
Installation of the support plate
Connect the support plate to the cutter as shown.
Warning: Do not put your fingers against the blade’s sharp edge at any time.
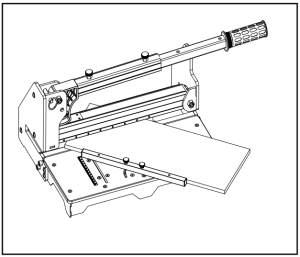
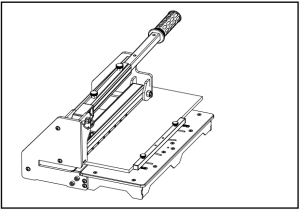
Installation of the handle
Pull up the lock pin on the aluminum handle as shown, and insert the handle base into the handle as shown. Push down the handle to pull out the spring pin from the lower hole and insert it into the upper hole. Screw the square pipe on the auxiliary plate for use.
Warning: Do not put your fingers against the blade’s sharp edge at any time. Installation of the support plate.

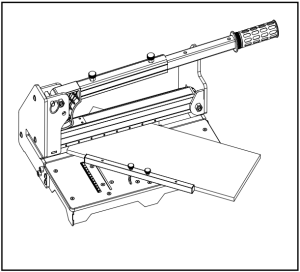
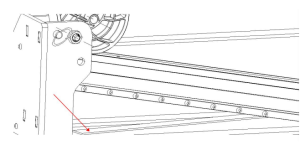
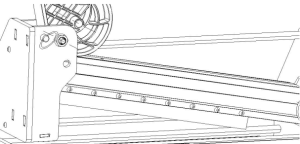
Cutting Preparation
- Adjust the angle attachment to the desired angle as needed.
- The angle attachment can be used on the left side of the tables as shown. Warning: Do not put your fingers against the blade’s sharp edge at any time.
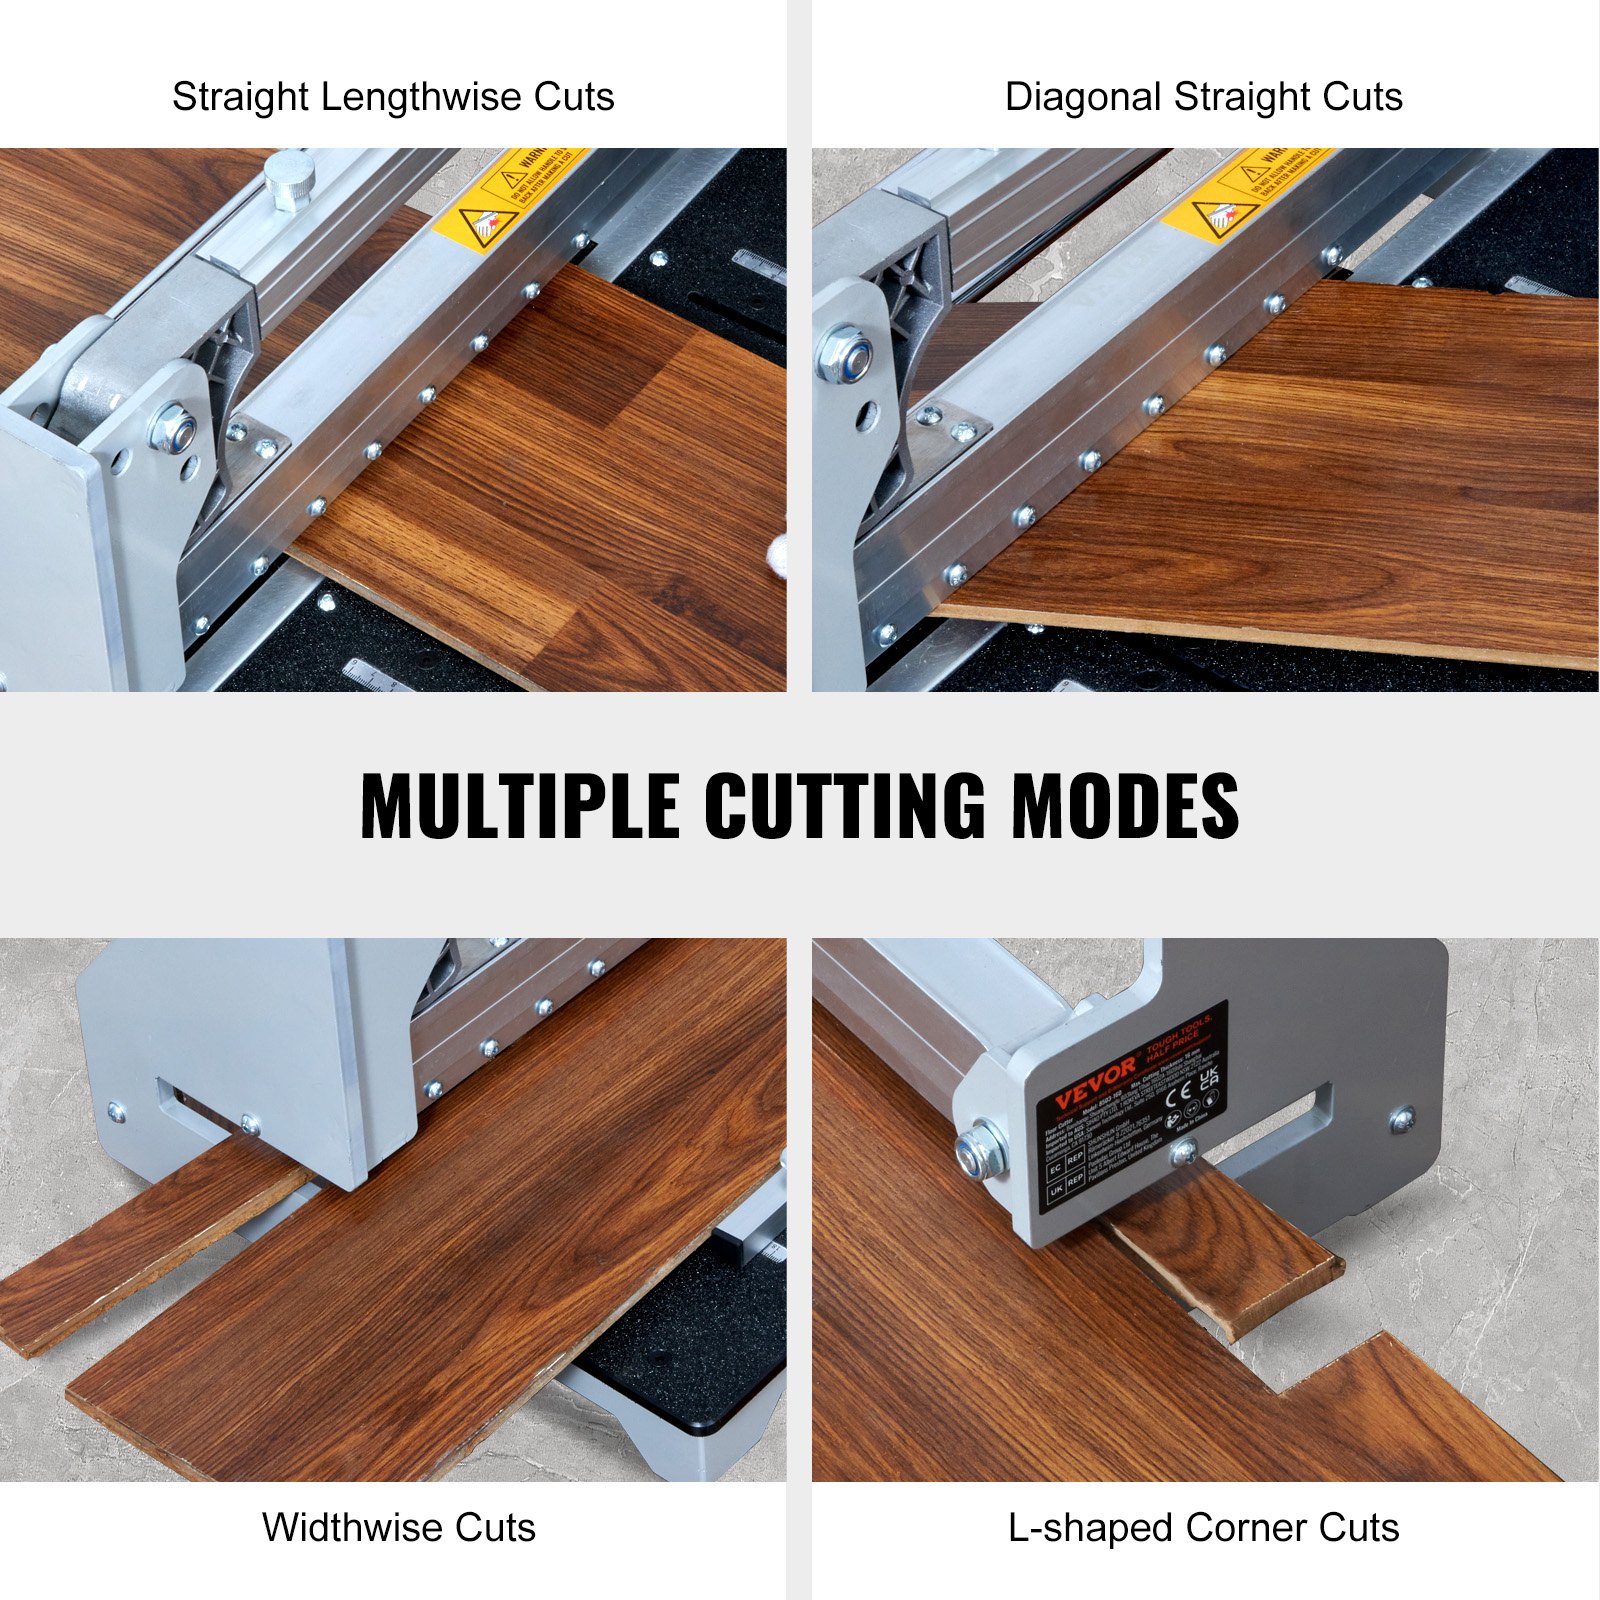
Cutting
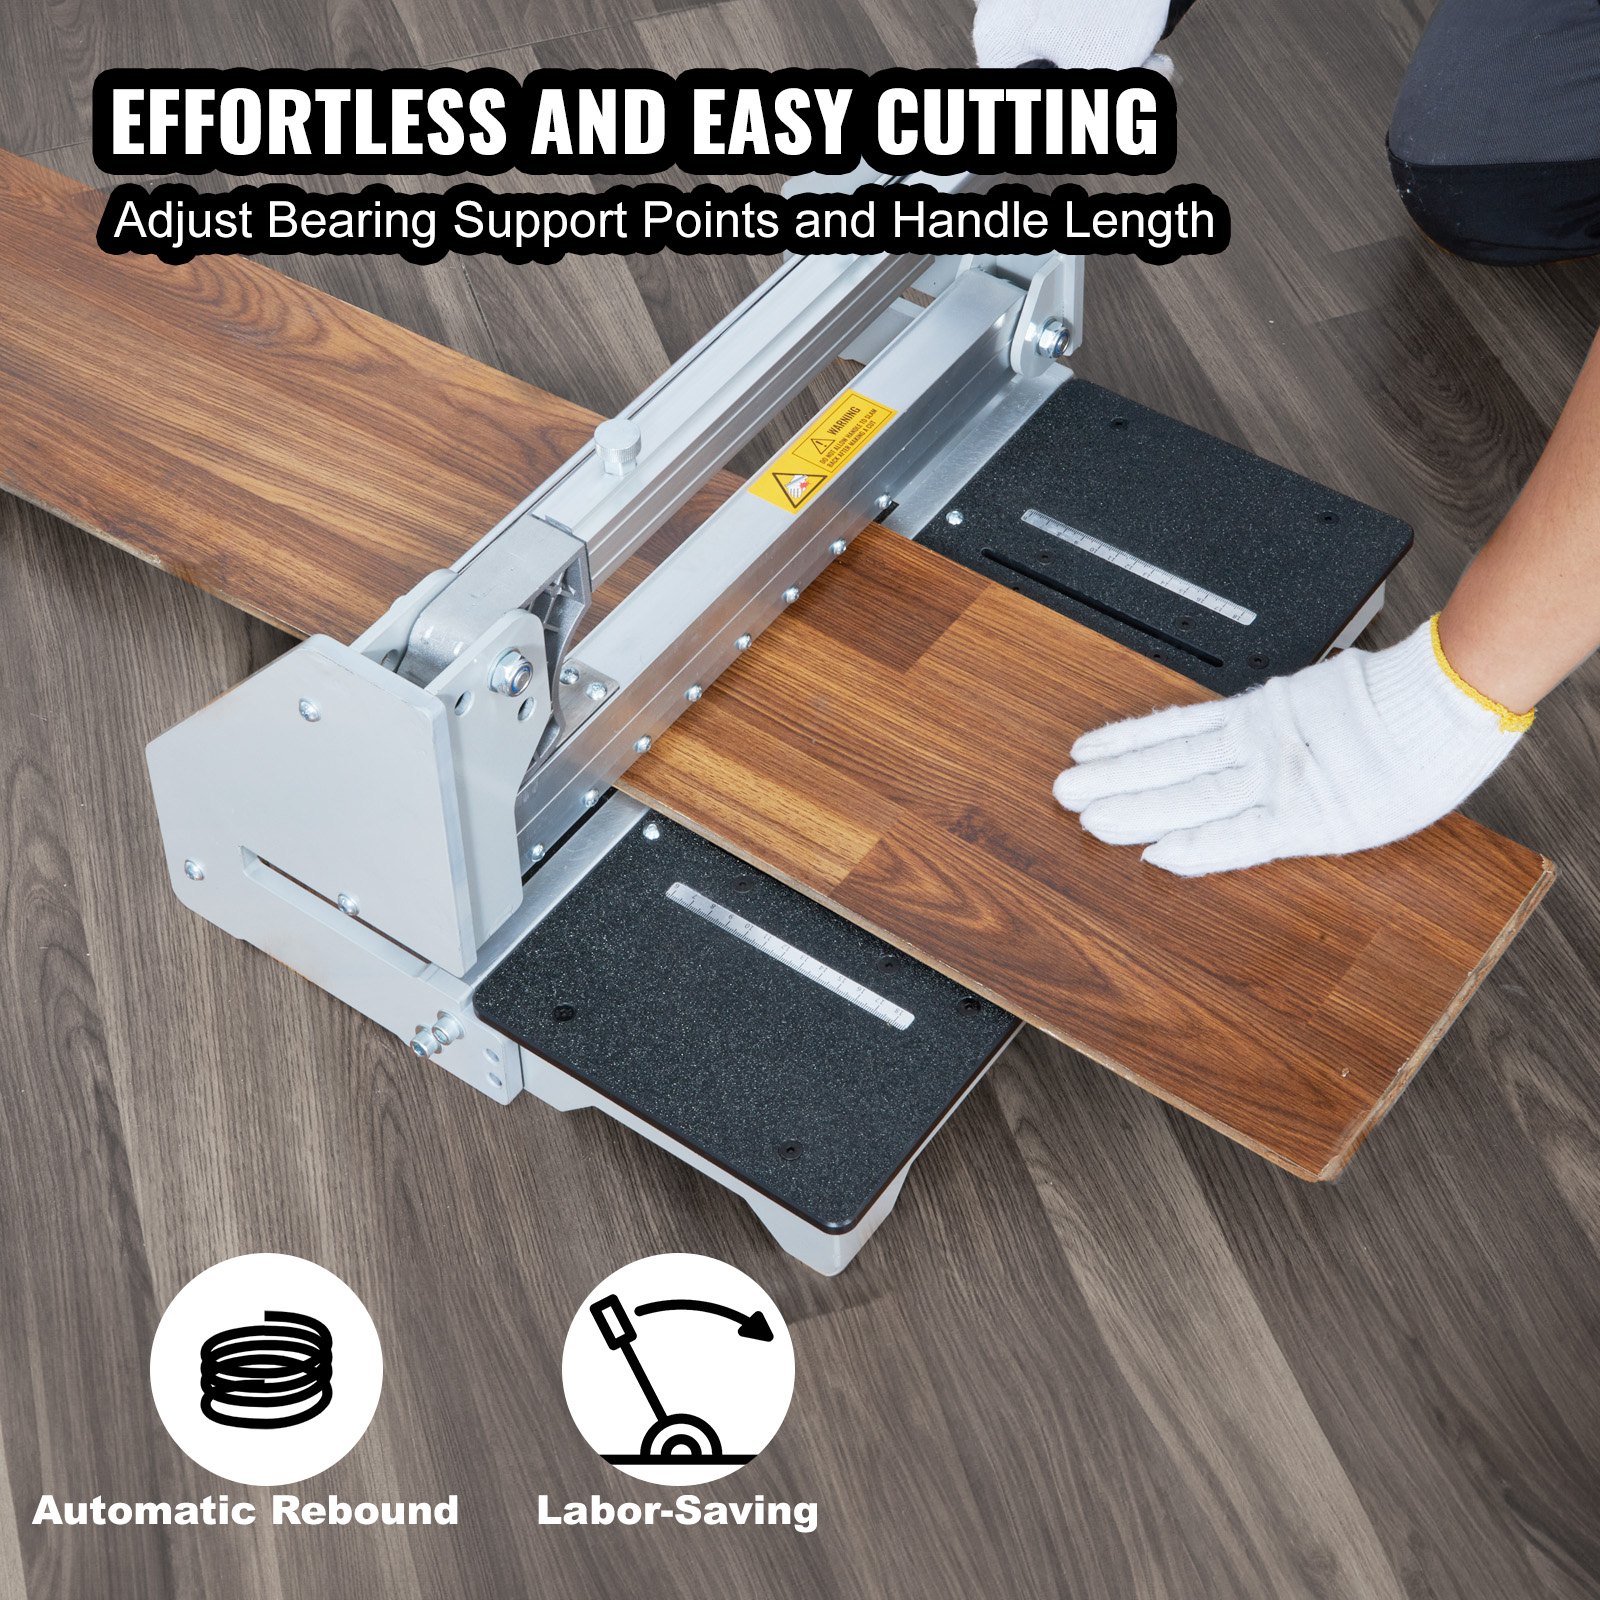
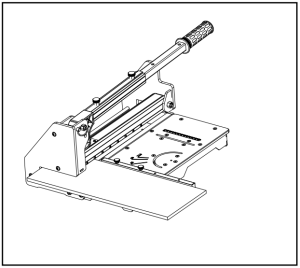
Straight Cutting
Insert material between the cutting blade and the base, flush with the angle attachment as shown. Hold the material with your foot, then push the handle down to complete a cut.
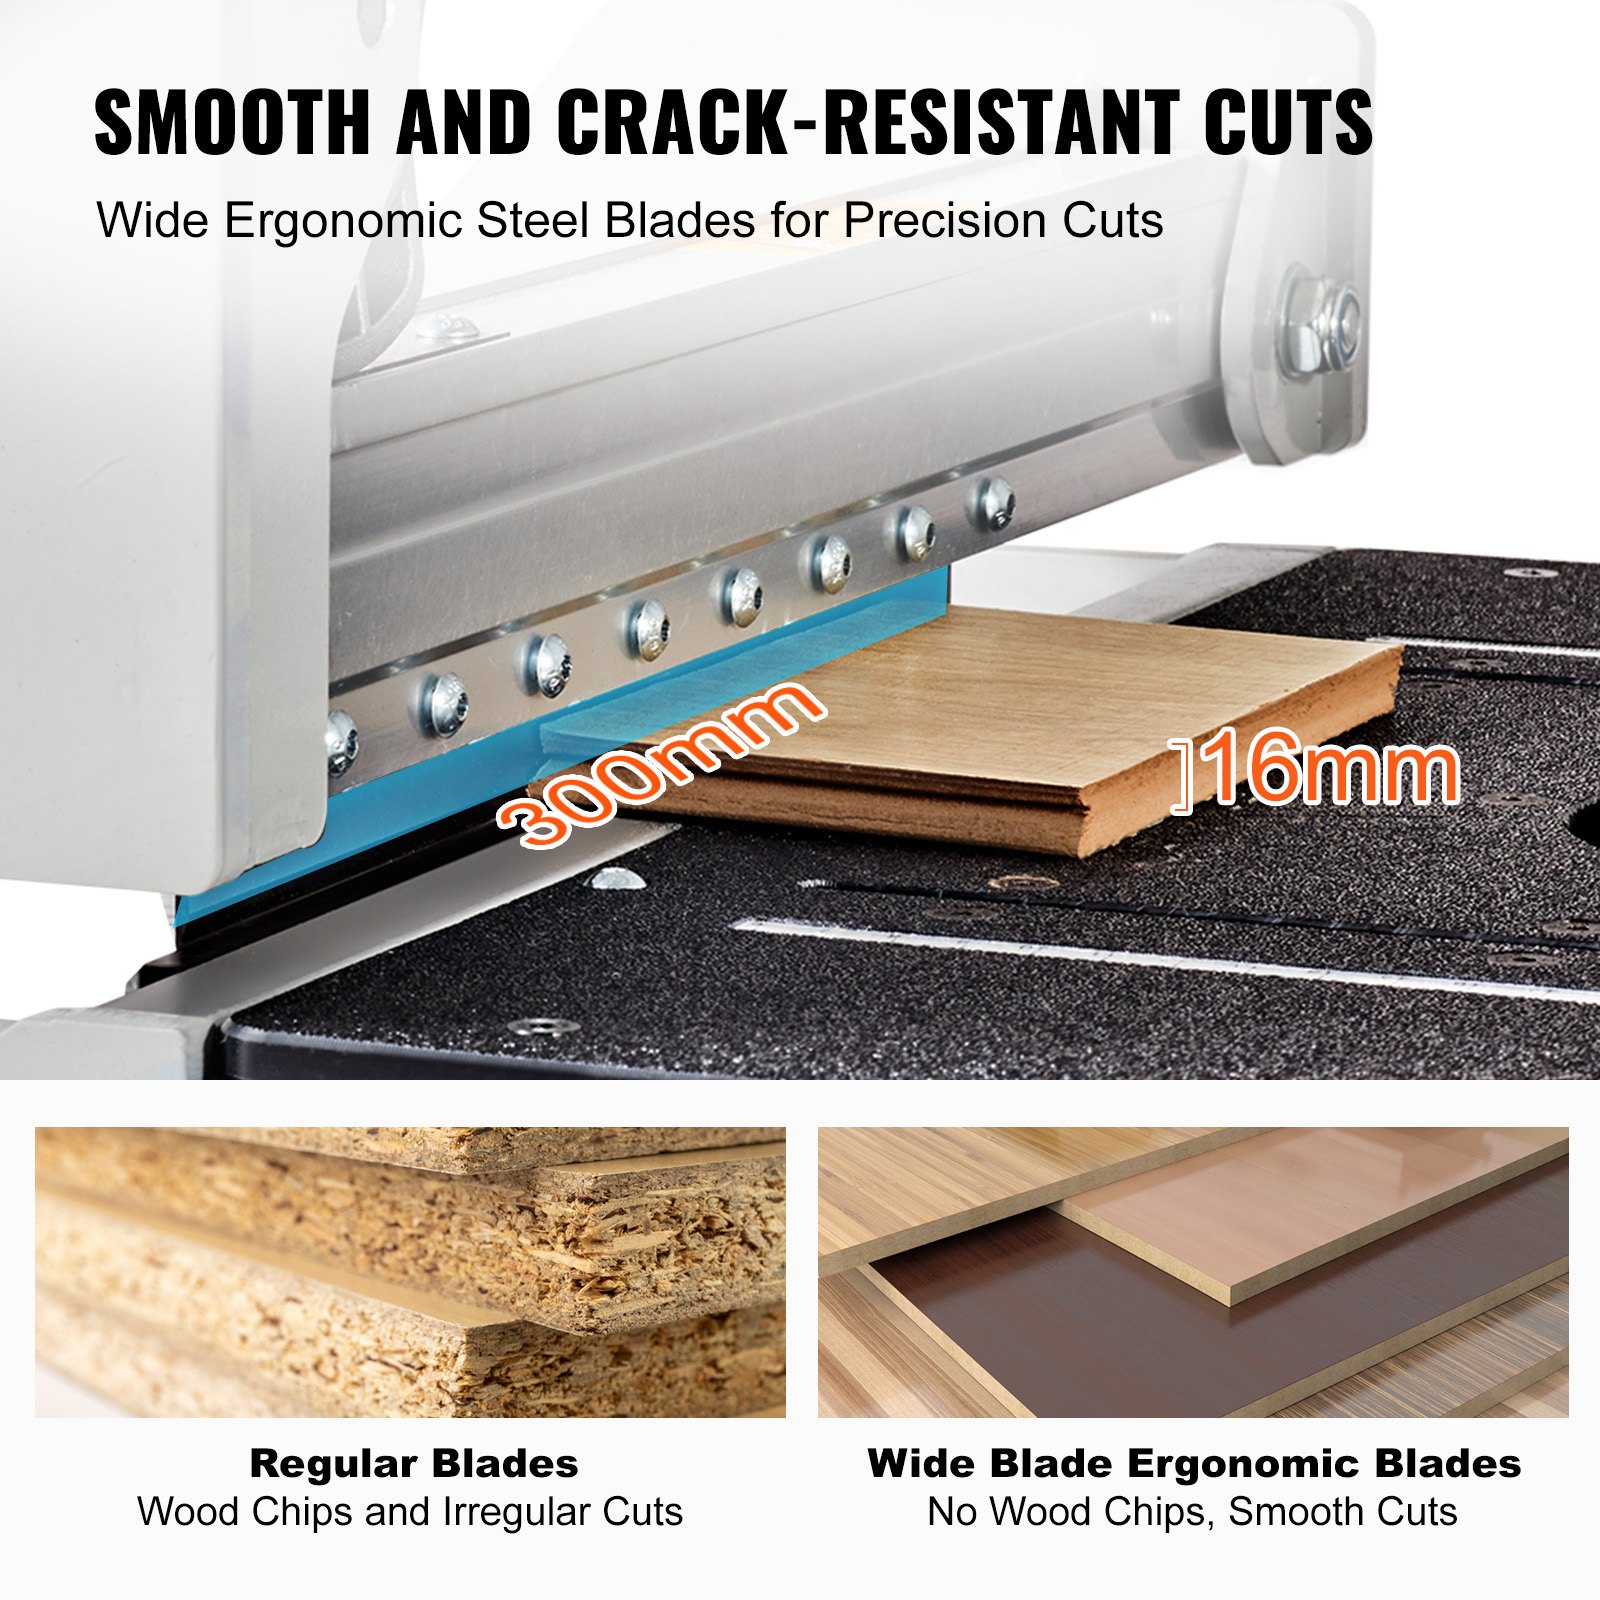
- Blade cutting maximum width: 300mm
- Blade cutting maximum depth: 16mm
Warning: Maintain control of the handle. Do not allow the handle to slam back after cutting.
Lengthwise Cutting
Insert material between the cutting blade and the base, flush with the angle attachment as shown, then push the handle down to complete a cut.
Warning: Maintain control of the handle. Do not allow the handle to slam back after cutting.
45° Cutting
Swing the angle attachment to 45°. Insert material between the cutting blade and the base against the angle attachment as shown, then push the handle down to complete a cut.
- Blade Cutting Maximum width is 300mm when the angle is cut at 45°.
Warning: Maintain control of the handle. Do not allow the handle to slam back after cutting.
Cutting
“L” Cutting
1st cut
Insert material between the cutting blade and the base at the end of the machine, flush with the angle attachment as shown, and then push the handle down to complete a cut.

2nd cut
Insert material between the cutting blade and the base at the machine’s front end, flush with the angle attachment, as shown, and then push the handle down to complete a cut.
Carry
Depress the handle to remove the spring pin from the upper face and insert it into the lower face, as shown.

Changing the Blade
Warning: Do not put your fingers against the sharp edge of the blade at any time.
1: Press the pressure rod down to the bottom, and replace the insurance plug-in from the top to the bottom;
2: Turn the screw to fix the blade counterclockwise;
3: pull out the safety plug, the blade falls off after lifting the pressure rod;
4: Put the new blade plane toward the connecting rod into theslot and tighten the fixing screw.
Made in China
Recommended For Your Project
VEVOR Floor Cutter 13 inch, Cuts Vinyl Plank, Laminate Manual

Reviews
There are no reviews yet.