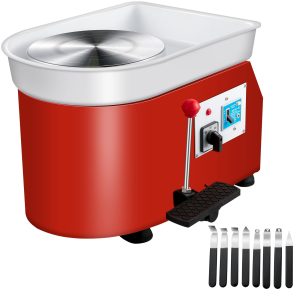
Unlock the full potential of your VEVOR Heat Press Machine with our comprehensive product manual download. Designed specifically for the 12X15 Inch 6 in 1 Combo Digital Multifunctional Sublimation Heat Transfer Machine, this manual is your go-to resource for setup, troubleshooting, and optimization.
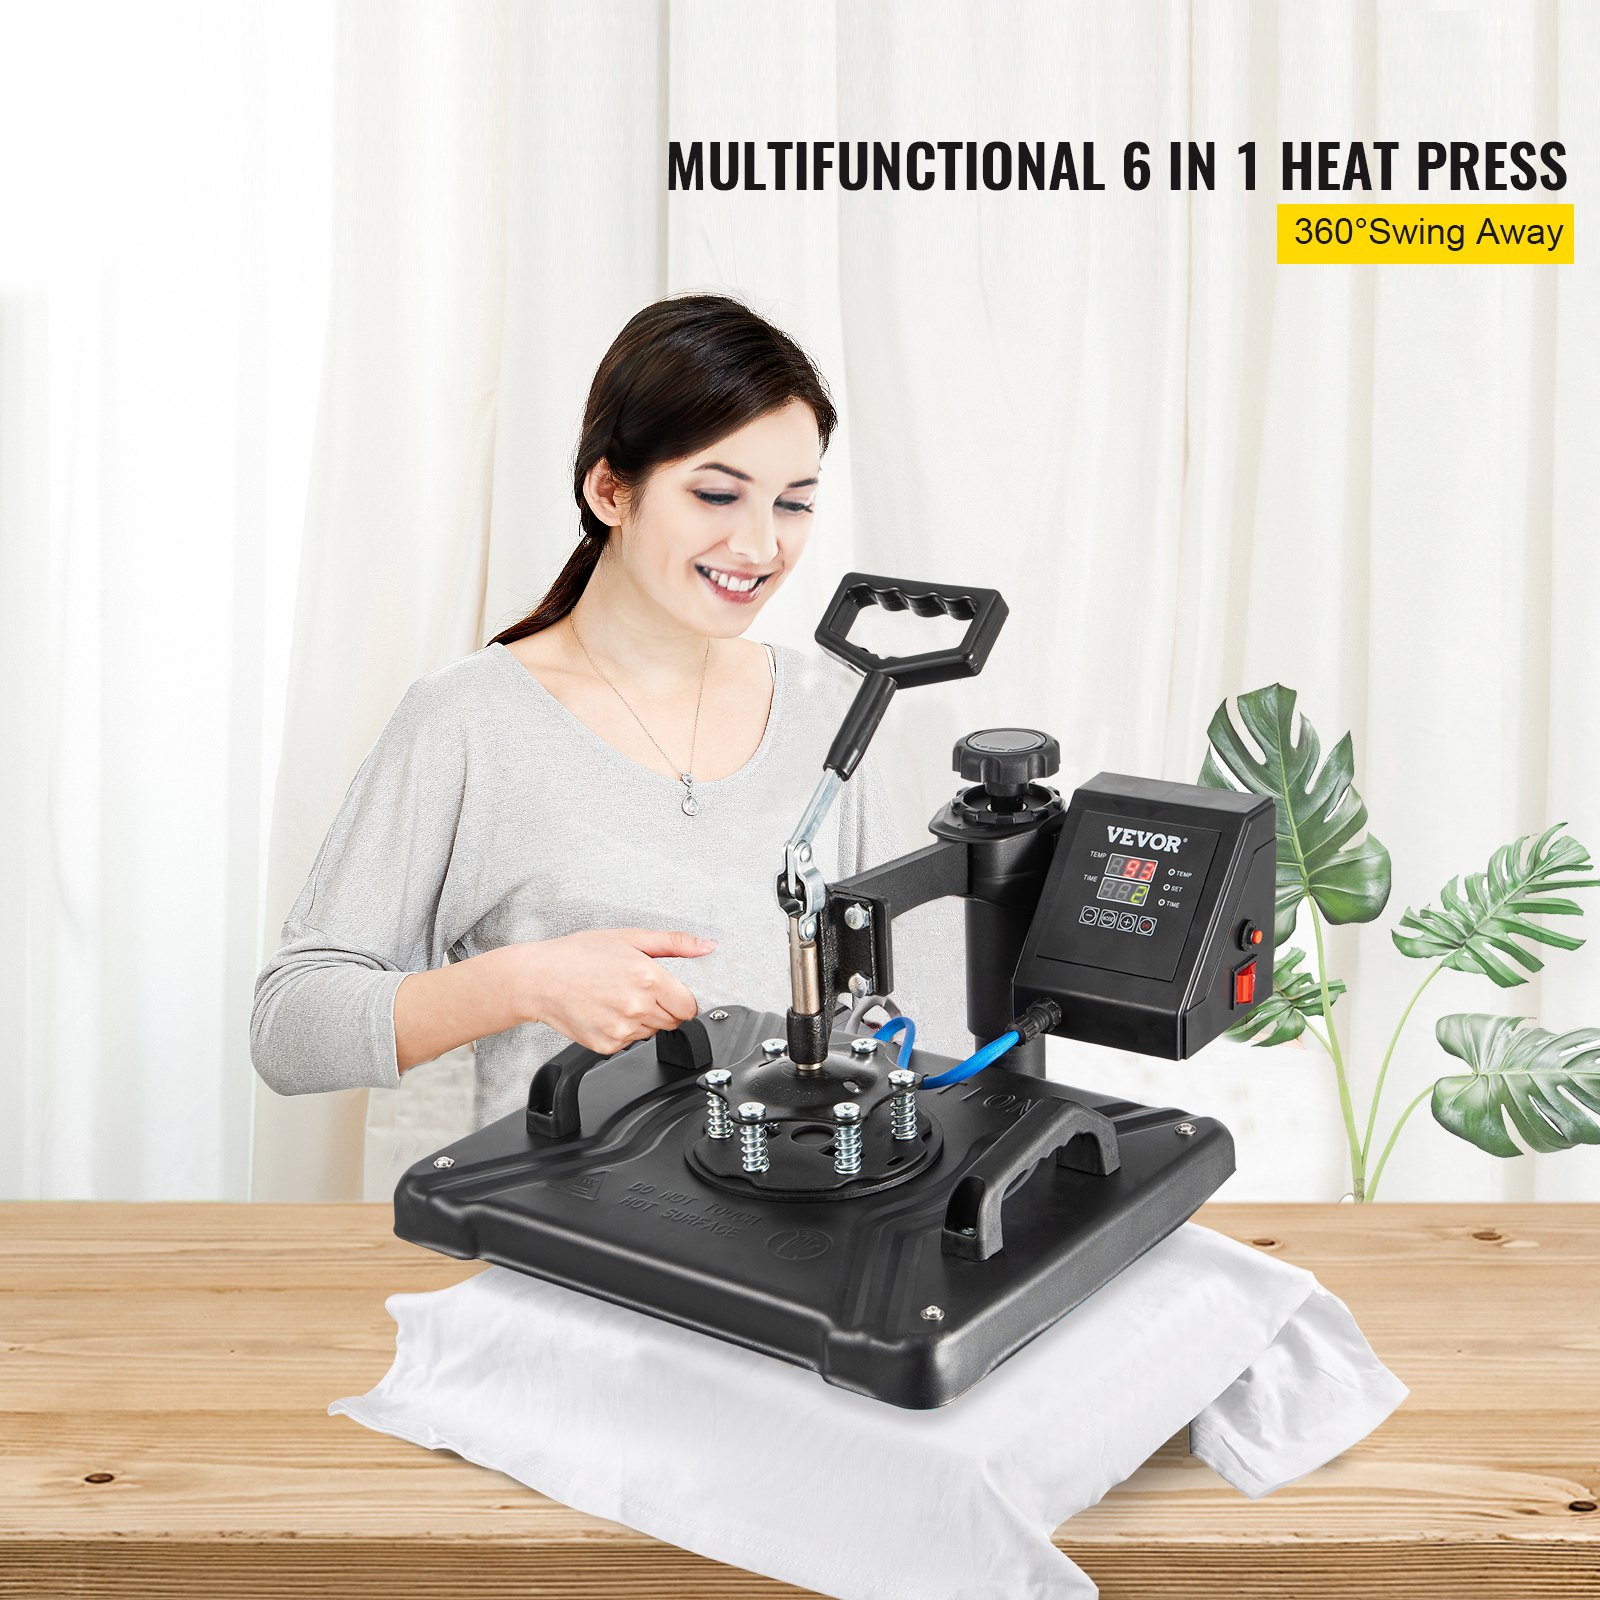
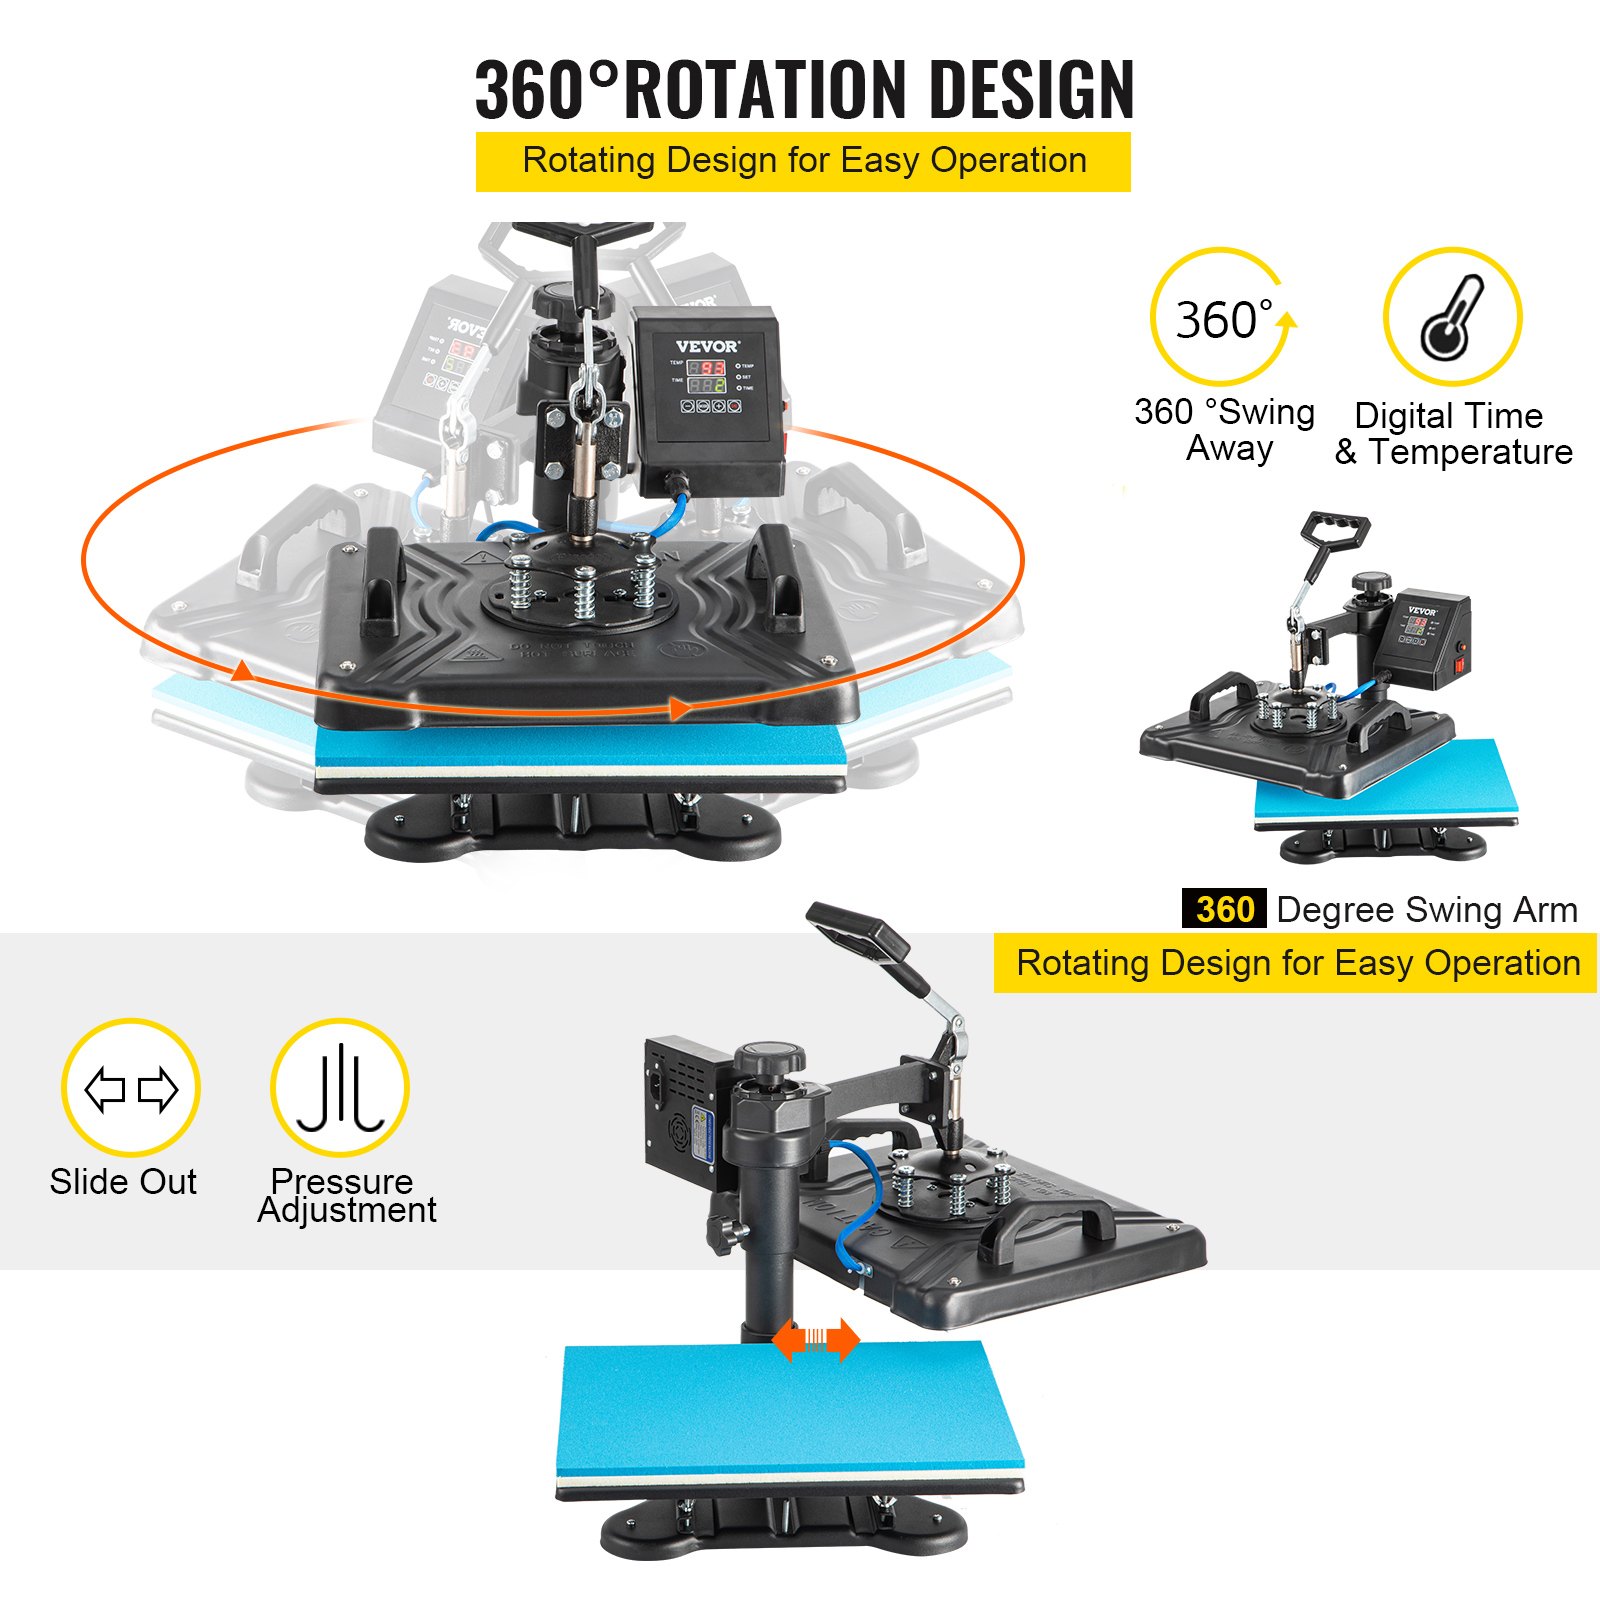
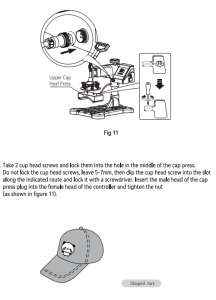
The 360-degree rotation swing-away heat press is easy to navigate with step-by-step instructions and detailed illustrations. It ensures professional-quality prints on T-shirts, hats, mugs, caps, and plates.
Whether you’re a beginner or an experienced user, our manual provides all the information you need to maximize this 1050W powerhouse. Say goodbye to guesswork and hello to flawless results every time.
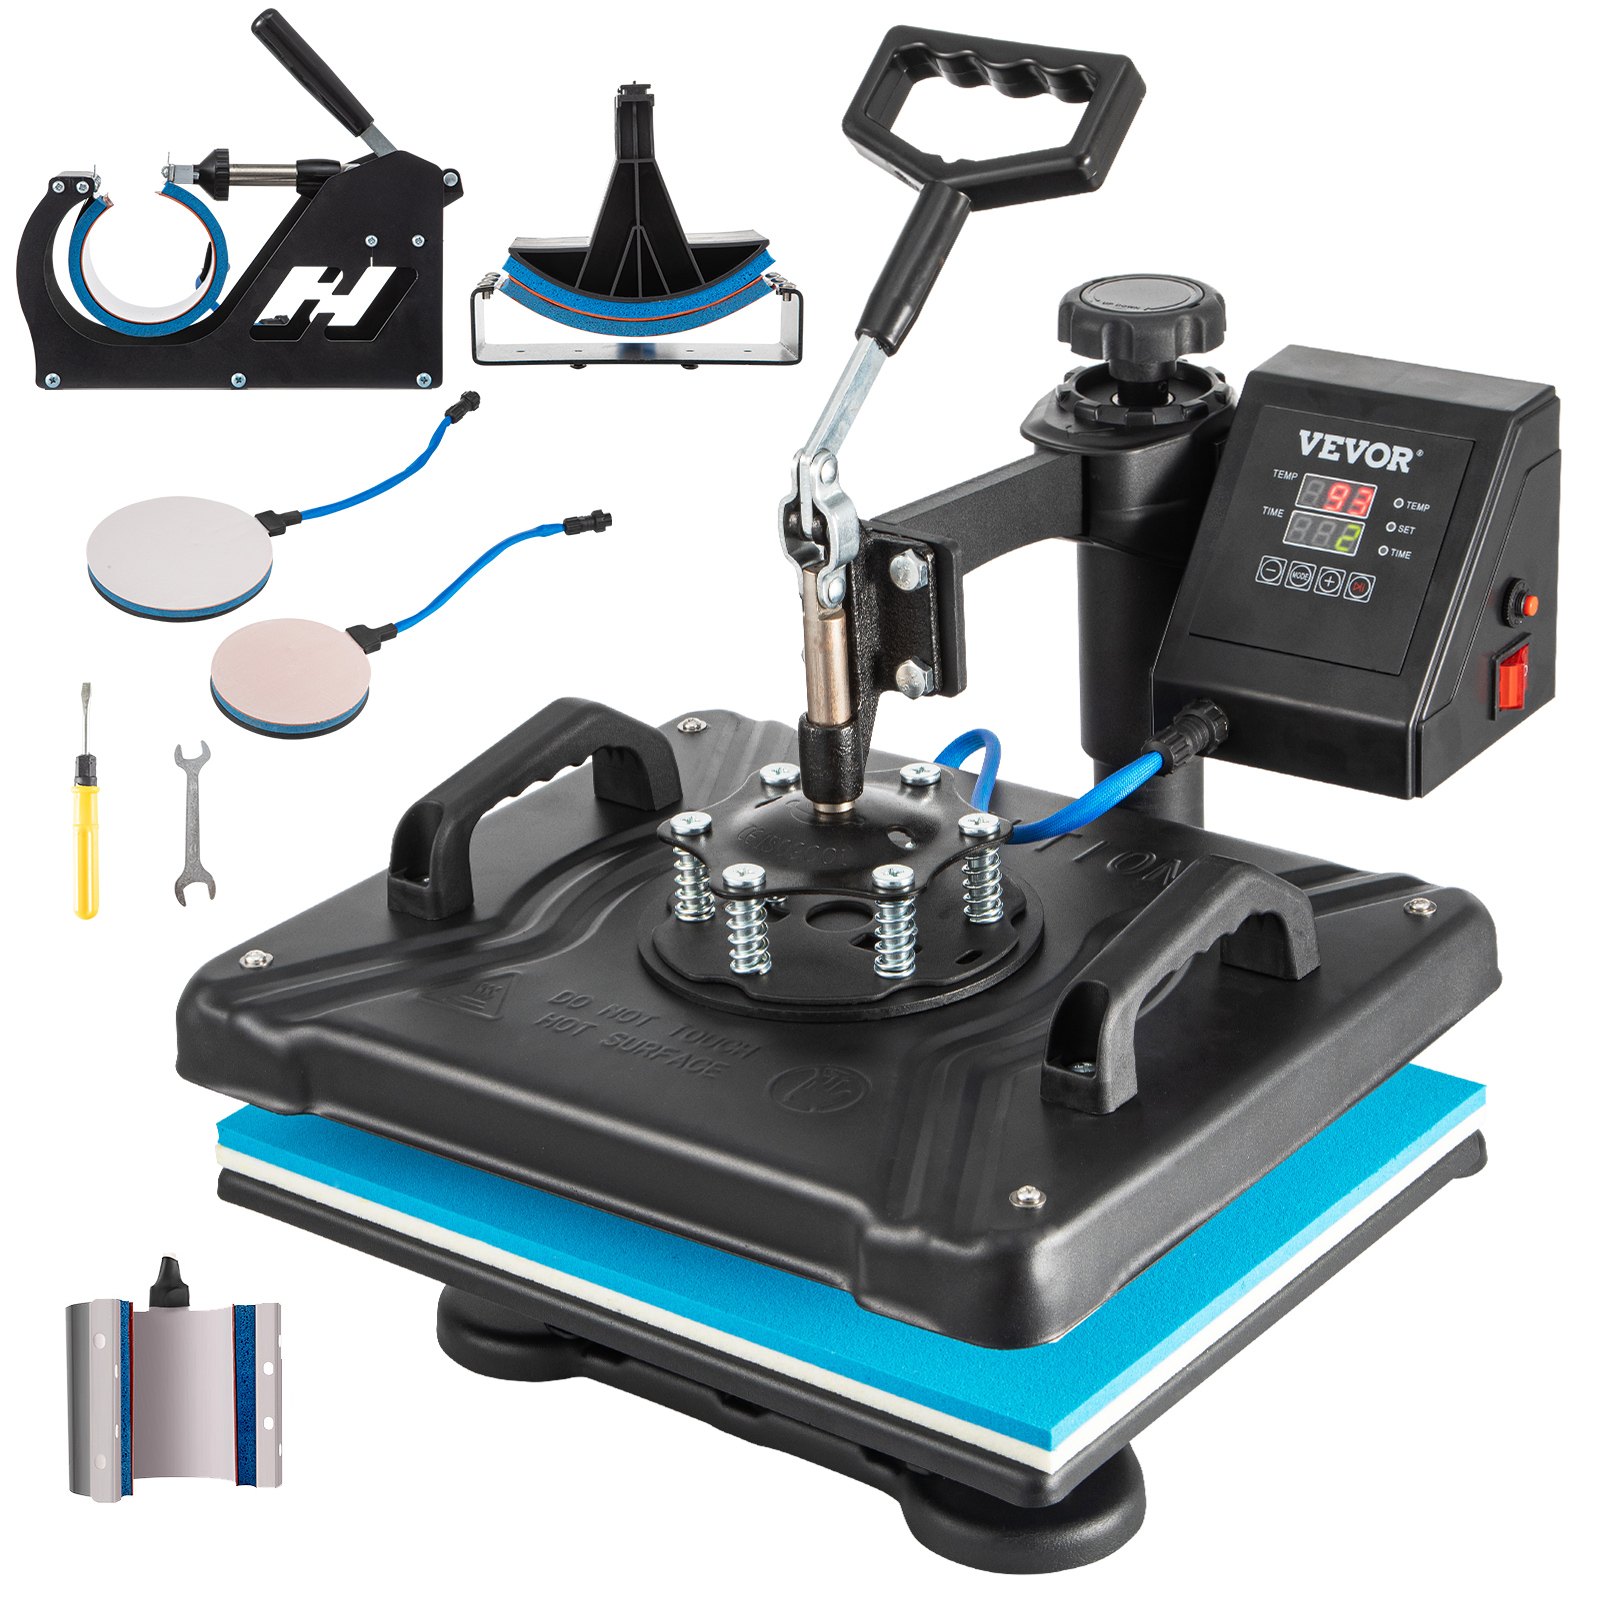
Multifunctional Digital Heat Press Machine
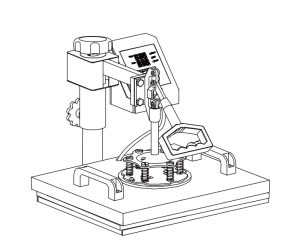
Heat Press Machine Parts Introduction
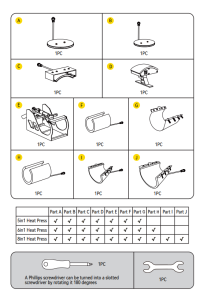
VEVOR Heat Press Machine Parts List
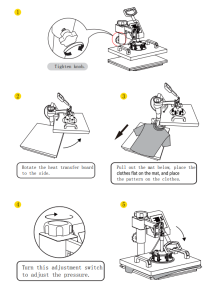
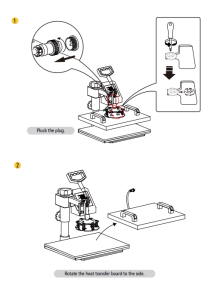
Heat Press Machine Assembly and Use Steps
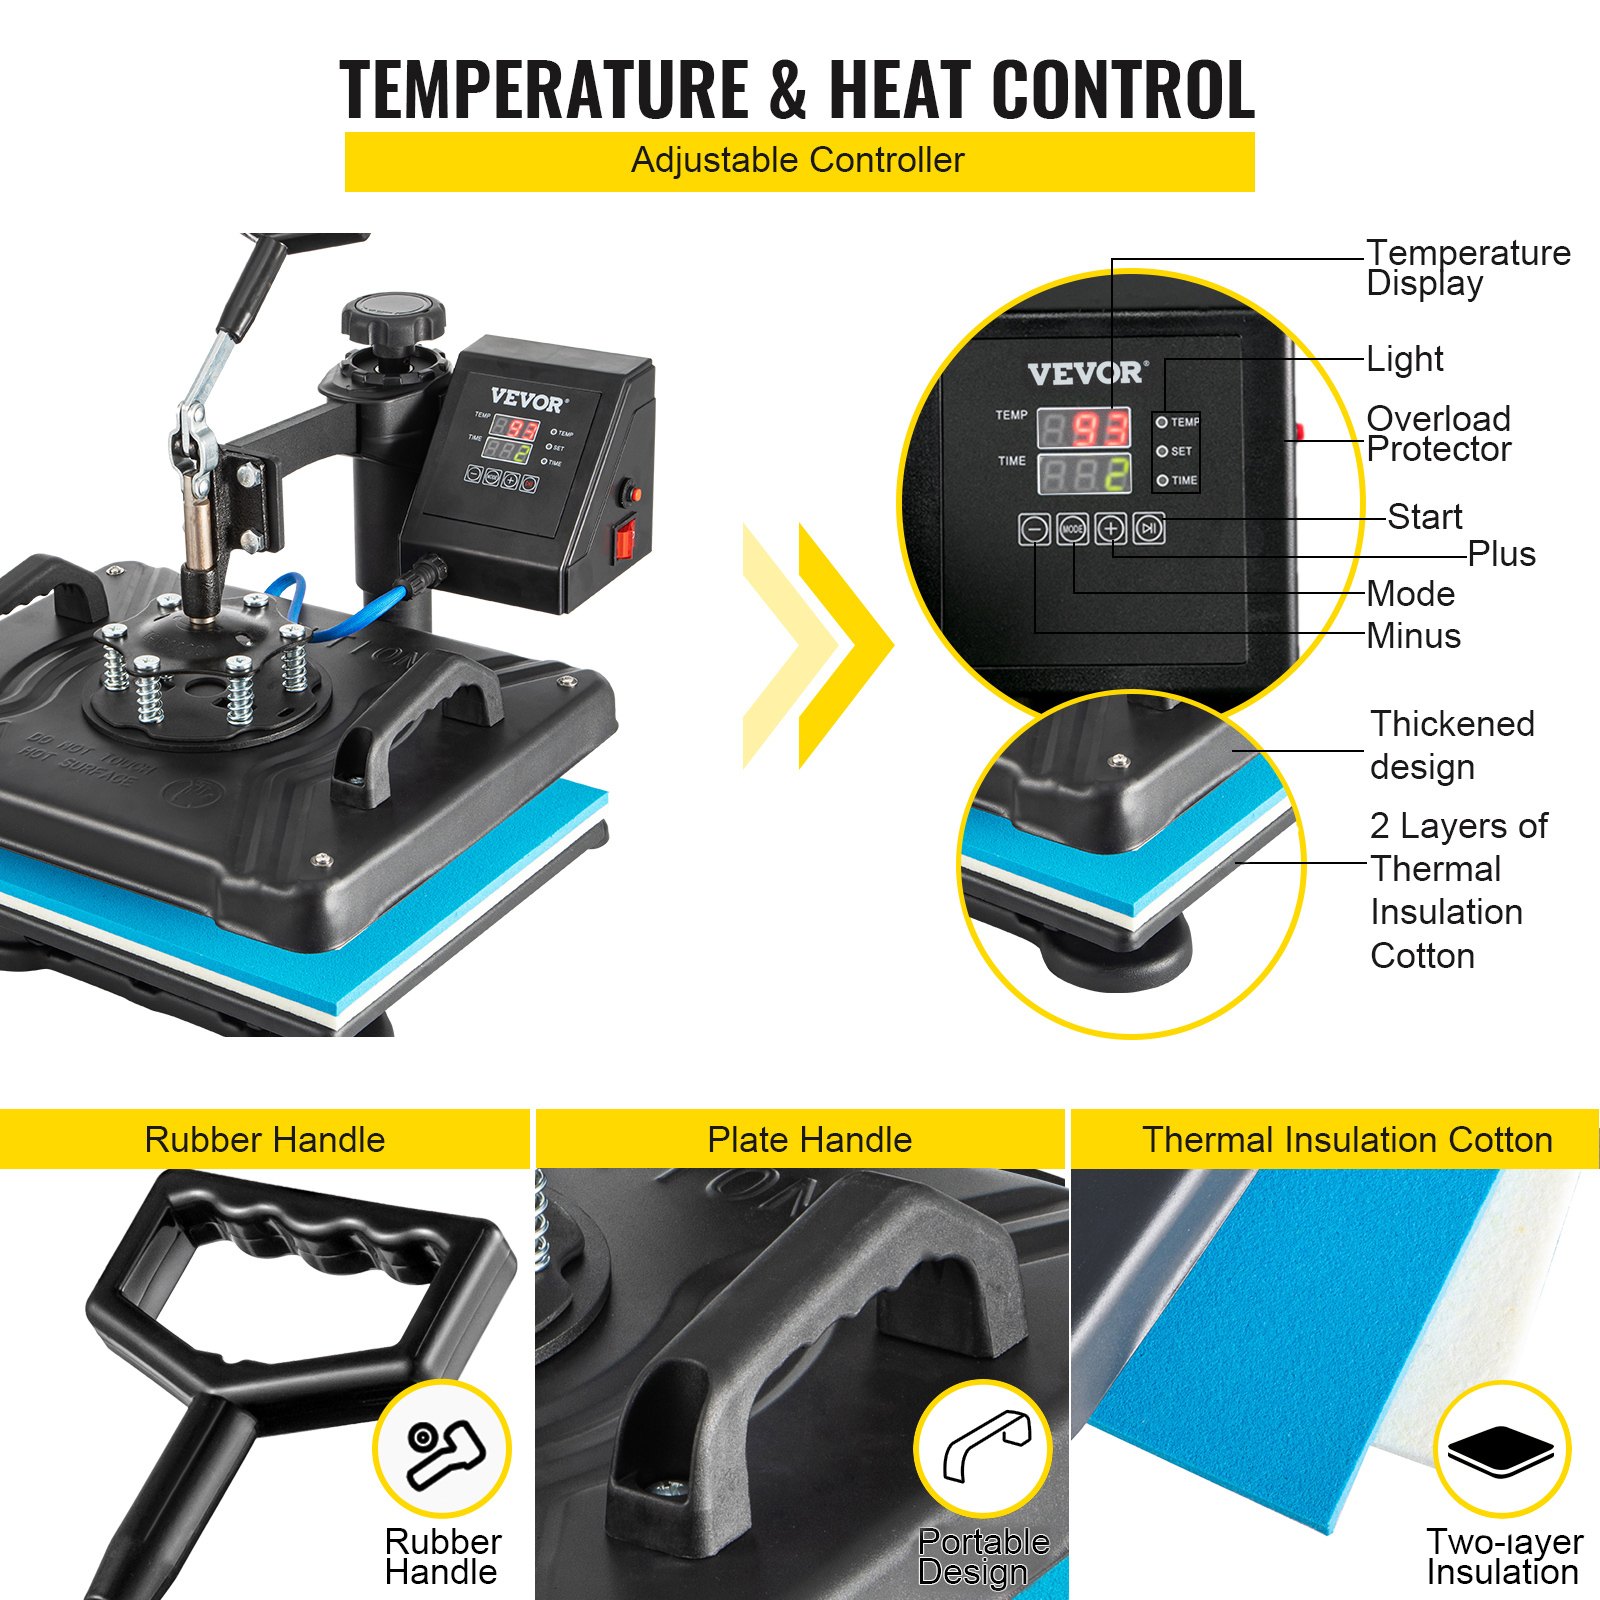
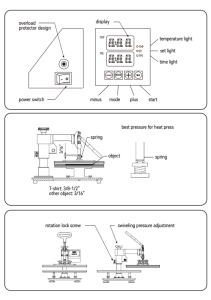
Intelligent Temperature Controller Operation Method
Preparation before Using
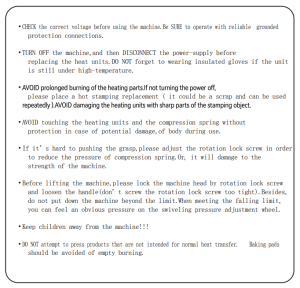
- Check the connection between the electrical cabinet’s power plug and the electrical socket. Be sure to operate with a safe ground wire!!!
- Before you switch the machine on, the heat press element must be securely plugged into the machine. Plug your electrical cord into the machine, and plug the electrical outlet into a wall outlet.
Turn the power on by flipping the on/off Switch on.

Set Temperature Required
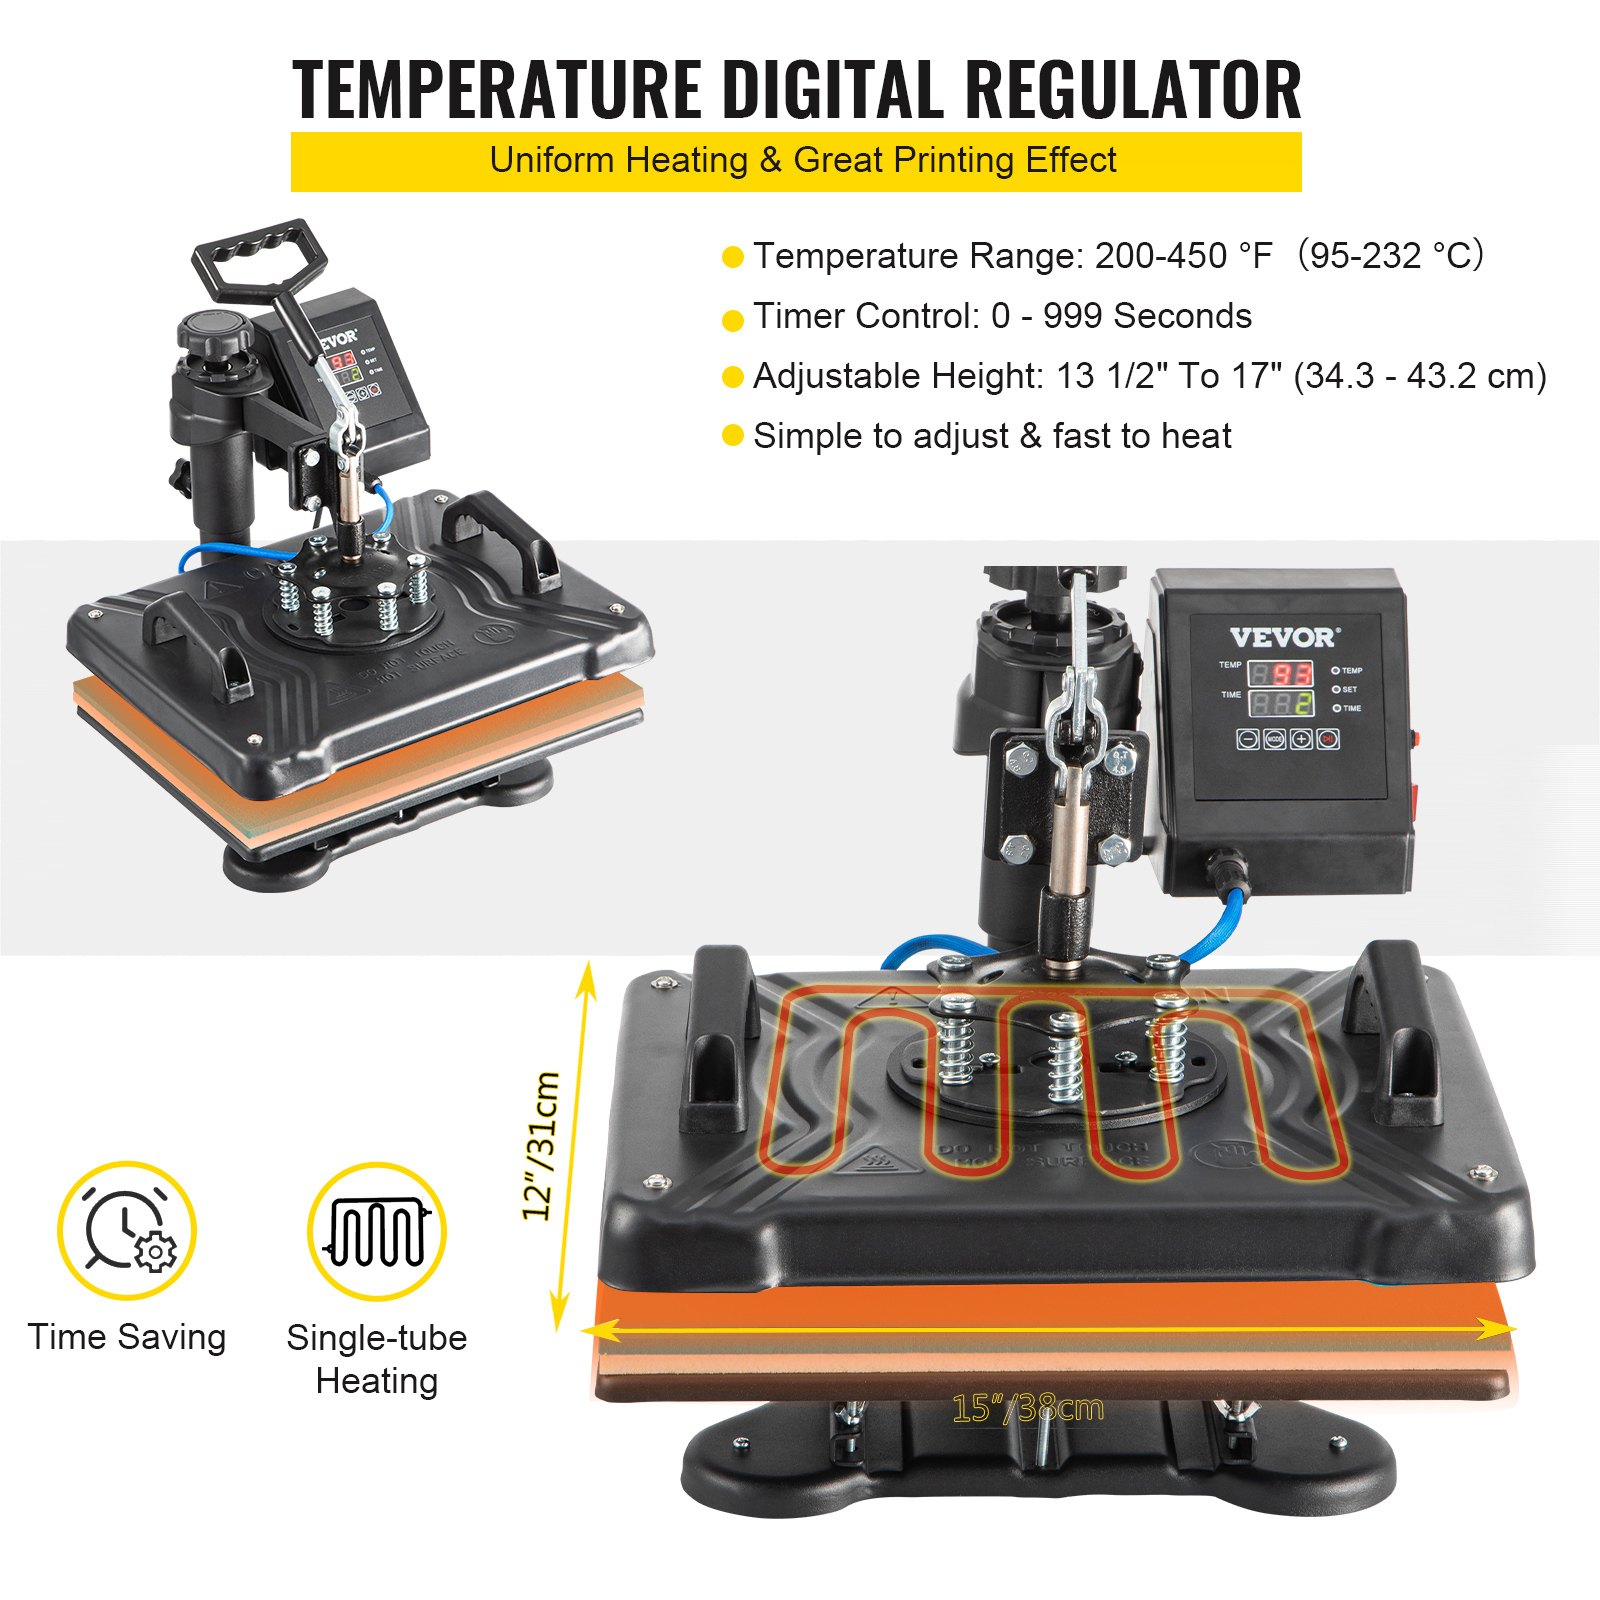
Set the temperature and time according to the table below, and get the corresponding temperature and timing setting. (Temperature is measured in Degrees Fahrenheit.)
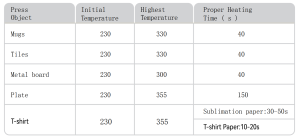
- Initial Temperature Setting (Range: 200-450F)
Press the “MODE” button ONCE, see the “set light” turning red. Then press the “plus/minus key” to set the initial heating temperature.
- Highest Temperature Setting (Range: 93-232C)
Press the “MODE” button for THE SECOND TIME; see the “temperature light” turning red. Then press the “plus or minus key” to set the highest heating temperature.
- Proper Heating Time Setting (Range: 0 – 999 sec)
Press the “MODE” button for THE THIRD TIME; see the “time light” turning red. Then press the “plus or minus key” to set the proper heating time.
- Fahrenheit to Celsius
After turning on the hot stamping machine, press the + and—buttons simultaneously for about five seconds. When PAE is displayed, press the MODE key to display (F-C) and change F to C in the time display gear so that Fahrenheit is converted to Celsius.
Finish the Setting and Stand by to Work
Press the “MODE” button for THE FOURTH TIME; finish the setting. The set light is on, and the temperature will continue to rise. When the maximum temperature is reached, the countdown starts. After the countdown ends, the “BEEF” sound will be emitted, the indicator light will turn off, and the operation will be complete. The machine stands by to work.
Note
- The heat press machine has a self-locking function for temperature setting.
- If the starting temperature is set to 340°F, the machine will automatically limit the maximum temperature setting range from 340 to 430°F.
- Conversely, if the maximum temperature is set to 250°F at first, the machine will automatically limit the starting temperature setting range to 200 to 250°F.
- Initial heating temperature always =<Highest heating temperature.
Replace Baking Tray Mat
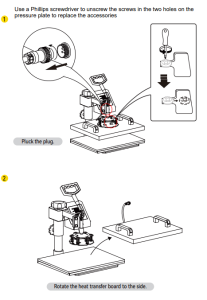
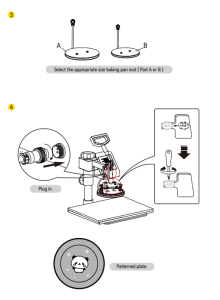
Replacing the Baking Cap Mat
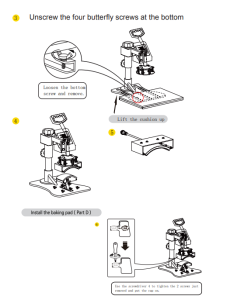
Replace the Baking Coaster
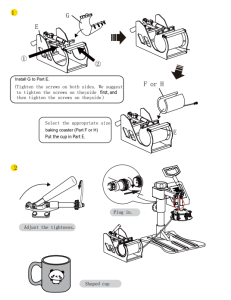
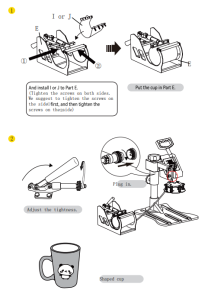
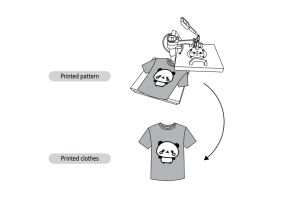
Printing Methods
Adjust pressure to your requirement (Neither too tight nor too loose). Plug in the power cord and turn the power switch ON.
The temperature starts to rise. Set the initial temperature, the Highest Temperature and the press time.
Once the temperature rises to the initial temperature, the buzzer will send a short “BEEF” sound.
Press the button once, then place the object (e.g., a T-shirt) on the press bed. Pull down the handle to press the object.
Wait for the time to end with a long buzzer sound. (Note: It will take about 5 seconds for the long buzzer to notify you it has finished, and after that, it will take 5 seconds for the short buzzer to notify you whether you still want to go on with the next work. If not, the temperature will fall to the initial temperature.)
Finish the work and take out the object.
Turn off the power switch.
Heat Press Machine Trouble Troubleshooting
- Pale color: The temperature is too low, the pressure is incorrect, or the temperature is not pressed long enough.
- Blurring pattern: Too much transfer time causes proliferation.
- Part Blurring of Pattern: Heat was incorrectly distributed through the heat plate. Allow more time between press operations. Pressure distribution can also be the cause, and it can be set on the four plate surface adjusters. Please note that they have been factory set, and there should be no need to adjust them.
- Dull Surface of Pattern: The pressure is too large or the temperature is too high.
- Scarred Pattern: Transfer time is too long.
- Different Pattern Color: The pressure is incorrect, or the transfer paper is poor quality.
- Adhesive Paper: The pressure is too high or poor printing ink.
Caution
Recommended For Your Project
VEVOR Heat Press Machine, 12X15 Inch 6 in 1 Combo Manual
Reviews
There are no reviews yet.