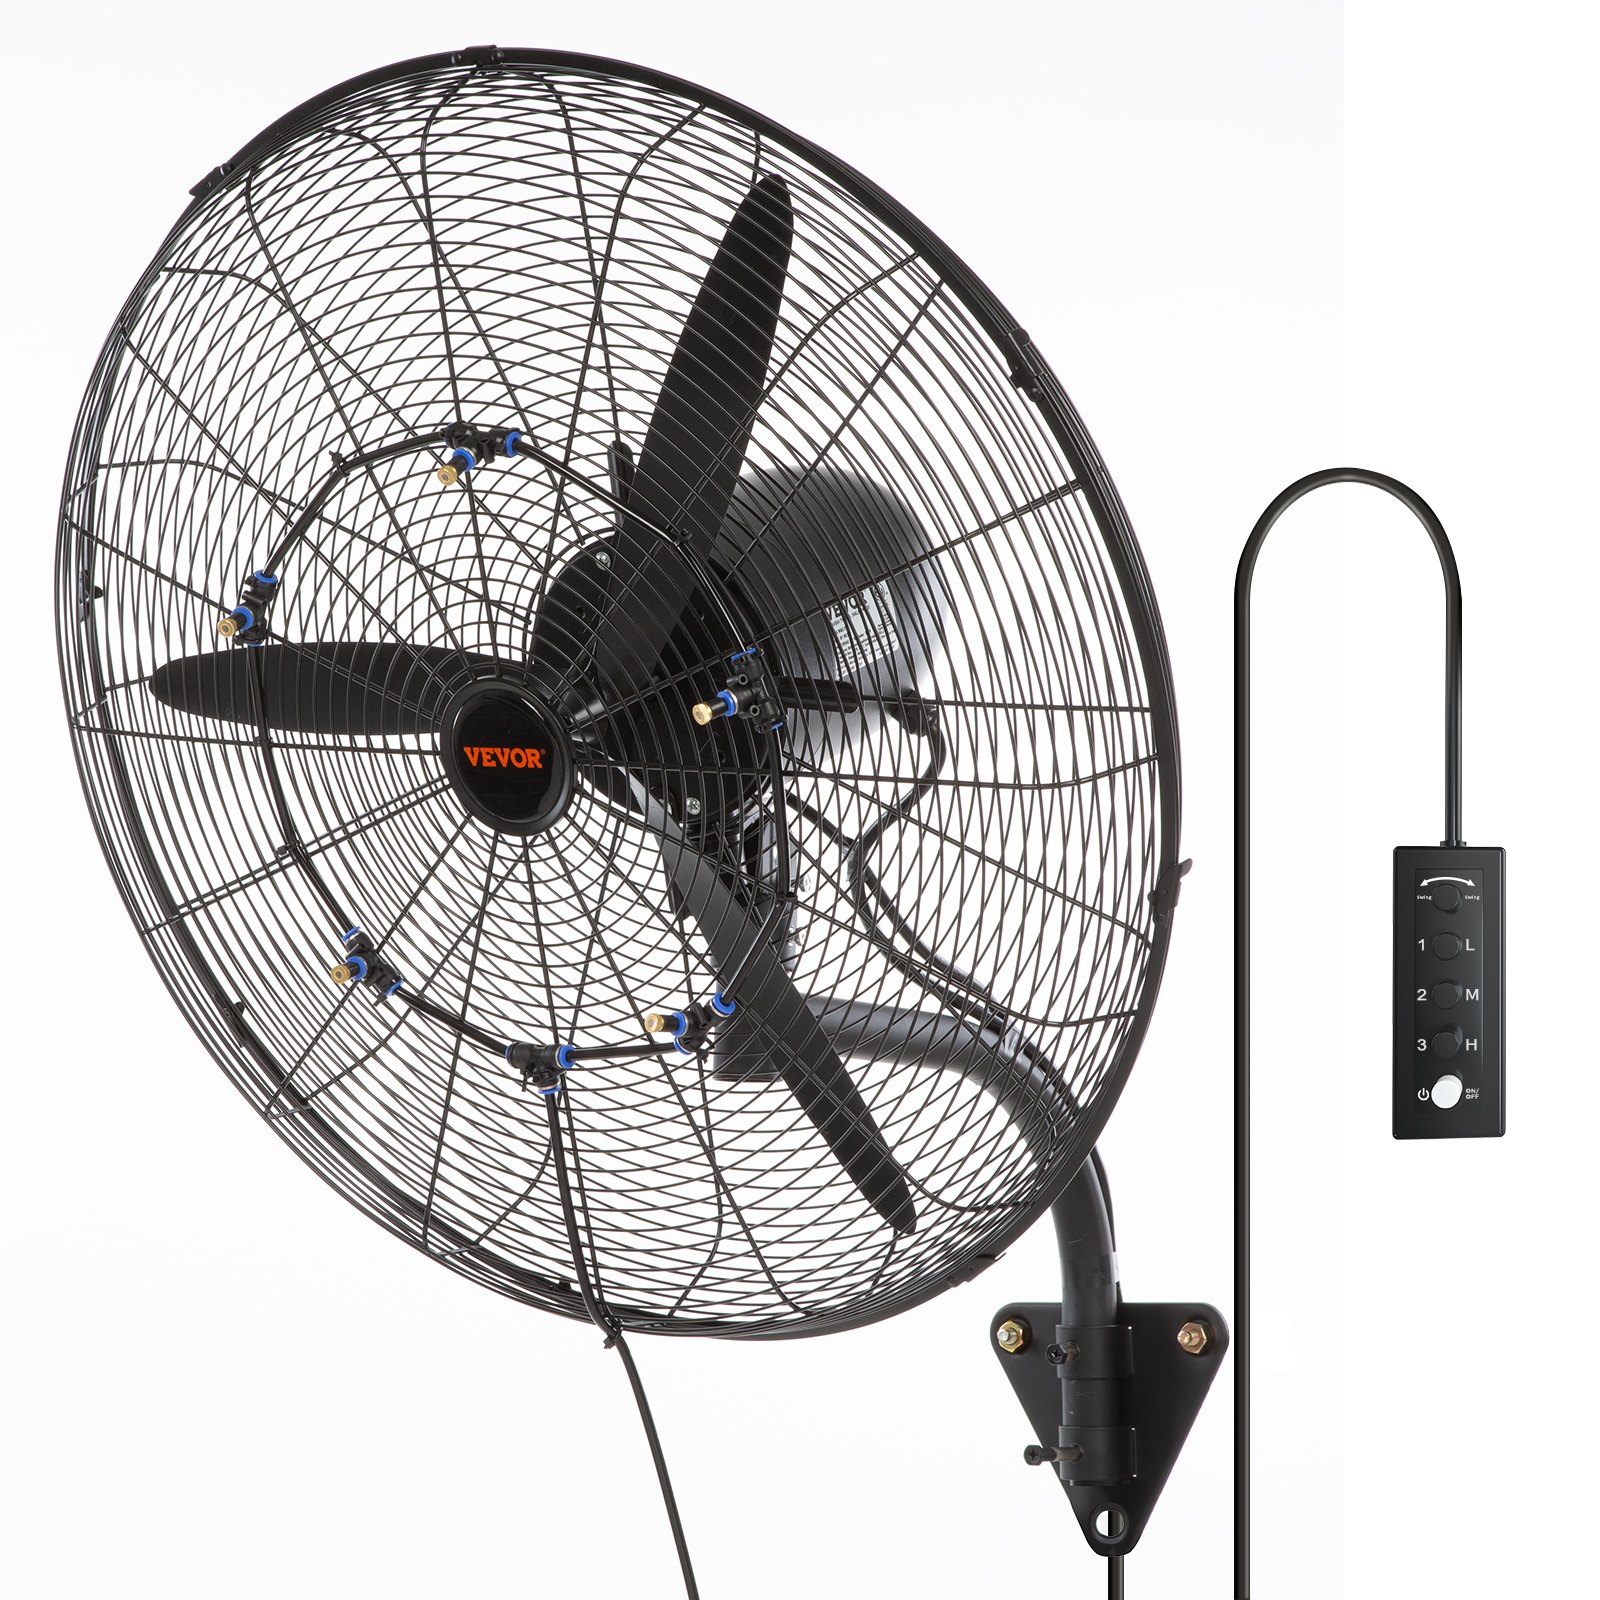

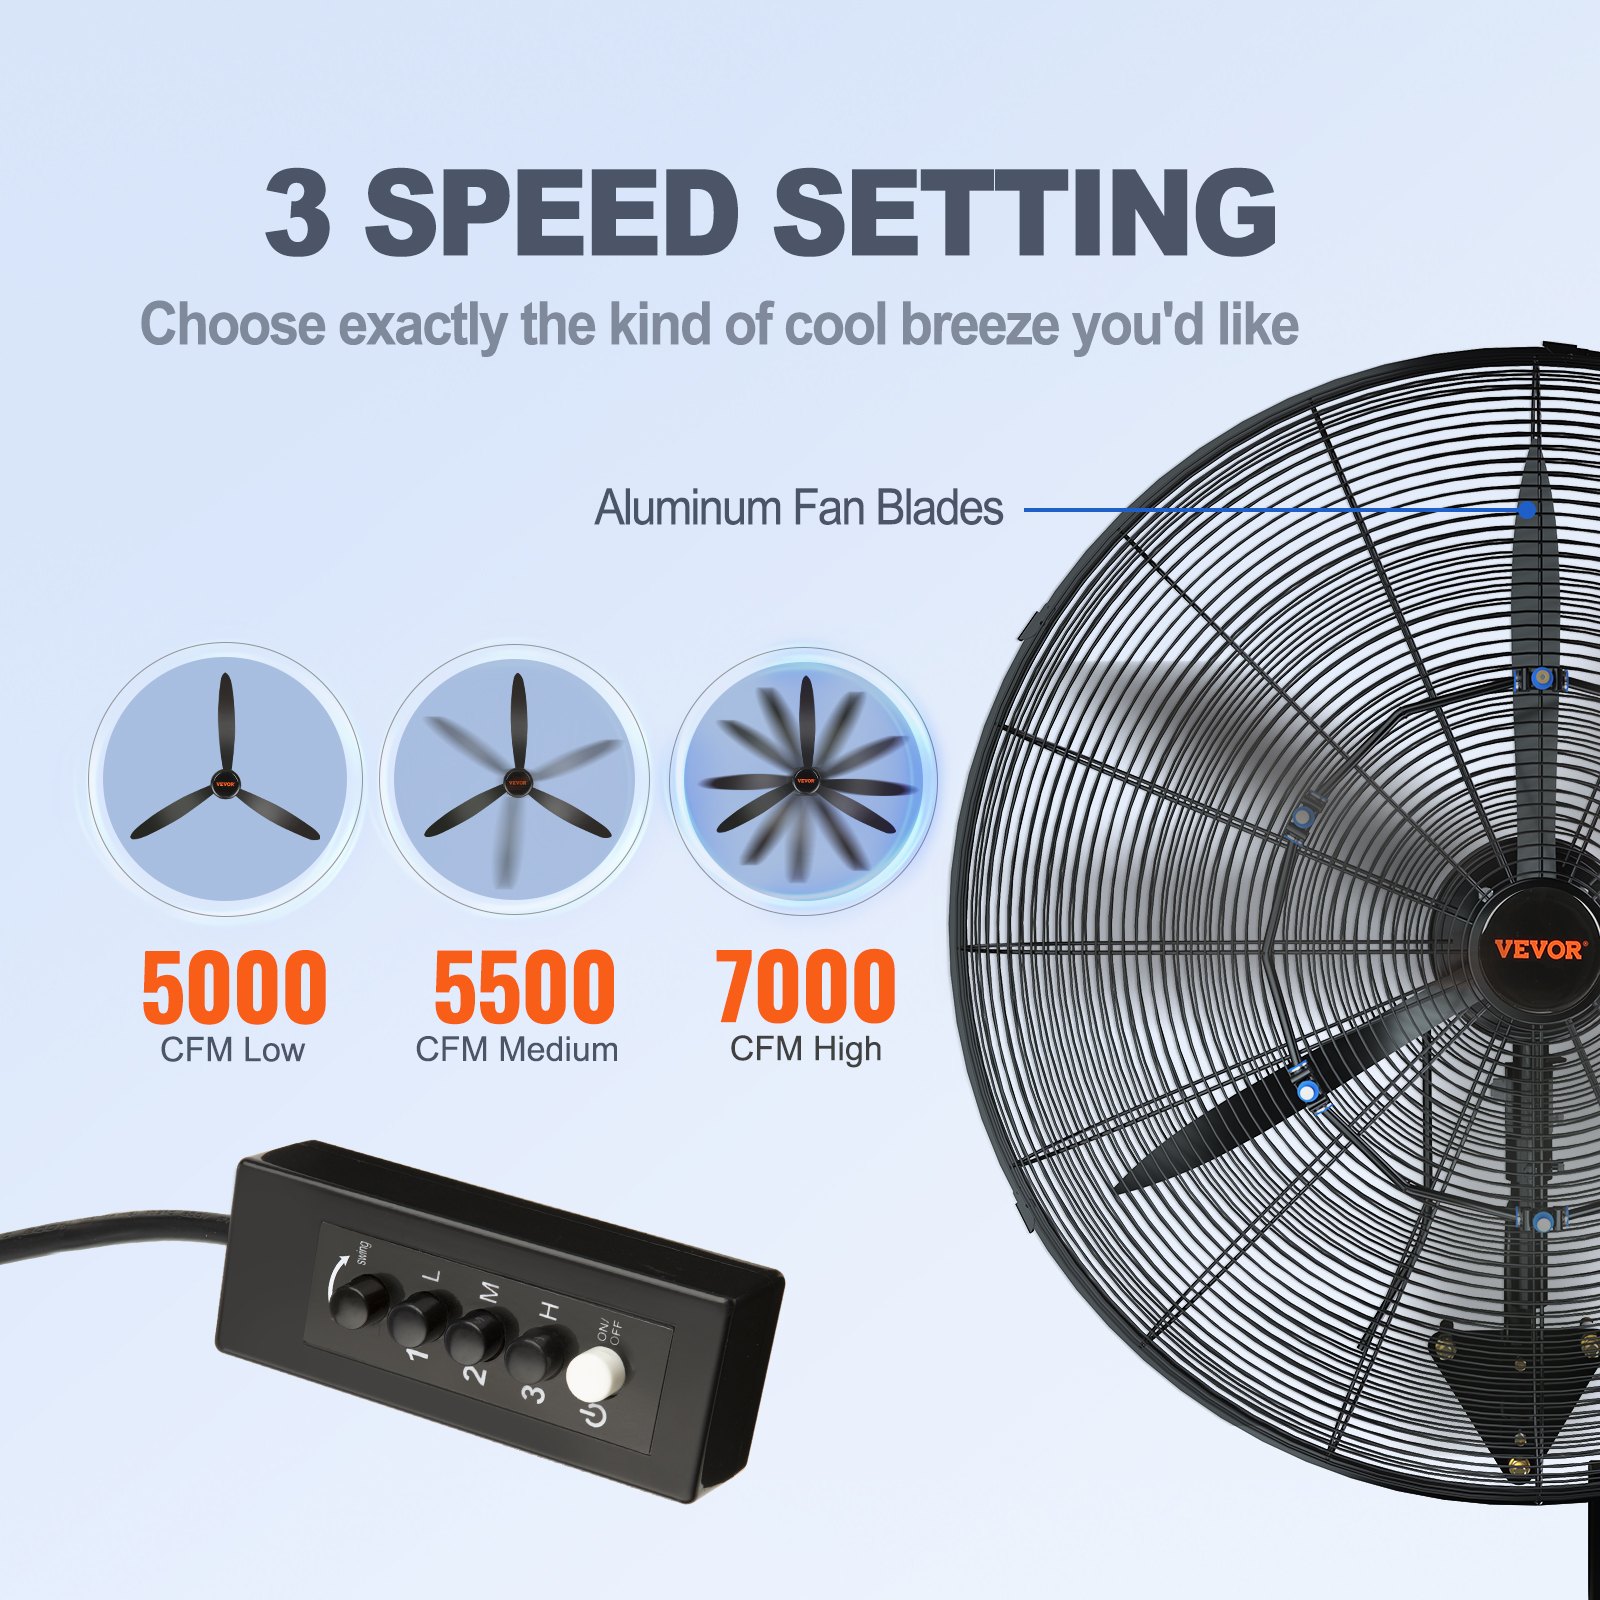
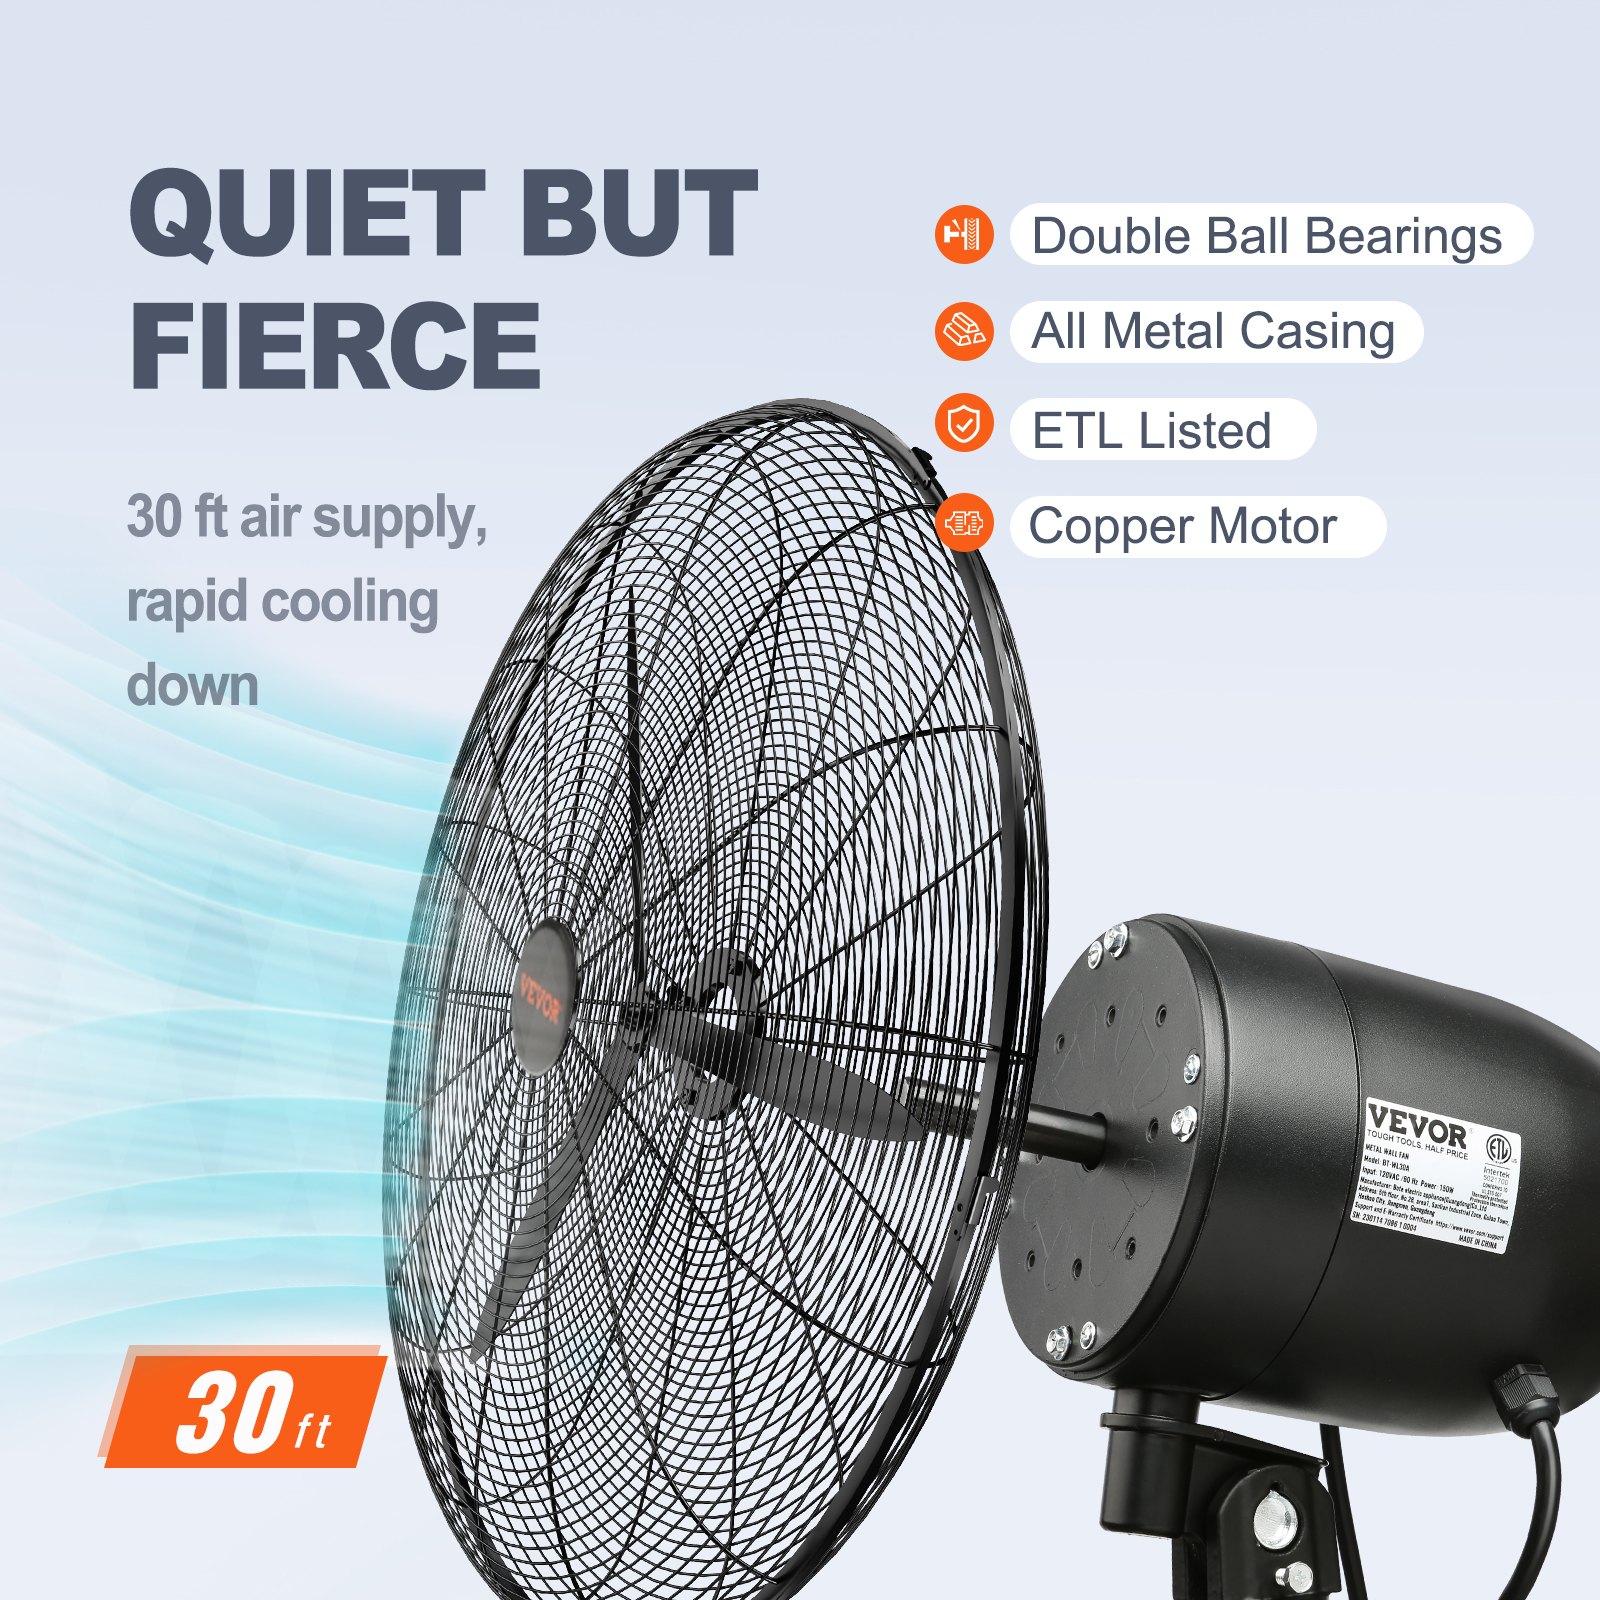
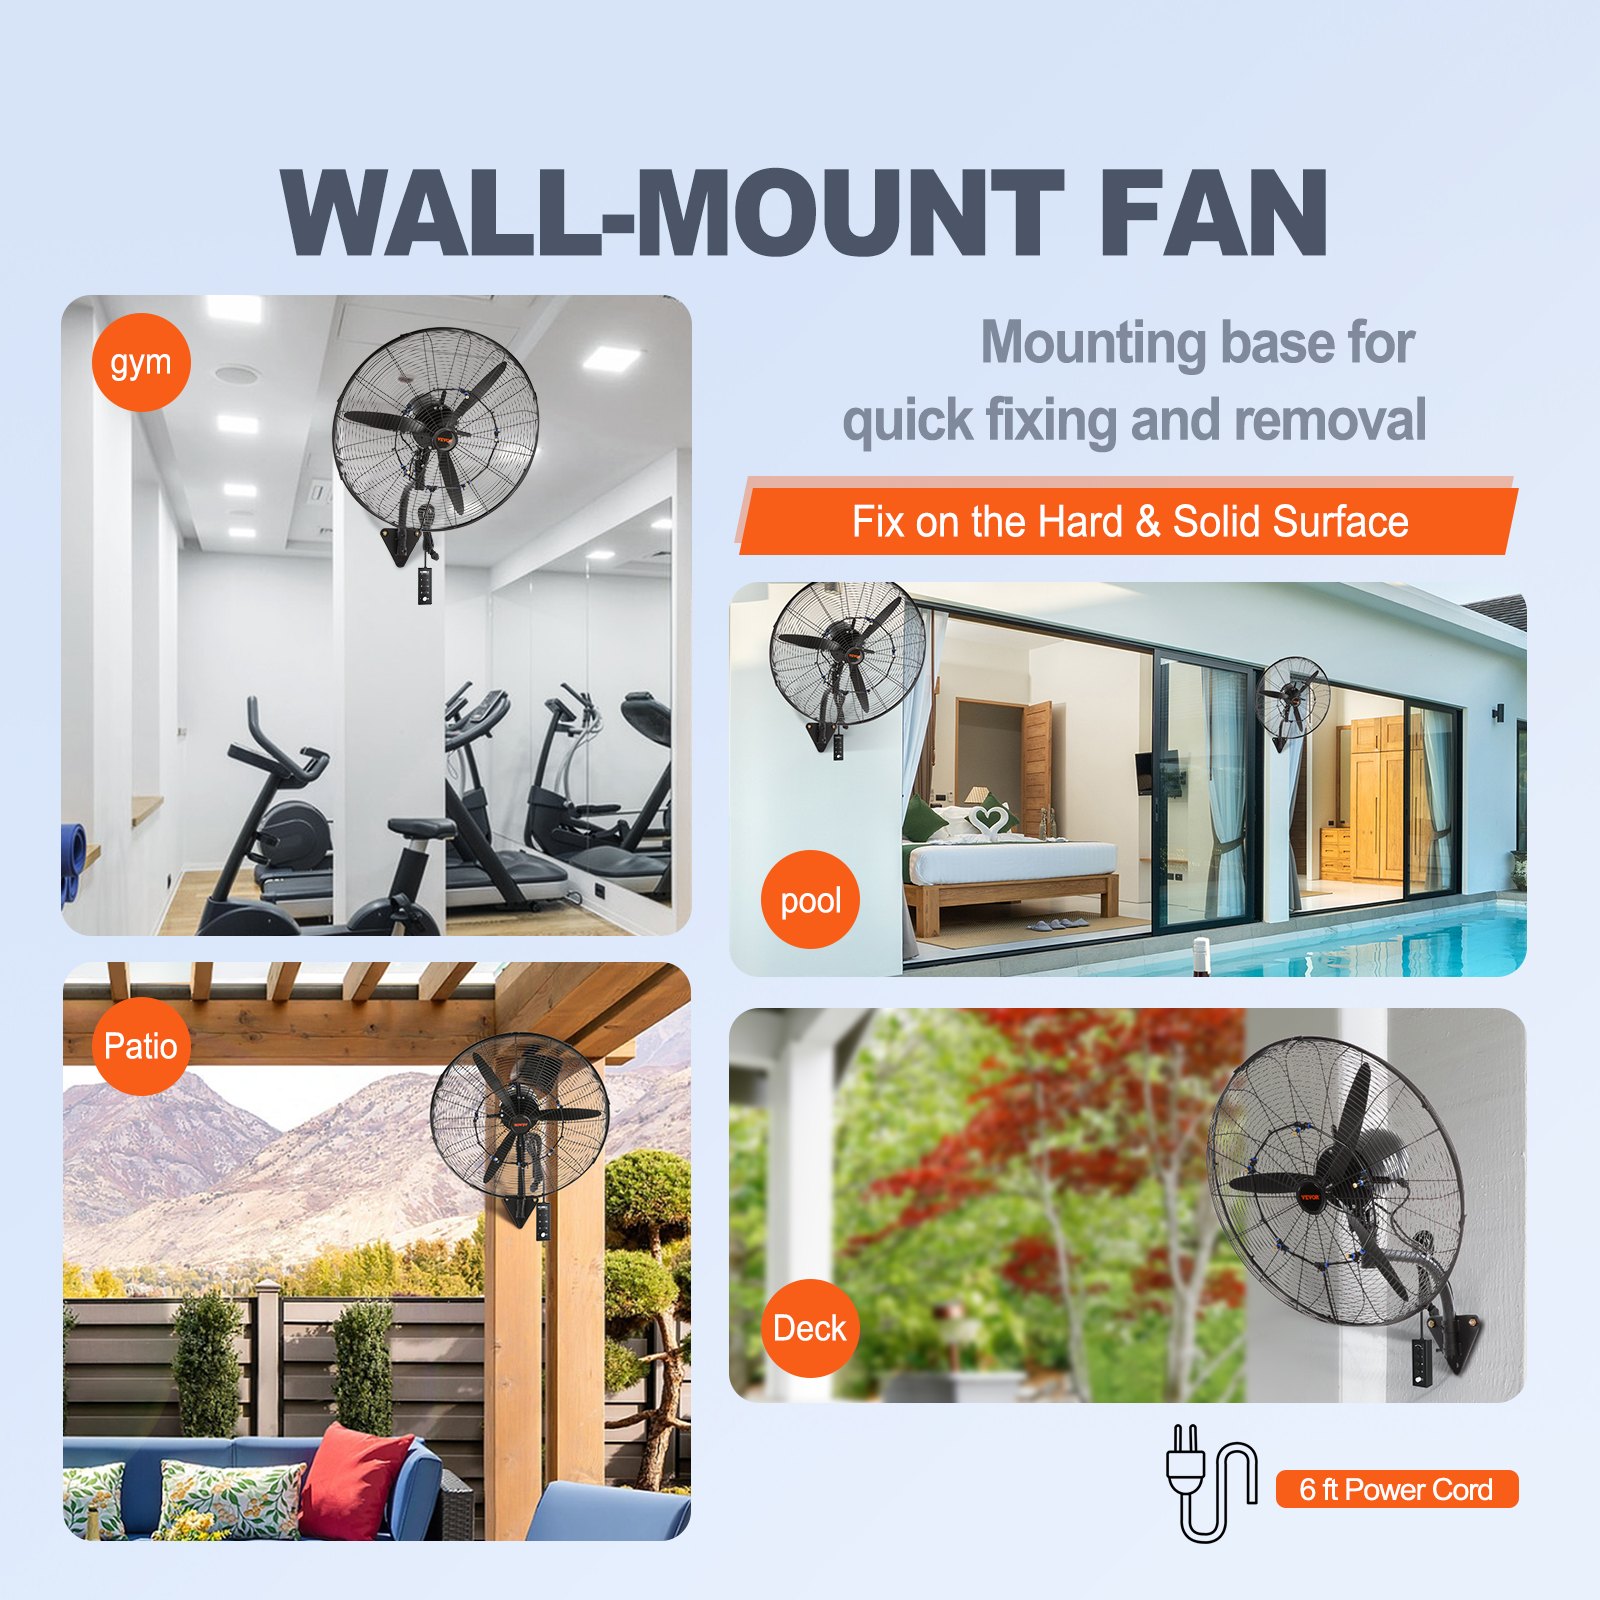
Unlock the full potential of your VEVOR Wall-Mount Misting Fan with our comprehensive product manual download. This 24-inch, 3-speed high-velocity fan, capable of reaching a maximum of 7000 CFM, is designed to deliver superior airflow in commercial and residential settings. Whether you want to enhance air circulation in a warehouse, greenhouse, or workshop, our waterproof oscillating industrial wall fan ensures optimal performance and durability.
Our detailed manual provides step-by-step instructions for setup, operation, and maintenance, making it easy for users of all levels to get the most out of their fan. Troubleshooting tips and optimization guidelines are also included, ensuring you can address any issues quickly and efficiently. With an ETL listing, you can be confident in the safety and reliability of your VEVOR Wall-Mount Misting Fan.
Download the manual today and experience the ease of use, comprehensive guidance, and invaluable troubleshooting advice that will help you maximize your fan’s performance and longevity. This manual is your key to a cooler, more comfortable environment, perfect for both commercial and residential applications.
VEVOR Wall-Mounting Misting Fan
MODEL: BT-WL24A/BT-WL30A
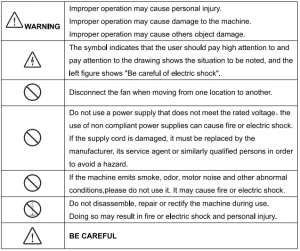
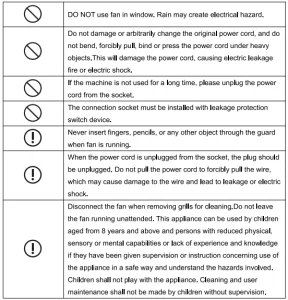
SAFETY PRECAUTIONS
WARNING
Please read all safety warnings, instructions, and specifications provided with this electrical appliance. Failure to follow all instructions listed below may result in electric shock, fire, and/or serious injury.
Save all warnings and instructions for future reference.
PRODUCT DESCRIPTION
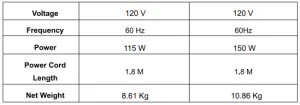
Technical Parameters

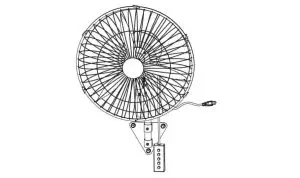
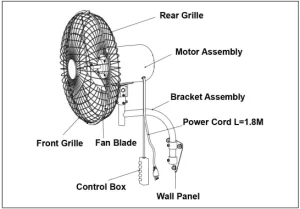
PRODUCT STRUCTURE DIAGRAM
INSTALLATION
TIPS/ PREPARE TOOLS IN ADVANCE
Cross screwdriver, small wrench, Hammer.
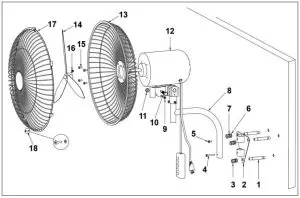
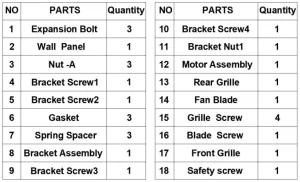
PARTS LIST
INSTALLATION METHOD
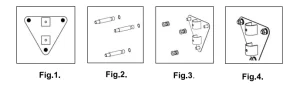
Step 1: Metal Wall Panel Installation
-
- Use wall panels (3) to set the required fans’ position. Mark three mounting holes, drill three holes into the marked locations. Make sure your mounting area is structurally sound and free from obstruction. See the (Fig. 1.)
- Insert the included three Expansion Bolts (1) into the drilled mounting holes. You may need to use a hammer to secure them through the holes. See the (Fig.2.)
- Install the wall panel (2) on the wall and lock the nut (3). You may need to use a small wrench. See the (Fig. 3) (Fig. 4)
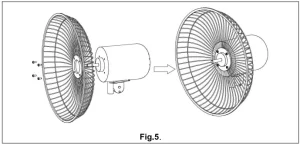
Step 2: Fan Head Installation
- Remove the grille screws from the motor head. Then fix the rear grille (13) on the motor head with the rear grille screw (15) as shown in the diagram (Fig.5)
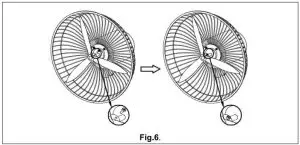
- Install the fan blade (14) on the motor shaft, and then lock the blade screw (16). See the (Fig.6)
Align the screw holes at the bottom of the front and rear grilles, then fasten the buttons on the top of the front grille cover to the back grille cover, fasten all the grille cover buttons (2), and finally lock the safety screws (18). See the (Fig.7.)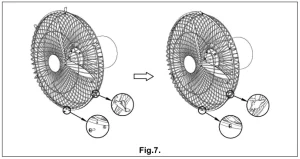
Step 3: Fan Body Installation
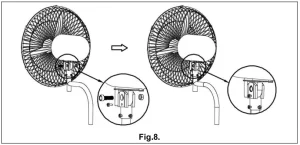
- Install the fan head on the bracket, then lock the bracket screws (10) and bracket nuts 1(11), and finally lock the bracket screws 3(9). See the (Fig.8)
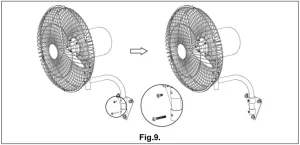
- Install the fan body on the wall panel (2), and then lock the bracket screws 1(4) and the bracket screw 2(5). Note that the screw holes on the bracket should correspond to the screw holes on the wall hanging panel. See the (Fig.9.)
Step 4: Installation of Spray Pipe (Optional)
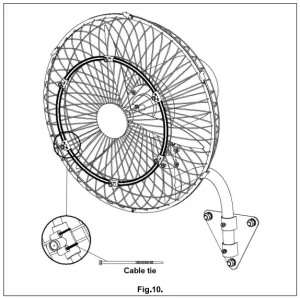
- Install the spray pipe on the front grille cover and fasten it with a cable tie. See the (Fig.10)
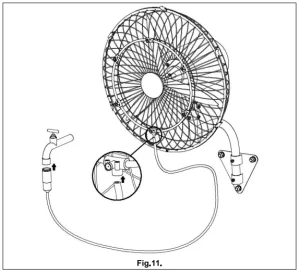
- Connect the water pipe to the faucet and the spray nozzle, respectively, and tighten the faucet. See the (Fig.11.) Done!
HOW TO USE THE MISTING FAN
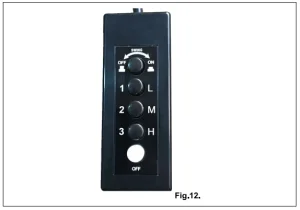
Speed Control
Press the white key to start the fan, and select gear 1, 2, and 3 wind speeds. Press the white key again to stop the fan. (Fig.12.)
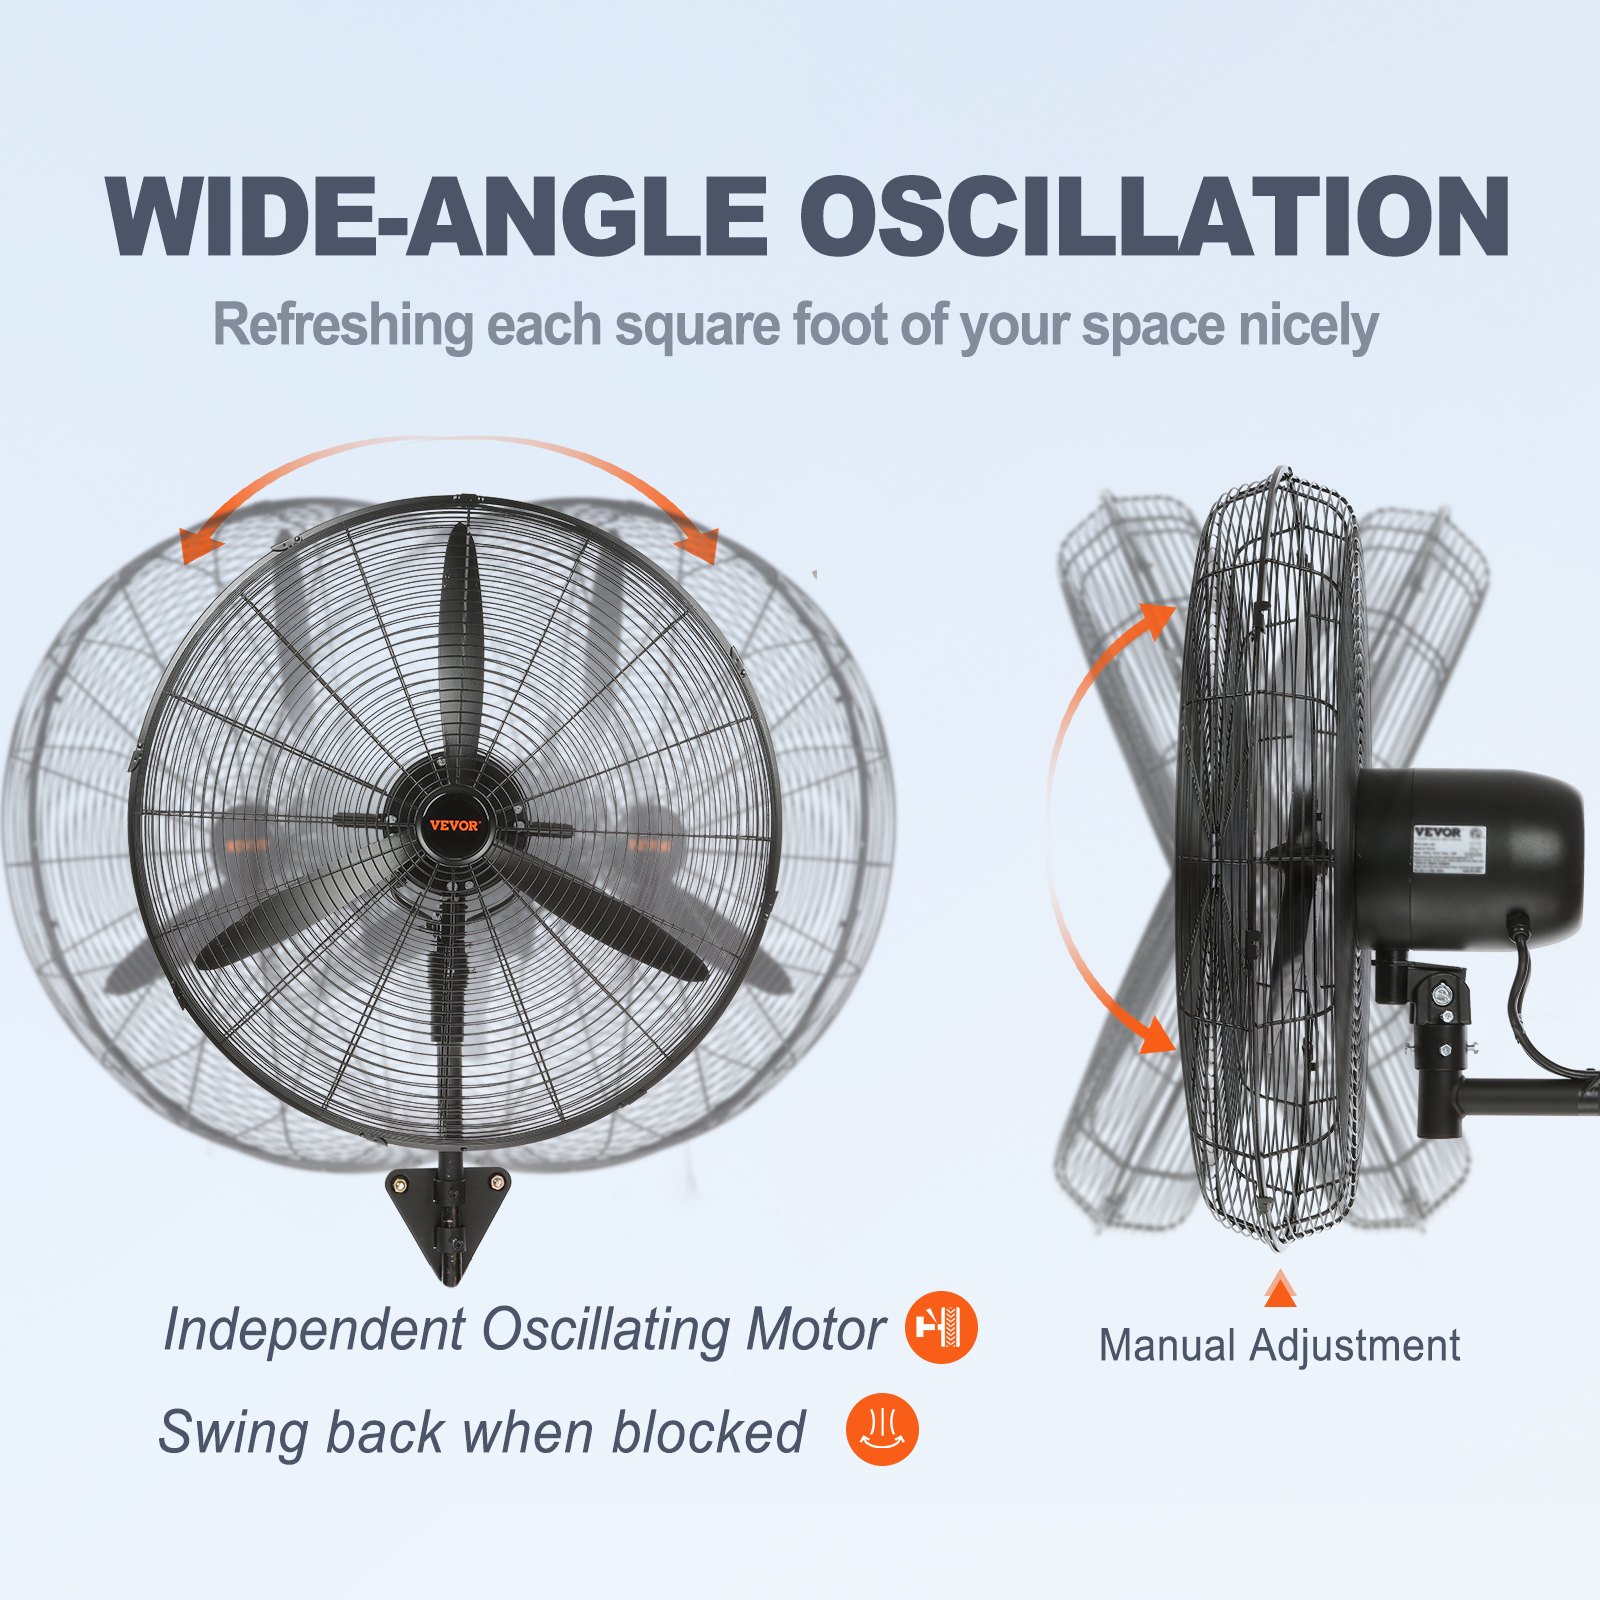
Oscillation
After the fan starts, press the swing key, and the fan shakes its head. Press the swing key again, and the fan stops shaking its head. See the (Fig.12.)
CLEANING
- Be sure to unplug from the electrical supply source before cleaning.
- Plastic parts should be cleaned with mild soap and damp cloth or sponge. Thoroughly remove soap film with clean water.
- Be sure not to get water or other liquid into the motor.
TROUBLESHOOTING
Q: Excessive Noise
- It is normal for noise to be present during operation. If it is too loud, please set the fan to a lower speed.
- Check if the blade is installed correctly.
Q: The Fan does not operate
- Make sure the fan is connected to a powered electrical outlet.
- Clean the blade regularly.
Recommended For Your Project
VEVOR Wall-Mount Misting Fan, 24 Inch, 3-speed High Velocity Max. 7000, CFM Manual


Reviews
There are no reviews yet.