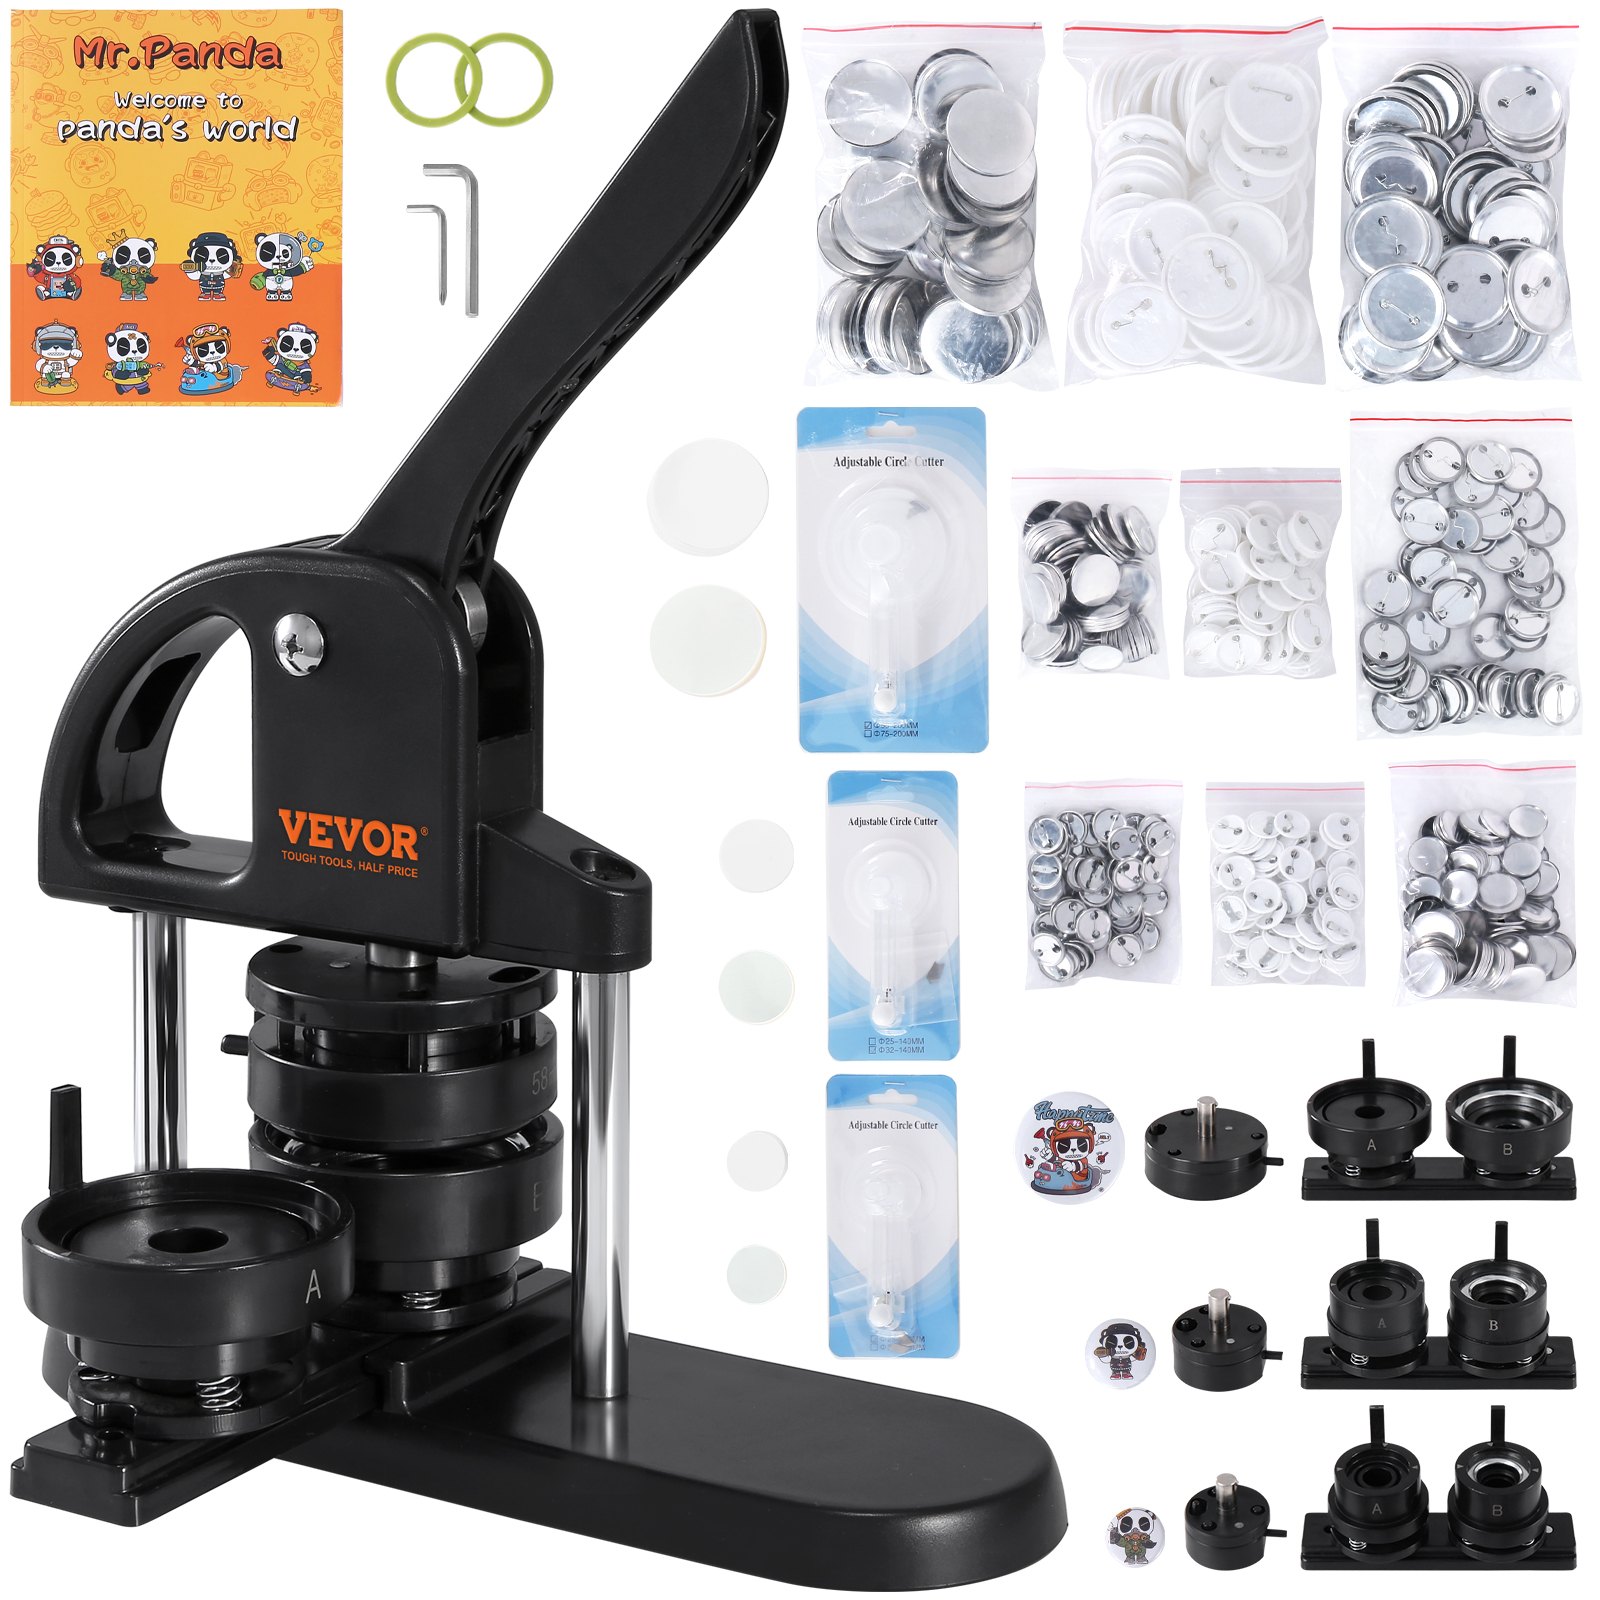

Unlock the full potential of your VEVOR Button Maker with our comprehensive product manual download. Designed to cover every aspect of your 1/1.25/2.28 inch (25/32/58mm) 3-IN-1 Pin Maker, this manual is an essential tool for both beginners and experienced users. From unboxing to troubleshooting, setup to optimization, our guide ensures a seamless experience with your Button Maker Machine.
Featuring step-by-step instructions, detailed diagrams, and valuable tips for creating flawless buttons, this manual is your go-to resource. Whether you are preparing DIY gifts for children or crafting custom buttons for an event, our ergonomic arc handle punch press kit manual will help you master every detail.
The manual also includes insights on utilizing the 300-piece button parts and the exciting Panda Magic Book for creative projects. Download now to elevate your button-making experience to a professional level and enjoy the ease of use and comprehensive support our guide offers.
Safety Reminder
- This badge machine is only used for the intended purpose. Don’t apply in other applications that exceed safety considerations.
- Children cannot operate this product unless accompanied by an adult.
- Pay attention to safety during operation, and avoid crushing fingers
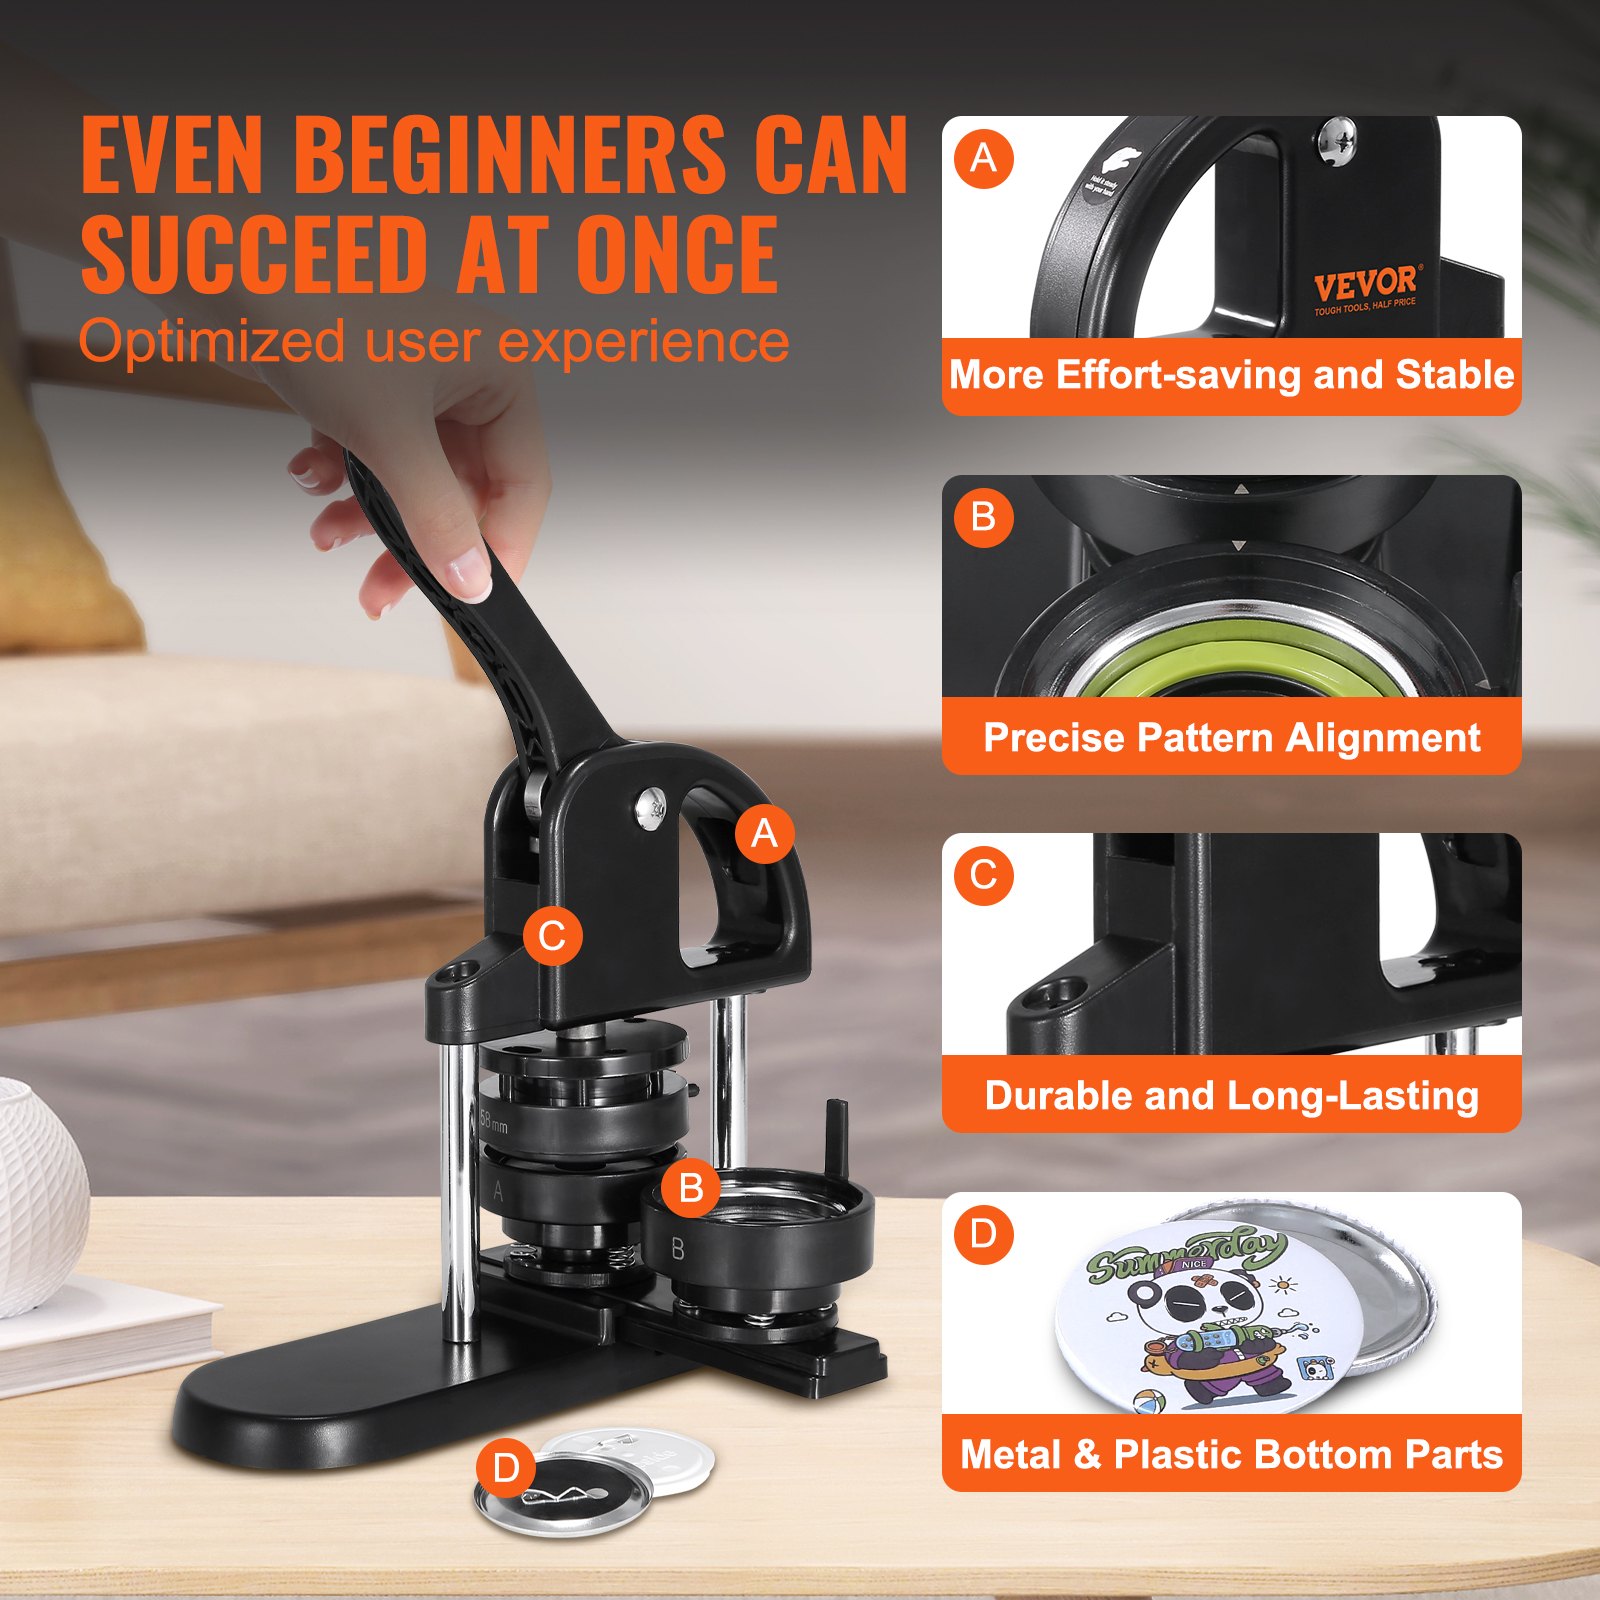
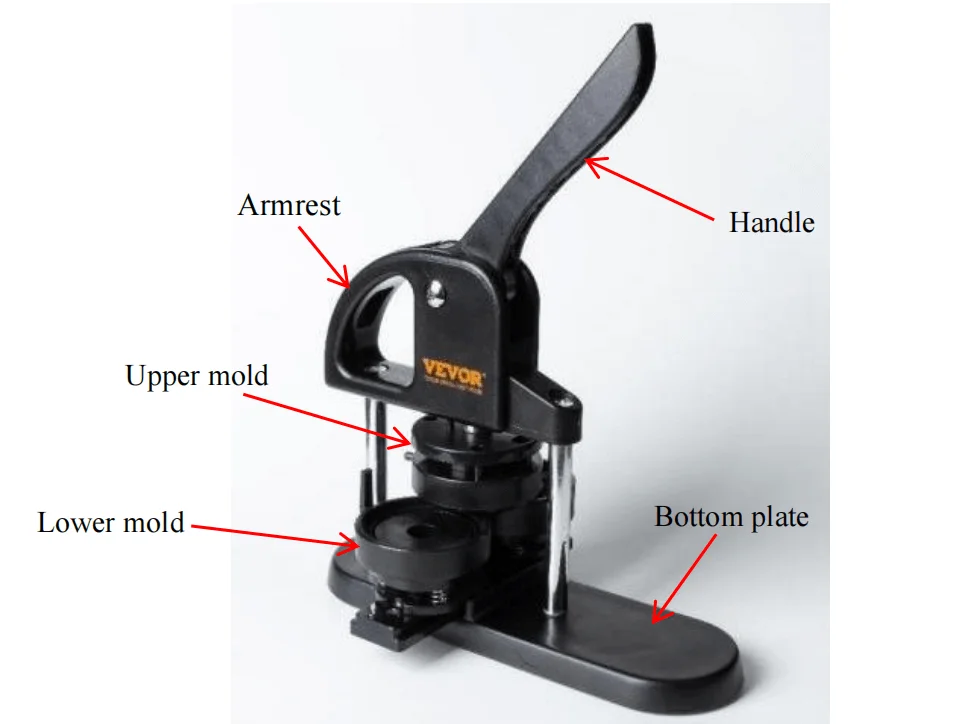
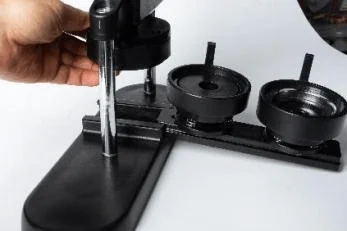
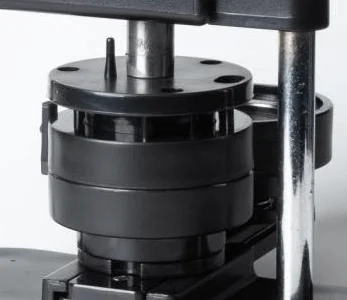
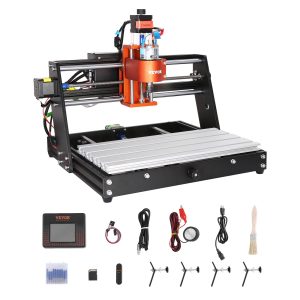
Button Maker Components

Button Maker Installation Steps
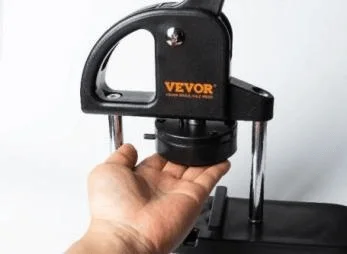
- Install the upper mold on the machine, align the mold side pin to the back and upward push, the magnetism automatically absorbs.
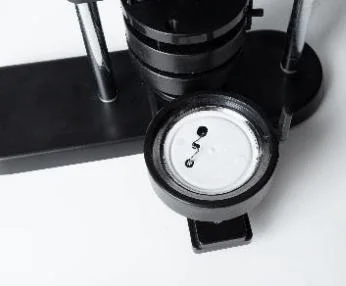
- Make up mold, align three holes, and lift up. Down mold, align to sliding rail groove and push to the middle. Loosen and put down the up mold.
- Put the pin on the side of the slide rail.
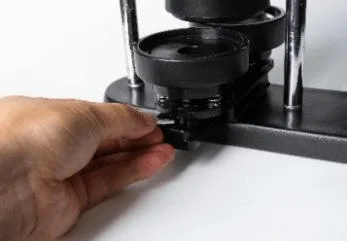
- Installation finished and able to start manufacturing.
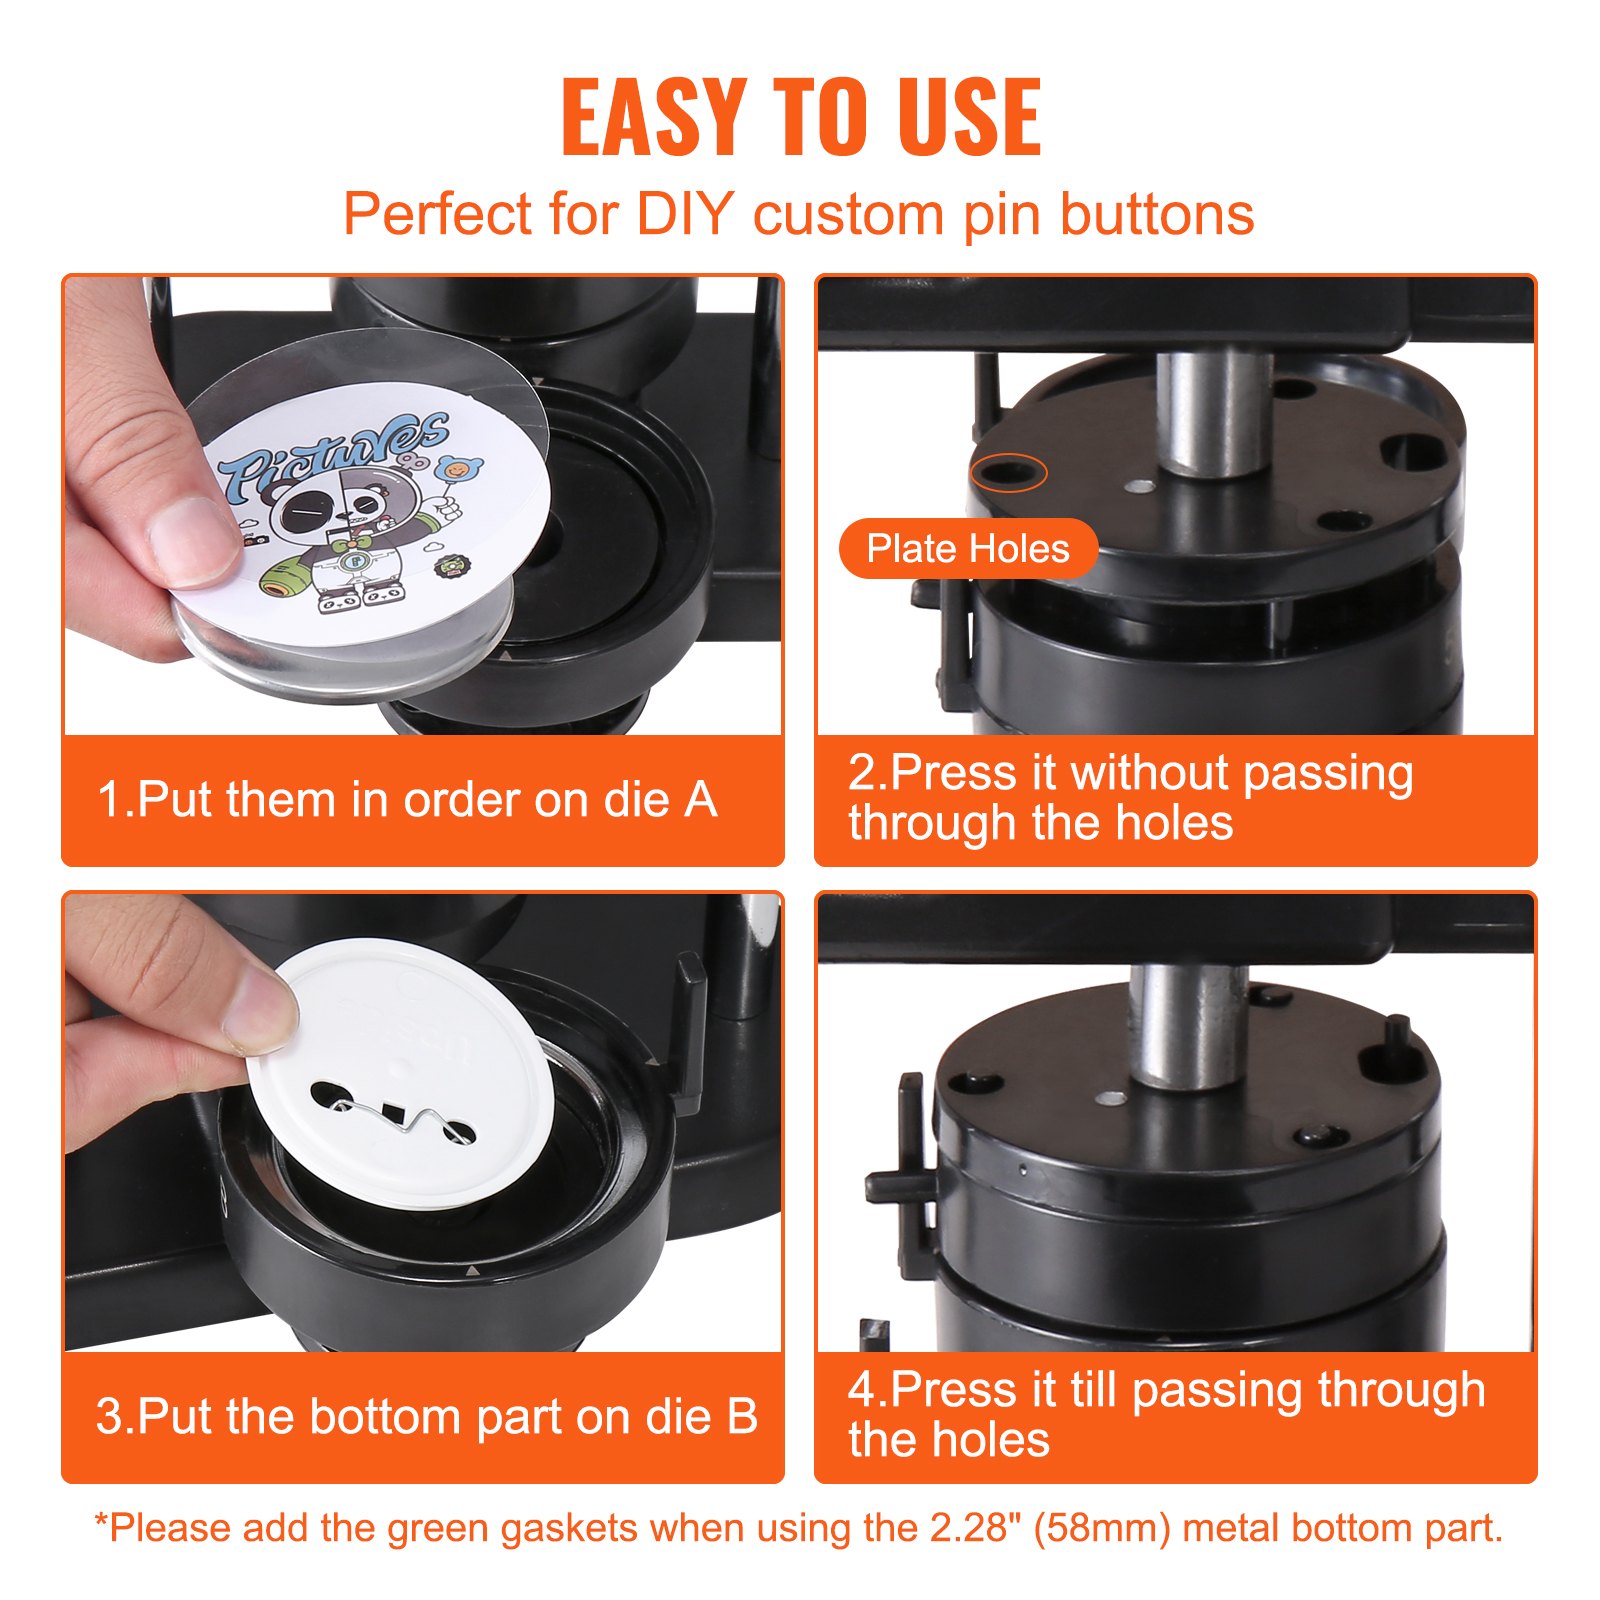
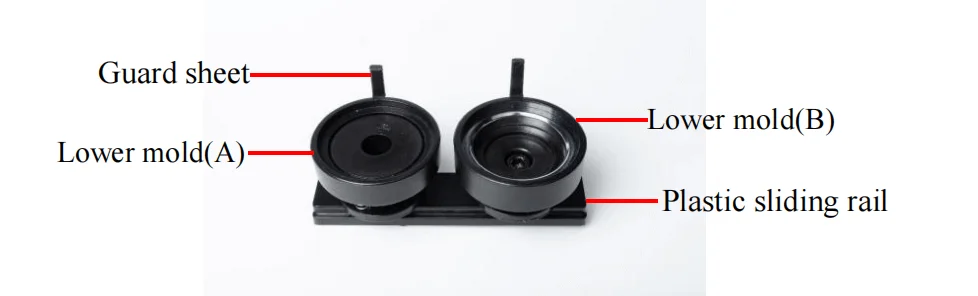
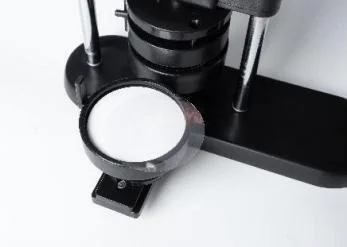
- Put “Tin up cover”–” Paper” (pattern levelly placed)—“Transparent plastic film” into “Lower mold(A)” in sequence, then push the lower mold until the up and down molds are aligned.
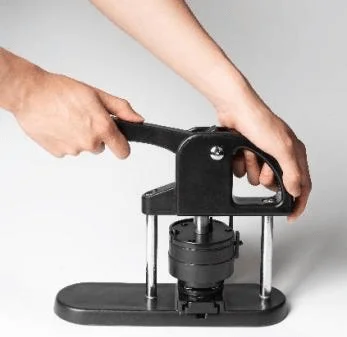
- Use one hand to hold the machine body first, then stabilize the machine body by the handle. Then, use another hand to press the machine handle until it presses down to the bottom. (NOTE: This time, the down-pressed mold hinge is in the open status.)
NOTE: Up mold hinge is in an open status.
- Put the “Back plate” into “Lower mold(B)”. (NOTE: Brooch should be level and not raised. Adjust the level as indicated by the top triangle.)
- Push the lower mold to the bottom from left to right till the up and down mold is aligned.
- Hold the machine body with your right hand, down-press the handle till up and down mold merges with the bottom.
Now the up mold hinge is in a closed status, the pin passes through the hole.
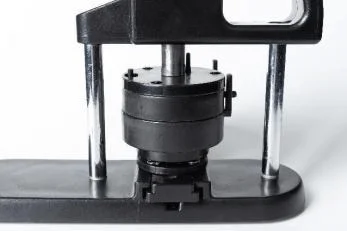
- Finish.
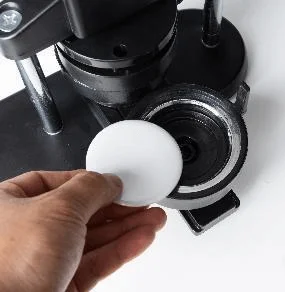
NOTE: If you use a metal backplate, the “Lower mold(B)” must have the plastic washer placed. (Metal backplate thinner, only 58 mm needs to add a washer, 25 mm, and 32 mmn’t need it.)

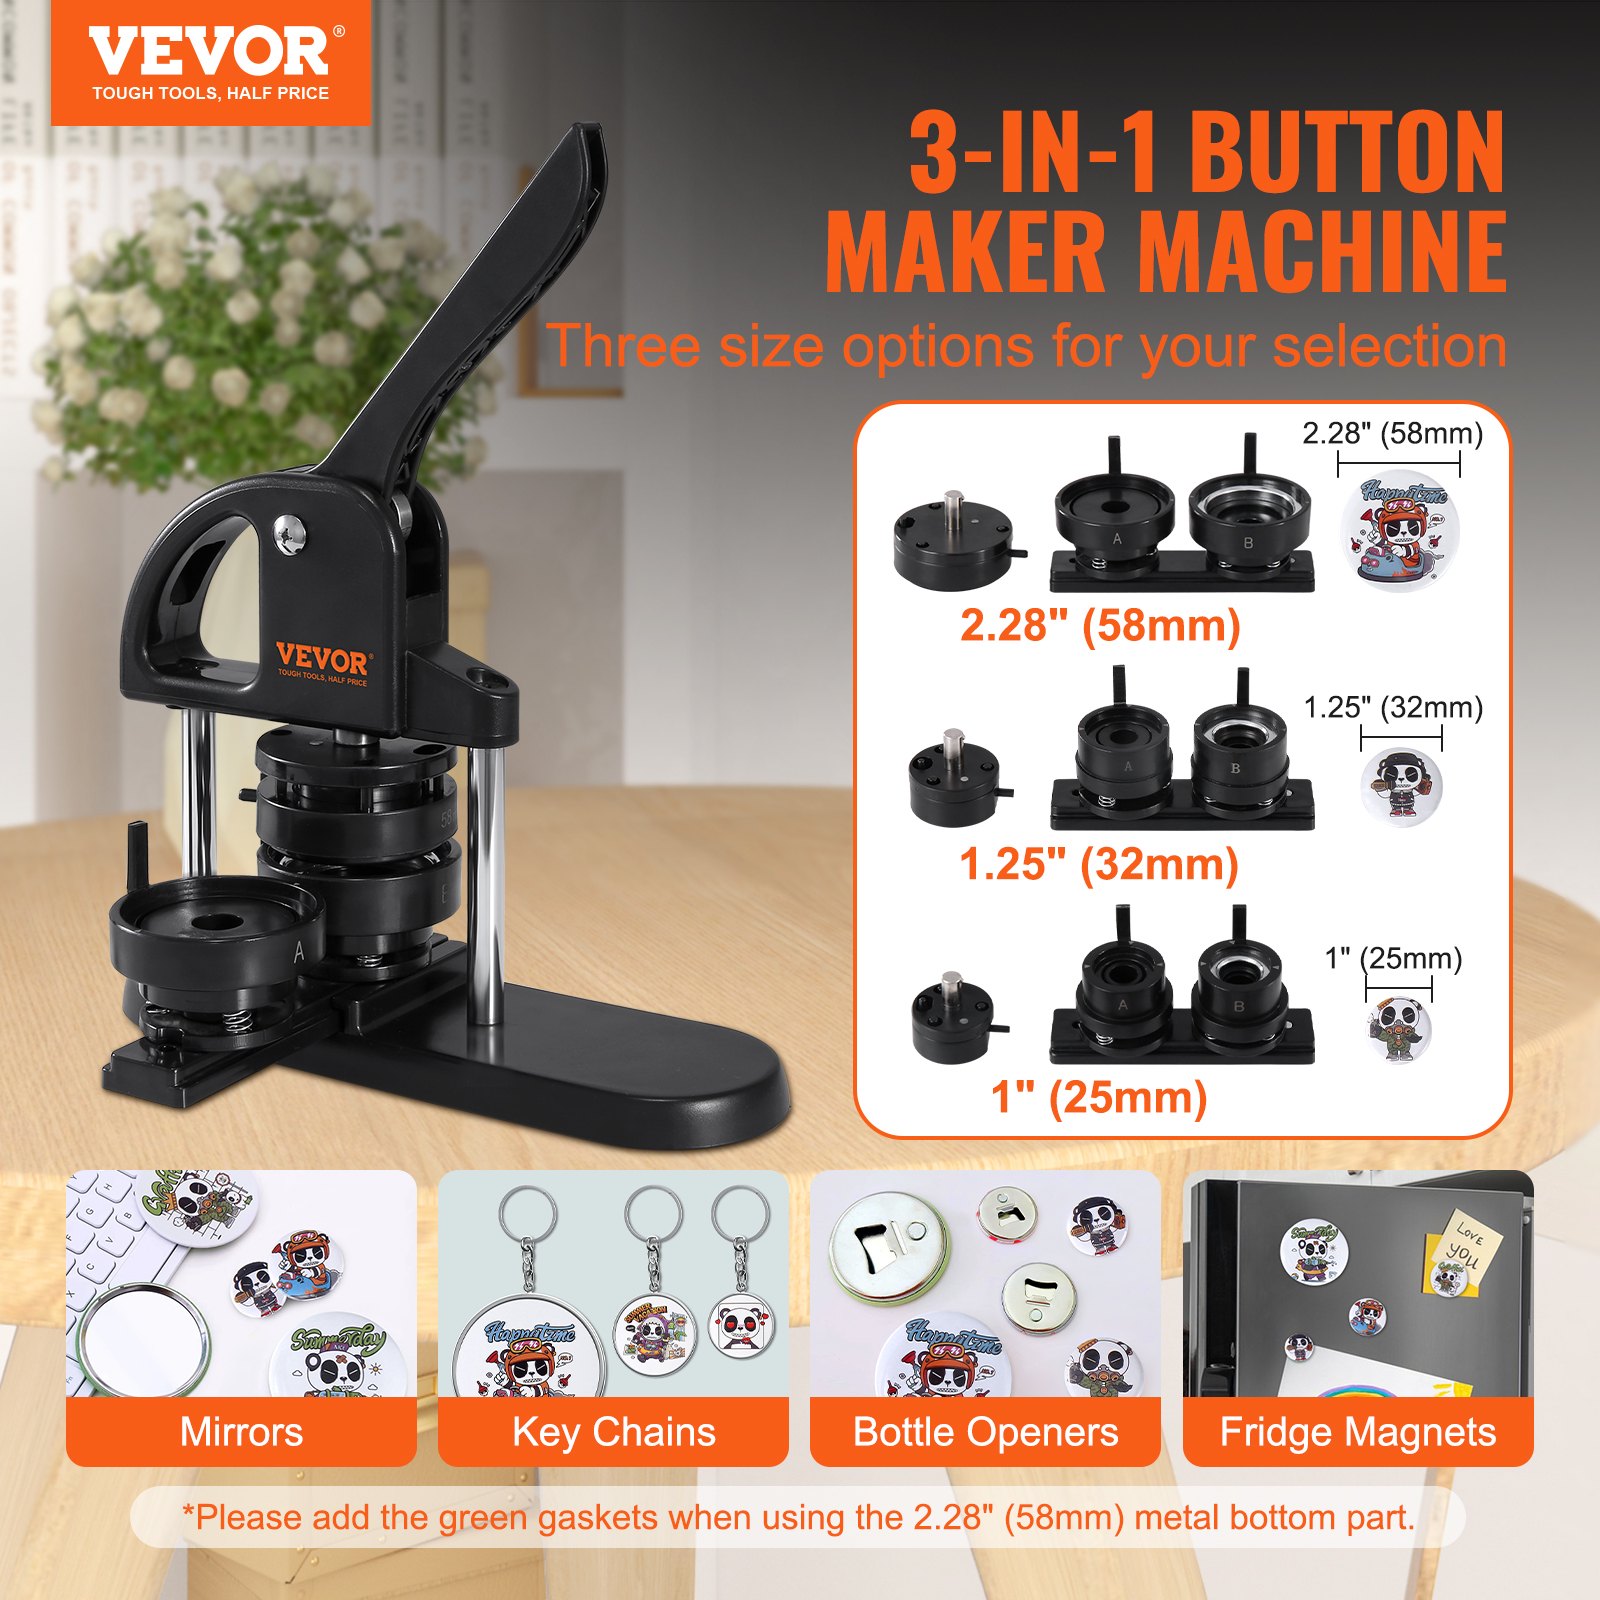
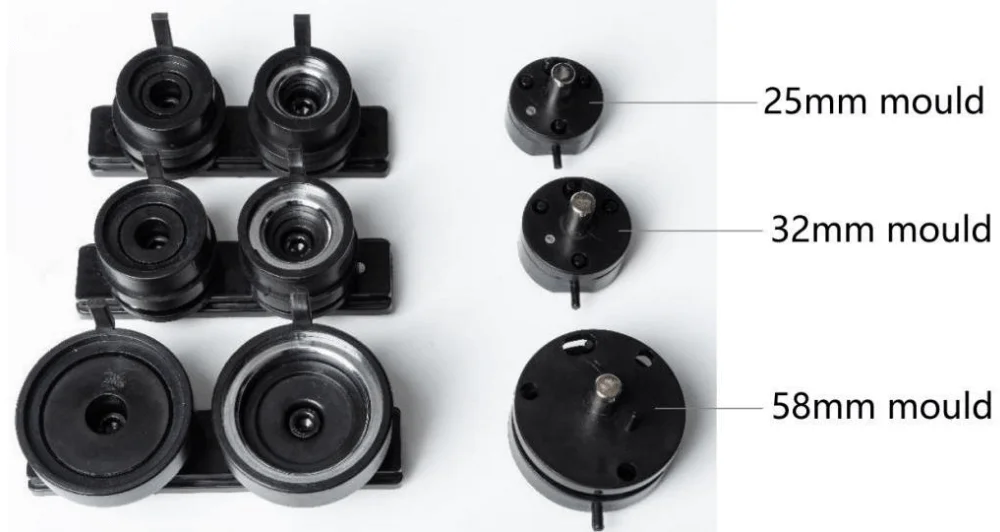
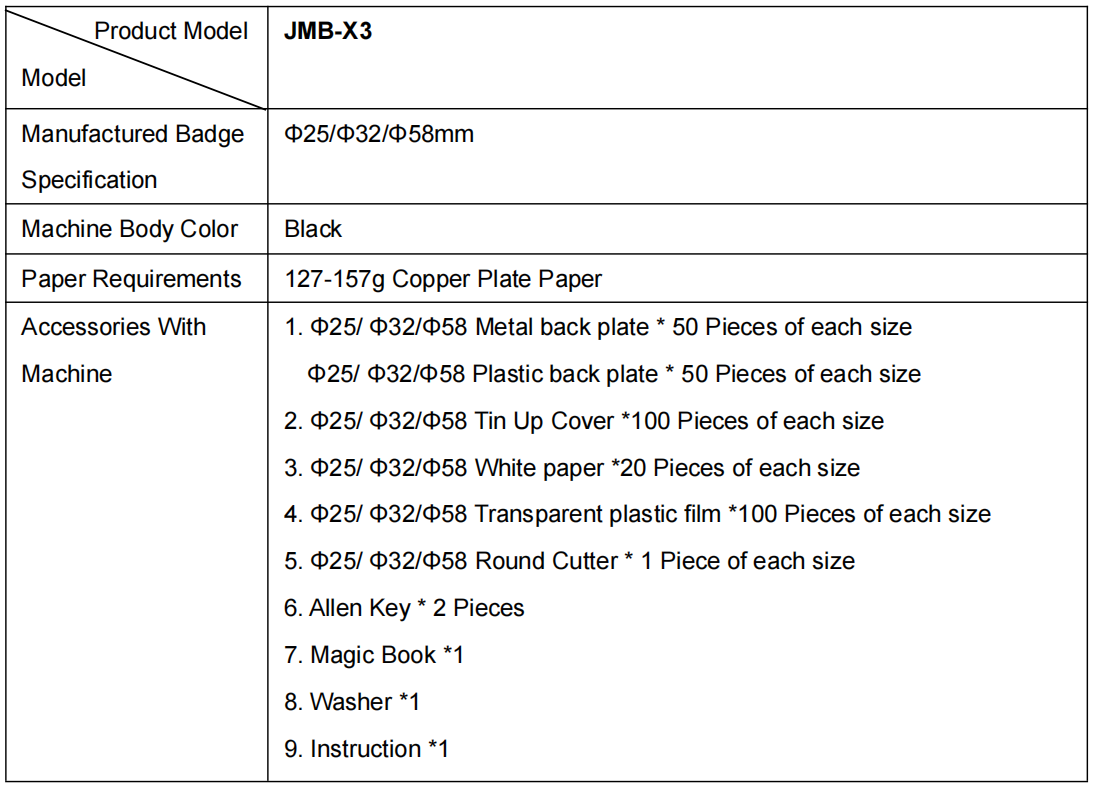
Model and Parameter
Button Maker Failures and Troubleshooting
| Failure Appearance | Possible Reasons | Troubleshooting |
| First time, press the iron cover downward and not absorbed to the upper mold | 1. Unsuitable operating method. 2. Too much lubricating oil in the upper mold. |
1. First-time downward press-up mold hinge is in a separate state. 2. Use a clean cloth or tissue to completely wipe it if too much lubricating oil is found on the upper mold. 3. When closing, the up and down mold must be on the same vertical line. |
| The second downward press part is not wrapped in | 1. Unsuitable operating method. 2. Unsuitable paper thickness. 3. Up mold screws loosen. |
1. The up and down mold must be on the same vertical line when closing 2. Use the stipulated thickness of paper. 3. Place the up mold on the machine body, the use the complimentary Allen key to fix the screws in the up mold internal hole center. |
| Badge pressed in but not firmly | 1. The downward press is not in place, not pressed to the bottom. 2. The paper is thinner. 3. (25 mm) Configured metal back consumables, do not place the washer |
1. Need to press the bottom when pressing downward. 2. Change to use a slightly thicker paper. 3. Right side mold place 2 mm thickness washer when using the metal back consumables. |
| Up mold unable to lift up after pressing, probably blocked | 1. The up and down mold position deviated. 2. The paper is incorrectly cut round or blocked by a foreign object. |
Use a sharp tool (such as a straight screwdriver) to align to the middle merge position clearance, which is between up and down mold, and pry open with the object like a hammer (Attention: Just tap it, generally, it will not be too tight) |
Recommended For Your Project
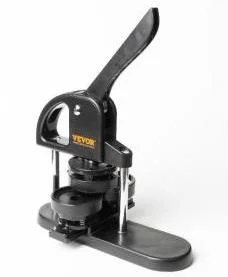
VEVOR Button Maker, 1/1.25/2.28 inch(25/32/58mm) 3-IN-1 Pin Maker Manual

Reviews
There are no reviews yet.