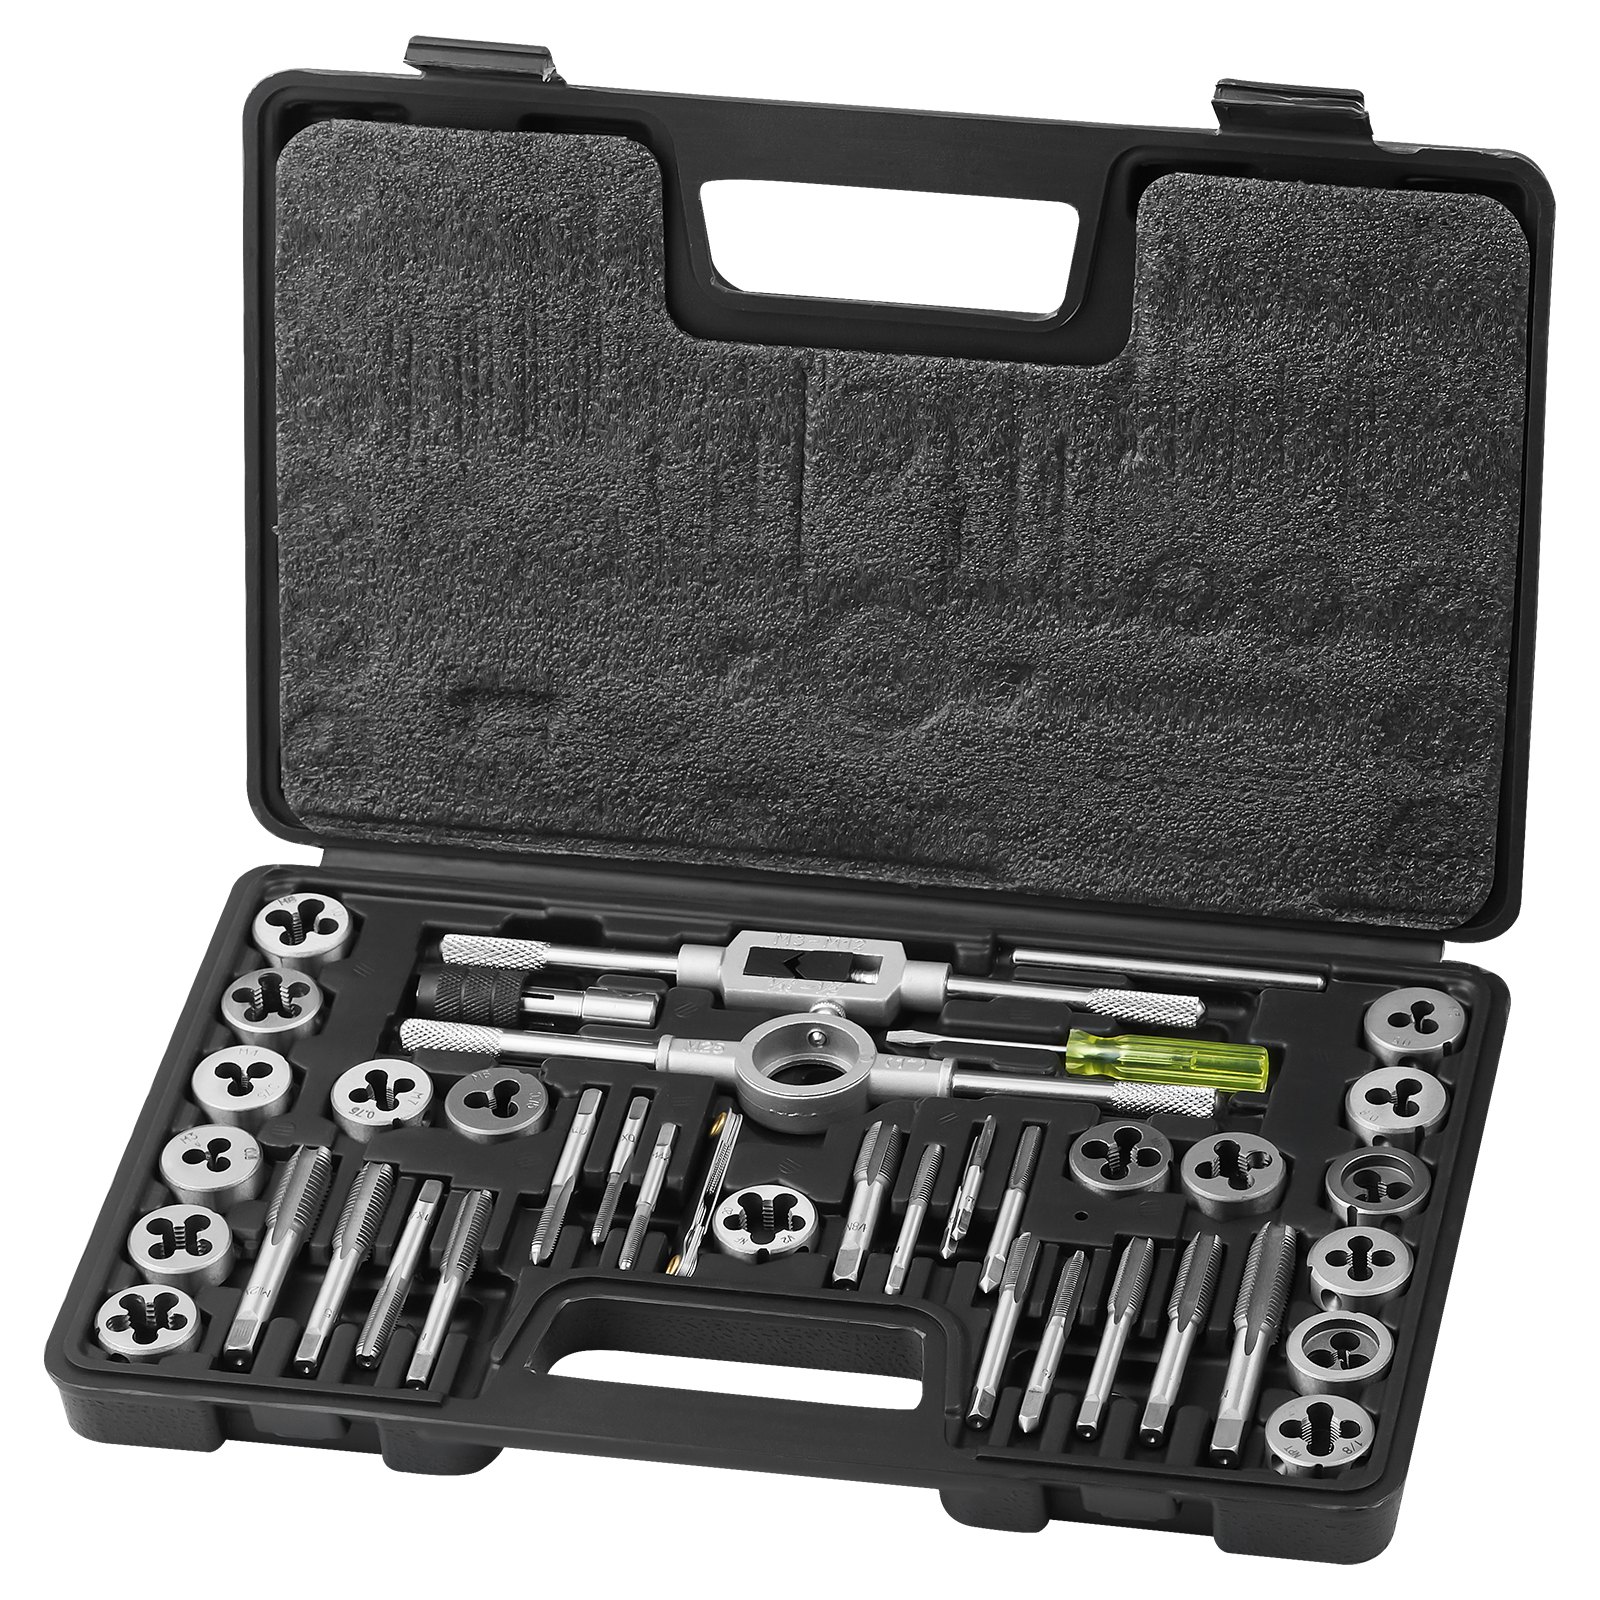


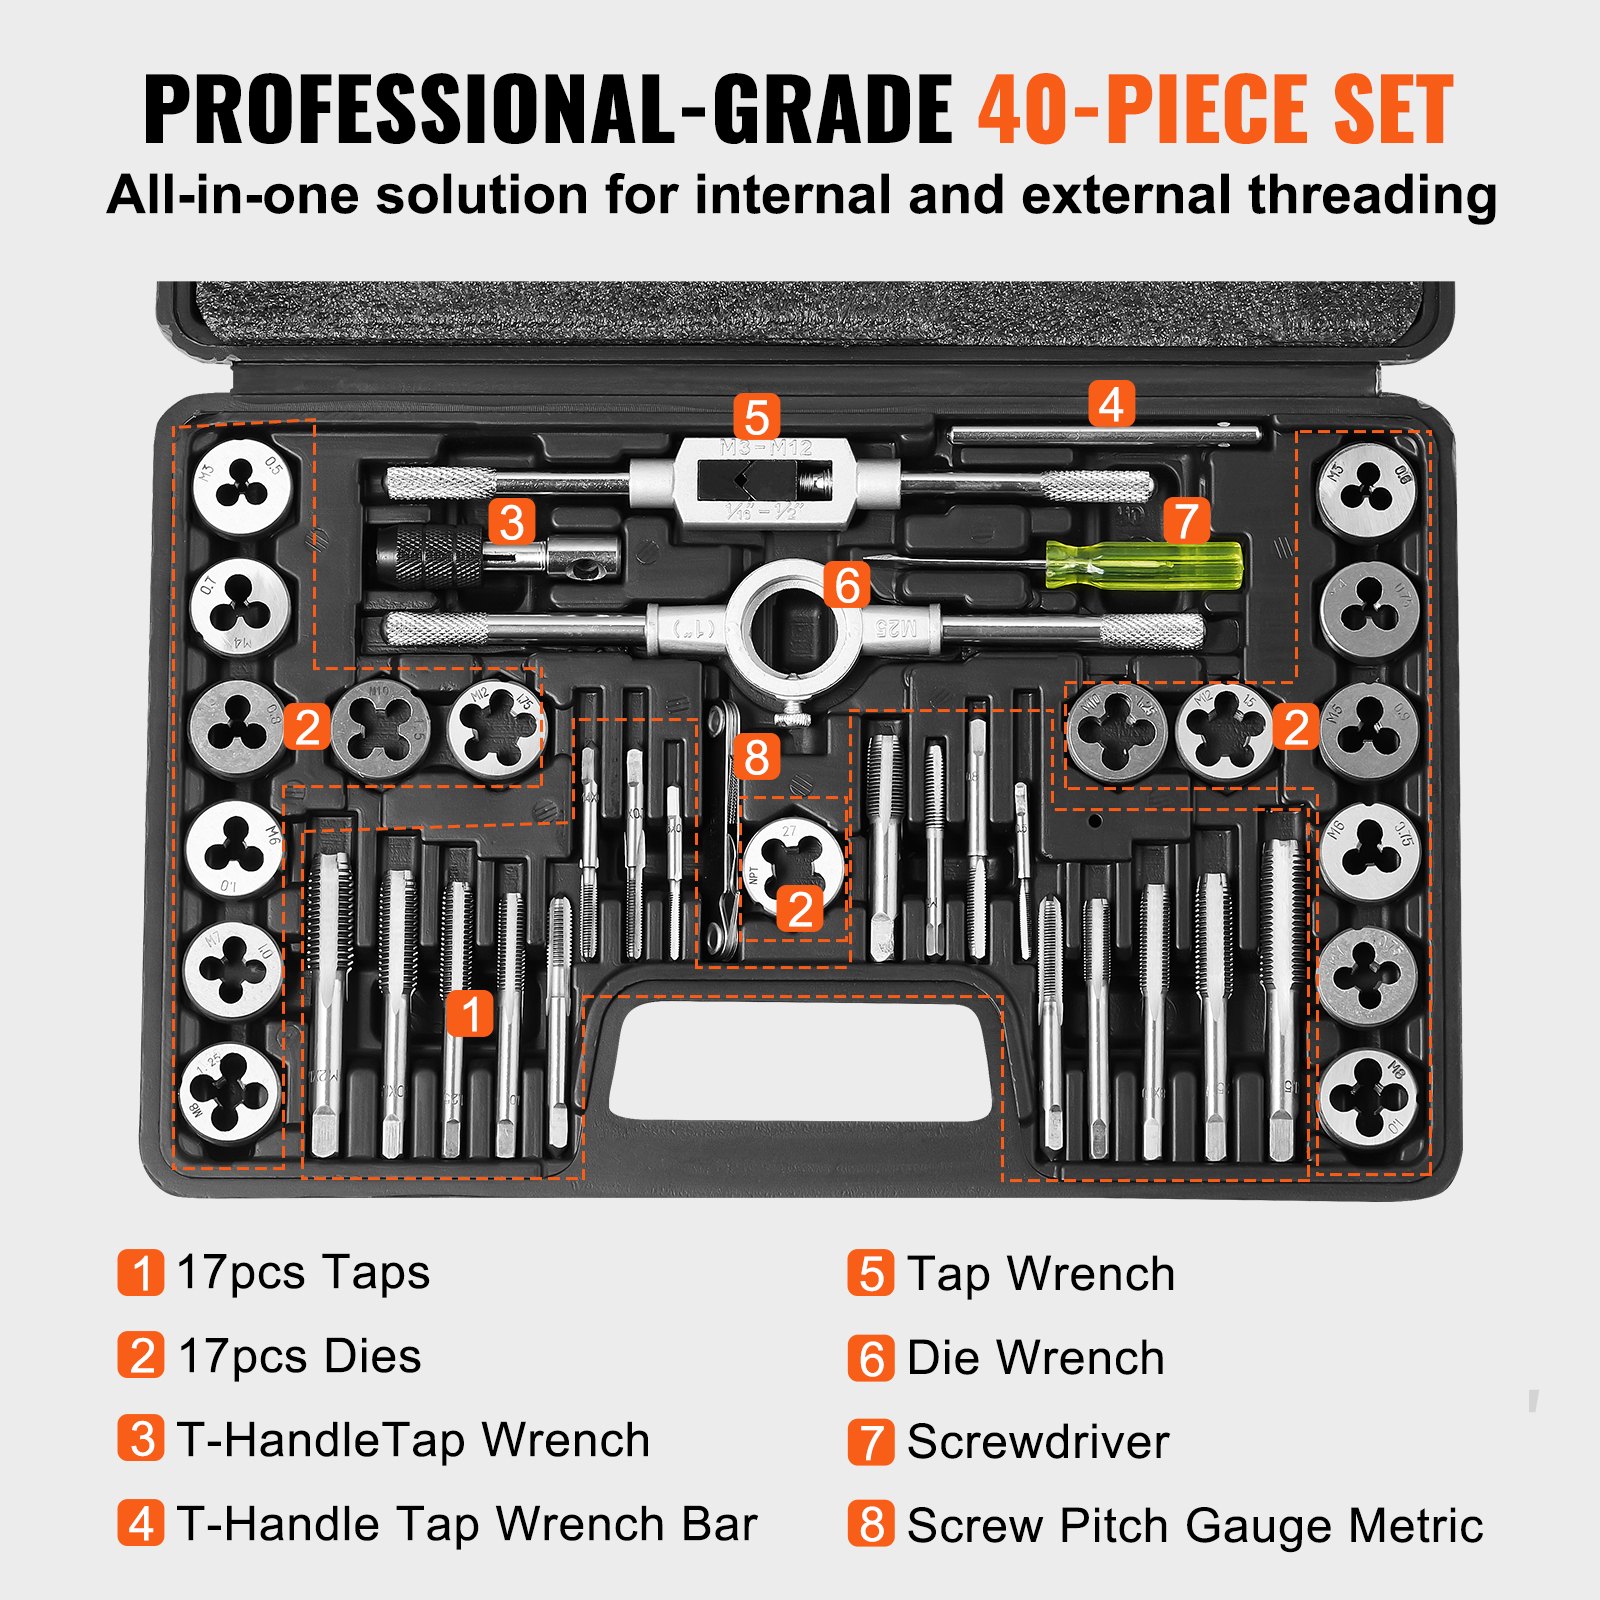


Unlock the full potential of your VEVOR Tap and Die Set with our comprehensive product manual. This detailed guide covers everything you need to know about your 40-piece set, which includes metric sizes from M3 to M12, crafted from high-quality bearing steel.
Whether you’re a professional or a DIY enthusiast, our manual ensures that you can easily set up, troubleshoot, and optimize your threading tools for cutting both external and internal threads.
With step-by-step instructions and clear illustrations, you’ll master the use of each tap and die, along with the complete accessories and storage case. Download now to get the most out of your essential threading tool.
Alloy Steel Tap And Die Set Manual (40Pcs)
Detailed List
Alloy Steel 40pc Tap And Die Set:
The size of the 17 pieces dies are as follows:
- Taper:M3x0.5, M3x0.6, M4x0.7,
- M4x0.75, M5x0.8, M5x0.9, M6x1.0,
- M6x0.75, M7x1.0, M7x0.75,
- Tap:M8x1.25, M8x1.0, M10x1.25,
- M10x1.5, M12x1.75, M12x1.5,
- Pipe Tap:1/8-27NPT
The size of 17 pcs taps are the same as the size of the tap above.
- 1 pc Die Handle
- 1 pc Tap Wrench
- 1 pc T-type Tap Wrench
- 1 pc Screw Pitch Gauge
- 1 pc Screwdriver
Use Instructions – VEVOR 116PC Tap and Die Set
-
Choose the Correct Tap or Die:
-
Identify the required thread size and pitch using the screw pitch gauges provided.
-
You can select from 51 taper taps, 51 plug taps, or matching dies (including metric and SAE sizes).
-
-
Prepare the Material:
-
Secure the workpiece using a vise.
-
For internal threads, drill the correct pilot hole size (refer to a tapping chart).
-
For external threads, clean and slightly chamfer the rod end.
-
-
Mount the Tool:
-
Insert the selected tap into a tap wrench (choose M3–M12 or M6–M20).
-
Place the die into the die wrench (25mm or 38mm, as needed).
-
Use the T-type tap wrench for better control in tight spaces or smaller taps.
-
-
Threading Operation:
-
Apply cutting fluid or lubricating oil to minimize friction and extend tool life.
-
For tapping: turn clockwise with even pressure; after every full turn, reverse a half-turn to clear chips.
-
For dies: align carefully and turn gently to start the thread. Continue with the same forward/reverse method.
-
-
Post-Threading:
-
Back the tool out slowly.
-
Clean threads with a wire brush or cloth.
-
Wipe down and oil the tap/die before returning it to the case.
-
-
Use Additional Tools:
-
Screwdriver: This is used to adjust die tension or perform tool maintenance.
-
Screw Extractors: Remove broken bolts or damaged threads by drilling a pilot hole and turning counterclockwise.
-
Precautions
-
Lubricate before use to reduce wear and avoid overheating.
-
Do not force the tool—this can cause breakage, especially in hard or stainless steel.
-
Always align properly to prevent cross-threading.
-
Avoid using hardened materials beyond the alloy steel taps and dies rating.
-
Clear chips frequently to ensure smooth operation.
-
Clean and oil tools after use to prevent rust and prolong life.
-
Secure workpieces firmly—slippage can damage both the tool and the material.
-
Store the tap and die set in the original case to keep the 116 pieces organized and protected.
Recommended For Your Project
VEVOR Tap and Die Set, 40-Piece Include Metric Size M3 to M12 Manual

Reviews
There are no reviews yet.