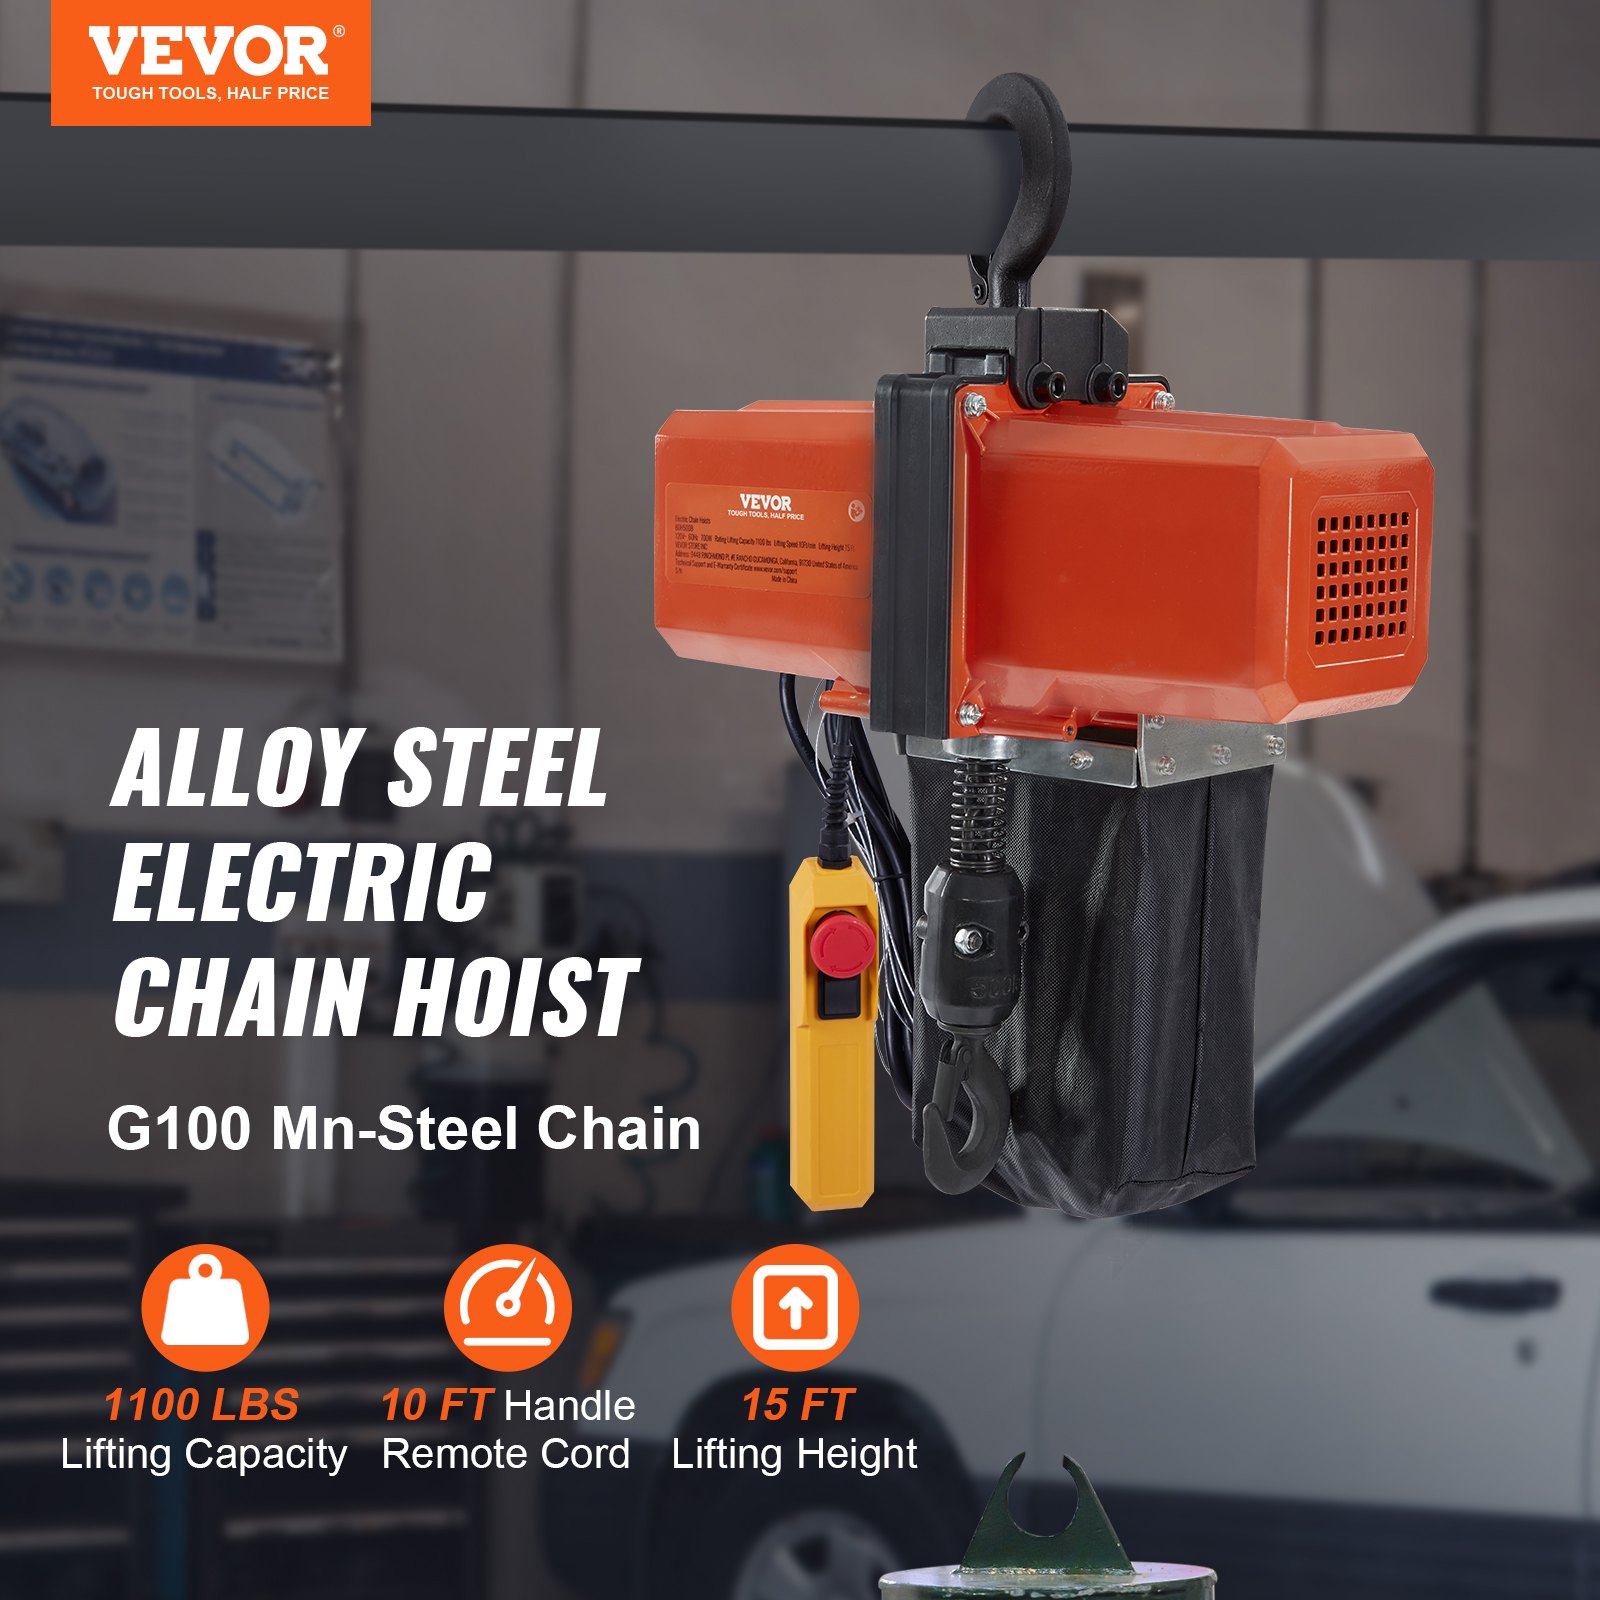


Unlock the full potential of your VEVOR Electric Chain Hoist with our comprehensive product manual. Designed for a lifting capacity of 2200 lbs (1 ton) and featuring a 10 ft lifting height and a speed of 10 ft/min, this manual is your ultimate guide to setup, troubleshooting, and optimization.
Whether you’re using it in your garage, shop, hotel, or home, our detailed instructions and tips ensure a seamless user experience. The manual covers everything from initial installation to advanced maintenance, helping you maximize efficiency and safety.
With step-by-step guides, clear diagrams, and useful troubleshooting tips, you’ll have all the information you need right at your fingertips. Download the VEVOR Electric Chain Hoist manual today and take the first step towards mastering your equipment.
Electric Chain Hoist User Manual
Model: BDH500B
The users must read and understand the instruction manual thoroughly and clearly before operating the hoist.
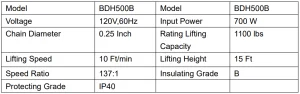
Product Specifications
Safety Instruction
Keep the work area clean. Cluttered areas can cause injuries.
Consider the work area environment.
Do not expose electric tools to rain. Do not use electric tools in damp locations. Keep the work area well lit. Do not use electric tools near flammable liquids or gases.
Guard against electric shock.
Prevent body contact with grounded surfaces, and ensure the hoist is appropriately grounded before being applied to operation.
Keep children away.
Do not let visitors use electric tools or extension cords. All visitors should be kept away from the work area.
Store idle tools
When not in use, electric tools should be stored in a dry, high, or locked place, out of the reach of children.
Use the right tools.
Do not force small electric tools or attachments to do the heavy-duty work; they will do a better job and operate more safely at the rate for which it was intended. Do not use electric tools for anything other than their intended purpose.
Dress properly.
Do not wear loose clothing or jewellery, as they can get caught in moving parts. Rubber gloves and non-skid footwear are recommended when working outdoors. Wear protective hair covering to contain long hair.
Do not abuse the cord.
Never carry an electric tool by the cord or yank it to disconnect it from the wall outlet. Keep cord from heat, oil, and sharp edges. Secure work. Maintain firm footing or be otherwise secured when operating the hoist, use tools to hold the workplace for safety, and free both handles to operate the electric tool.
Do not overreach.
Keep proper footing and balance at all times.
Maintain tools with care.
Keep electric tools sharp and clean for better and safer performance. Follow instructions for lubricating and changing accessories. Inspect electric tool cords periodically; if they are damaged, have them repaired by an authorized service facility. Inspect extension cords periodically and replace them if damaged. Keep handles dry, clean, and free from oil and grease.
Avoid unintentional starting.
Do not carry a plugged-in electric tool with your finger on the switch, and be sure that the electric tool is switched off before plugging in.
Outdoor use extension cords.
When an electric tool is used outdoors, use only extension cords intended for use outdoors and so marked
Stay alert.
Watch what you are doing. Use common sense, and do not operate an electric tool when you are tired, distracted, or under the influence of drugs, alcohol, or medication, causing diminished control.
Check damaged parts.
Before further use of the electric tool, check carefully to determine that it will operate properly and perform its intended function. Do not operate a damaged, malfunctioning, or unusually performing hoist.
Warning: Read and understand the instruction manual thoroughly and clearly before using the hoist. Ensure operators know how the machine works and how it should be operated.
The user shall always work in compliance with the operating instructions. Using any accessory or attachment other than recommended in the instruction manual presents a risk of personal injury. Have your tool repaired by an expert.
This electric appliance is built according to the relevant safety rules. Its repair must only be carried out by experts; otherwise, it may cause considerable danger for the user.
Additional Safety Rules
- Do not operate the hoist until you have thoroughly read and understood this instruction manual
- Do not lift more than the rated load for the hoist
- Do not use the hoist with a twisted, kinked, damaged, or worn load chain.
- Do not use the hoist to lift, support, or transport people.
- Do not operate unless the load is centered under the hoist
- Do not attempt to lengthen or repair the damaged load chain.
- Protect the load chain of the hoist from weld splatter or other damaging contaminants.
- Do not operate the hoist when it is restricted from forming a straight line from hook to hook in the direction of loading.
- Do not use a load chain as a sling, or wrap a chain around a load.
- Do not apply the load to the hook tip or the hook latch.
- Do not apply load unless the load chain is seated correctly in the chainsprocket.
- Do not operate beyond the limits of the load chain travel.
- Do not leave a load supported by the hoist unattended unless specific measures have been taken.
- Do not operate a hoist unless load slings or other approved single attachments are correctly sized and seated in the hook saddle.
- Take up slack carefully, ensure the load is balanced, and load holding action is secure before continuing.
- Shut down a hoist that malfunctions or performs unusually and report such malfunction.
- Make sure the hoist limit switches function properly.
- Warn personnel of the approaching load.
- Check brake function by tensioning the hoist before each lift operation.
- Avoid swinging the load or hook.
- Make sure the hook travel is in the same direction as shown on the controls.
- Inspect the hoist regularly, replace damaged or worn parts, and keep appropriate maintenance records.
- Do not use limit switches as routine operating stops. They are emergency devices only.
- Do not allow your attention to be diverted from operating the hoist.
- Do not allow your attention to subjected to sharp contact with other hoist, structures, or objects through misuse.
- It is not allowed to use it in a potentially explosive atmosphere.
- The value of the equivalent sound emission pressure level at the operator’s position is lower than 78 dB.
- Supplying power demand: voltage 230V±10%, frequency 50Hz±1%.
- The hoist is used at relative humidity below 85%, height above or below 1000 meters.
- The hoist’s transportation and storage temperature may be above-25℃, below55℃. Its highest temperature can not exceed 70℃.
- Be supplied with a 10 A fuse or 10 A over-current circuit-breaker to protect your electric system.
- Do not try to lift a fixed or plugged load.
- Do not lift the load diagonally.
- Avoid excessive jogging (resulting in a short motor shock).
CIRCUIT DIAGRAM

Use Instructions
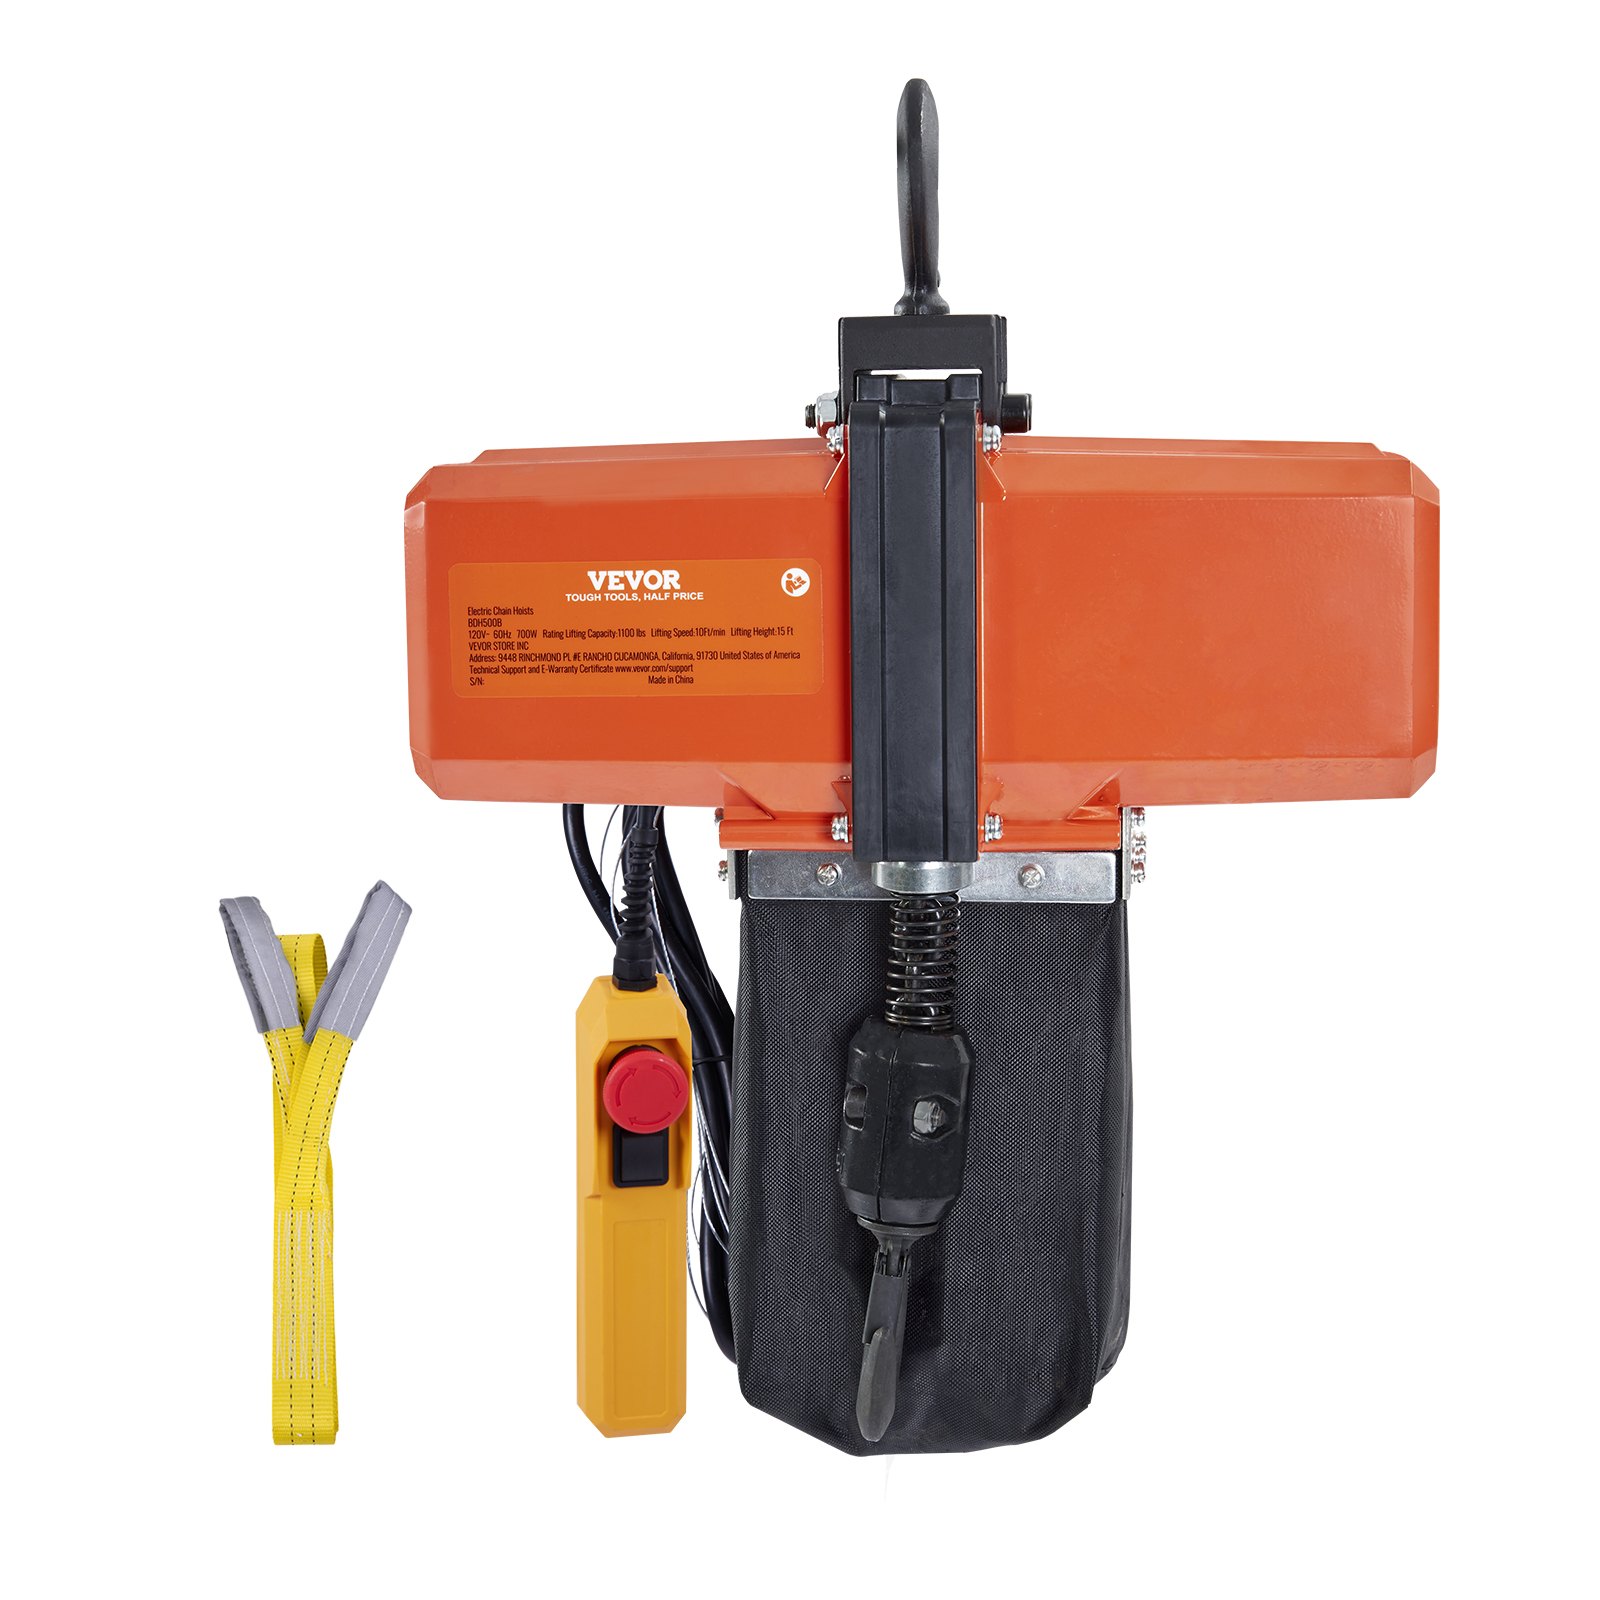
The electric chain hoist promises improved work conditions and high efficiency. It has limit switch devices and features such as a compact structure, lightweight, easy operation, and a pleasant appearance.
Unpacking
After opening the carton, carefully inspect the hoist frame, cords, hooks, CHAIN, and control station for damage that may have occurred during shipment.
Mounting the hoist
Hang the hoist from its intended support. The structure to support the hoist must have sufficient strength to withstand the load imposed several times. Suspending the hoist from an inadequate may allow the hoist to fall and cause injury and/or damage.
Checking for adequate voltage at the hoist
The hoist must be supplied with sufficient electrical power for proper operation and to reduce problems resulting from insufficient power(low voltage).
These include:
- Noisy hoist operation due to brake and/ or contactor chatter.
- Heating of the hoist motor and other internal components, and heating of wires and connectors in the circuit feeding the hoist.
- Failure of the hoist to lift the load due to the motor stalling.
- Slowing of motors connected to the same circuit and checking for others. After the hoist is suspended from its support and you have made sure the power supply complies with the requirements, the hoist is ready for operation.
Operating Instructions
Check if the (emergency) stop switch is pressed. Turn the red stop switch clockwise to engage.
An overload is indicated when the hoist speed slows down; it raises the load jerkily or will not lift it. Also, a clutching noise may be heard if the hoist is loaded beyond rated capacity. If this occurs, immediately release the “up” button to stop the operation of the hoist. At this point, the load should be reduced to the rated capacity. When the excessive load is removed, regular hoist operation is automatically restored.
The hoist is not recommended for use in any application where there is a possibility of adding to an already suspended load to the point of overload. The hoist is used at unusual extremes of ambient temperatures, above 40℃, or below -9℃. Changes in lubricant properties may present the possibility of damage or injury, and in those conditions, the work duty is reduced from normal operating conditions.
Hoist operation is controlled by depressing the control station pushbuttons. Depressing the “up” push button moves the load hook toward the hoist, while depressing the “down” push button moves it away from the hoist.
The “up” and “down” buttons are momentary, and the hoist will operate in the selected direction as long as the button is held in the depressed position. Release the push button, and the hoist will stop.
When preparing to lift a load, ensure the attachments to the hook are firmly seated in the hook saddle. Avoid off-centre loading of any kind, especially on the hook’s point.
When lifting, raise the load only enough to clear the floor or support and ensure that the attachment to the hook and load are firmly seated. Continue lifting only after you are assured the load is free of all obstructions.
Do not use this hoist out of its work duty.
Stand clear of all loads and avoid moving a load over the heads of other personnel. Warn personnel of your intention to move a load in their area.
Do not leave the load suspended in the air unattended.
Only qualified personnel are permitted to operate the unit.
Do not wrap the load chain around the load and hook it on itself as a choke chain.
Do not allow a load to bear against the hook latch. The latch helps maintain the hook in position while the chain is slack before taking up the slack.
Take up a slack load chain carefully and start loading easily to avoid shock and jerking of the hoist chain. If there is any evidence of overloading, immediately lower the load and remove the excess load.
When the push button is pressed, the machine will stop.
Periodic Inspection
To maintain continuous and satisfactory operation, a regular inspection procedure must be initiated so that worn or damaged parts can be replaced before they become unsafe. The intervals of inspection must be determined by the individual application and are based upon the type of service to which the hoist will be subjected.
Periodic inspections are to be performed semi-annually and should include the following:
- Extemal evidence of loose screws.
- External evidence of worn, corroded, cracked or distorted hook fixing block, gears, bearings, chain stop ball and hook retainer.
- External evidence of damage or excessive wear of the lift wheel. Widening and deepening of pockets may cause the chain to lift up in the pockets and cause binding between the lift wheel and the chain guide or between the lower sheave and the hook block. Check chain guide for wear or burring where the chain enters the hoist. Severely worn or damaged parts should be replaced.
- There is external evidence of excessive wear of brake parts. Check the control station push buttons to ensure they operate freely and spring back when released.
- Check the power cord, control cord and control station for damaged insulation.
- Check the chain pin, dead-end pin, and chain stop for wear and cracks. Any deficiencies noted must be corrected before the hoist is returned to service.
Hook inspection
A hook damaged by chemicals, deformations, or cracks, having more than a 10° twist from the plane of the unbent hook, or having an excessive throat opening indicates abuse or overloading of the unit.
Ensure that the latch is not damaged or bent and that it operates properly with sufficient spring pressure to keep it tightly against the lip of the hook. When released, allow the latch to spring back to the tip. If the latch does not operate properly, it should be replaced.
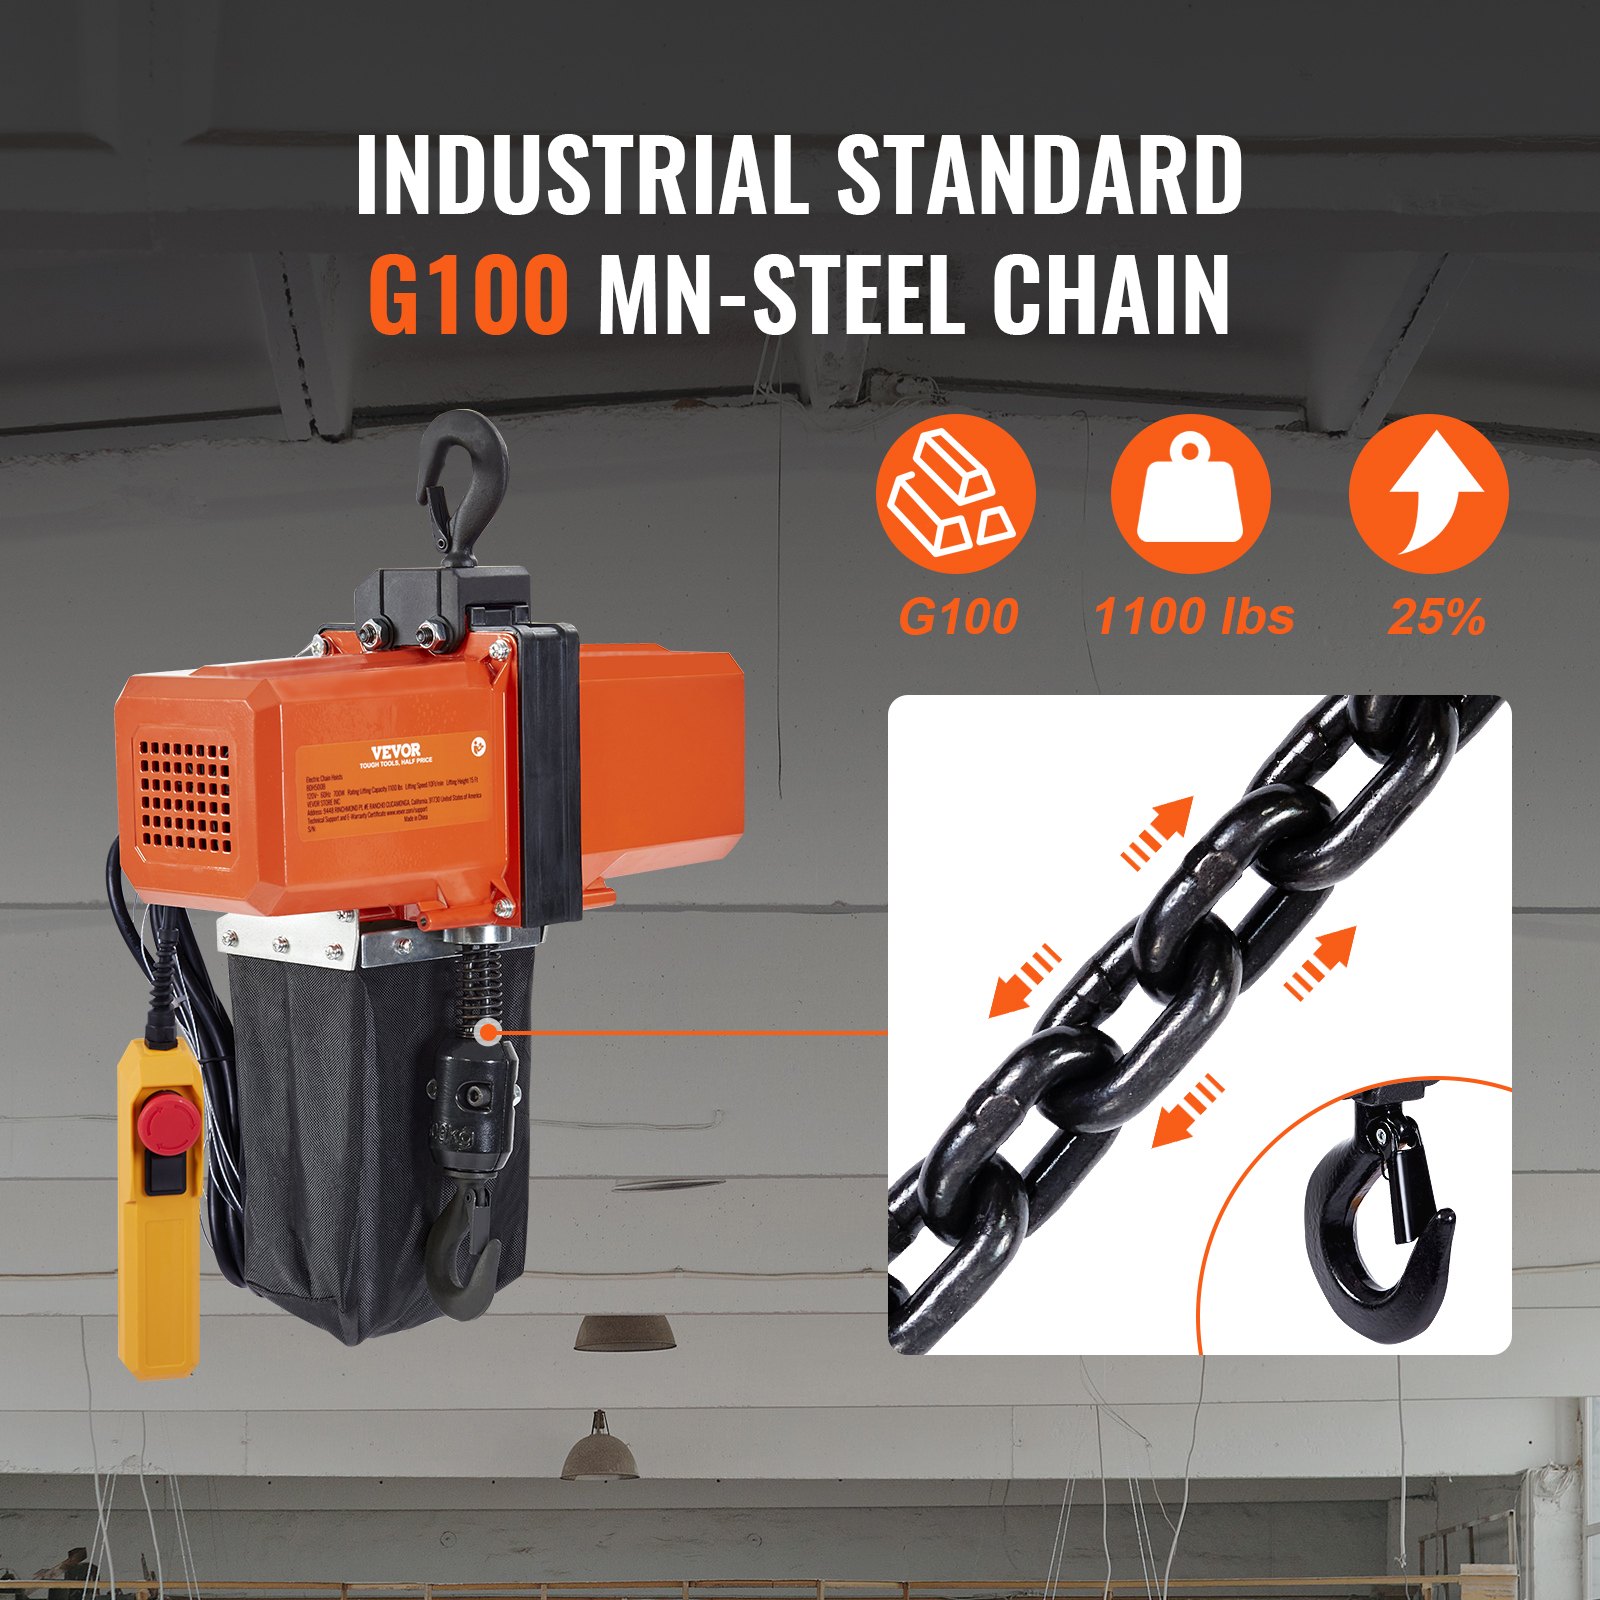
Chain inspection.
Nicks, gouges, twisted links, weld spatter, corrosion pits, striations, cracks in weld areas, wear and stretching.
A chain with any one of these defects must be replaced. Lubricate the chain using 3#calcium-based grease after 200 cycles. The life of the chain is 50000 cycles.
Slack is the chain portion that passes typically over the lift wheel. Examine the interlink area for the point of maximum wear.
Measure and record the stock diameter at this point of the link. Then measure stock diameter in the exact location on a link that does not pass over the lift wheel (use the link adjacent to the loose end link for this purpose). Compare these two measurements if the stock diameter of the worn link is 0.254 mm (or more).
If the stock diameter of the unworn link is less than the chain’s diameter, the chain must be replaced. The chain is 3 meters long and has 157 Knots.FIG 2.2 shows the specific dimensions of the chain.
Lubrication
The gears are packed with grease at assembly and should not be renewed unless removed from the housing and degreased.
Bearing.
Rotor bearings are pre-lubricated and require no lubrication. Needle bearings are packed at assembly with grease and should not be relubricated. However, if the housings, lift-wheel or sheave wheel have been degreased, these bearings should be greased using lithium grease.
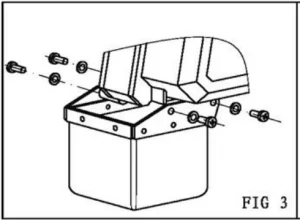
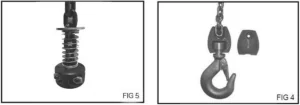
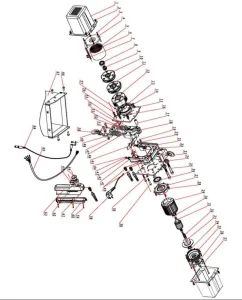
Load Chain Removal/Installation
(FIG 3 & FIG 4 & FIG 5)
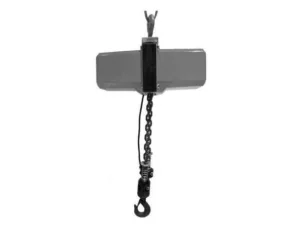
1. Remove the chain bag (FIG. 3)
2. Remove the hook lock(FIG 4). Depress the “up” button and run the chain from the hoist.
3. Jog the “down” push button while pulling on the new chain until the old one emerges from the hoist.
4. Attach the hook block to the new chain.
5. Remove the chain stop ball from the old chain(FIG. 5) and attach it to the new chain by reusing the chain pin.
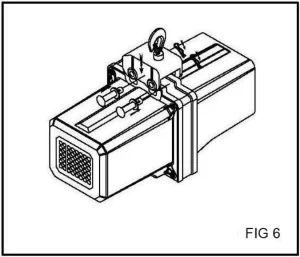
Hook for pulley installation/ removal
(FIG 6)
1. The 2 holes of the hook for the pulley are aligned with the holes of the electrical chain hoist.
2. Firmly secure the hook for pulley and electrical. Using two flat roundhead rivets, 2 plain washes, and 2 split pins.
3. Installation in the reverse order to removal hook for pulley.

Recommended For Your Project
VEVOR 1100 lbs Electric Chain Hoist 15 FT Manual


Reviews
There are no reviews yet.