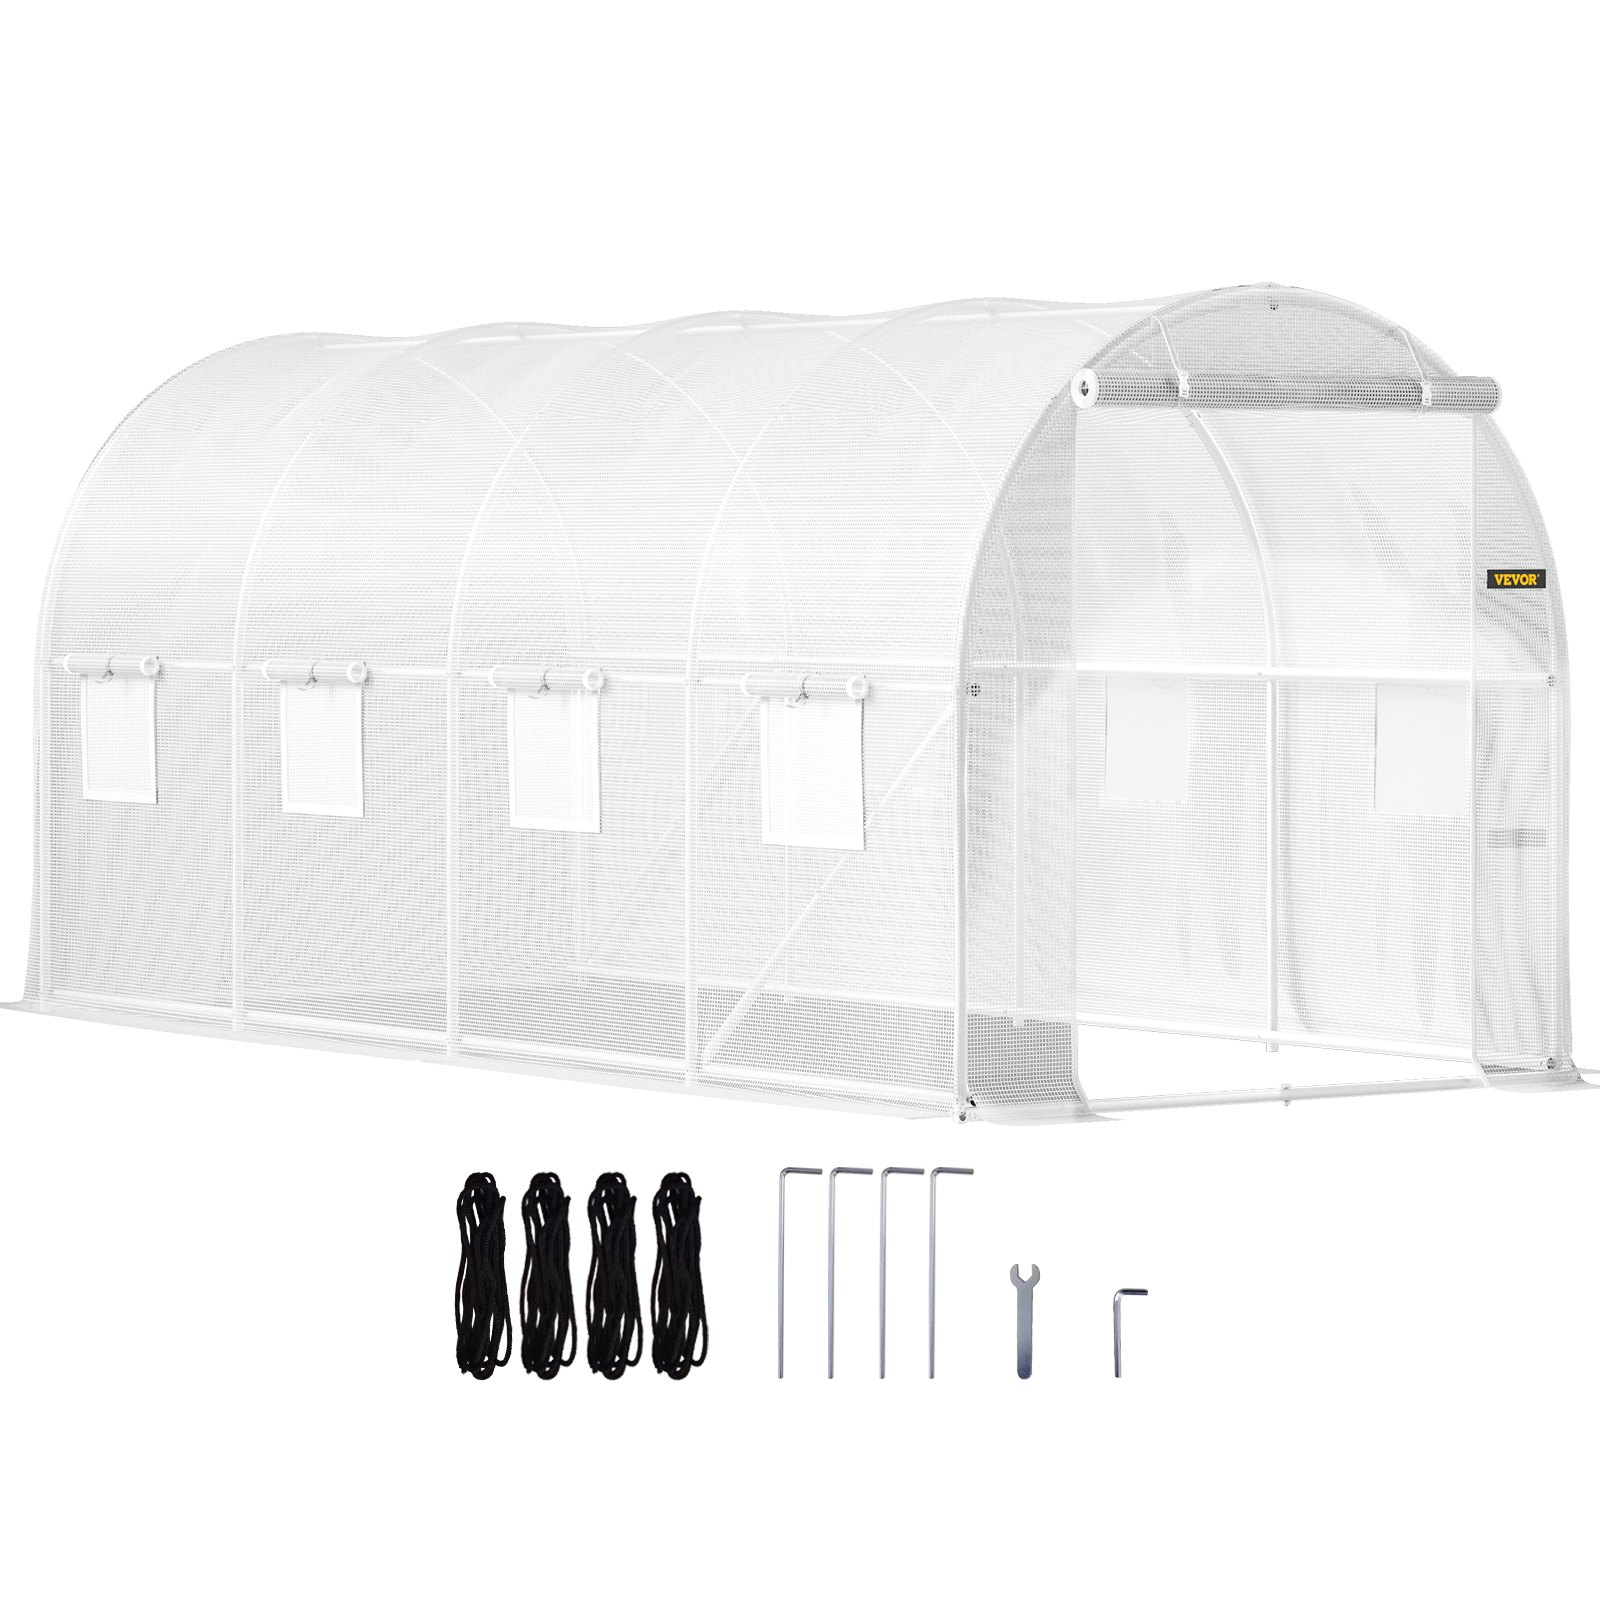

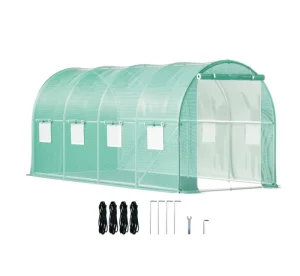
Unlock the full potential of your gardening experience with our comprehensive product manual for the VEVOR Walk-in Tunnel Greenhouse, 15 x 7 x 7 ft Portable Plant Hot House with Galvanized Steel Hoops, 1 Top Beam, Diagonal Poles, Zippered Door, and 8 Roll-up Windows in White. This easy-to-follow manual is designed to help you seamlessly set up, troubleshoot, and optimize your greenhouse for the best results.
Our detailed guide walks you through each assembly step with clear, professional instructions and helpful diagrams, ensuring that even first-time users can have their greenhouse up and running quickly. The manual also includes essential tips for maintaining the structure, maximizing plant growth, and protecting your plants from the elements.
Whether you’re a seasoned gardener or a beginner, this manual ensures your VEVOR Walk-in Tunnel Greenhouse operates at its best. Download the manual today to start creating the perfect environment for your plants and enjoy a thriving garden all year round.
VEVOR Walk-In Tunnel Greenhouse User Manual
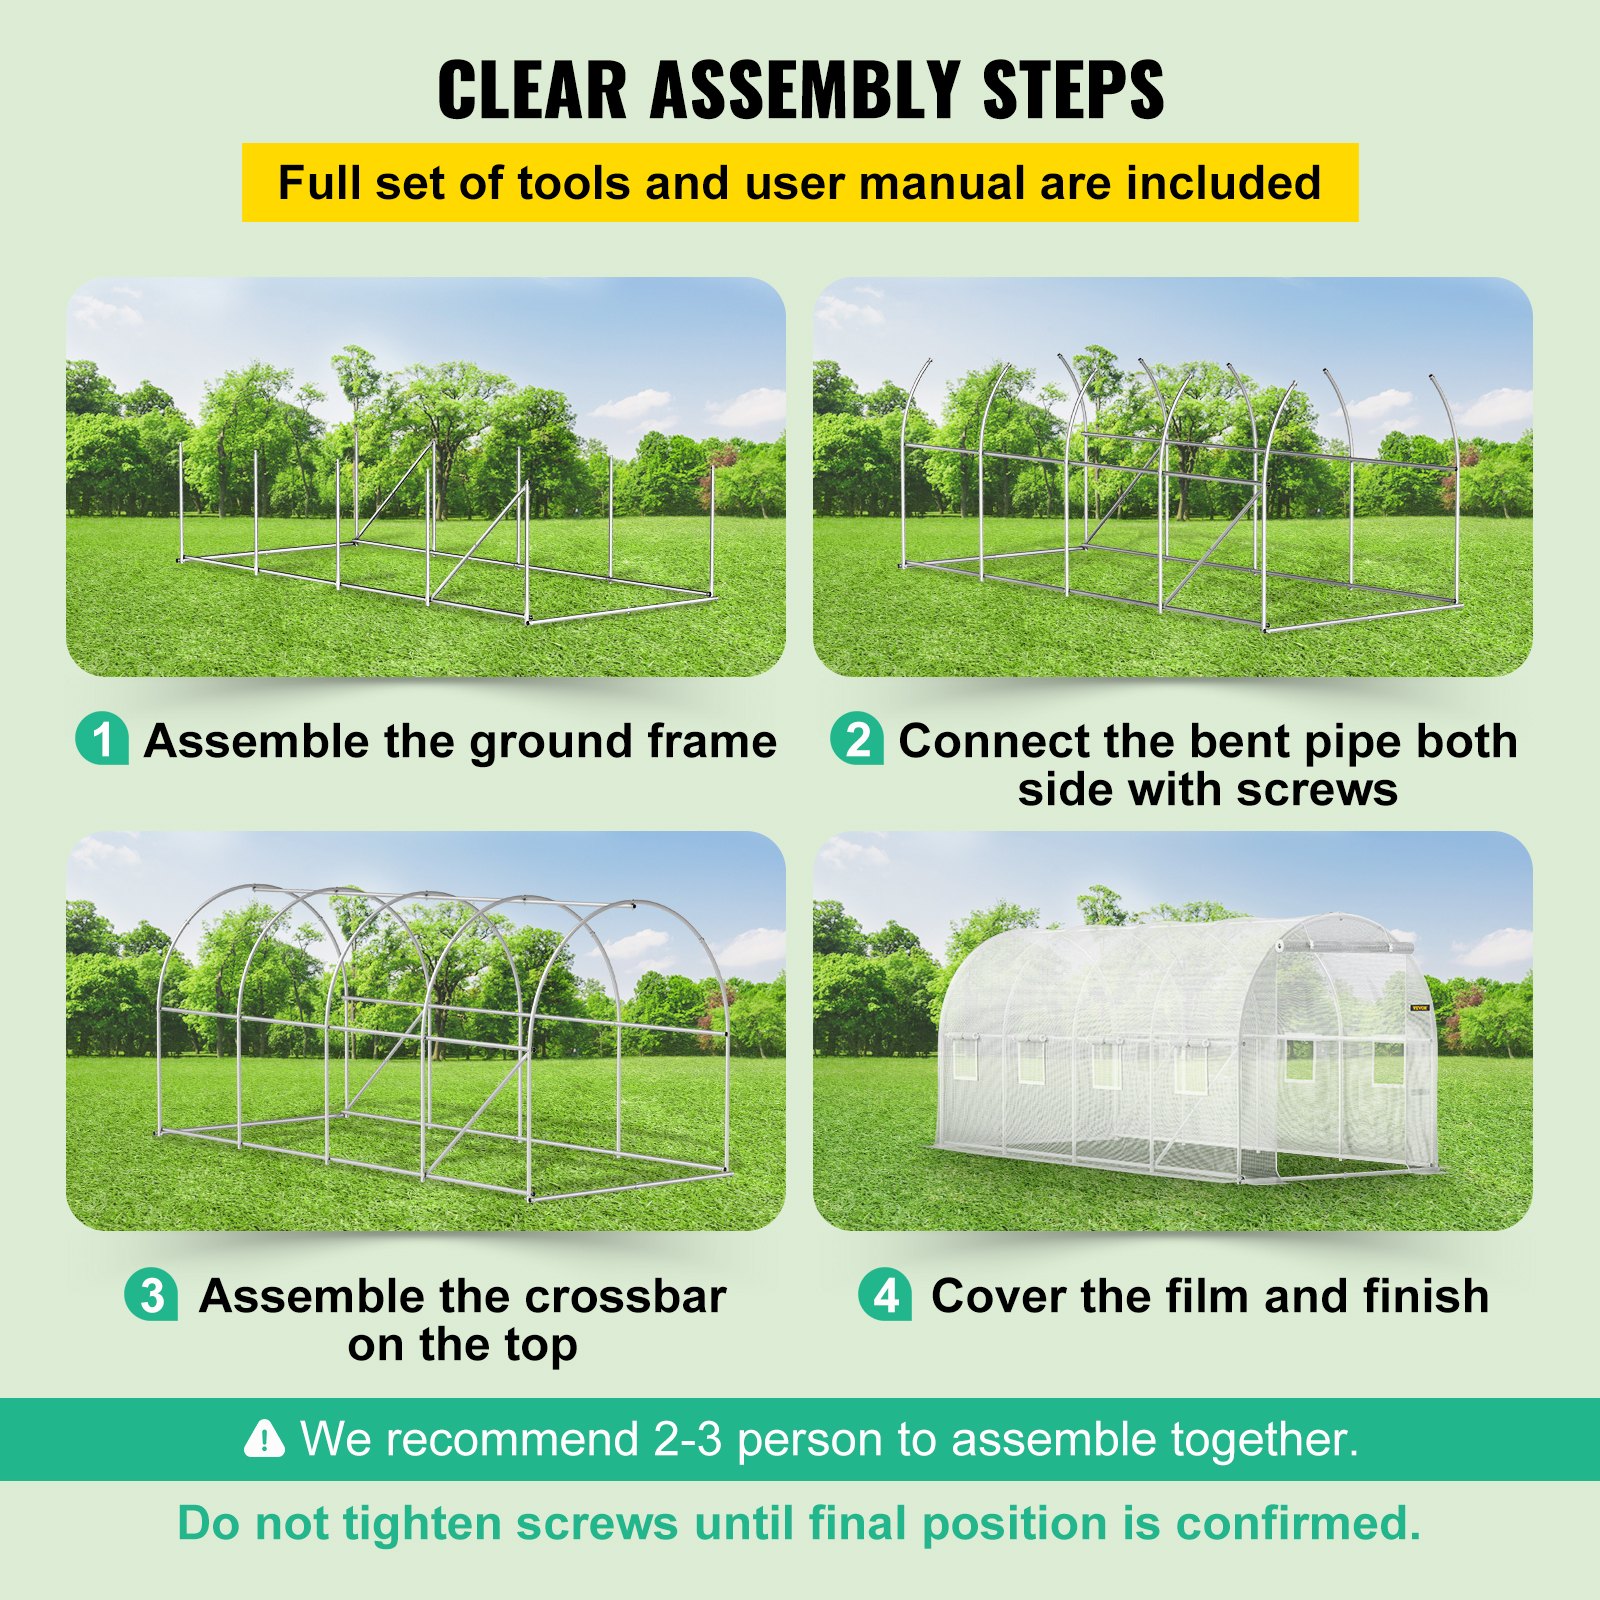
Read the installation instructions carefully. It is recommended that 4 people participate in setting up the walk-in tunnel greenhouse.
Walk-in Tunnel Greenhouse Assembly Instructions
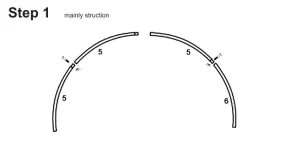
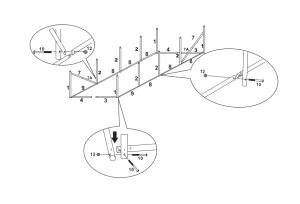
Assemble 5 sets of no.5+no.5 together, make them into one part first, use the shorter bolts, put the curved tube on the flat ground, make both tubes horizontal, and then tighten the nuts. And assemble for 5 sets, no.5+no.6 in the same way.
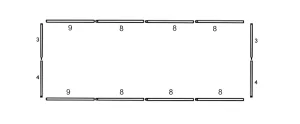
Assemble for 2 sets floor tubes no.3+no.4 use the shorter bolts, and the horizontal frame no.9+no.8+no.8+no.8 together.

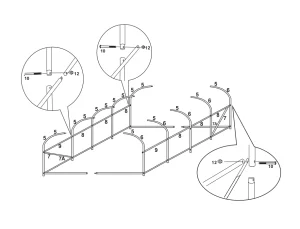
Step 2
Loosely assemble the complete frame before tightening all bolts in the final position.
Step 3
Loosely assemble the complete frame before tightening all bolts in the final position.
Step 4
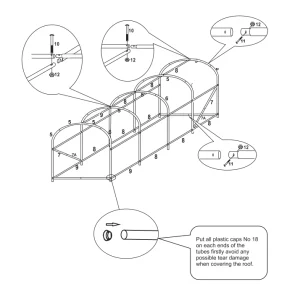
Loosely assemble the complete frame before tightening all bolts in the final position.
Step 5
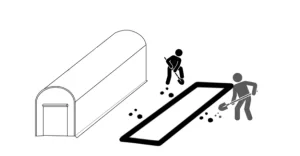
For maximum stability of your walk-in tunnel greenhouse, we recommend digging a 20 cm-wide trench around its base and back.
 Put the frame inside the trench, filling it with soil.
Step 6
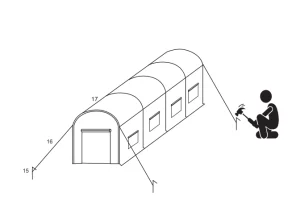
Tied the string in the back of the cover to the frame.
Use the ropes and stakes for the four corners of the greenhouse to reinforce its stability.
Walk-in Tunnel Greenhouse Use Instructions
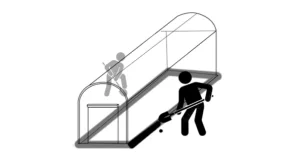
Covering the roof carefully ensures that all places are in the correct position, so as not to make the frame structure of the greenhouse out of shape.
Do not use the Walk-in Tunnel Greenhouse in bad weather conditions like rainstorms, hail, heavy snow, and wind.
Recommended For Your Project
VEVOR Walk-in Tunnel Greenhouse, 15 x 7 x 7 ft Portable Plant Hot House Manual


Reviews
There are no reviews yet.