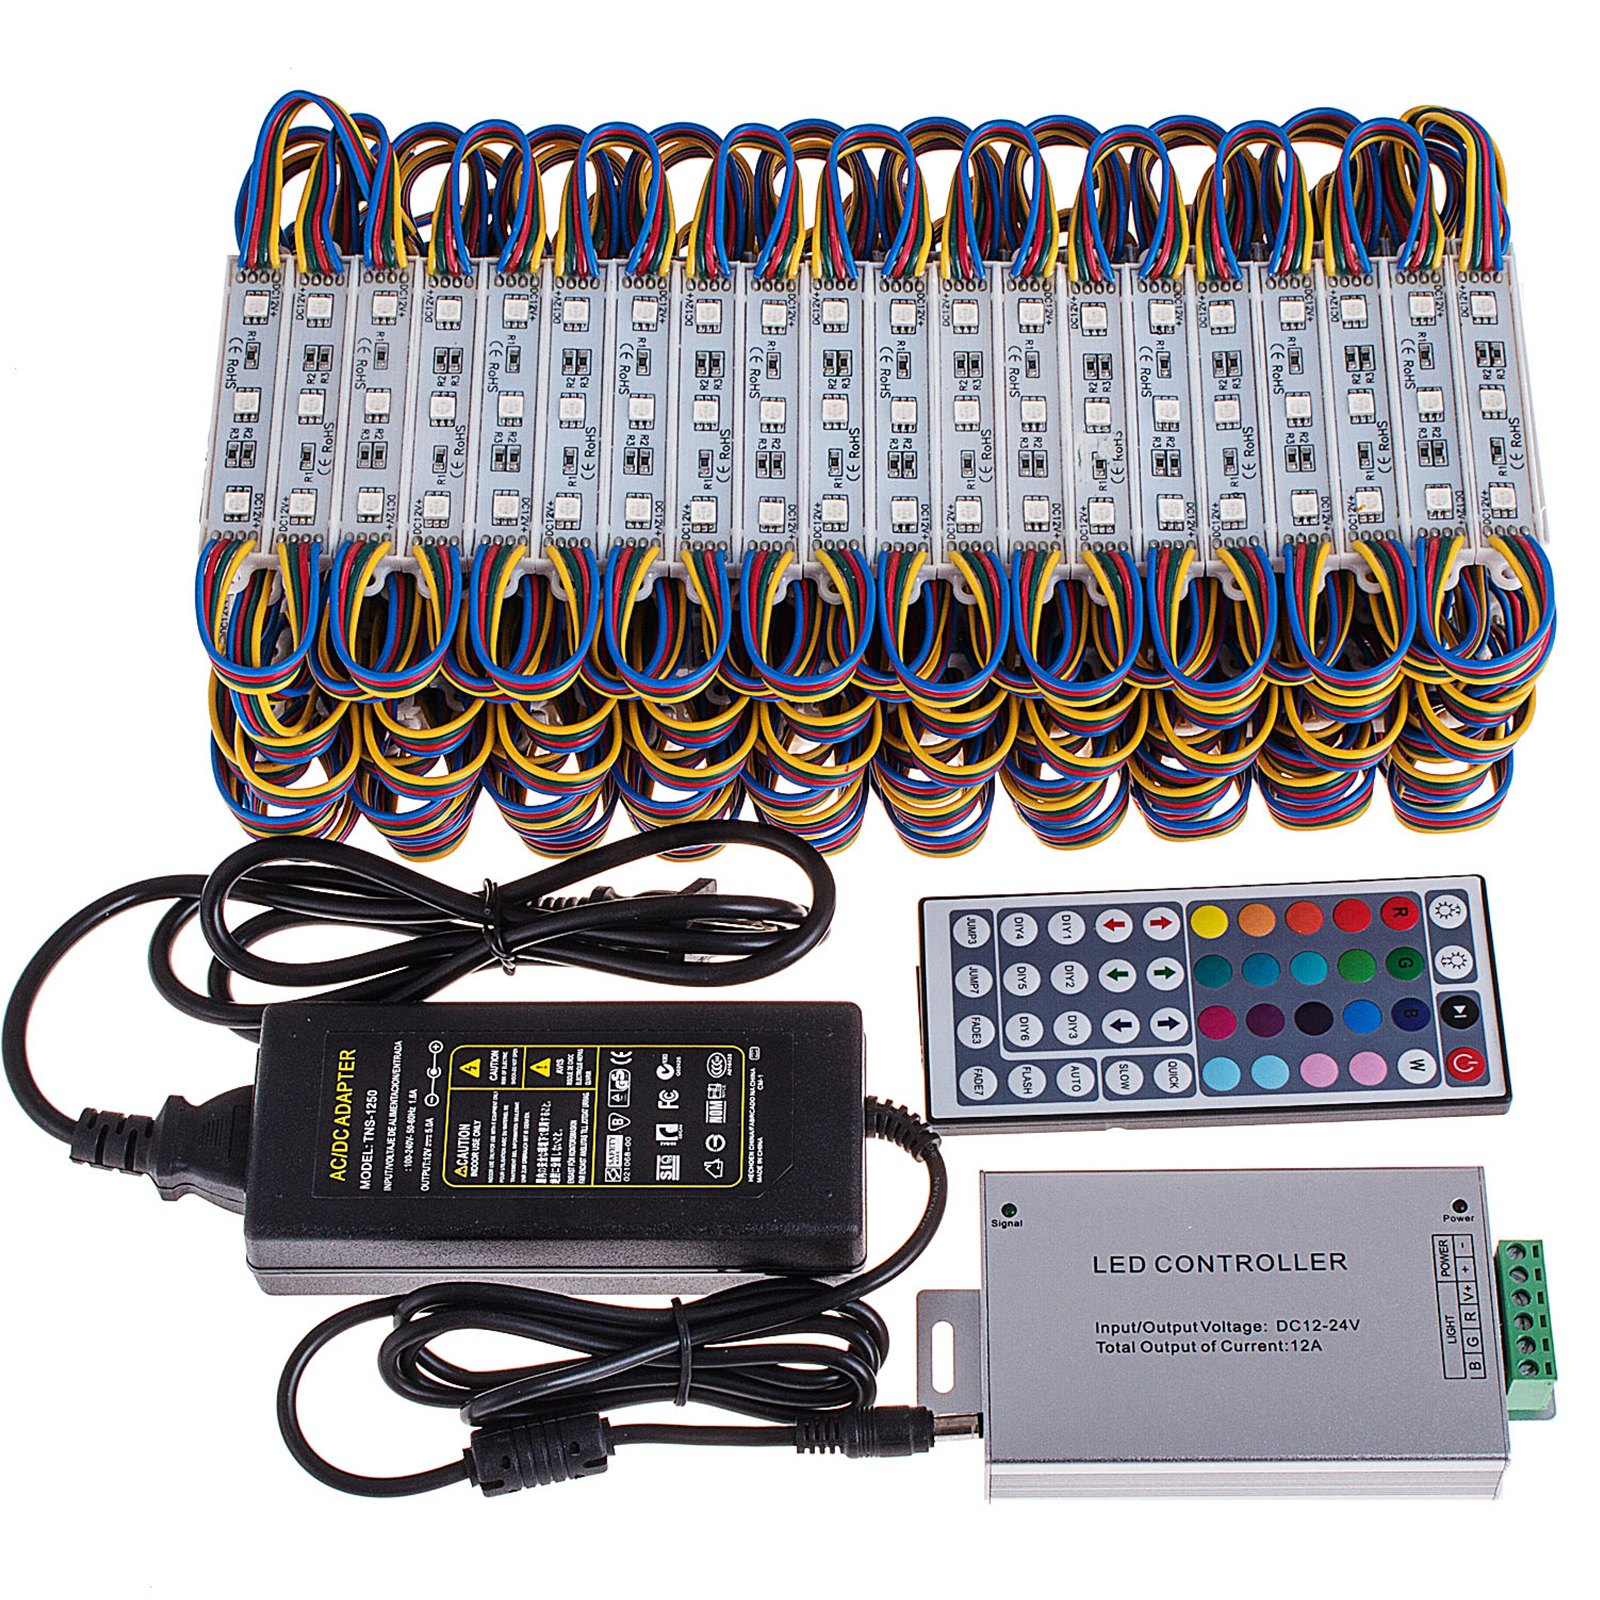
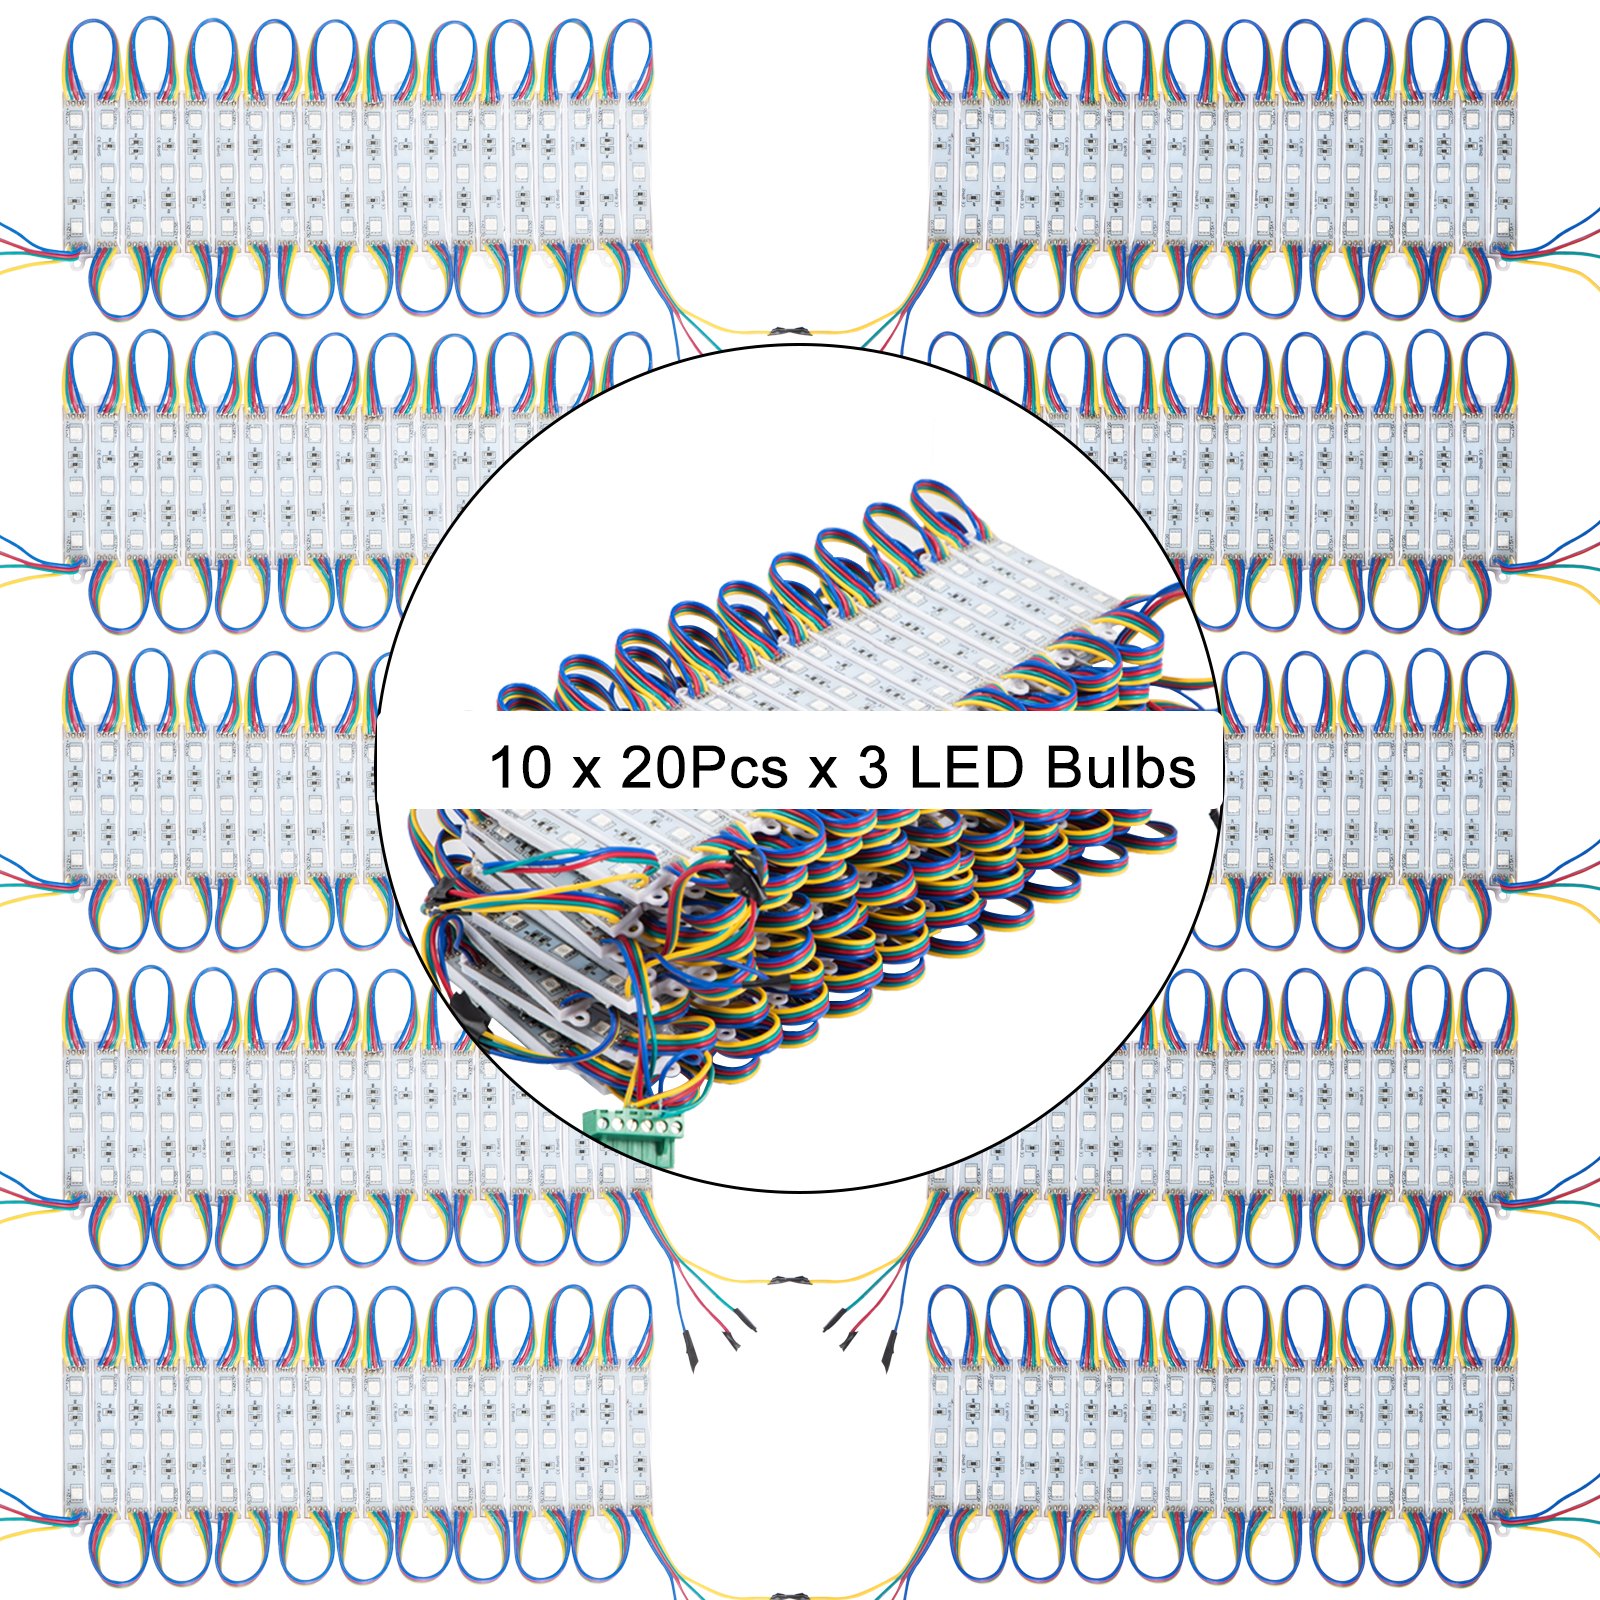
Unlock the full potential of your VEVOR Storefront Lights RGB SMD5050 with our comprehensive product manual download. This detailed guide is designed to help you seamlessly set up, troubleshoot, and optimize your 20 Colors Window LED Light (100Ft, 200Pcs, 3 LED Module Light).
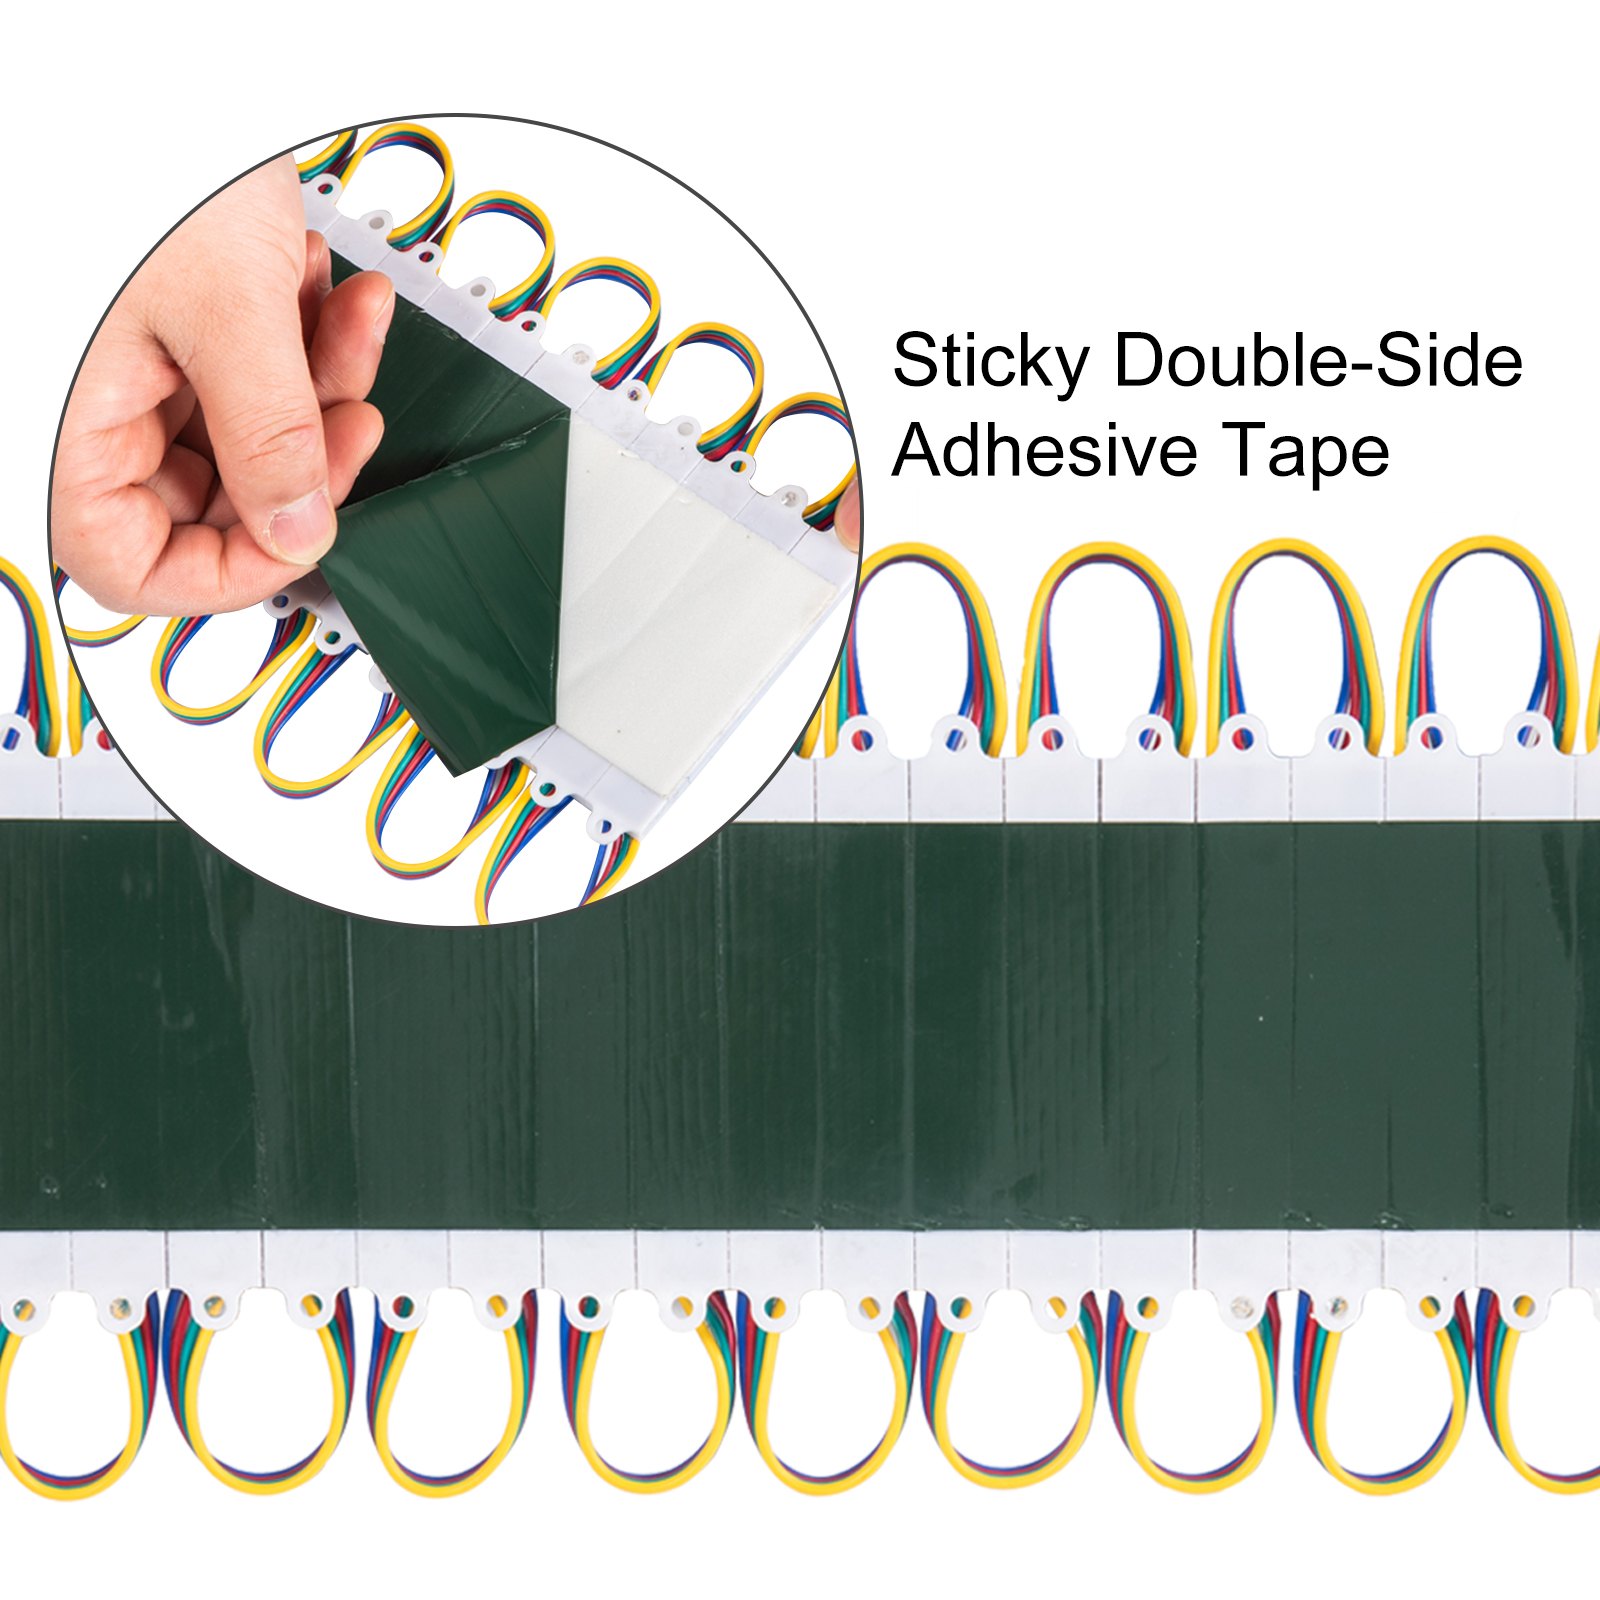
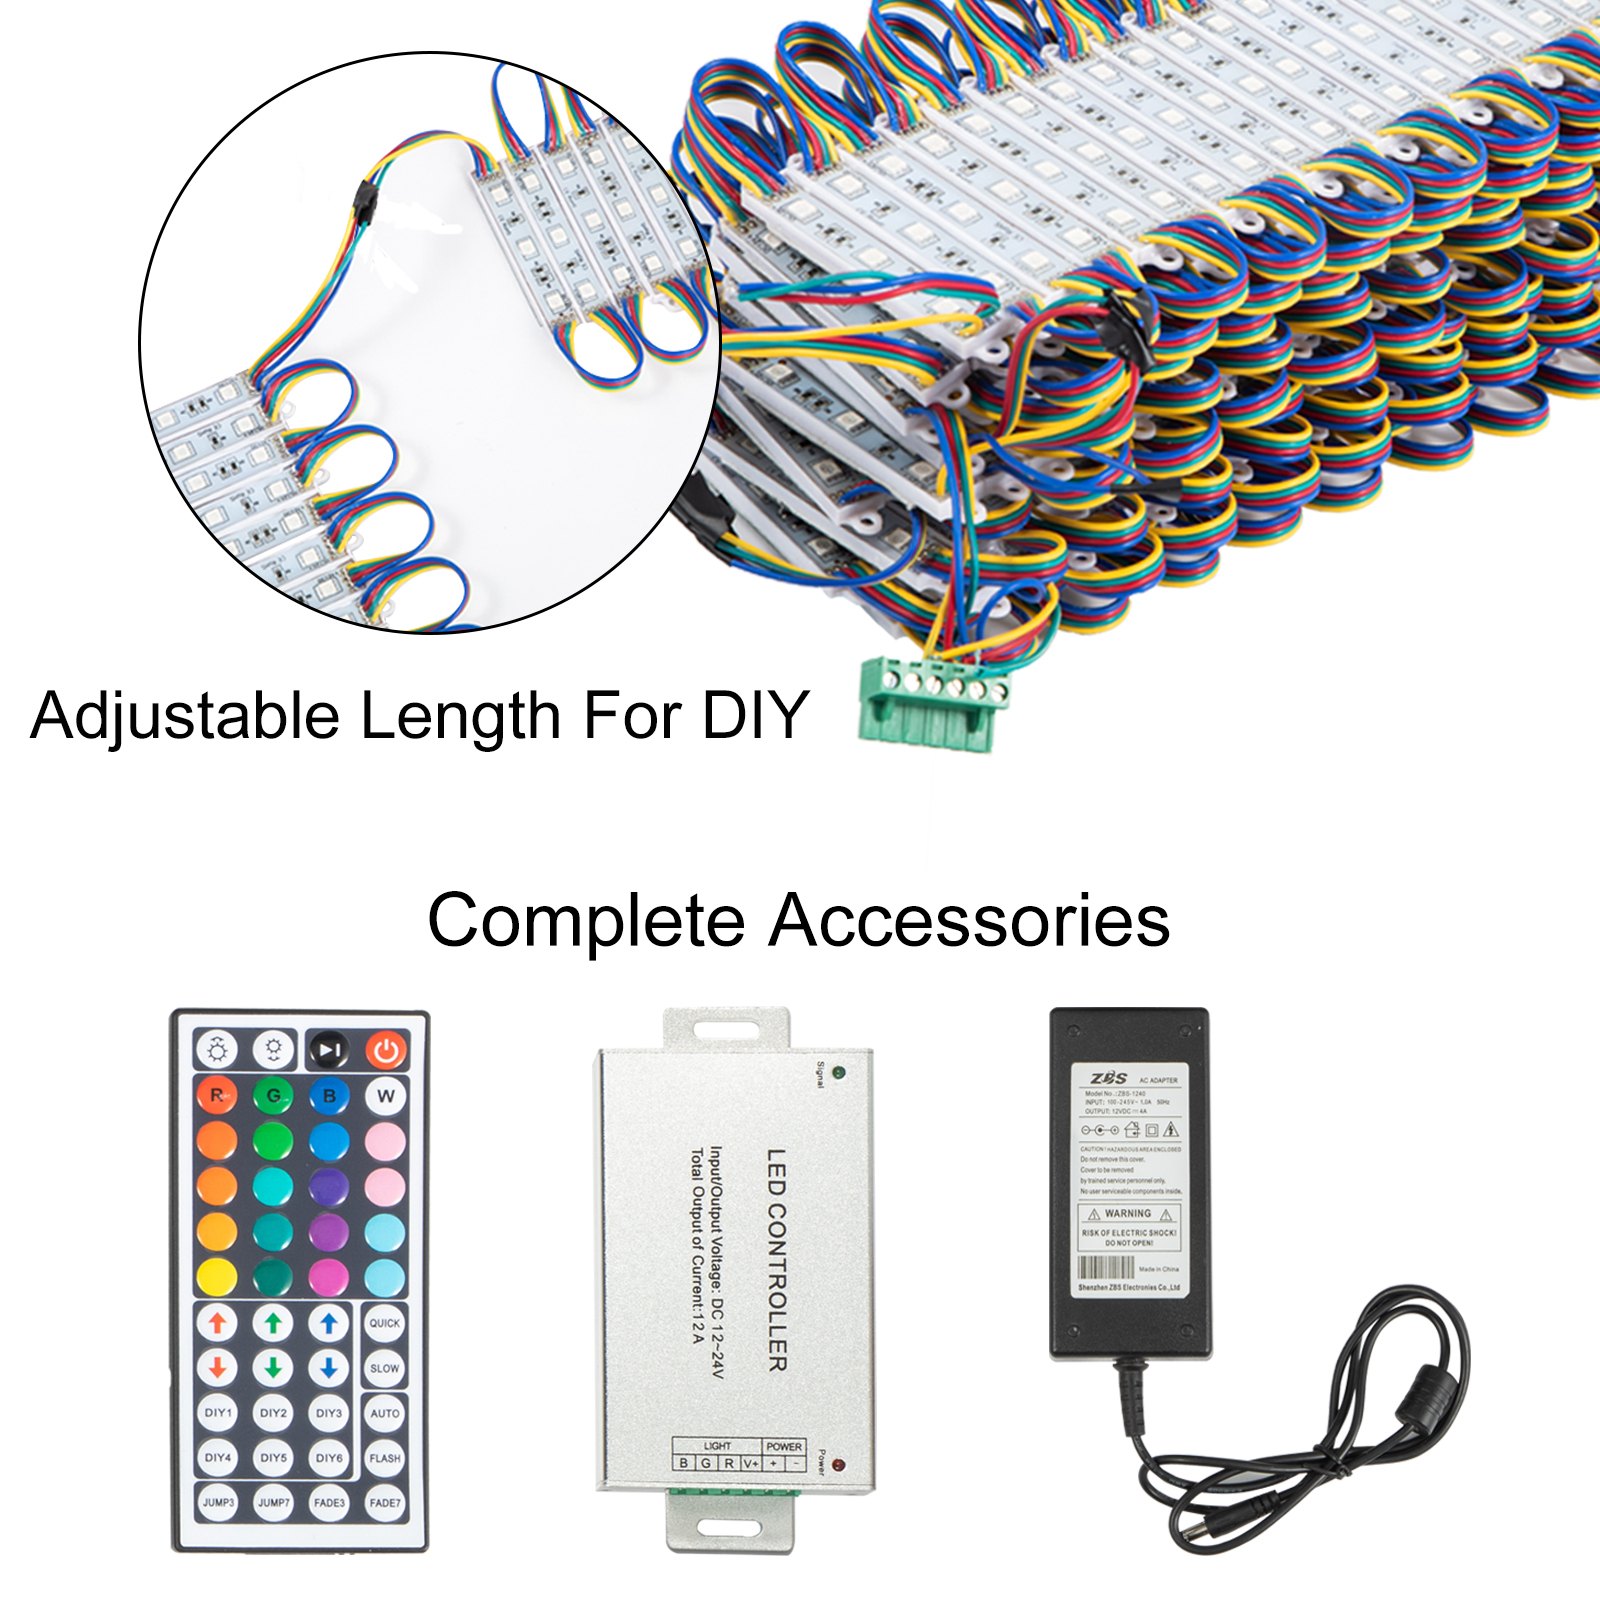
Whether you’re a DIY enthusiast or a business owner, our manual covers every aspect of your Waterproof Business Decorative Light, ensuring you get the most out of its adhesive-backed design for indoor and outdoor applications.
Inside, you’ll find step-by-step instructions, valuable tips, and troubleshooting advice to help you create stunning lighting displays with ease and confidence. Download now to elevate your VEVOR lighting experience.
VEVOR Storefront Lights User Manual
MODELS: 505080, 5050200, 5050400
Important
Please read all safety precautions and installation instructions carefully before installing.
- Do not handle any energized fixture or attempt to energize any fixture with wet hands, or while standing on a damp surface or in water.
- Assure that the fixture is mounted onto a sound structural surface that will support the fixture.
- Do not install on a radiant-heating type surface.
Storefront Lights Installation Instructions
Note:
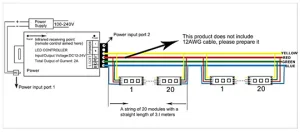
1. Installation steps:
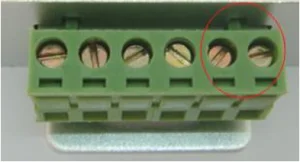
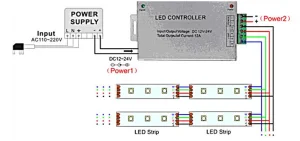
- Prepare 12AWG cable
- Connect the 12AWG cable to the controller V+, R, G, and B ports respectively (as shown in the above figure)
- Connect the modules in parallel to the 12AWG cable main line
2. Each power adapter can use 80 modular lamps. If all lamp groups need to be installed and used, purchase a power supply yourself .
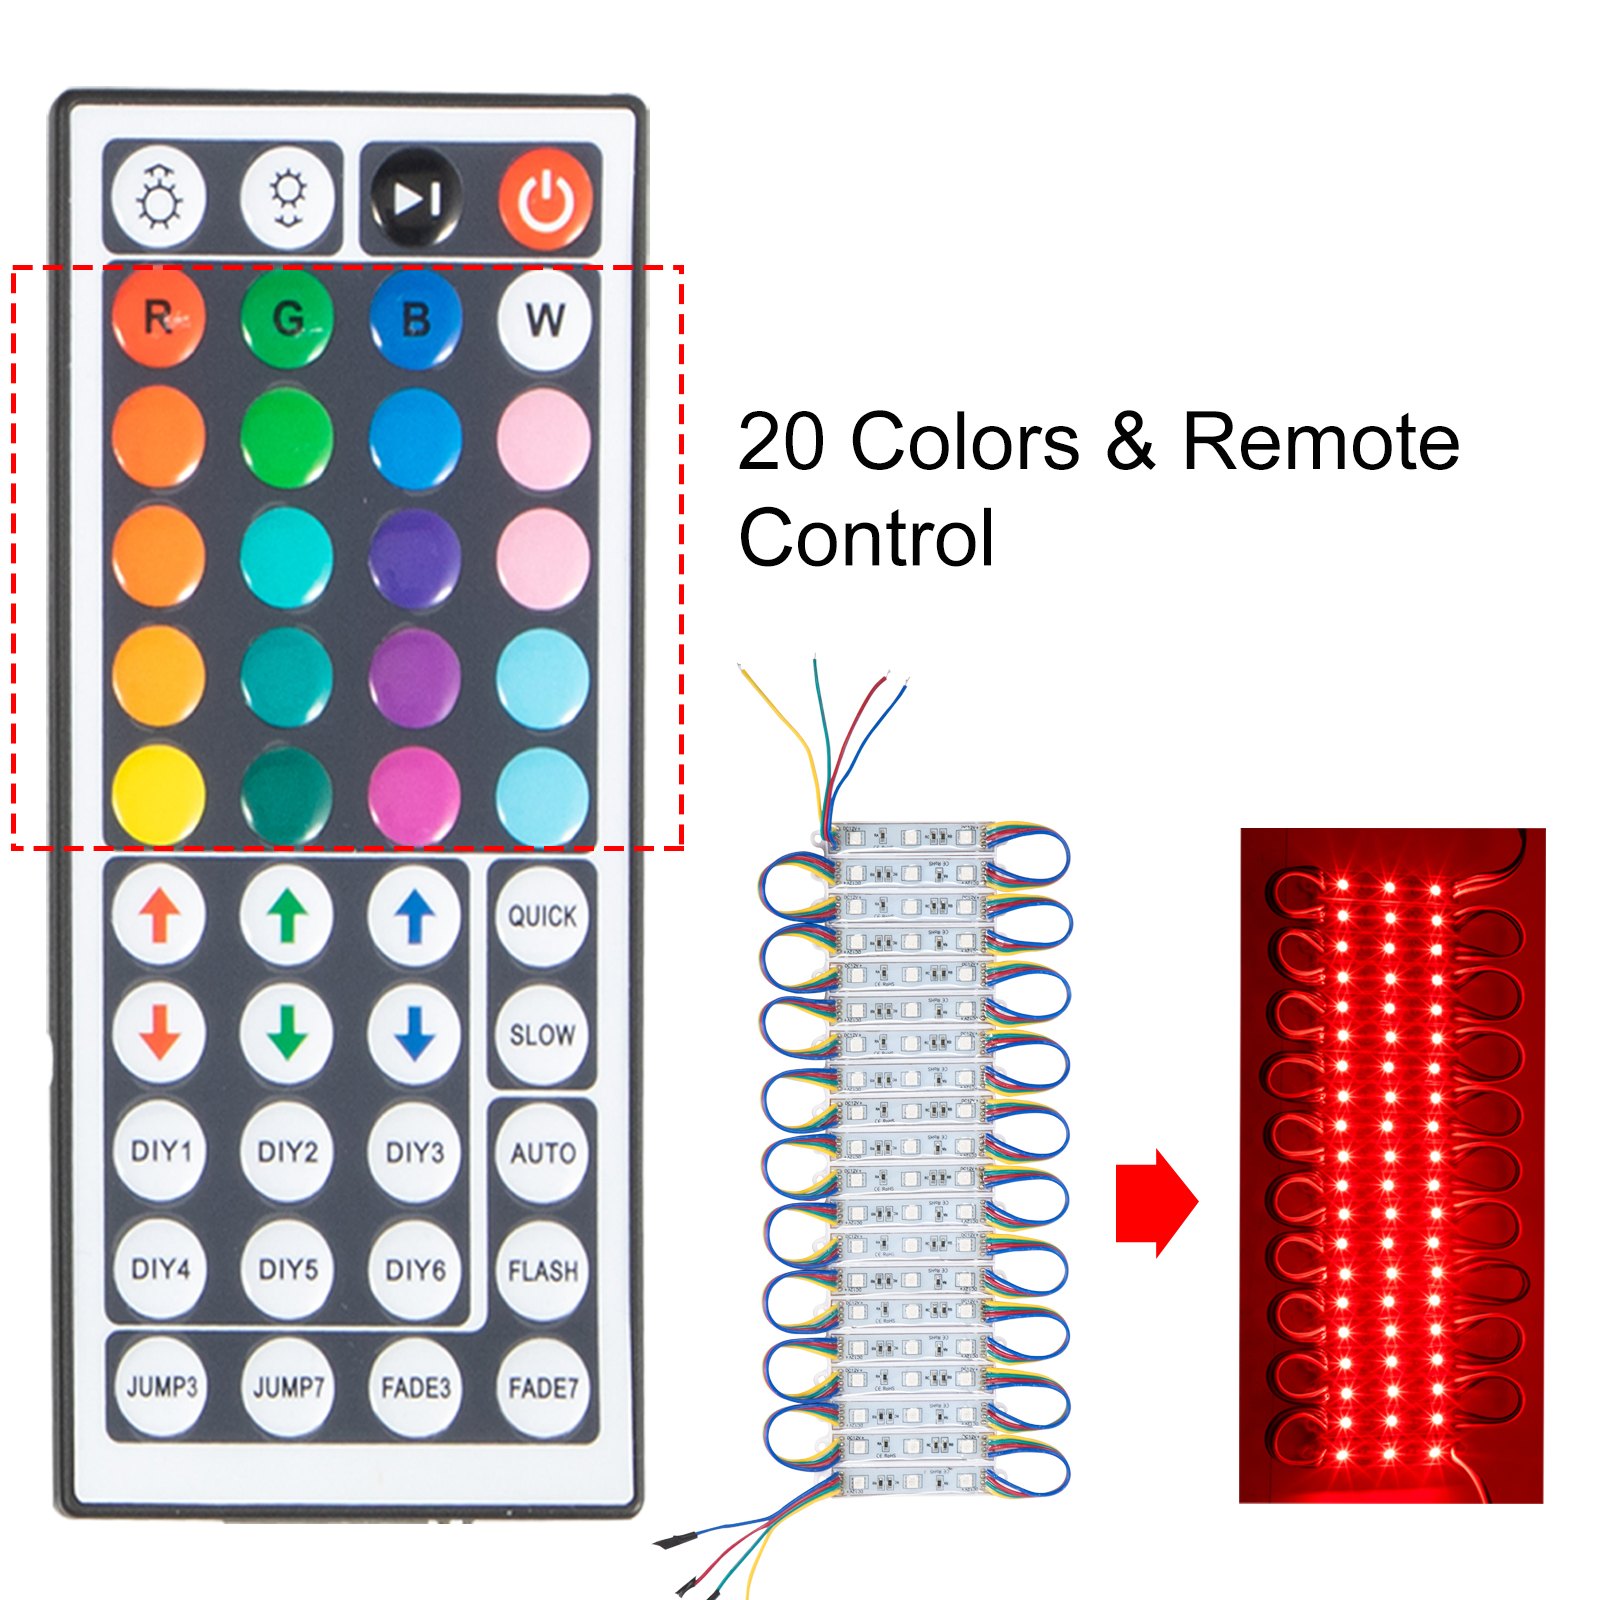
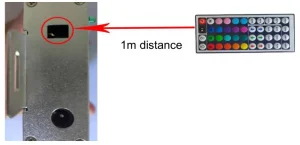
3. The remote control distance is within 1M (When not aligned with the receiving point, the remote control distance is 15CM)
4. When there are no obstacles between the remote control and the receiving head, the maximum remote control distance of the remote control is 1 meter. When there are obstacles, the maximum remote control distance is 15cm.
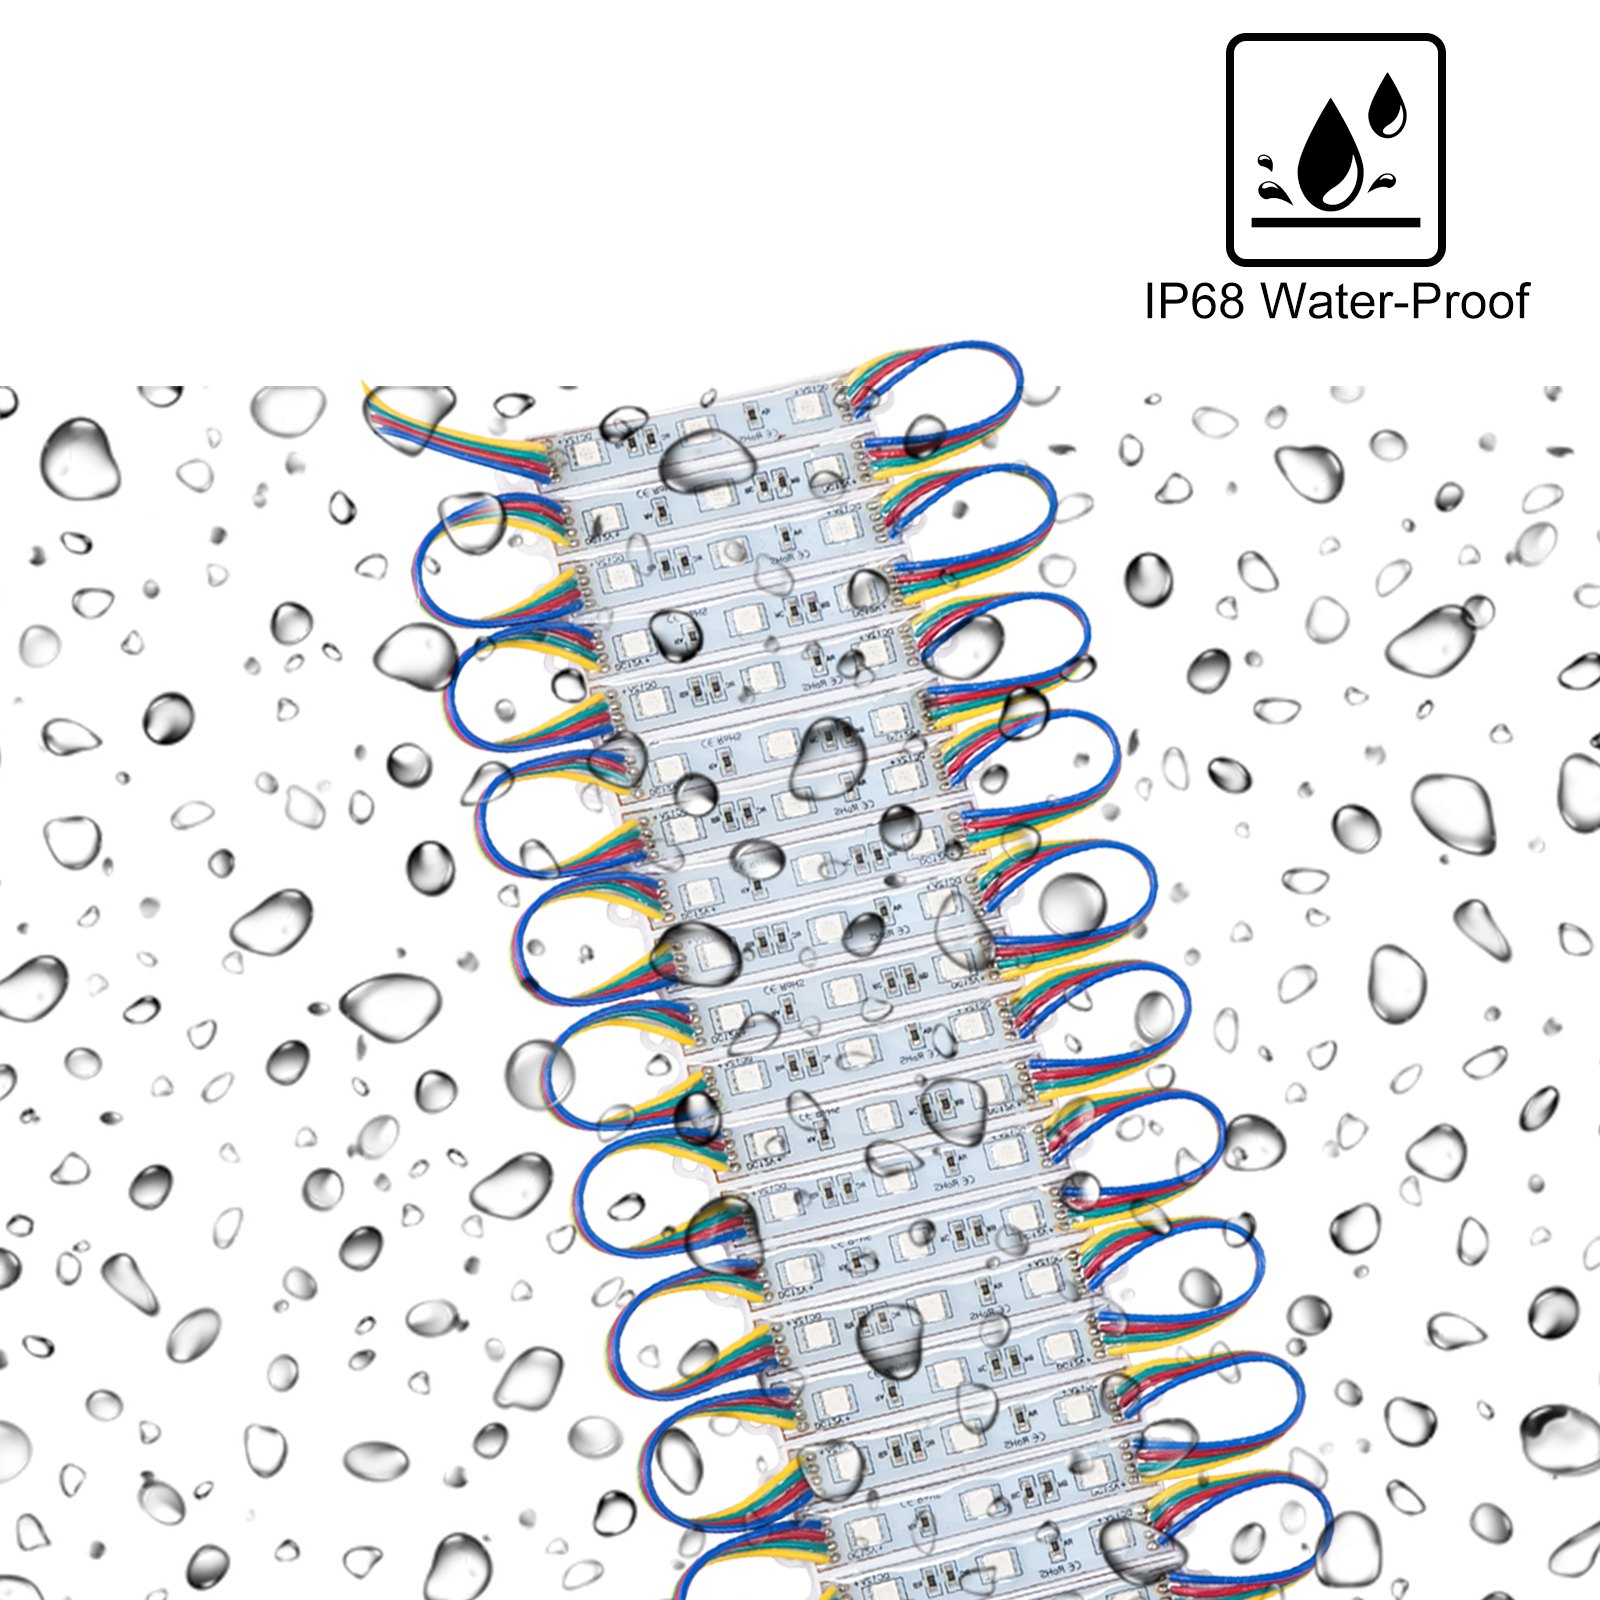
5. The module light group must be installed in parallel, and serial installation will cause a voltage drop (the front light group is very bright, and the back light group is dark, which will affect the normal service life of the
light group.
Storefront Lights Technical Information
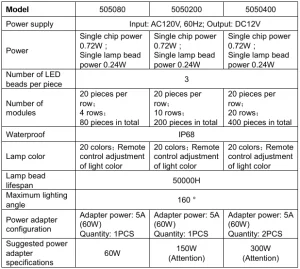
Attention: The power adapter delivered has a power of 60W, and each power adapter can use 80 pieces of modular lamps. If all lamp groups need to be installed and used, you need to purchase a power supply yourself:
- Model: 5050200; Suggested power adapter specifications, 150W
- Model: 5050400; Suggested power adapter specifications, 300W
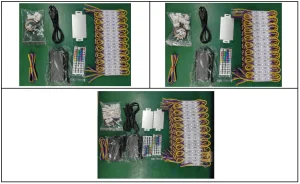
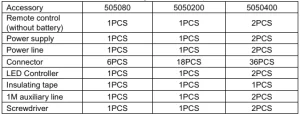
List of accessories corresponding to different specifications:
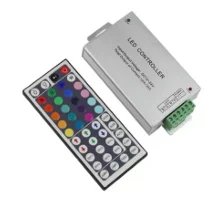
LED Controller
I. Specifications
- Working temperature:-20-60℃
- Supply voltage:12-24
- Product size: L114xW64xH25mm
- Net weight:165g
- Package size: L135xW72xH42mm
- Gross weight:185g
- Output: Three CMOS drain-open outputs
- Connecting Mode: Common anode
II. Interface Description
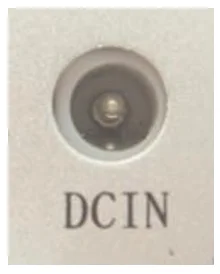
Power input interface (Method 1)
Using a conventional DC power socket as the power input interface
Power input interface (Method 2)
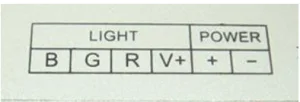
Using a screw interface
Infrared receiving interface
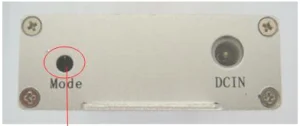
Built-in infrared receiver
III. Instructions for use
Infrared receiving interface:
Built-in infrared receiver
- Connect the load line first, then the power line. Ensure there is no short circuit between the connecting wires before powering on.
- When operating, point the remote control towards the hole of the infrared receiver. When there are no obstacles between the remote control and the infrared receiver, the maximum remote control distance is 1 meter. When there are obstacles, the maximum remote control distance is 15cm.
IV. Control Method
The key-press functions are shown in the table below (per the key position order)
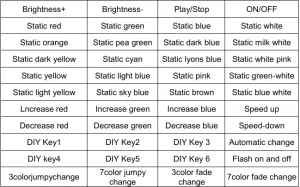
Additional explanation: Regarding the DIY key, when it is pressed for the first time, it will enter the DIY color mode. You can freely increase or decrease the color of R/G/B by adjusting the six custom color keys mentioned above (if other keys are pressed, it will jump out of the DIY color mode setting).
You can also save the color set by pressing the DIY key again. The next time this key is pressed, it will display the last saved color.
Due to the 6 DIY keys, you can save your favorite 6 colors. They are all independent and do not influence each other. For example, if you press DIY key 1 and then press DIY key 2 again, DIY key 1 will be invalid until you press DIY key 2 again, and the current color will be saved.
V. Panel specification and connecting drawing as follows:
VI. Warning:
- The supply voltage of this storefront Light is 12-24V; never connect to AC110V or AC220V.
- Never connect two wires directly in case of a short circuit.
- The lead wire should be connected correctly according to the connecting diagram’s colors.
- Warranty of this product is one year, but excludes the artificial situation of damage or overload during working
Notice:
- No static touch, hotline work.
- Use a switch or power supply with an installed security (over-voltage, over current, open circuit protection, etc.)
- Please maintain correct wiring.
- The module is prohibited from being overloaded
- It is strictly forbidden to use the hand to press the LED surface.
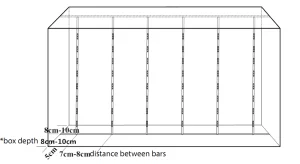
Application: Light box
We recommend: –
- Box depth: 8cm-10cm – Distance between bars:7cm-8cm
- Box depth can be from 8 cm to 12 cm
- If the box depth is more than 12cm, the brightness will decrease
- If the depth of the box is less than 8cm to 10cm, the distance between bars should be less than 7cm
- The wider the beam angle of the LED module, the thinner the depth of the box.
- The narrower the beam angle of the LED module, the deeper the depth of the box.
Recommended For Your Project
VEVOR Storefront Lights RGB SMD5050 20 Colors 200Pcs Manual

Reviews
There are no reviews yet.