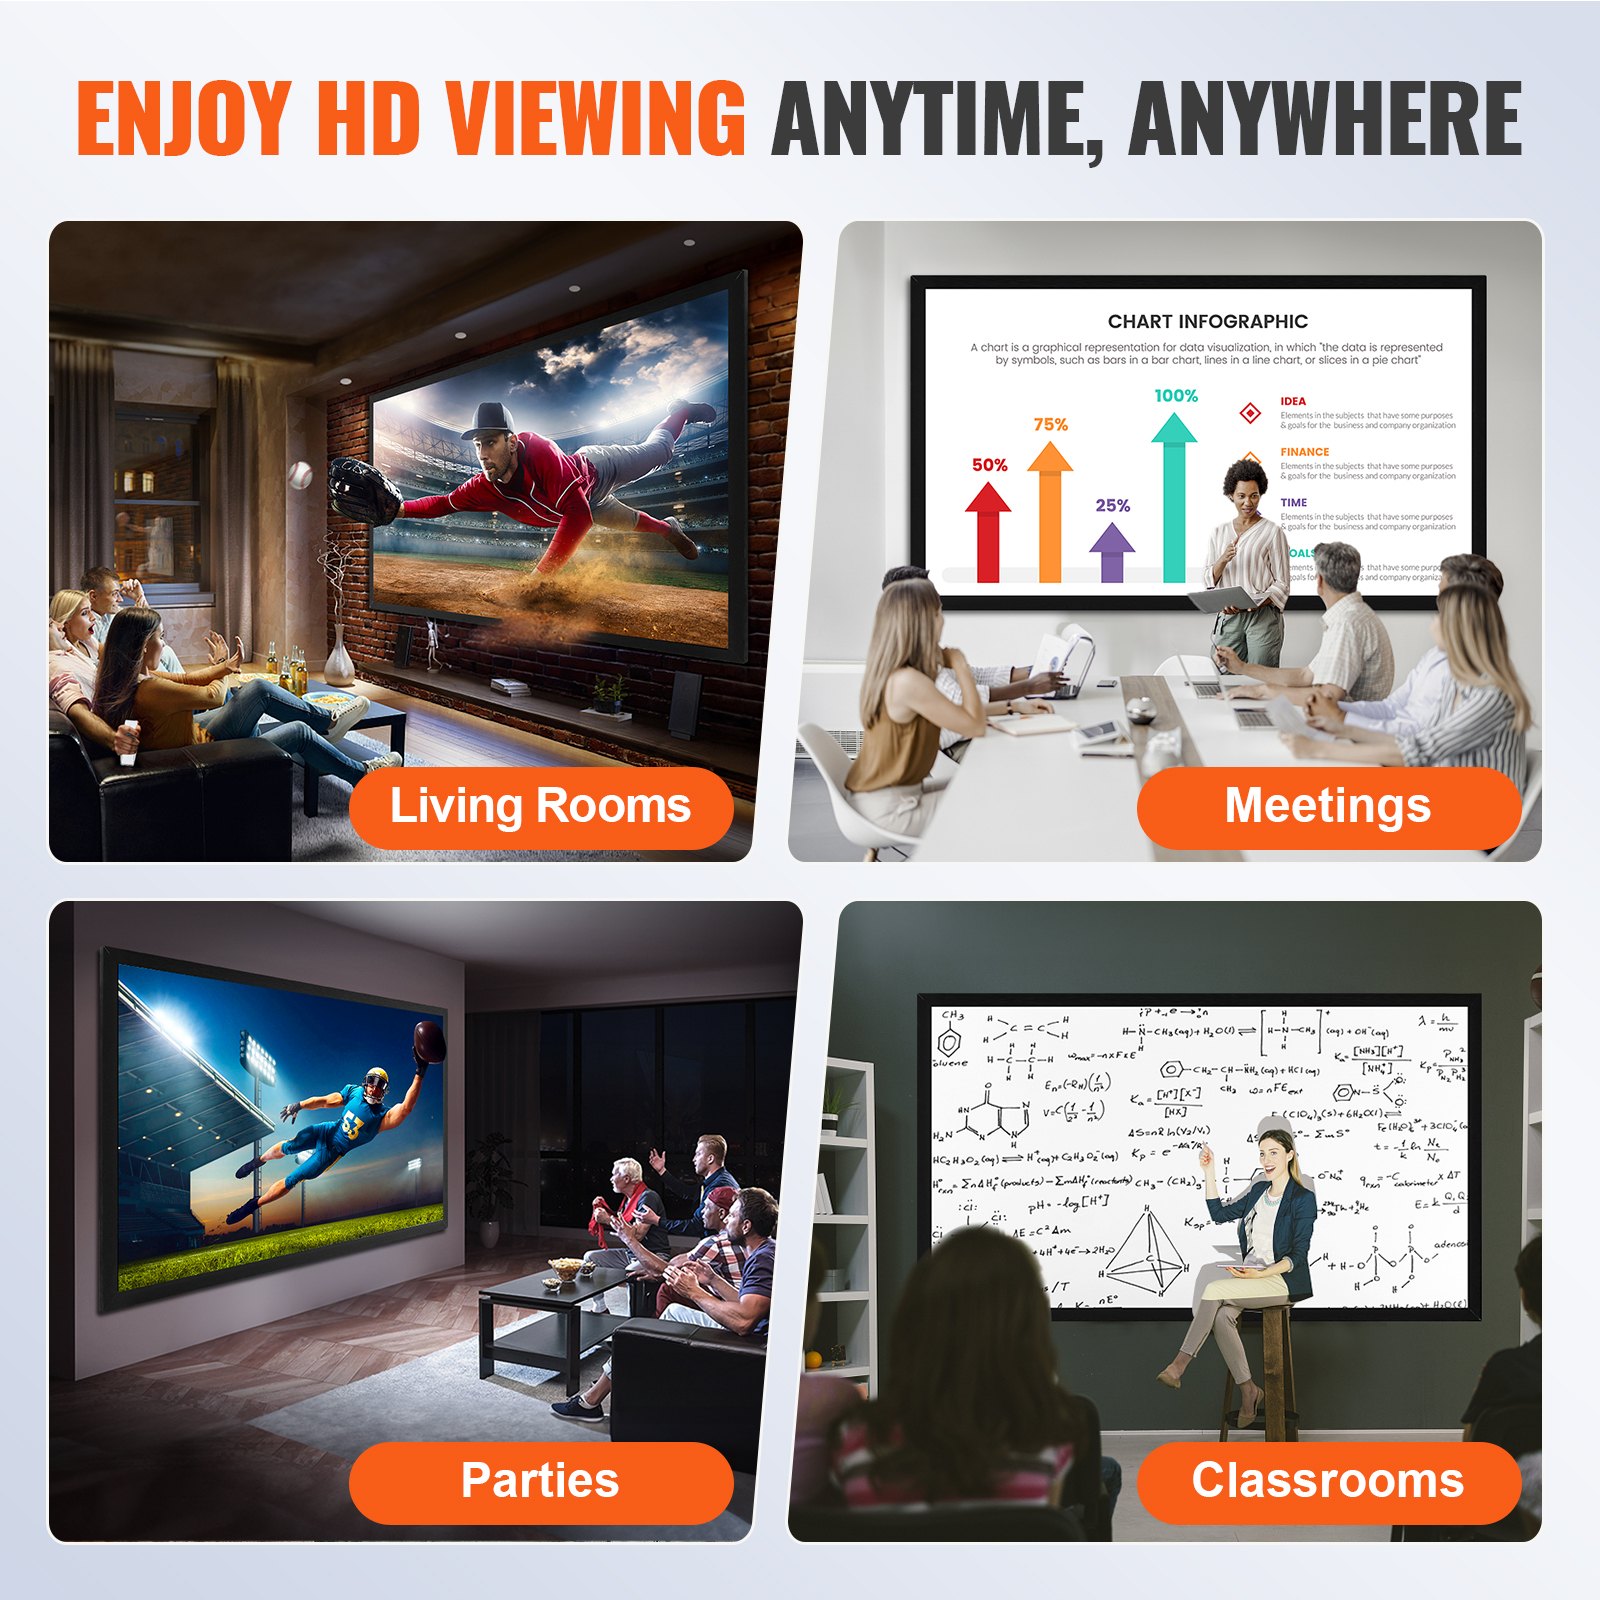
Unlock the full potential of your VEVOR Projector Screen Fixed Frame 100-inch Diagonal 16:9 4K HD Movie Projector Screen with Aluminum Frame Projector Screen Wall Mounted for Home Theater Office Use with our comprehensive product manual download. This detailed guide is meticulously crafted to help you seamlessly set up, troubleshoot, and optimize your projector screen setup.
Whether you’re using it in a home theater or an office environment, our manual offers step-by-step instructions, insightful tips, and valuable information to ensure you get the most out of your projector screen.
Our manual, designed with user-friendliness, makes complex installations straightforward, providing a stress-free experience from start to finish. Download now and take the first step toward an unparalleled viewing experience.
Projector Screen Fixed Frame Assembly Guide

Before you begin
- Clear out an area to assemble the screen. Make sure the area is larger than the screen’s size.
- Remember that the assembly will require at least two people to complete some steps.
- Do not assemble in areas with a high temperature to avoid damaging the screen.
- Read through this entire Assembly Guide before beginning the first step.
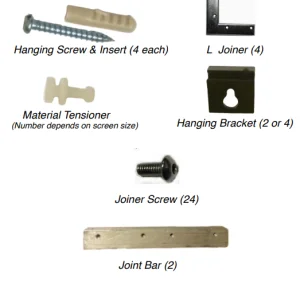
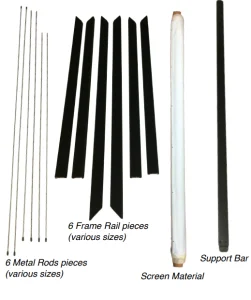
Parts
Required Tools:
- Philips Screwdriver
- Level
- Allen Wrench (Included in box)
Projector Screen Fixed Frame Installation Procedures:
1. Unpack all the parts in the box. Do not unroll the screen yet.
2. Make sure your assembly area is clean. When spread out, at least two feet of space is required on all four sides of the screen.
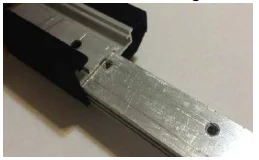
3. Unwrap the Frame Rails and lay them out upside down.
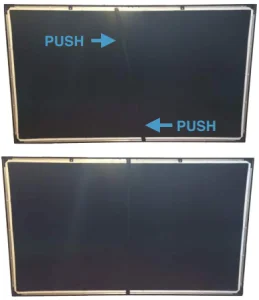
4. Assemble both of the Large Frame Rails by sliding the Joint Bars into the ends and securing them with the Joint Screws.
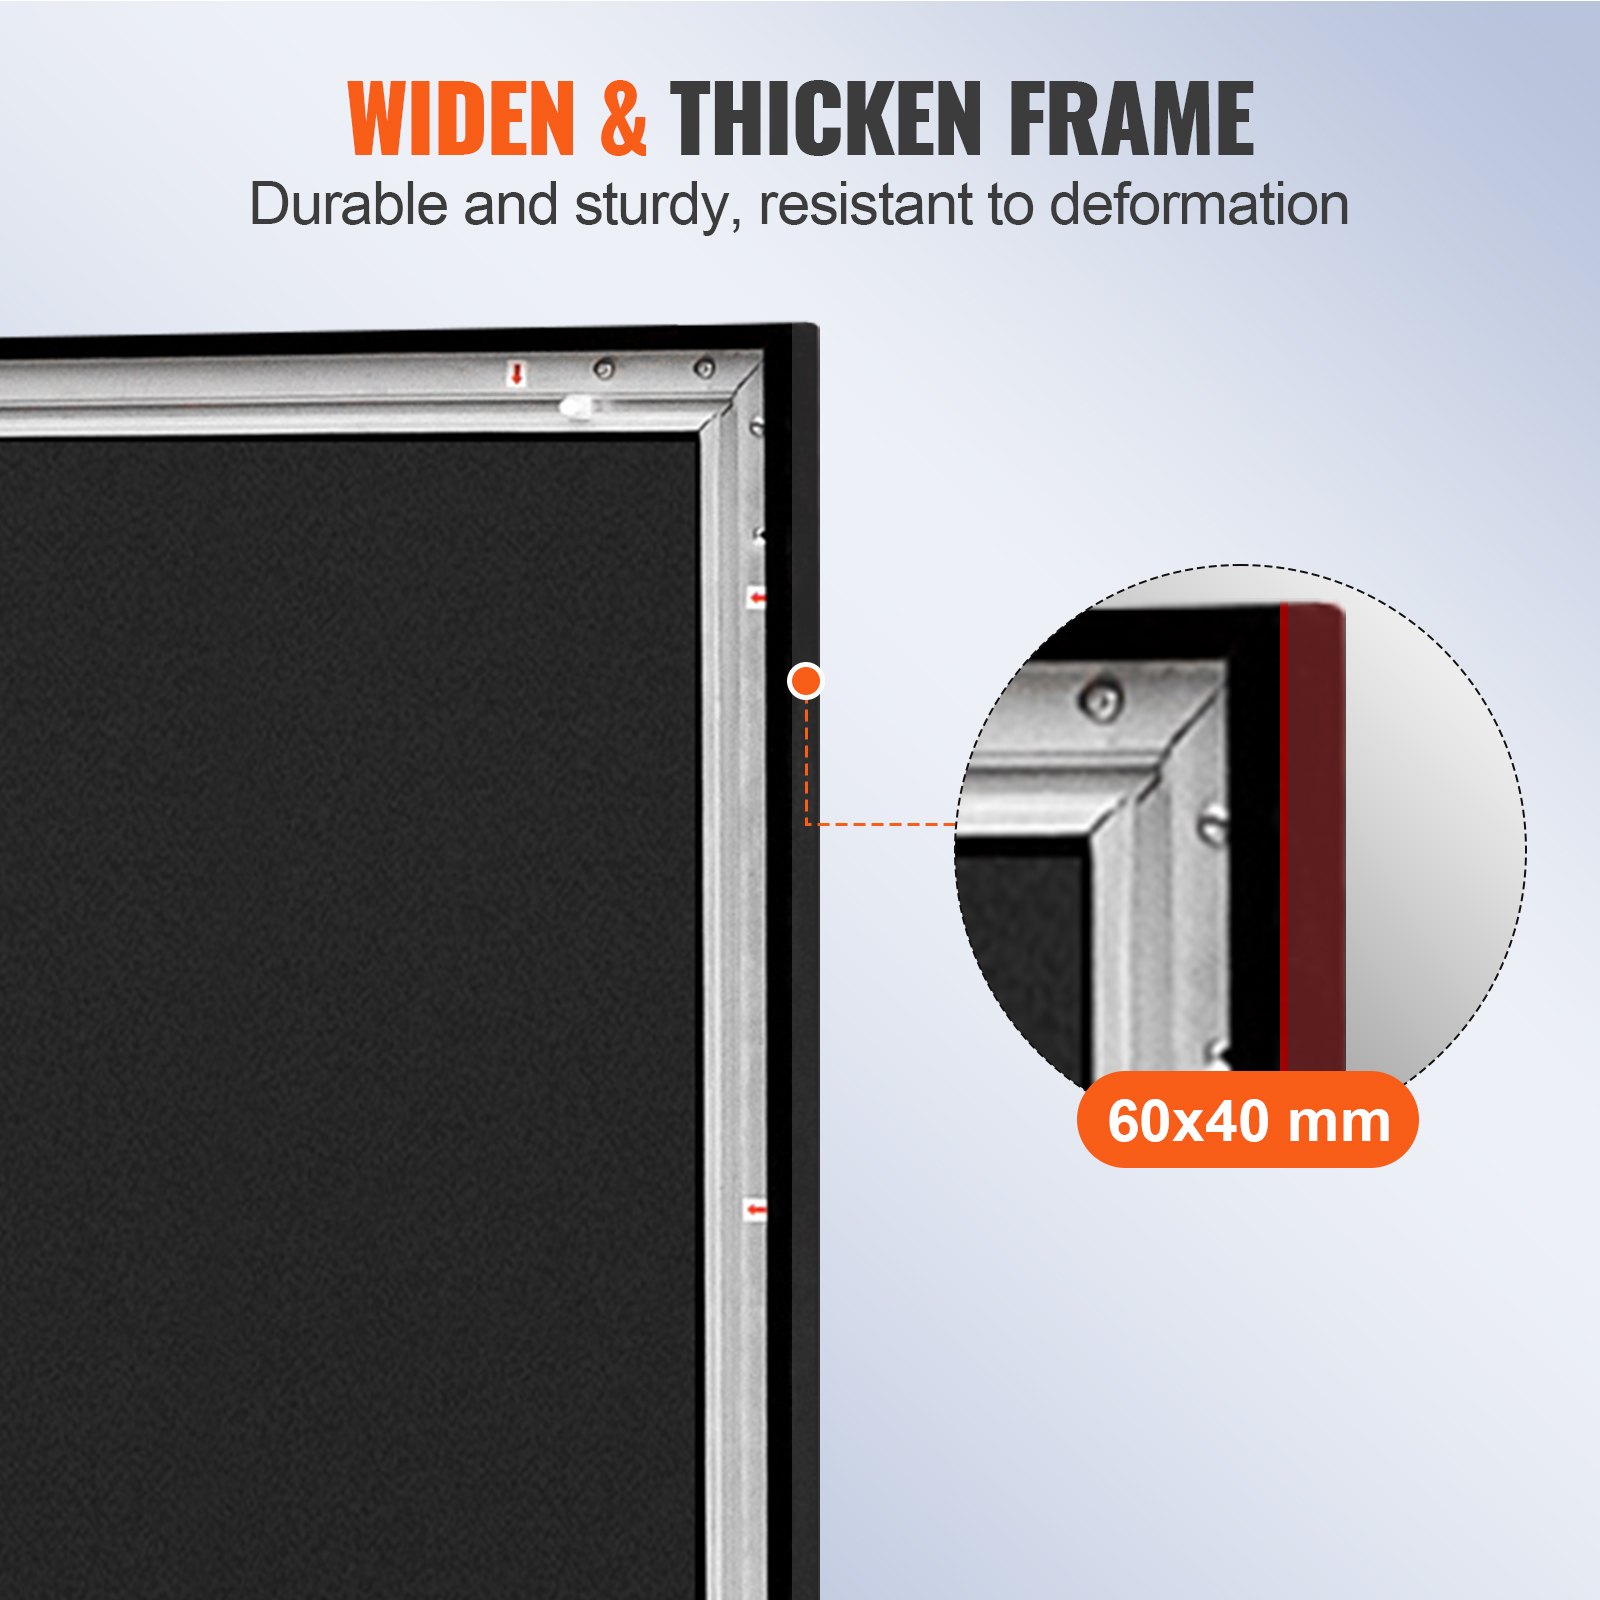
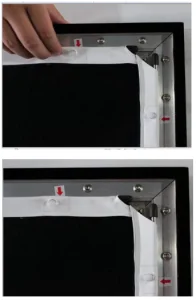
5. Slide Material Tensioners into the areas indicated by the red arrows on the Frame Rails.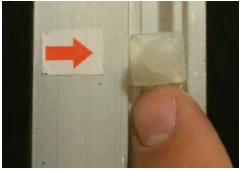
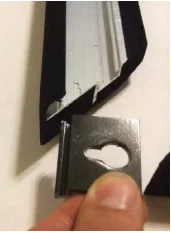
6. Slide the Hanging Brackets into place. Depending on your screen size, there will be two to four of them. Two go on the top rail, and maybe two on the bottom rail, and they will be used to hang the screen.
7. Connect the Short and Long Frame Rails by sliding the L Joiner into them, then sliding them onto the L Joiner. Repeat this step for each corner until the Frame is complete.

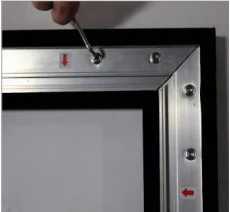
8. On each corner, place an L Iron Joiner. Use the Allen Wrench and L Joiner Screws to connect it to the
Aluminum Connectors beneath it.
9. Unroll the Screen Material and place it gently on the floor with the viewing side facing down. Make sure the
floor is clean.
10. Connect two of the rods to make a longer rod. Repeat. These connected rods will be used for the long sides of the screen. Insert the Metal Rods into the pockets at the edges of the screen, using the appropriate rods for each side.
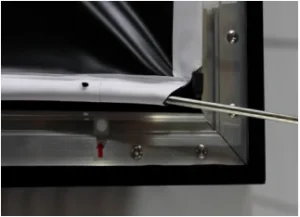
11. Place the Screen Material onto the frame. Push the Material Tensioners through the slots on the edges of
the Screen Material. Start at one end of the screen and move along the frame until all the Material Tensioners
are correctly inserted.
Note: The last few Material Tensioners may require hard pulling to flatten the screen. Make sure everything looks correct before hanging the screen. Material Tensioners do not have to align perfectly with the red arrow stickers.
12. Now, place the Support Bar diagonally in the middle of the screen. Push the ends of the Support Bar until they are vertical in the center of the screen where the frame pieces join.
13. To fasten the screen frame to the wall, first use a level and a pencil to mark the desired location for the Hanging Screws. Different wall types require different types of fasteners, which are not included.
14. Use two people to lift the screen. Stand on opposite sides of the screen and lift it gently. Hang the screen onto the Hanging Screws at your desired location.
Thank you for purchasing our Fixed Frame Screen. Our excellent screen material and design will provide years of trouble-free enjoyment.
Recommended For Your Project
VEVOR Projector Screen Fixed Frame 100inch Diagonal Manual

Reviews
There are no reviews yet.