
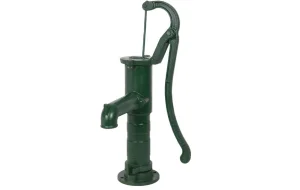
Discover the ultimate guide to optimizing and maintaining your VEVOR Antique Hand Water Pump 14.6 x 5.9 x 26 inch Pitcher Pump with Handle Cast Iron Well Pump. This comprehensive product manual is designed to make installation, troubleshooting, and daily use a breeze.
Whether you’re setting up your old-fashioned pitcher hand pump in your home, yard, pond, or garden, this detailed manual ensures you get the most out of your purchase. With pre-set 0.5″ holes for easy installation and user-friendly instructions, you’ll have your pump up and running in no time.
The manual covers all aspects of the VEVOR hand pump, from initial setup to advanced optimization techniques, ensuring you have everything you need to keep your pump functioning efficiently. Download your copy today and enjoy the peace of mind with a complete and reliable guide.
VEVOR Antique Hand Water Pump User Manual
SAFETY INSTRUCTIONS
WARNING! Read all safety warnings and all instructions laid down in this manual.
Save all warnings and instructions for future reference.
- All bystanders (esp. children) should be kept away from tool and work area.
- Keep the product away from children or from their environment. Never allow children to operate the tool. Children should be supervised to ensure that they do not play with the product.
- Remarks:
The safety warnings and/or instructions given in this manual are unable to cover all of the conditions and the situations that may arise. - Operators and/or user must use common sense and caution when operating the product especially for those that are not mentioned in the manual.
- The product is intended for outdoor domestic use in private gardens.
- Only operate with this kind of pump
- The product is not intended for artisanal, commercial, professional and/or industrial use
- Do not use the product for purposes, for works and for liquids for which it is not designed nor intended.
- The manufacturer and/or seller cannot be held liable for incorrect or non-compliant use of machine.
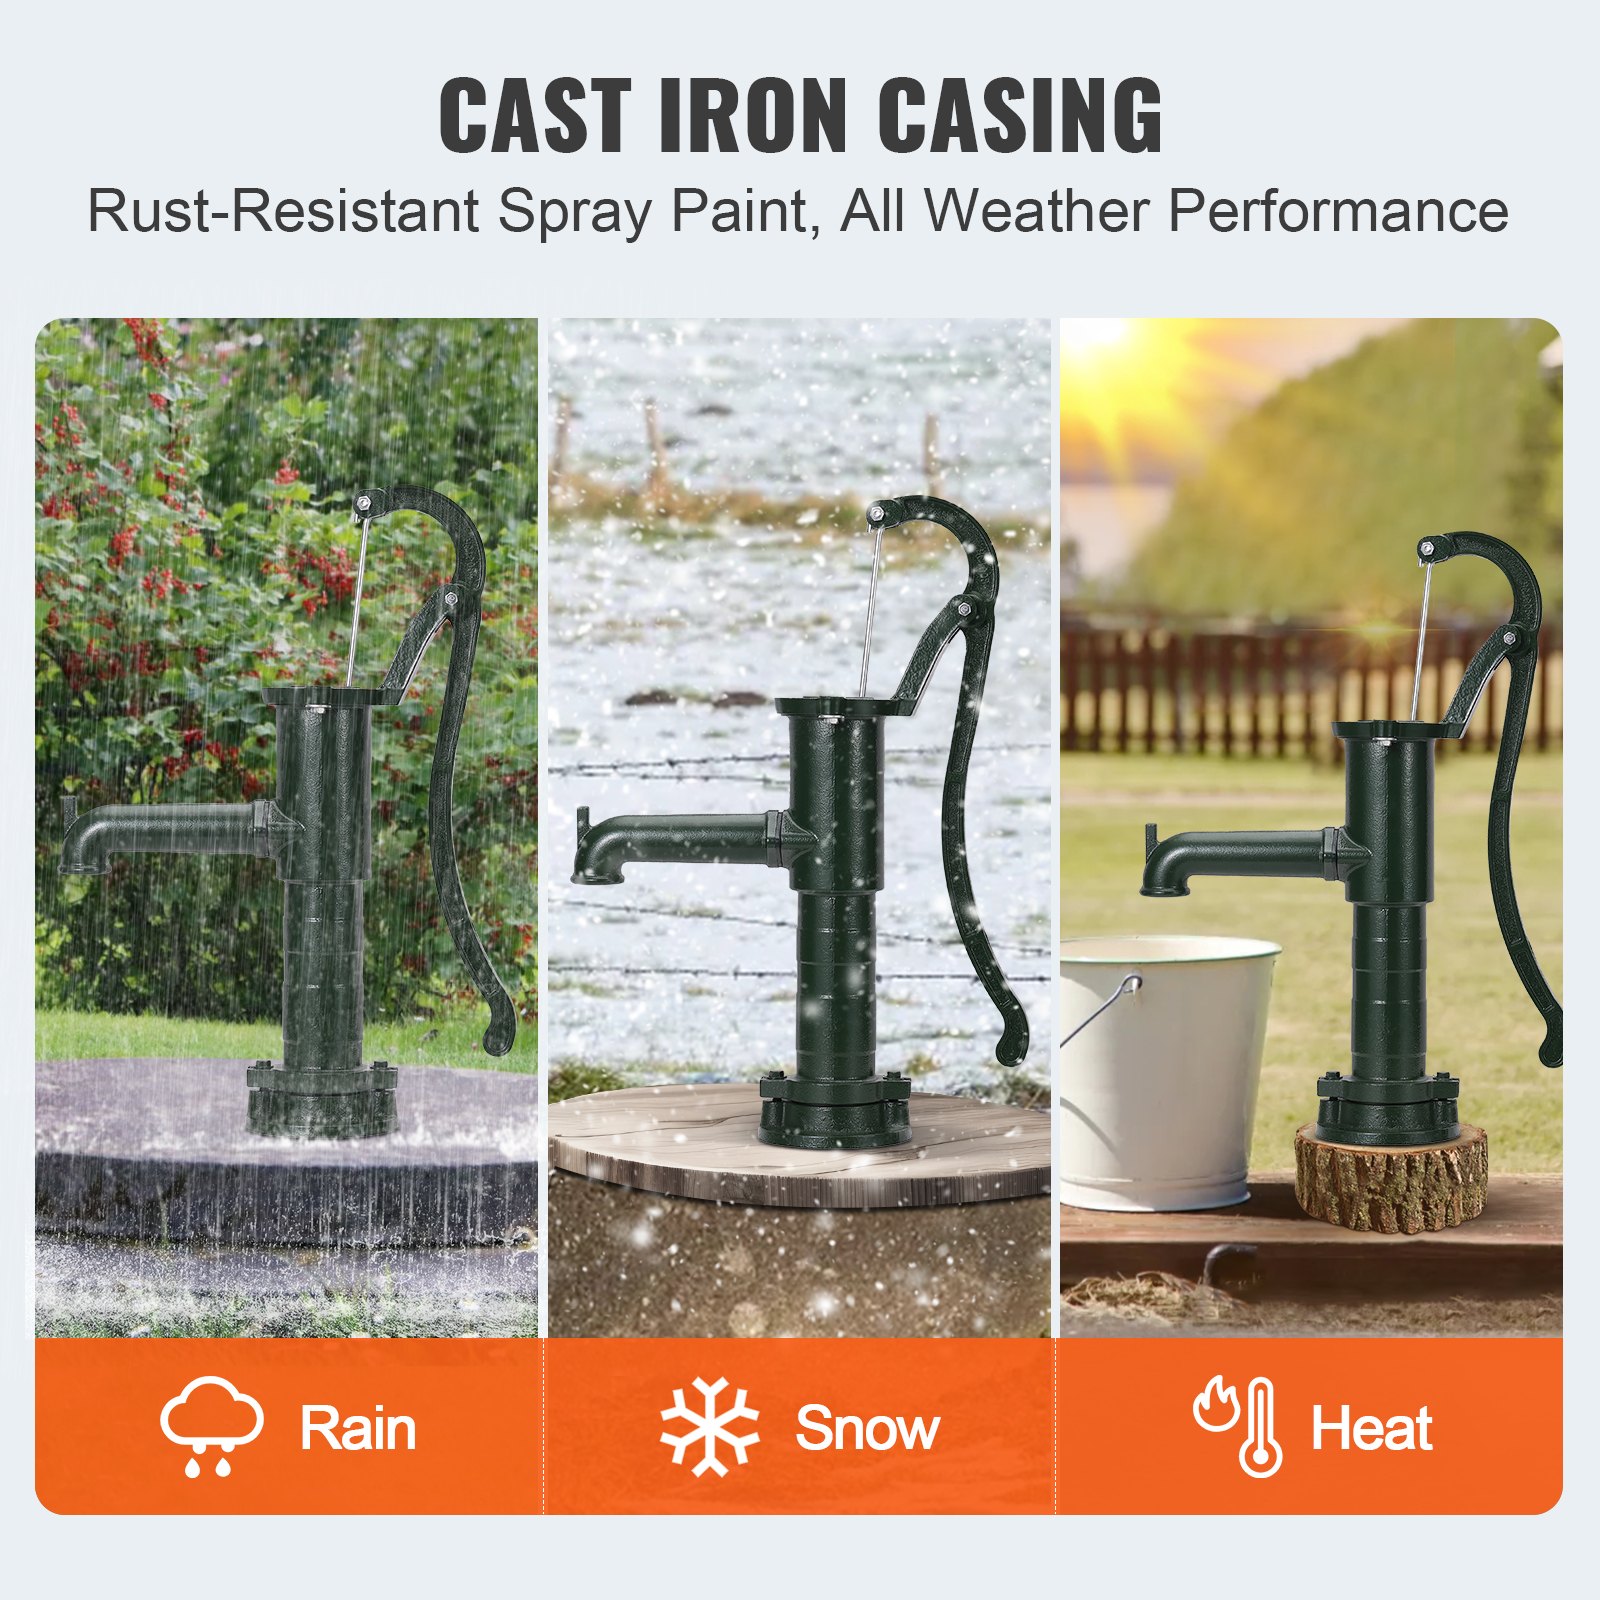
- Protect the pump from freezing. Doing so will void the warranty.
- Periodically inspect the pump
- The product should not be rubbish in the environment.
Proceed with disposal of the product, accessories and packaging according to local regulations regarding the protection of the environment.
SUCTION PIPE INSTALLATION
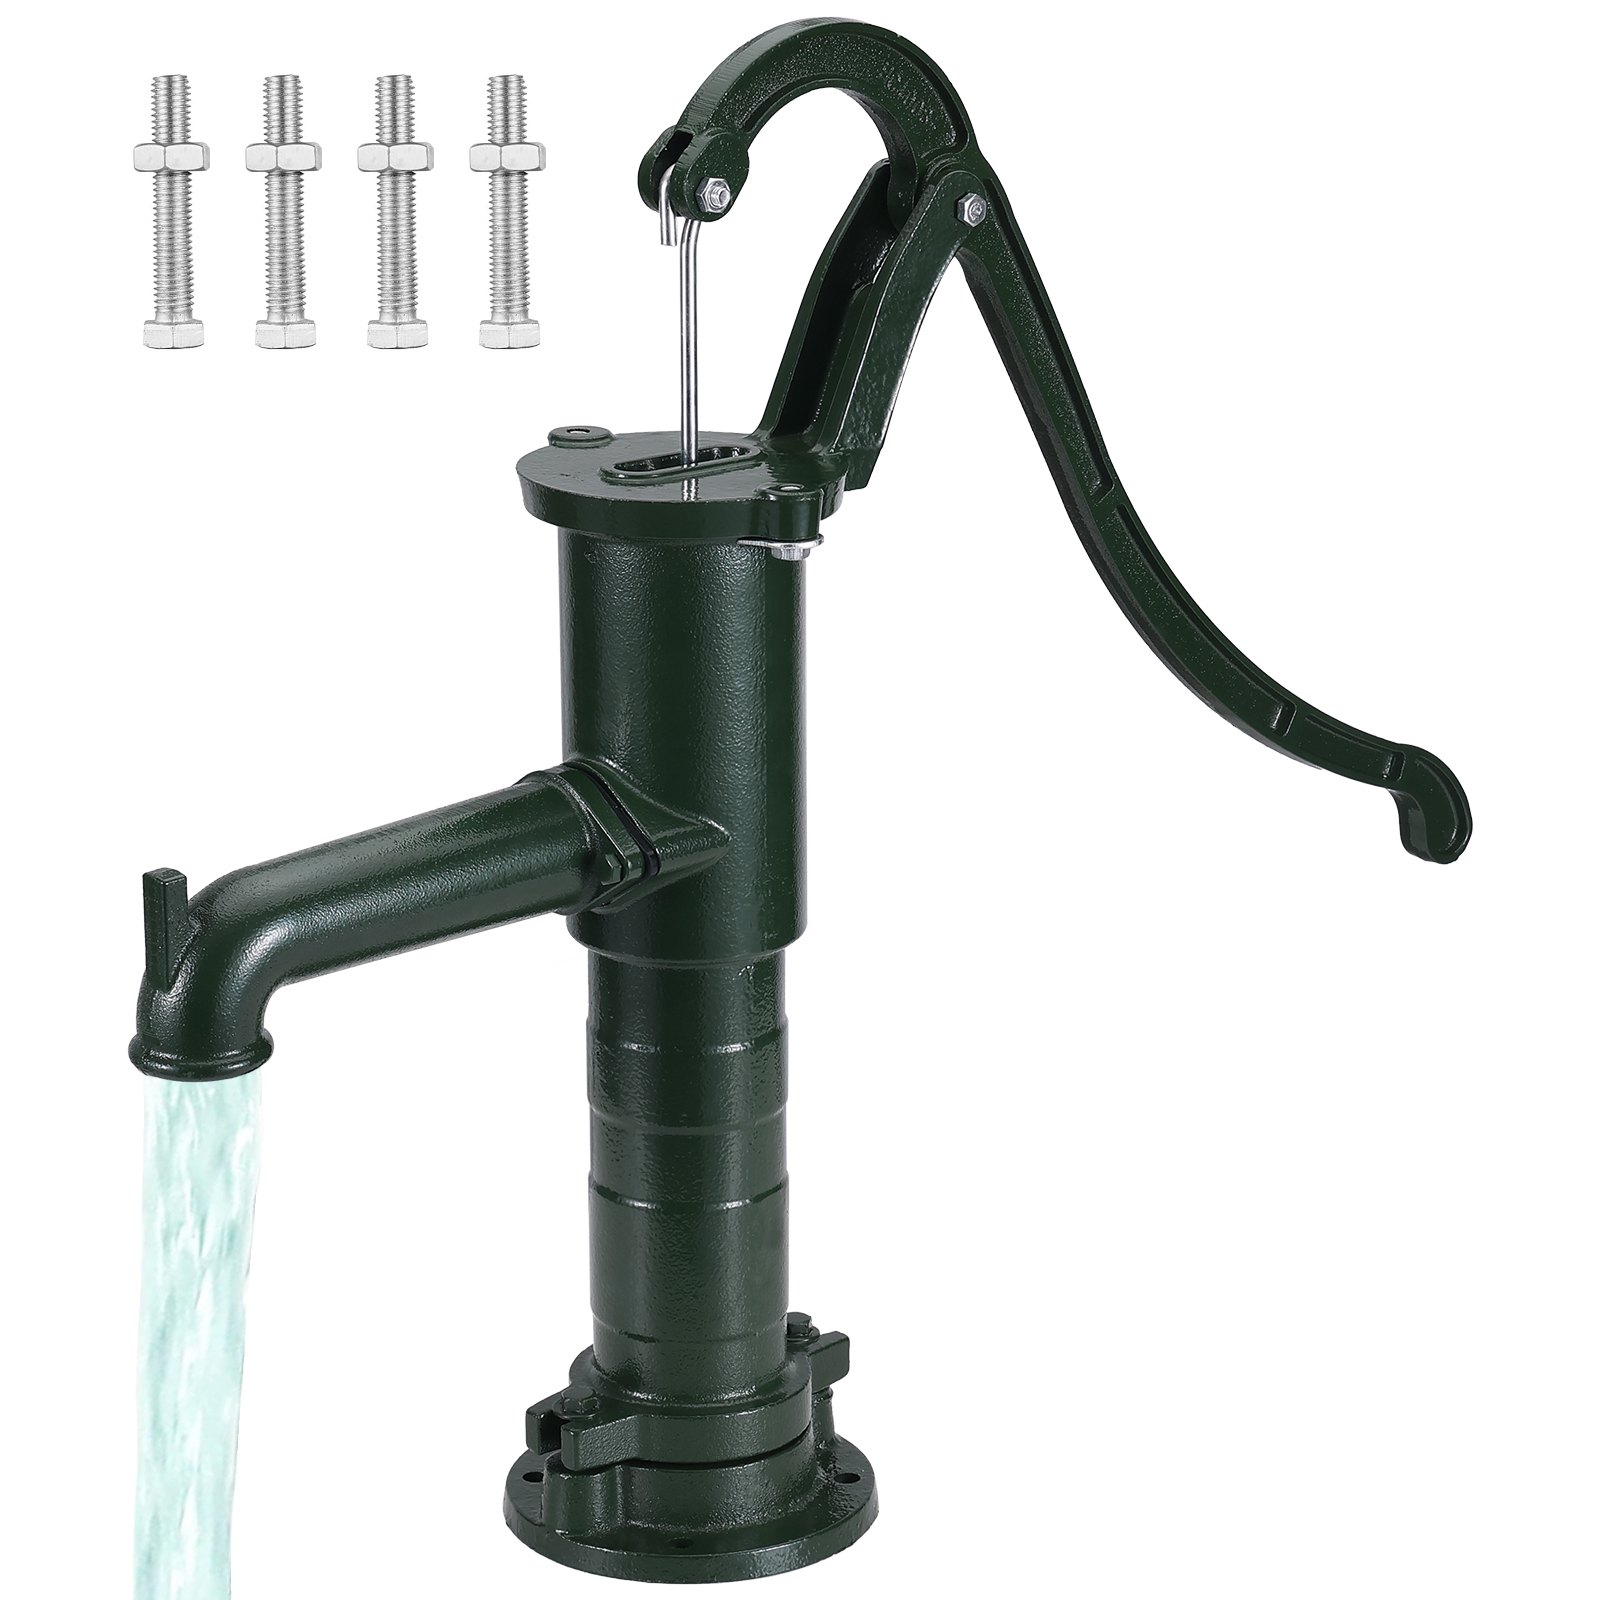
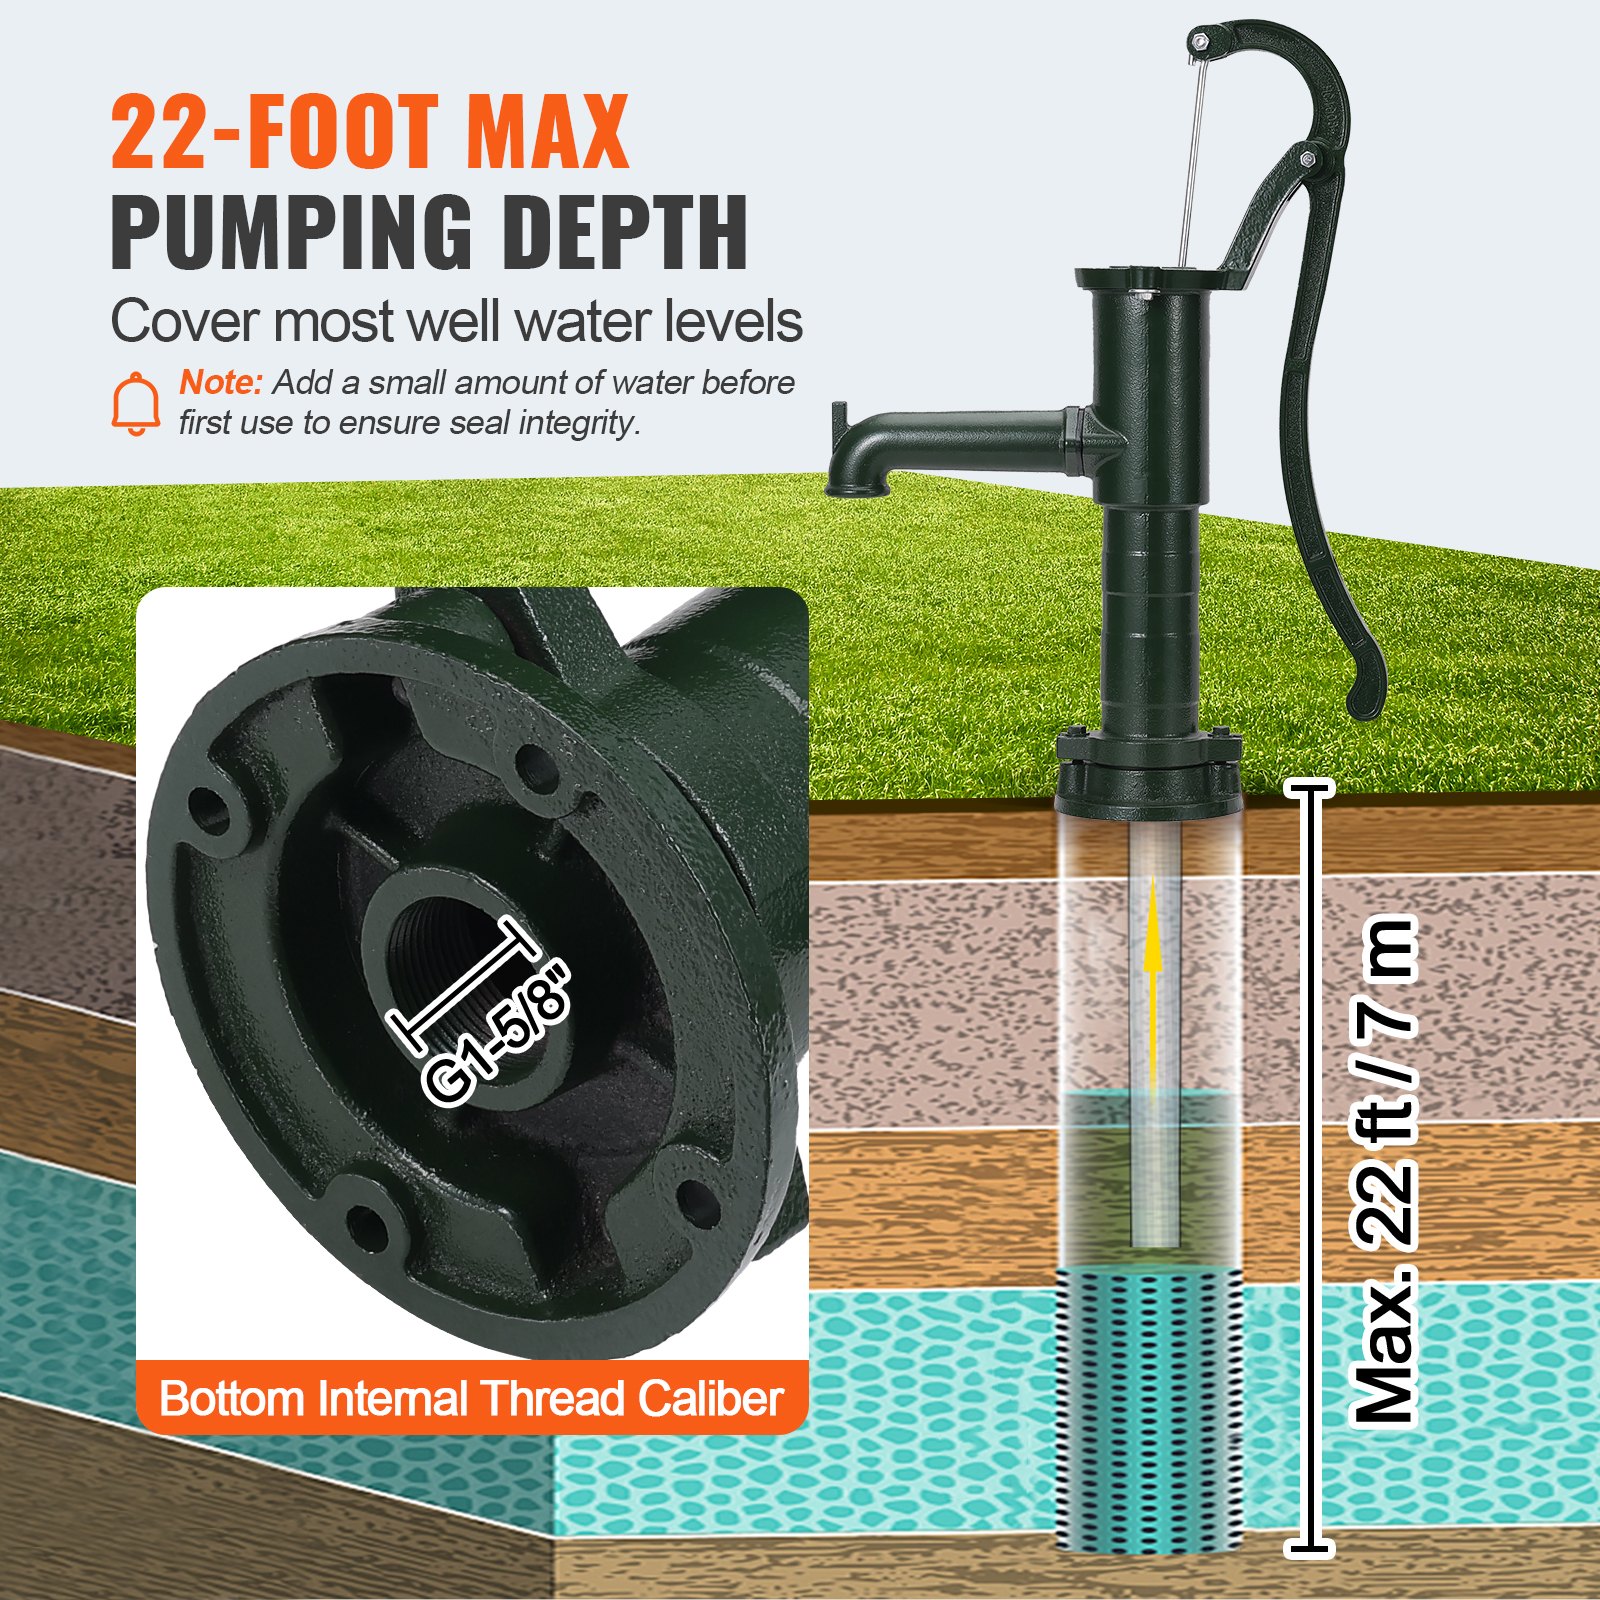
You will need 1¼” steel pipe with threads or 1¼” PVC pipe with a 1¼” male adapter.
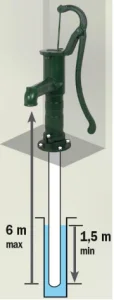
- Screw a drop-pipe to the bottom of the pump (the drop-pipe should be the same size as the connection on the pump). The drop-pipe should be submerged at least 1.5m.
- Tighten the pipe enough to prevent leaks.
NOTE: Any small leaks will prevent the pump from priming.
Sealing pipe joints:
- Thread tape or a good quality thread sealant should be used on all pipe threads.
NOTE: Do not use thread tape with PVC pipe.
- Use only thread tape or Teflon-based joint compounds for making metal to metal connections on the pump itself.
- Make sure that all pipe joints in the suction pipe are air tight as well as water tight.
- If the suction pipe can suck air, the pump will not be able to pull water from the well.
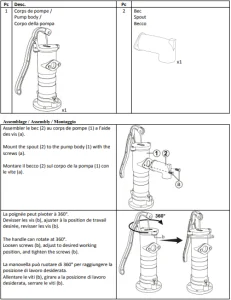
PUMP ASSEMBLY ON STAND
(Stand and screws not provided)
Attach the pump to the pump stand with the M8 or M10 screws.

PRIMING THE PUMP
Never operate the pump while it is dry. Operating the pump without water may cause damage to the leather gasket. Always fill the pump with water before starting the pump.
- To prime the pump, pour water into the top of the pitcher pump until it runs out of the spout.
- Wait 5 minutes until the cup leather swells enough to make contact with the pump wall.
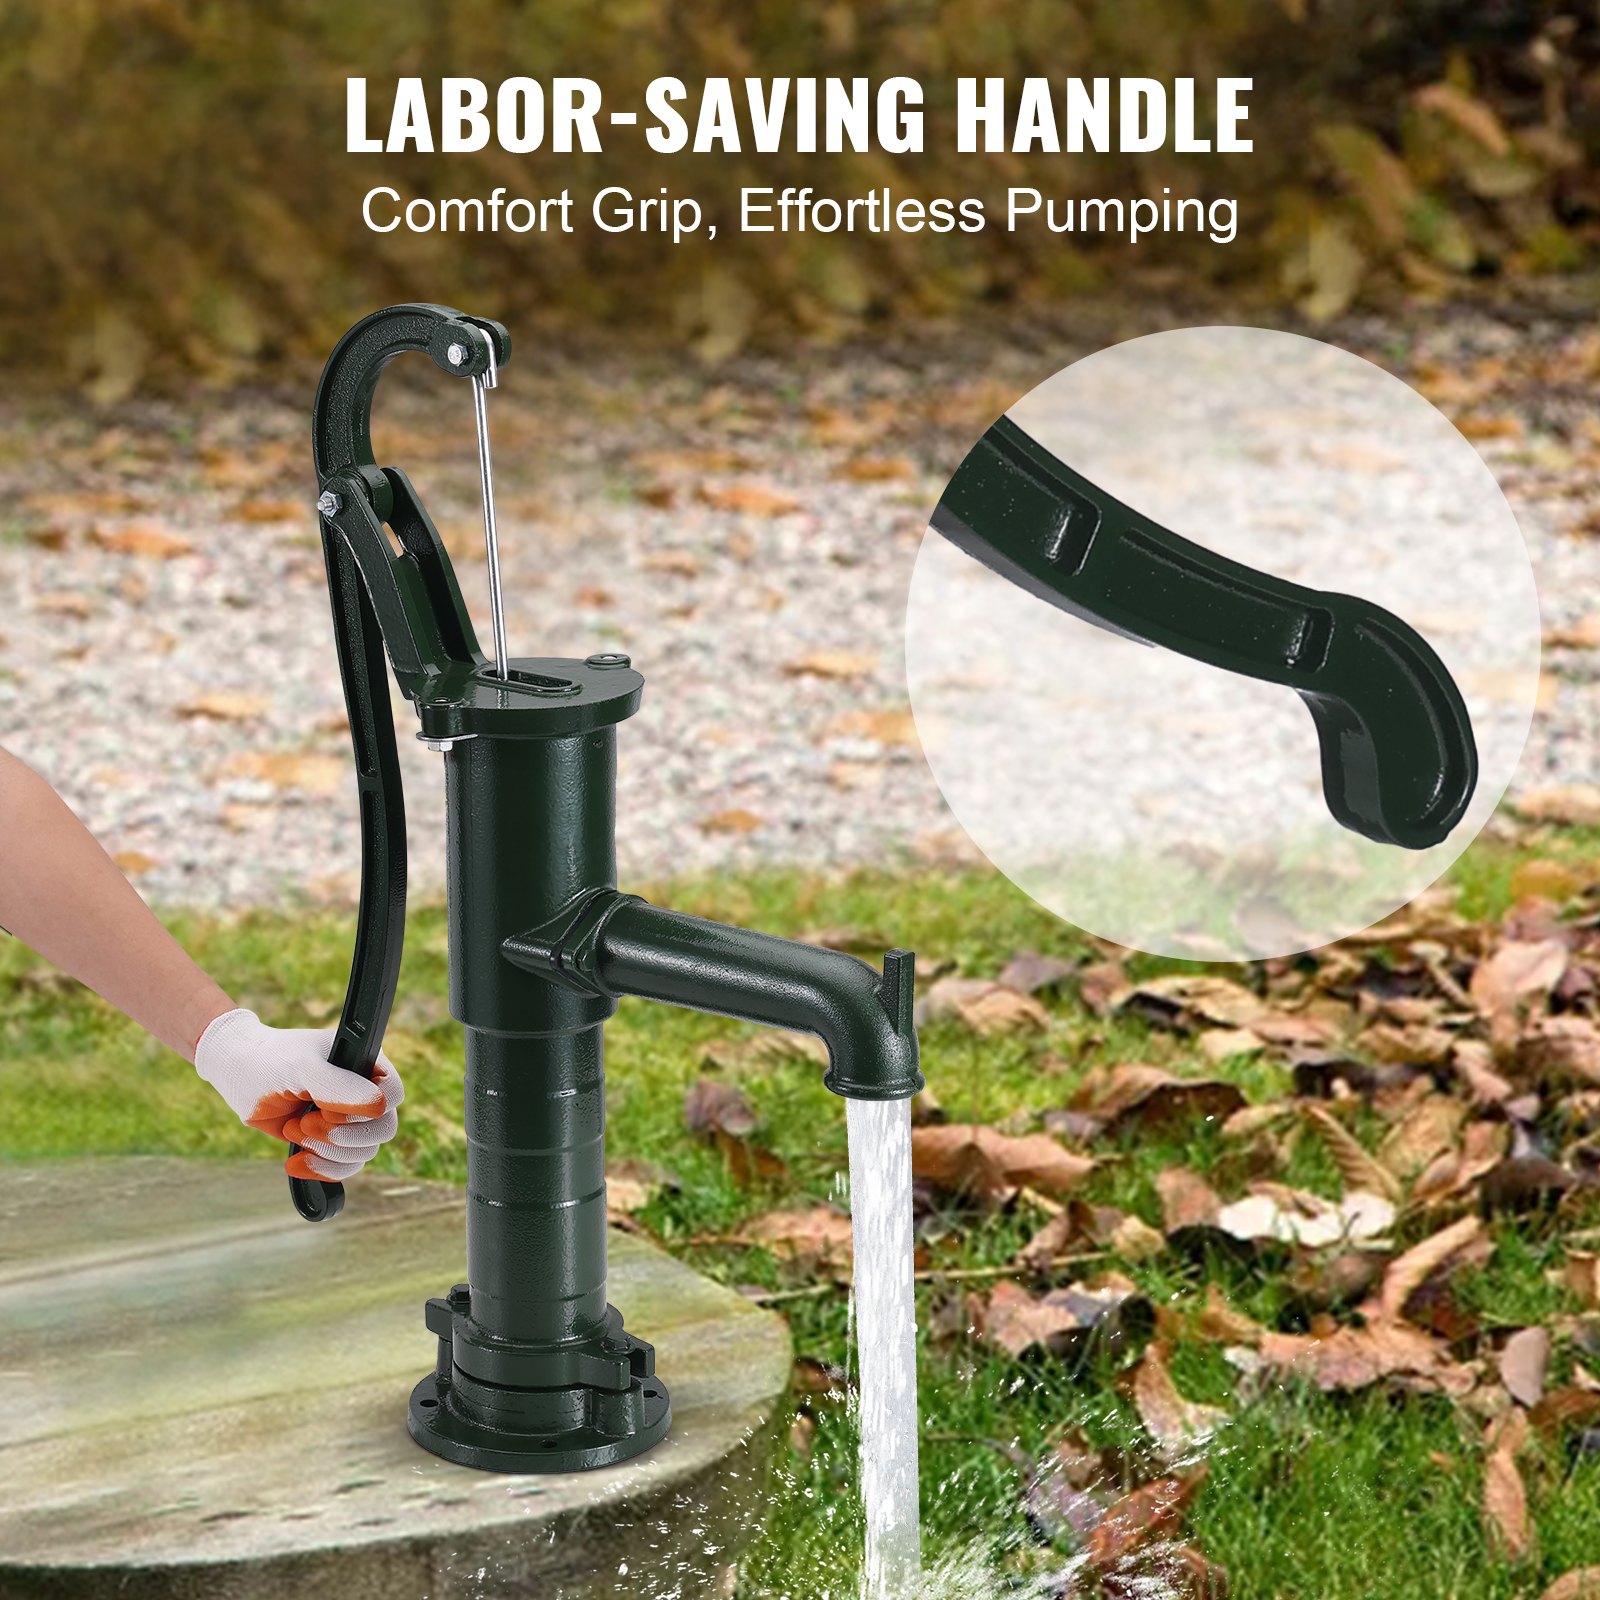
- Raise and lower the handle in short strokes until the suction pipe fills with water.
(NOTE: Any leak on the suction pipe will prevent the pump from priming)
USAGE
- Check for leaks around the joints. Tighten clamps or add thread tape as needed. Replace defective fasteners.
- Make sure the pipe end is submersed in the water.
- Use plenty of clean water when priming. The cup leather (9) will expand as it absorbs water. Let the cup leather absorb water for a few hours and try again.
- Make sure you are not trying to lift water more than 6m (measured from the water surface to the spout).
- At higher elevations, the depth of the water to be pumped is being reduced. At sea level and under ideal conditions, this pup will lift to a maximum of about 6m.
FREEZING PROTECTION
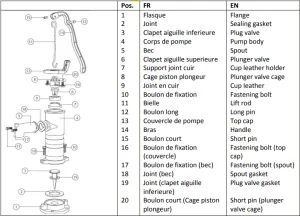
- In freezing weather, the plug valve gasket (19) and the cup leather (9) may freeze to the pump body. If you start pumping, these two pieces may tear, making the pump inoperable.
- You can protect the pump against freezing by keeping the handle in the ‘up’ position, since in this case, the pitcher pump will self-drain.
ANTIQUE HAND WATER PUMP MAINTENANCE
REPLACING THE CUP LEATHER
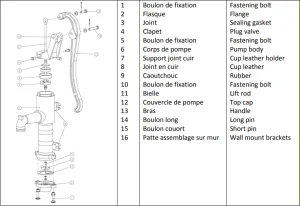
- Loosen the fastening bolt for top cap (16) and lift the plunger assembly out of the pump.
- Unscrew the cup leather holder (7).
- Remove the old cup leather (9) and put on a new cup leather.
- Screw the cup leather holder (7) back into the original position.
- Reassemble the plunger assembly and top cap (13).
- Fasten the fastening bolt (16) and tighten.
REPLACING THE PLUG VALVE GASKET AND THE SEALING GASKET
- Loosen the fastening bolt (10) and remove the pump body (4) from the flange (1).
- At the valve of the plug valve (3), remove the old plug valve gasket (19) from the plug valve and then put on a new gasket.
- Remove the old sealing gasket (2) from the flange (1) and put a new sealing gasket on the flange.
NOTE: Remove any remaining debris from the surface of the flange (1), clean the flange by removing dirt/debris that can cause leakage. - Place the plug valve (3) back into the original position.
- Reattach the pump body (4) to the flange (1) by tightening the fastening bolt (10)
Recommended For Your Project
VEVOR Antique Hand Water Pump 14.6 x 5.9 x 26 inch Manual

Reviews
There are no reviews yet.