
Unlock the full potential of your woodworking projects with the VEVOR Mortising Attachment for Drill Press. Our comprehensive product manual is designed to provide you with detailed guidance on setup, operation, and troubleshooting for the 4 Model Drills Square Hole Chisel Set, Bench Drill Locator Set, and Mortise and Tenon Tools equipped with 5 Bushings. Whether you are a seasoned professional or a woodworking enthusiast, this user-friendly manual ensures you can optimize your mortising, tenoning, and drilling tasks with ease.
This manual covers step-by-step instructions, from initial assembly to advanced usage tips, making it an invaluable resource for achieving precise and efficient results. Illustrations, safety tips, and maintenance advice are included to help you maximise your VEVOR Mortising Attachment. Download now to enhance your woodworking skills and ensure your projects are executed flawlessly.
VEVOR Mortising Attachment for Drill Press Manual
MODEL: DPA65
Introduction
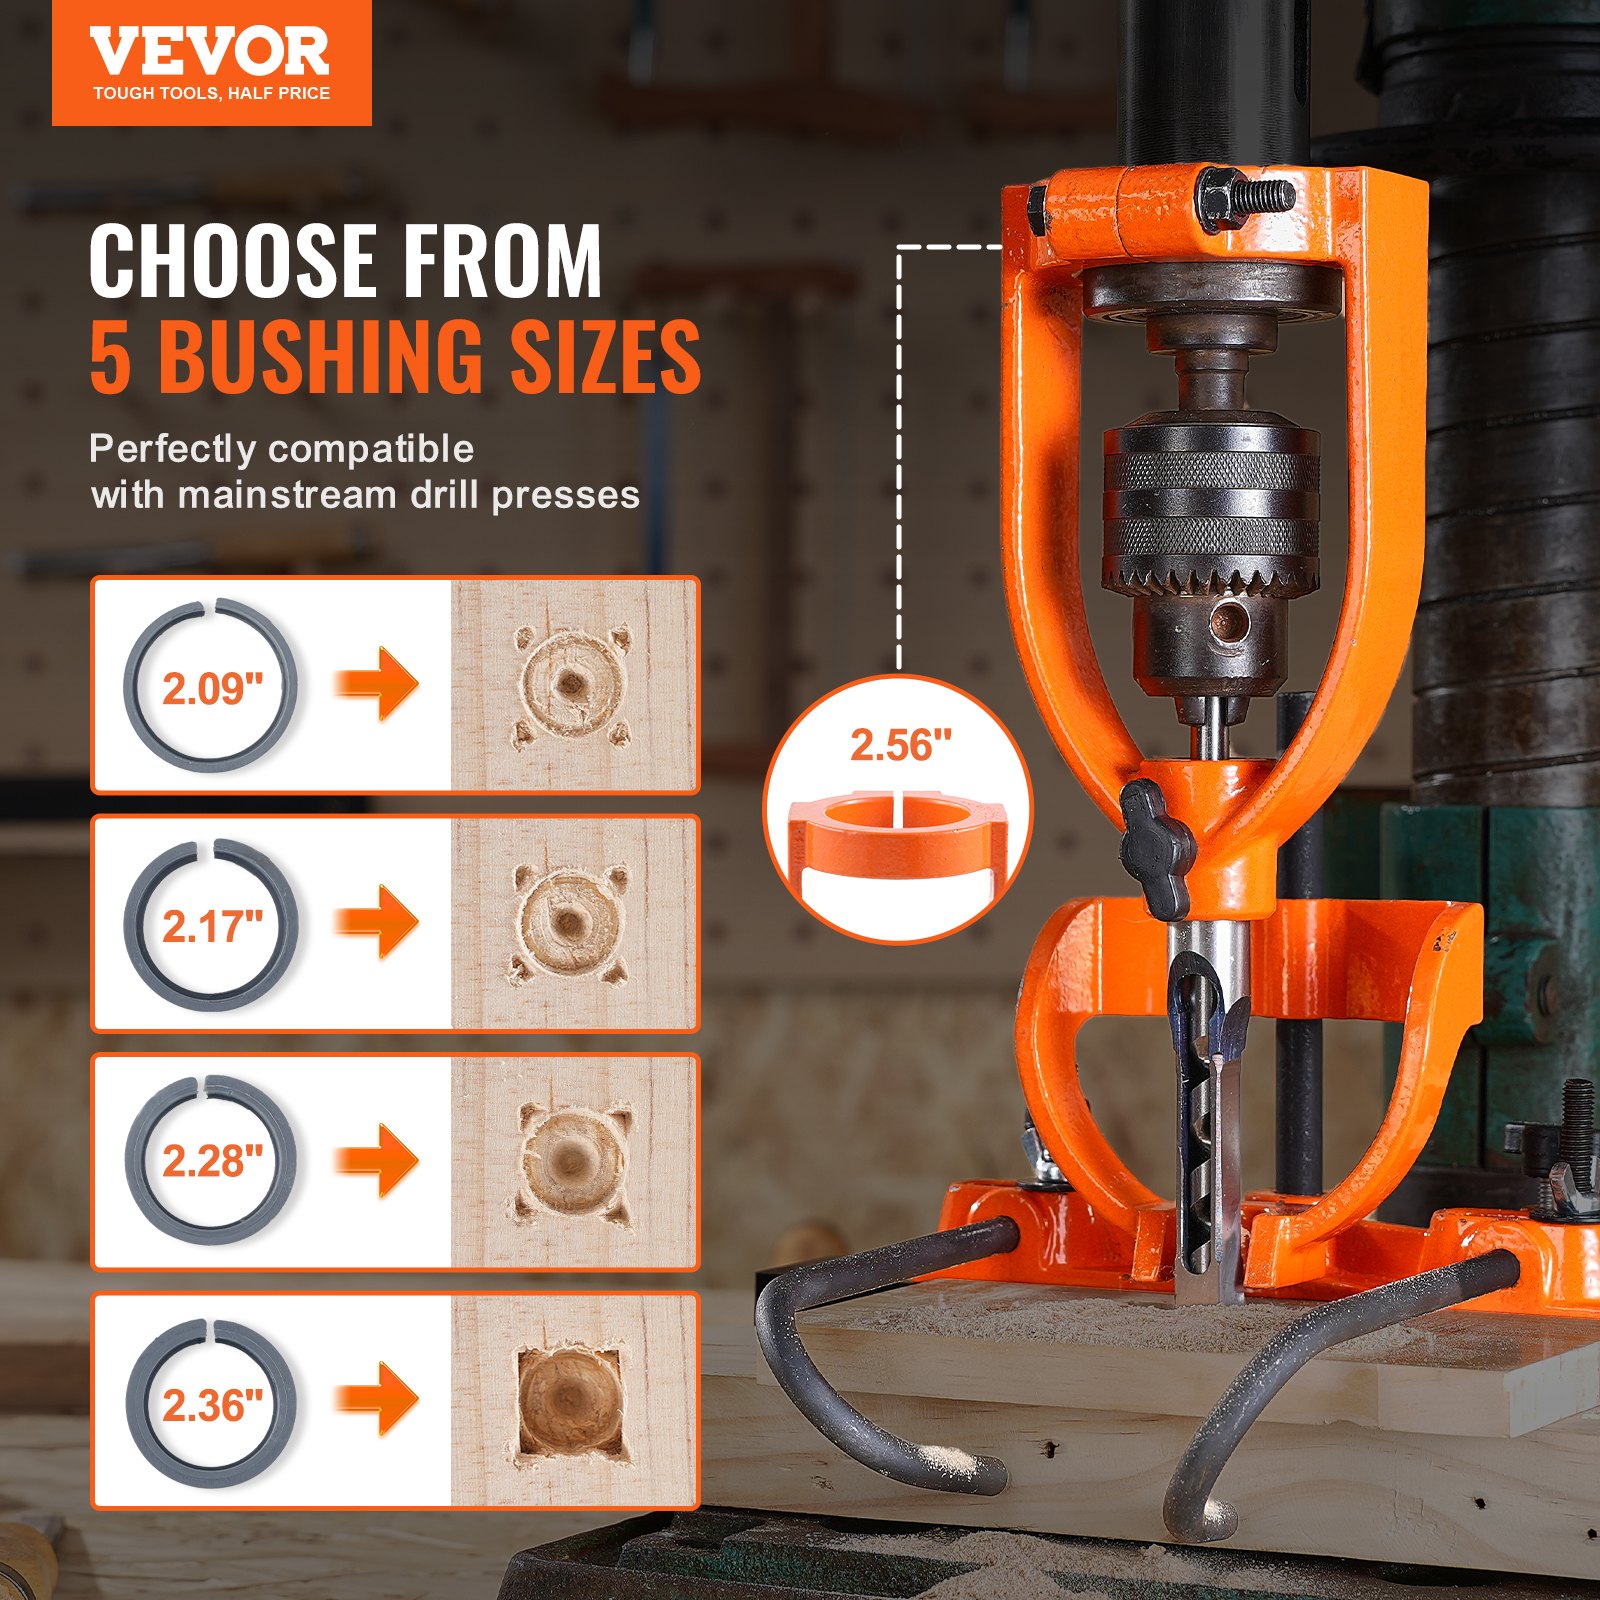
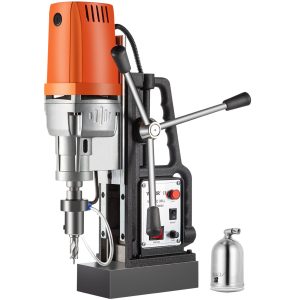
- The Mortising Attachment converts your Drill Press into an accurate mortising machine. It is ideal for drilling square holes for mortise & tenon joints commonly used in furniture, cabinets, sash, pattern shops, and other woodworking plants.
- The Mortising Attachment Kit can be installed on any drill press with a collar size of 52.5mm, 55mm, 60mm, or 65mm.
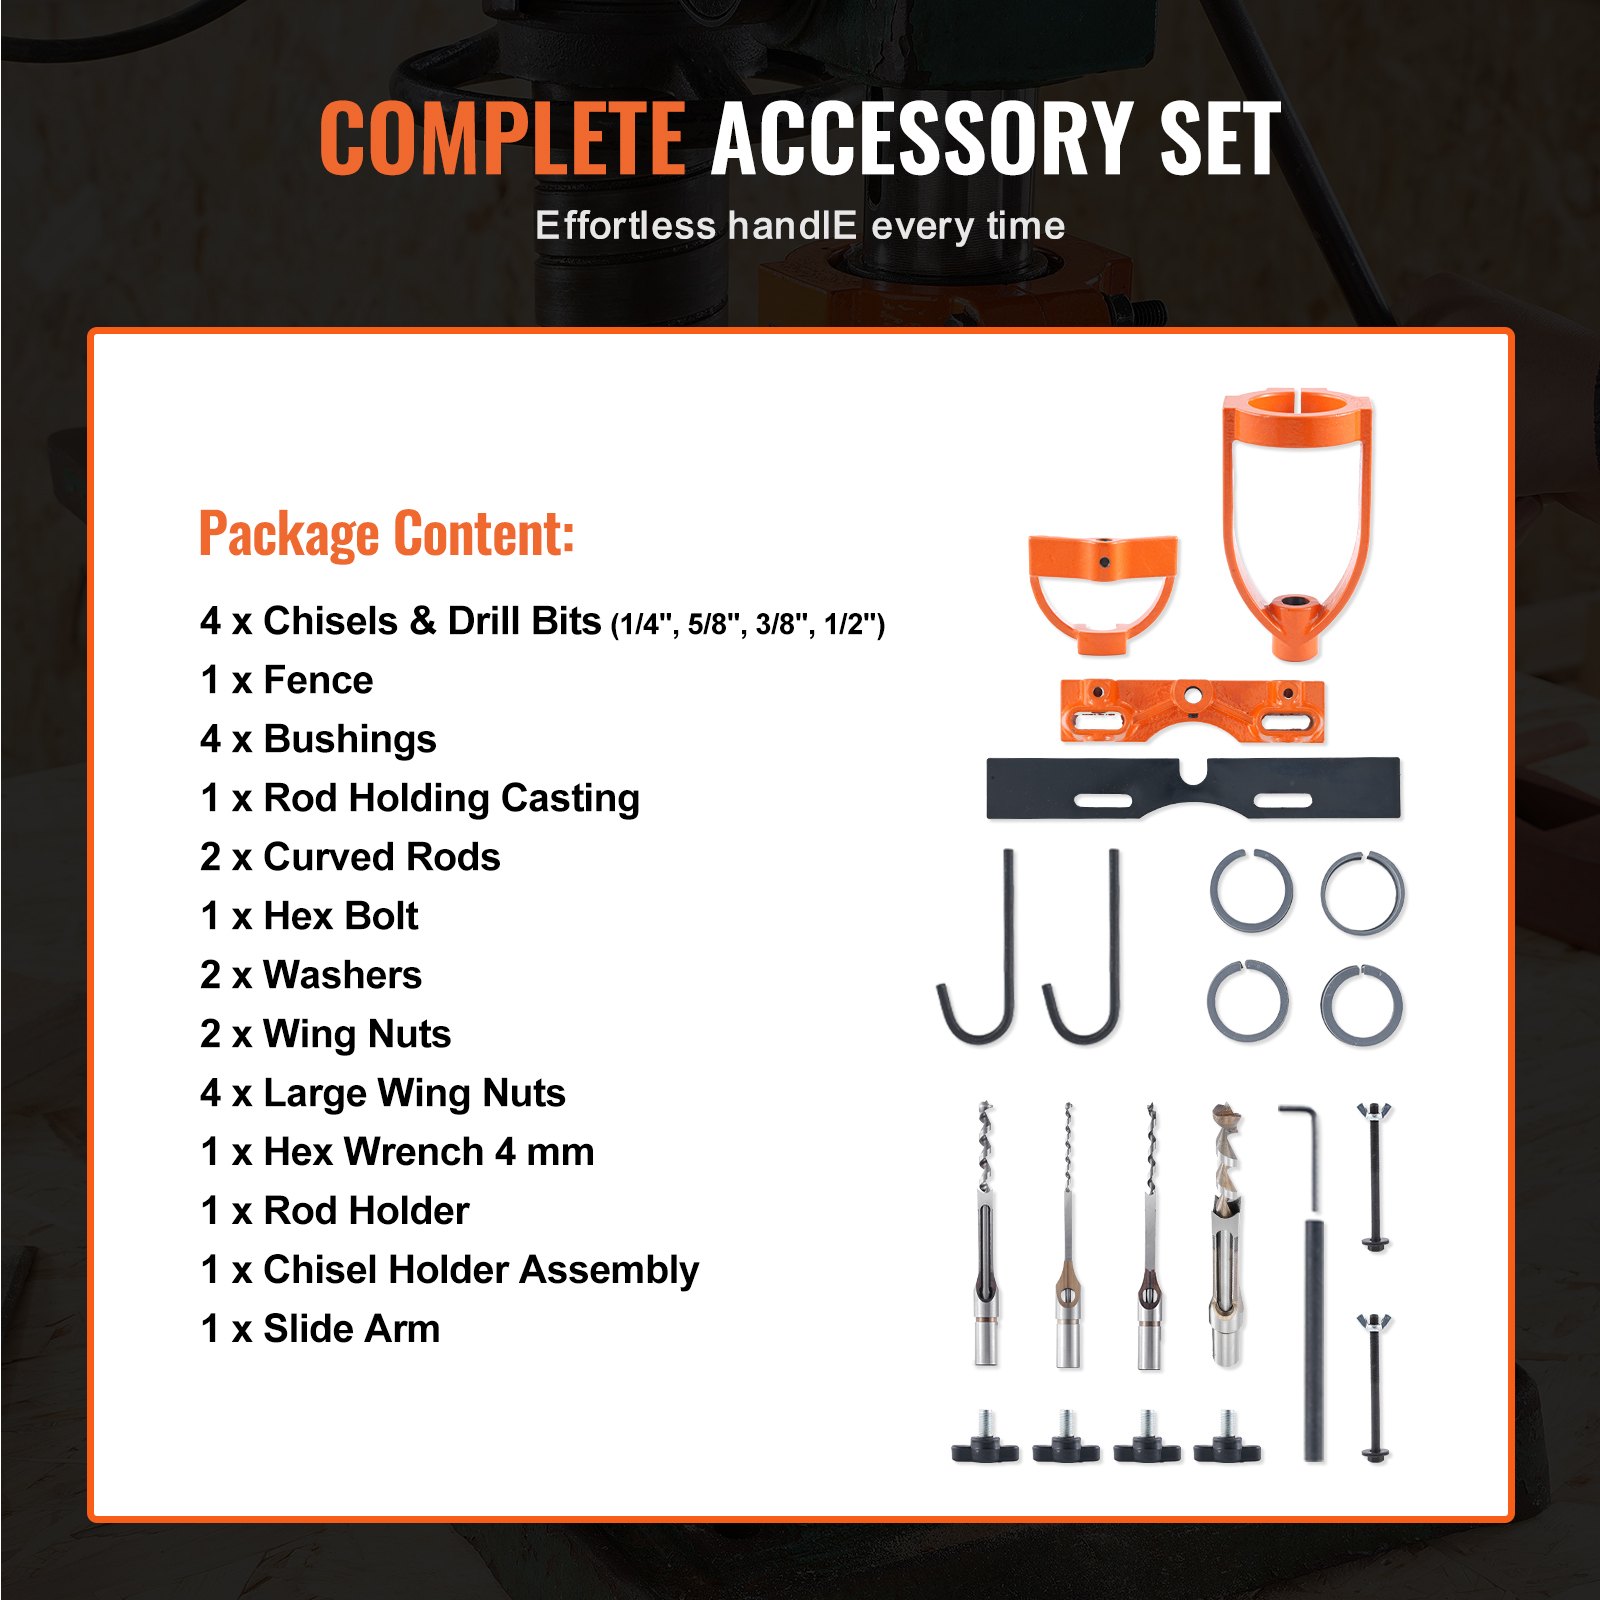
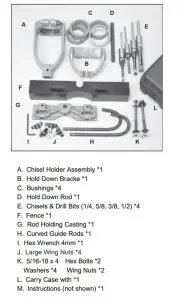
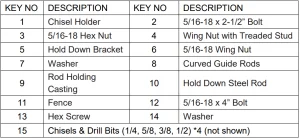
- The name of the kit inventory.
Installation Instructions
Mounting on the Drill Press Table.
We recommend installing a 1/2 plywood panel on the drill press table. It can be held in place by inserting it under the mortising fence. Drill holes in the plywood to match the slots in the table.
The plywood will prevent damage to the mortising chisel and drill bit if they should accidentally strike the metal drill press table. It is also a simple way to increase the size of the drill press table to hold your projects.
Mounting the Chisel Holder.
- Mount the Chisel Holder (A) onto, or just above, the base of the Drill Press quill, with the holder’s fastening bolt facing outward, away from the drill press column. For a proper fit, a Bushing (C) may be required to be inserted within the chisel holder’s top collar.
- Once installed, tighten the nut and bolt on the chisel holder to keep the attachment from slipping.
Install Mortise and Tenon Chisels and Drill Bits.
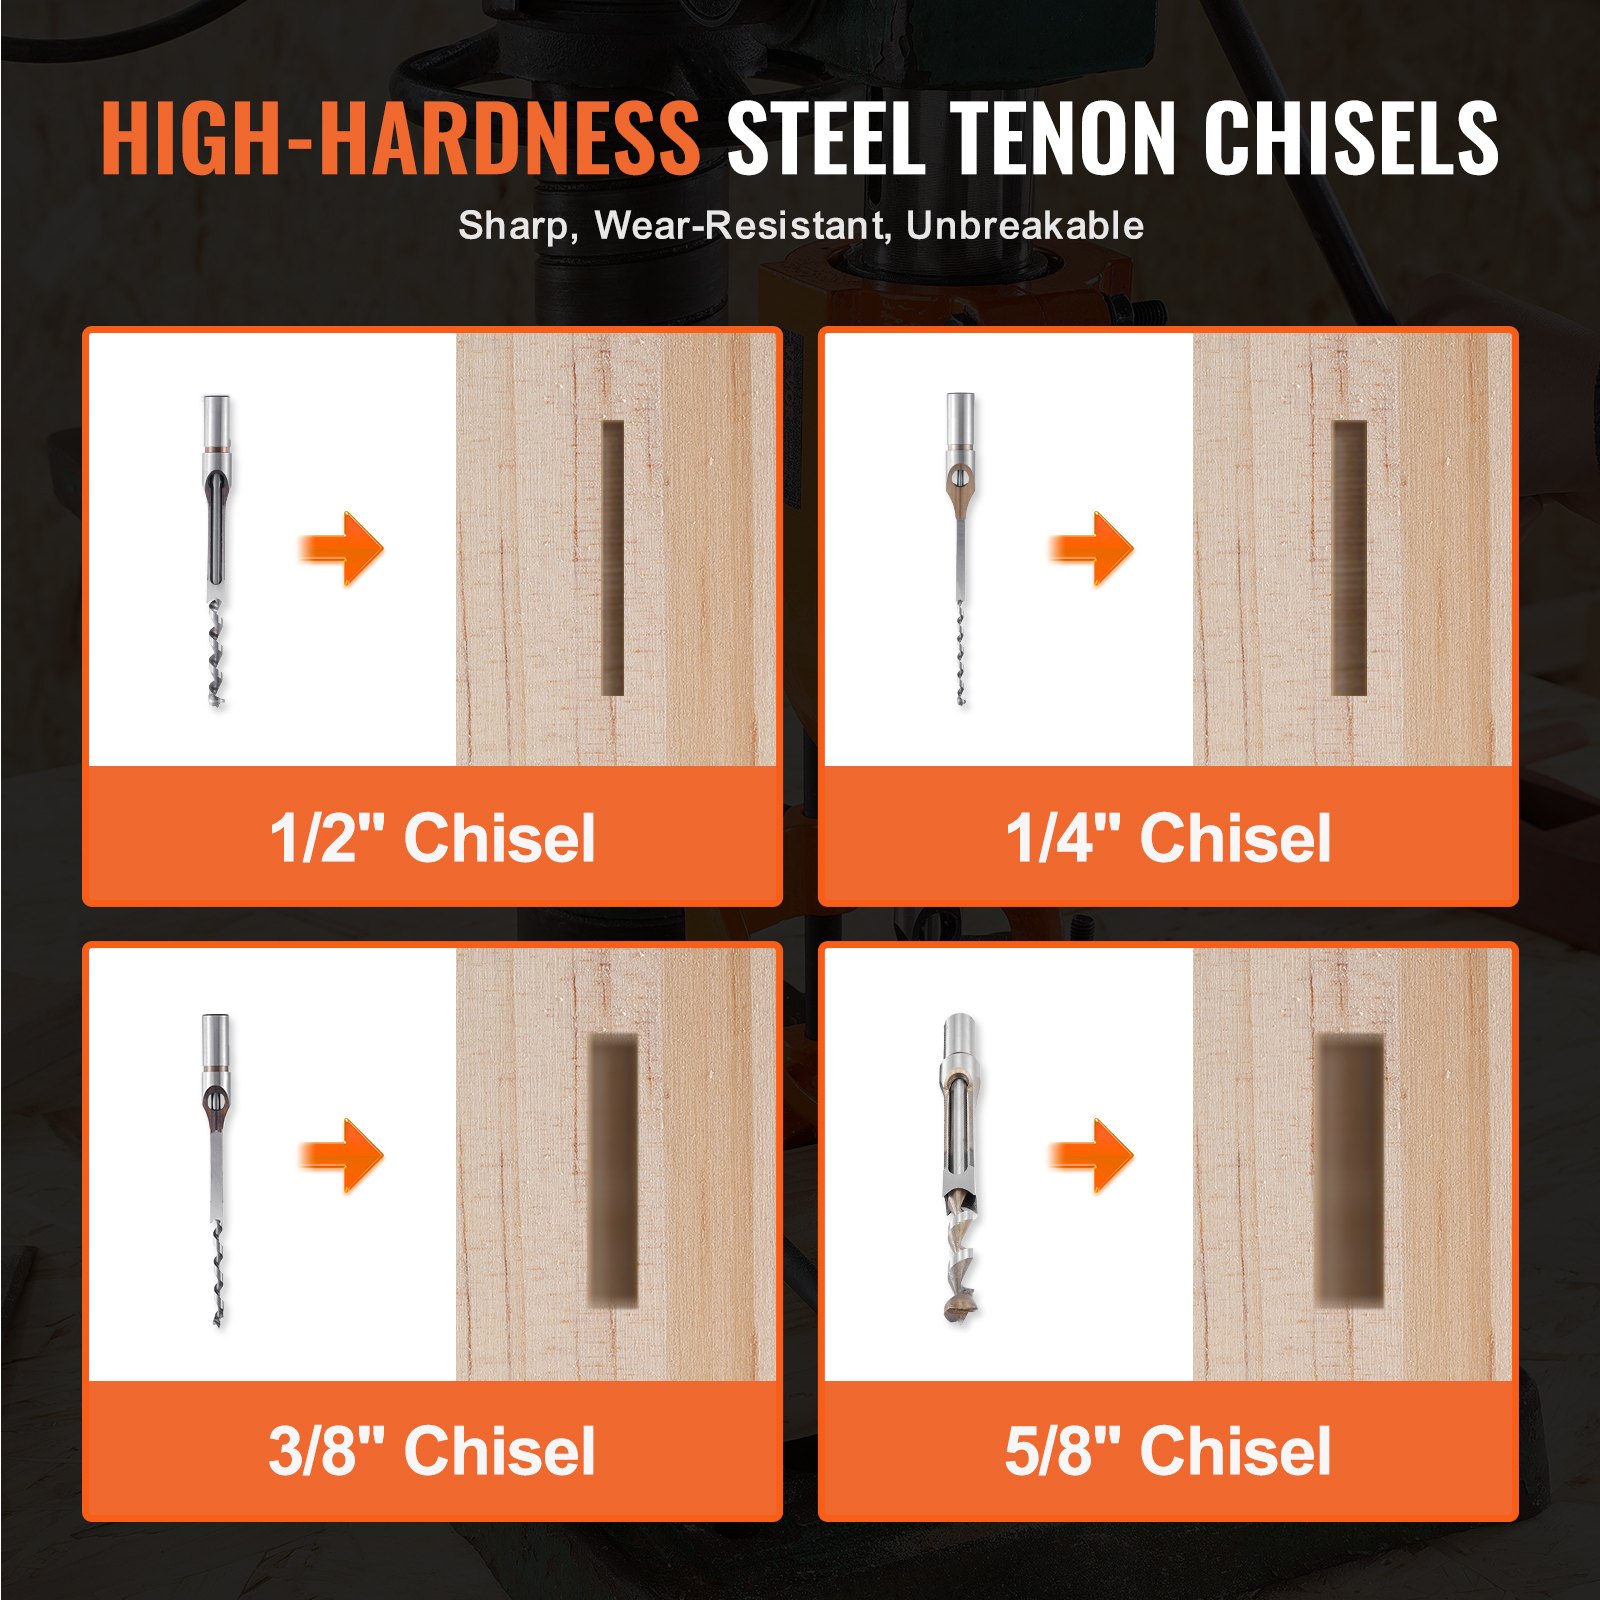
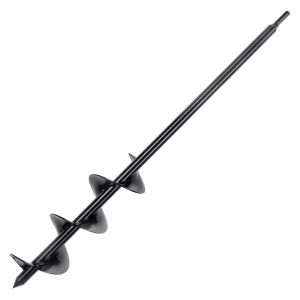
- Four sizes of Hollow Chisel Mortising Chisels and Bits (E) are included with the kit: 1/4”, 5/8”, 3/8” and 1/2”. Use only the correct combination of the chisels with their corresponding bit. These tools are supplied factory-ground, and MUST be sharpened before use. If either one is dull, there will be excessive friction with heat build-up, making the drilling operation difficult and damaging the tools.
Consult woodworking books or magazine articles on the proper techniques for putting sharp edges on these items.
- No bushings are required to install the drill bit shanks into the chisel holder’s collar, as they have the same diameter. The shank of the chisel will be held by the drill press keyed chuck, just as a normal drill bit would be held.
Installing the Bit and Chisel
- Insert the drill bit through the chisel and into the drill press’s keyed chuck. Hand-tighten the chuck only.
- Insert the chisel into the holder, and secure it with the wing nut.
NOTE: Clamp the chisel so its shoulder is about 1/32” below the bottom of the holder.
- Push the drill bit up into the drill chuck as far as it will go, and fasten it in place with the chuck key. The end of the drill bit should be up against the end of the square chisel.
- Loosen the wing nut securing the chisel and move the chisel upward to take up the 1/32” space previously left in Step 2. Tightenthechiselinplace. This method assures that there is proper clearance between the cutting lips of the drill bit and the points of the chisel. When used, the square chisel will cut into the wood, forcing the cut material inwards. The drill bit then cuts out the centre of the hole and directs the chisel-cut material up out of the hole in a single motion. The Hex Bolts (K) supplied with the Kit are long enough to go through the hold-down bracket, fence, plywood and drill press table. Insert the hex bolt through the slots in each. Use washers under the hexhead bolt and wing nut to distribute the holding pressure.
Assemble the Hold-Down Bracket
1. Insert the Hold Down Rod (D) into the centre hole of the Rodholdingcasting (G) and secure it in place with the Hex Screw. An A4mmHexWrench (I) is supplied for this.
2. Slide the Hold-down Bracket (B) onto the hold-down rod. The bracket can be adjusted up and down on the rod as needed to apply slight pressure to the work being drilled. This bracket will keep your project held down when the mortising chisel and bit are released and pulled out of the hole that they were drilling.
Install the Curved Guide Rod
- Insert the two Curved Guide Rods (H) into the horizontal holes on either side of the rod-holding casting and secure them in position with the supplied wing nuts.
- The guide rods should be positioned on the front face of your work so that they press against the wood and push your project against the fence.
Set Up
1. Place your work piece on the drill press table and adjust the table height so that the mortising chisel & bit are about 1/2” above the work.
2. Determine the mortise depth you want to cut, and set the drill press depth stop to this distance.
3. Set the fence distance so that the chisel & bit are in the location you want to drill the mortise. Mark your workpiece with the exact location of the mortise (s) that must be drilled. Secure your work against the fence with the guide rods and the hold-down bracket. Move the fence in or out until the chisel aligns perfectly with the mortise lines marked on your work. Secure the fence in position with the two hex bolts that run through the casting, fence and drill press table.
Operation.
- The best drill press speeds are between 650 and 1800 RPM.
- Use lower speeds on hardwoods.
- Make sure the chisel is square/parallel to the fence.
- Test drill on scrap stock of the same wood as your project to set the mortising positions and drill press speed.
- First, cut the outside and ends of the mortise, then make overlapping cuts between the two to finish the mortise.
- Raise the chisel often to clear chips and prevent clogging.
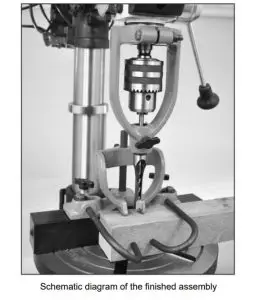
Exploded view of the product part
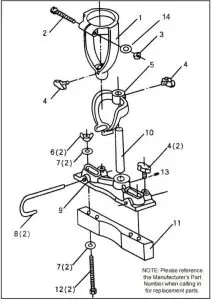
Parts List

Note: Specifications, photos, drawings, and information in this book manual represents the current model at the time the manual was written. Changes and improvements may be made at any time without obligation Modification of previously delivered units by VEVOR.
Recommended For Your Project
VEVOR Mortising Attachment for Drill Press, 4 Model Manual


Reviews
There are no reviews yet.