

Unlock the full potential of your VEVOR 2-Pack 2x4FT LED Flat Panel Light with our comprehensive product manual. This detailed guide is designed for ease of use, ensuring you can quickly and efficiently set up, troubleshoot, and optimize your new LED ceiling light fixture.
Whether you’re installing it in a home office, classroom, or any other space, our manual walks you through each step with clear instructions and helpful visuals.
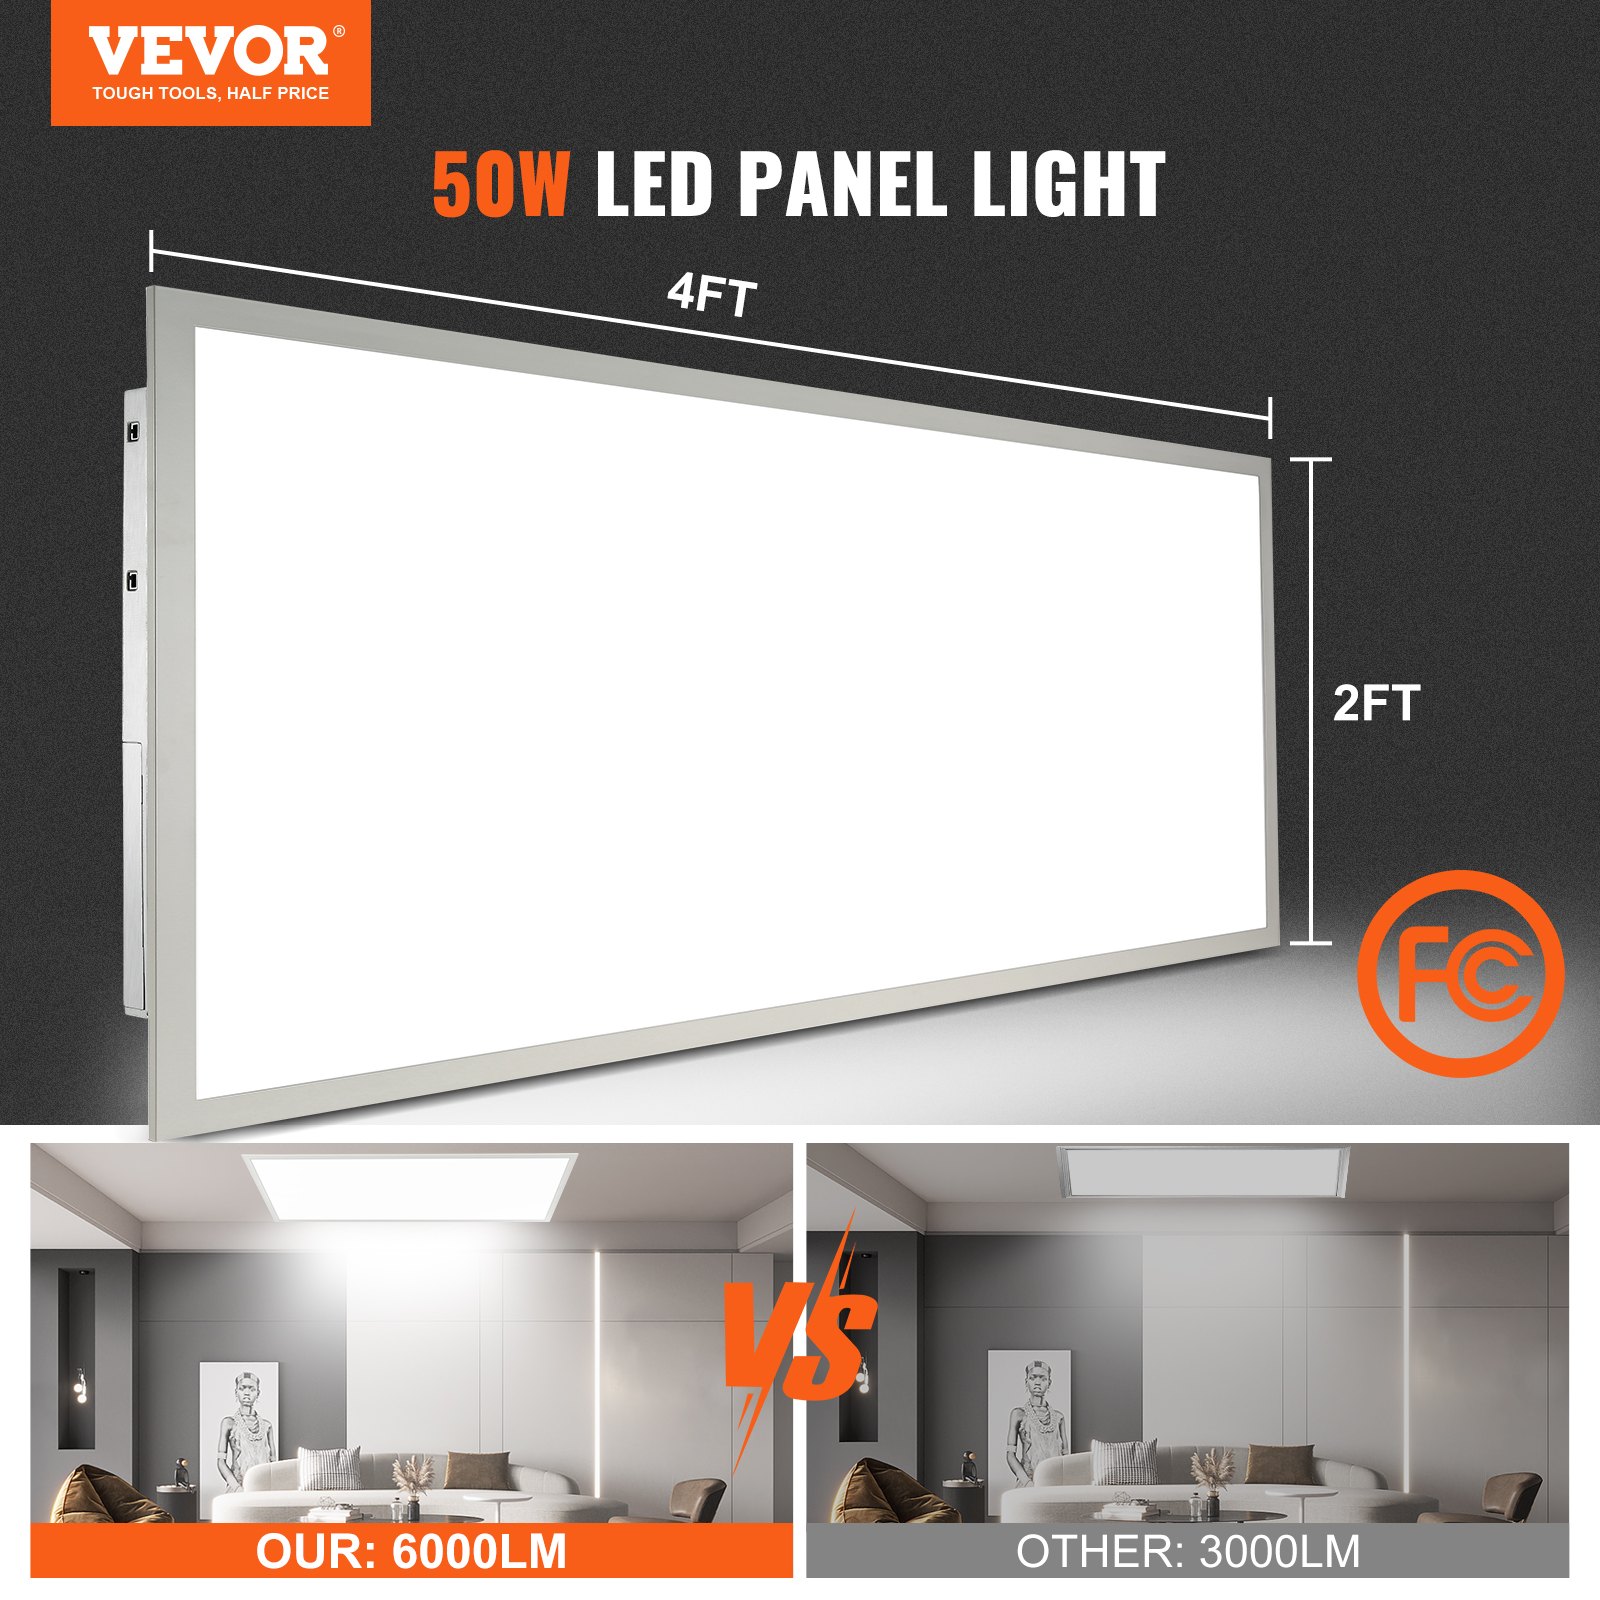
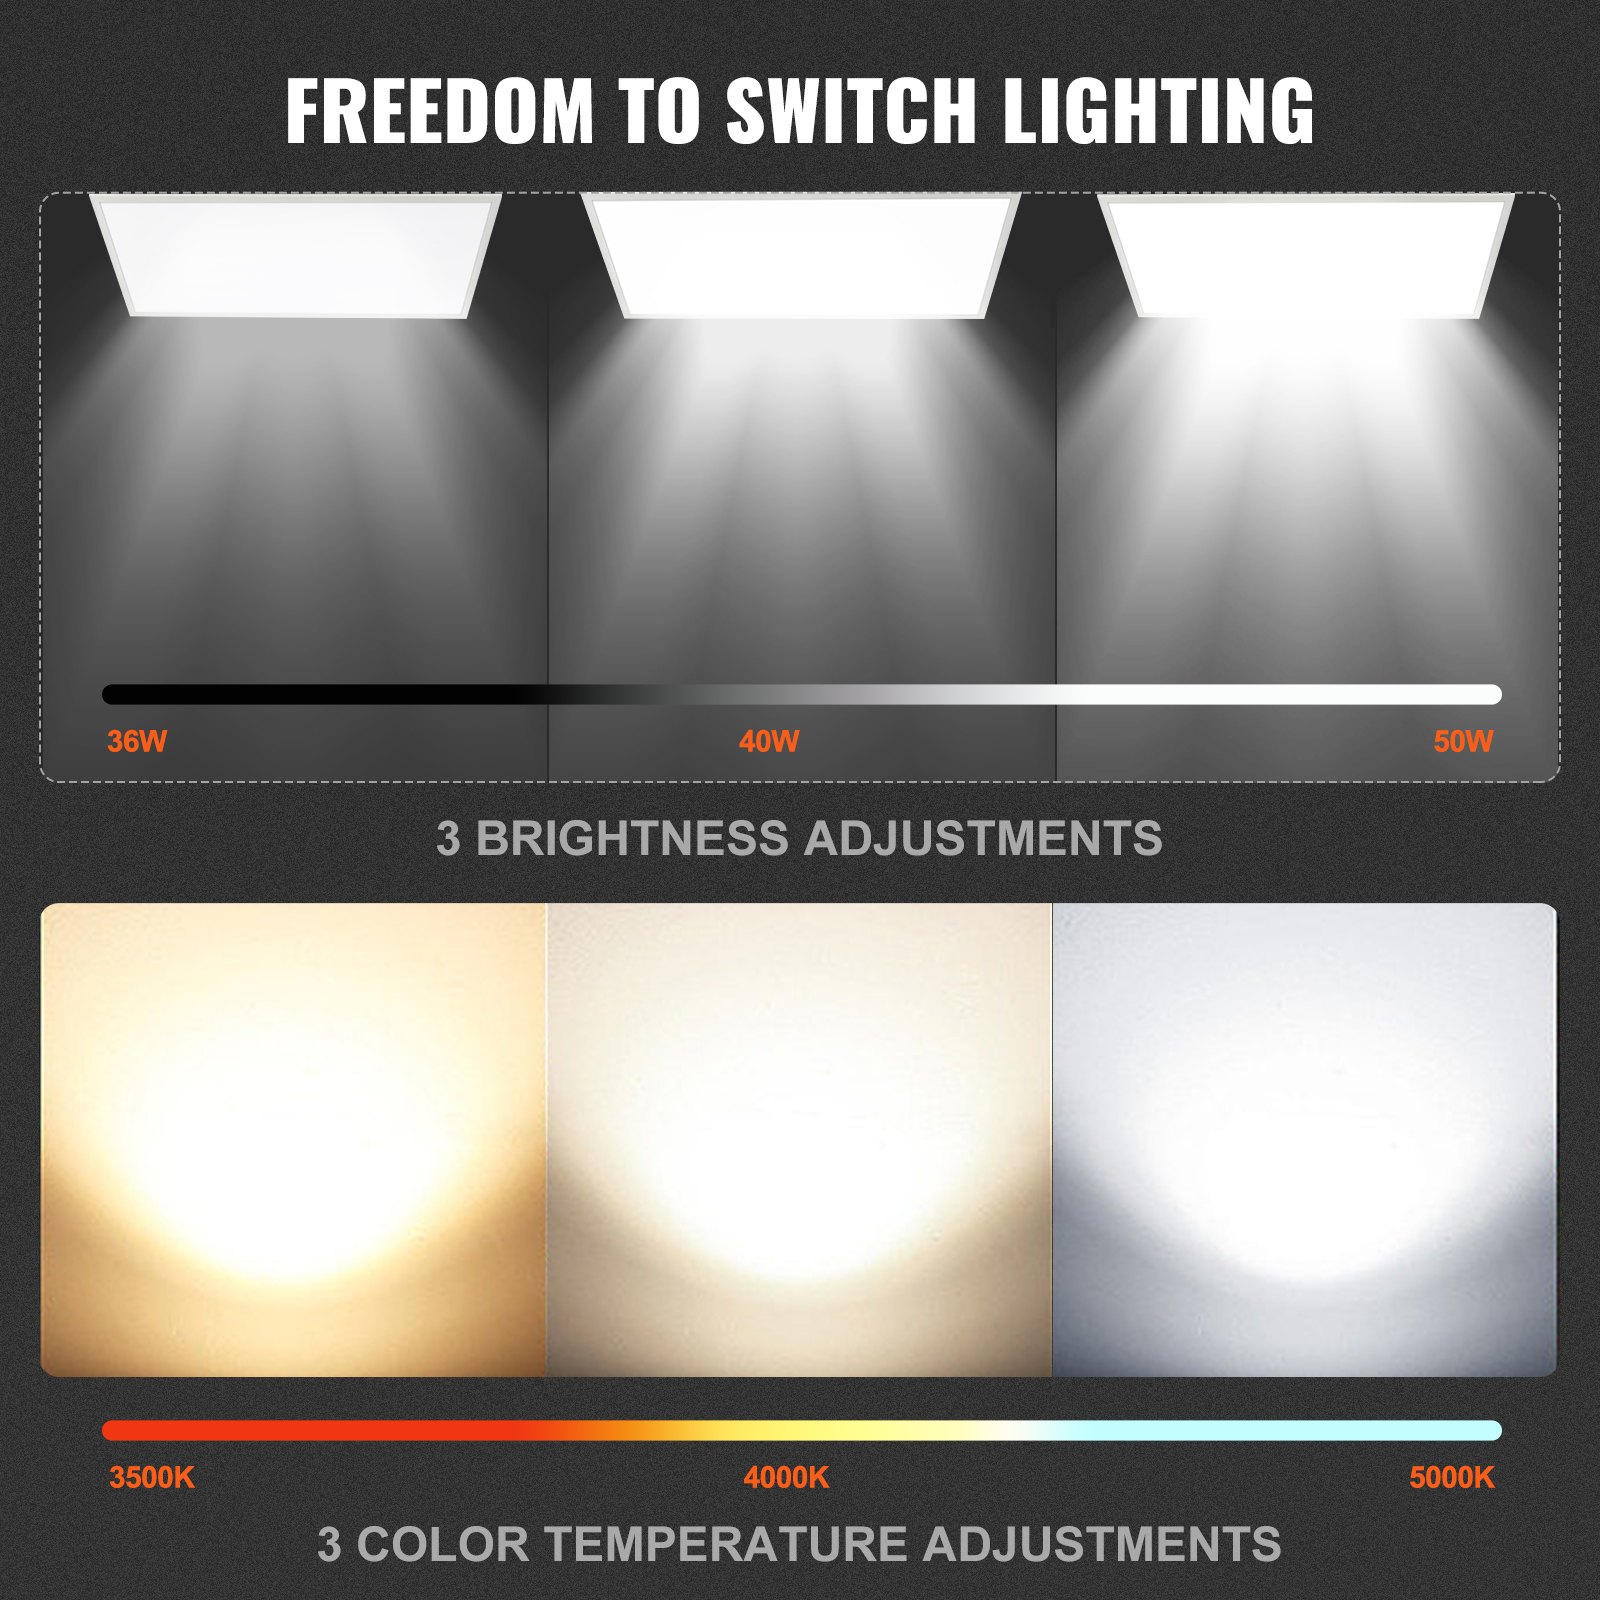
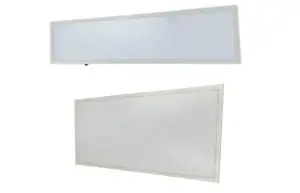
The manual covers all aspects of the VEVOR LED Flat Panel Light, including the adjustable color temperature settings (3500K/4000K /5000 K), and provides valuable tips for maximizing its 6000LM, 50W output. Tested to UL standards, this product manual is your go-to resource for ensuring your lighting system operates at peak performance.
VEVOR LED Flat Panel Light User Manual
Model: HFPL24D-50/HFPL14D-30
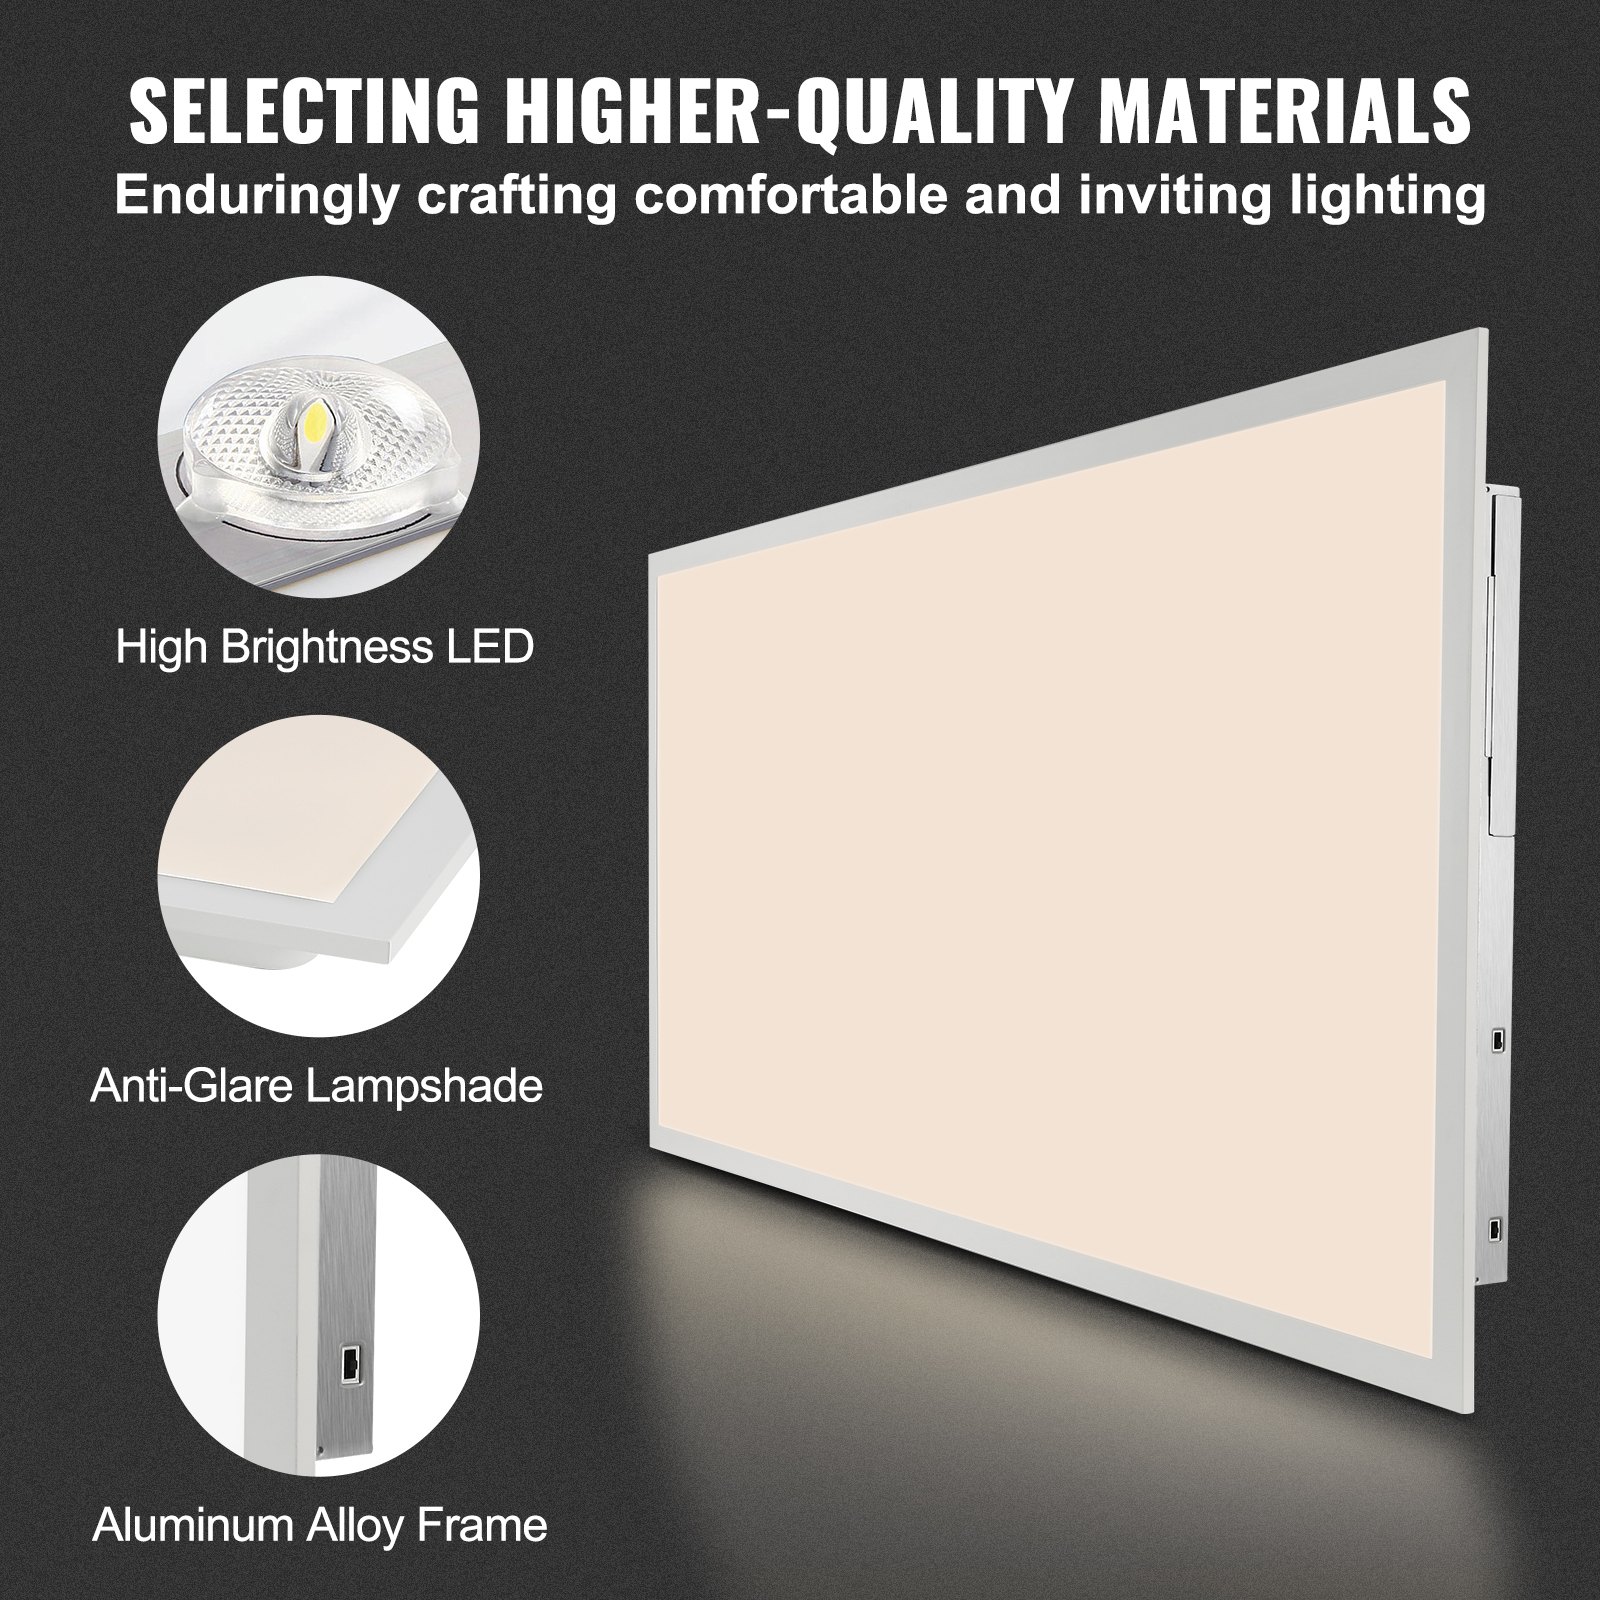
LED Flat Panel Light Properties
Always turn off the main power before installation!

PLEASE READ: Important Information Before Installation
This equipment is intended to be installed only by qualified personnel. The installation must be made in accordance with the current edition of the National Electrical Code and all applicable state and local building codes.
The final installation must be approved by the appropriate qualified electrical/building inspector(s). Improper installation may result in a fire or electrical hazard. Before installing this electrical system, be sure the electrical power to the circuit has been disconnected.
- Review the diagrams thoroughly and disconnect all electrical power before installation to avoid an electric shock.
- Do not mount near flammable materials or electric heaters.
- Do not let power supply cords touch a hot surface.
- The fixture is for indoor and dry locations. Do not use for outdoor locations.
- The fixture shall be installed or maintained by a qualified electrician or someone familiar with the luminaires.
On-Off Wiring Steps:
- Open the cover of the junction box.
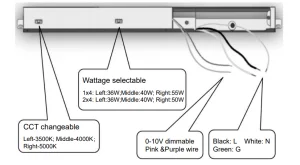
- Remove the round knock-out and connect the conduit or cable to the wiring box with proper connectors. AC input connects neutral to AC-N, the line connects to AC-L, and the ground connects to the green wire. Using 16GA pigtails from the terminal block to the respective power supply wires is recommended.
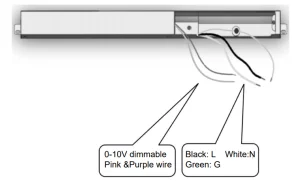
- 0-10V Dimmable Wiring.
- Connect low-voltage leads from the 0- 10V dimming device to the terminal block’s respective DIM+ and DIM-.
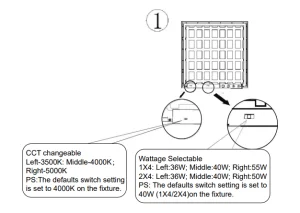
As shown in the following figure(1), there are two switches. The right switch is the power adjust, which has three settings, beginning with the lowest power setting on the left and increasing to the right. The left switch is the color temperature adjust, which has three settings, changing the color temperature 3500K/4000K/5000K from left to right.
Universal voltage driver permits operation at 120V through 277V,50or60HZ. 0-10V control wires must be rated for 300V minimum.
LED Driver
Must add pigtail or jumper wire into the ACL and ACN terminal if you wish to use a wire larger than 16AWG for both AC and Neutral Line
NOTE: Requires 0-10V DIMMER. SEE DIAGRAM
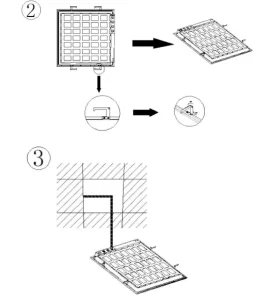
Recessed Installation Steps:
As shown in the following figure:
- In view of the power and color temperature switches, please move the two switches to the desired power and color temperature.
- Turn the clip 90° counterclockwise to secure the panel
- Connect the driver to the power source
- Insert the LED panel into the T-bar face down, align the panel with the edge of the T-bar
- Adjust the LED Flat Panel Light to the right place
- “Mounting Hook is for positioning only” or equivalent, in Format S24-L2
Metal rope suspension installation instructions
Regarding the power and color temperature switches, please move the two switches to the desired power and color temperature. (Same as Figure 1) above).
As shown in the following figure:
- The lamp body has four metal rings that secure the drop rope.
- Thread the wire rope into the fixed metal ring, and screw the metal ring clockwise into the lamp body fixing ring.
- Install four fixing rings of fixed wire ropes at the same position on the roof, thread the four wire ropes into the fixed ring of the roof, adjust the appropriate height, and tighten the fixed metal ring clockwise.
Exegesis: Installing the roof and fixing the metal ring requires professional impact power station tools. Please pay attention to safety!!
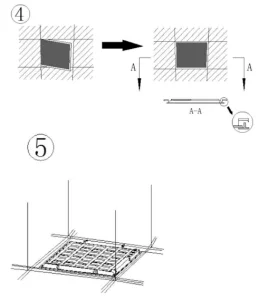
LED panel light hanging installation operating instructions
- Use a Phillips screwdriver to remove the screws near the diagonal of the lamp body. (See Figure 1)
- Please take out the screws and stainless steel cylindrical nuts of the accessory bag and put the screws into the stainless steel cylindrical nuts. Then use a Phillips screwdriver to screw the stainless steel nut to the lamp body. (where the screw is removed in the first step). (See Figure 2).
- Please take out the stainless steel cylindrical screw and the wire rope, and thread the wire rope into the inner hole of the stainless steel cylindrical screw. (See Figure 3).
- Please press the center hole of the stainless steel screw by hand to adjust the wire rope to your desired height. (See Figure 4).
- Please install the top of the house by yourself; it is not explained here.
LED Flat Panel Light Accessories
KDSLEDMBDJ1J2LG8JRV6
- Panel light *1
- Hanging wire *4
- Stainless steel nut *4
- Hanging wire sleeve *4
- Hanging wire holder *4
- Spring head *4
- Screw *4
- Instruction manual *1
KDSLEDMBD2J2WVJJAUV6
- Panel light *2
- Hanging wire *8
- Stainless steel nut *8
- Hanging wire sleeve *8
- Hanging wire holder *8
- Spring head *8
- Screw *8
- Instruction manual *1
KDSLEDMBD2J15TAL6V6
- Panel light *2
- Hanging wire *8
- Stainless steel nut *8
- Hanging wire sleeve *8
- Hanging wire holder *8
- Spring head *8
- Screw *8
- Instruction manual *1
Recommended For Your Project
VEVOR 2 Pack 2x4FT LED Flat Panel Light, 6000,LM 50W Manual
Reviews
There are no reviews yet.