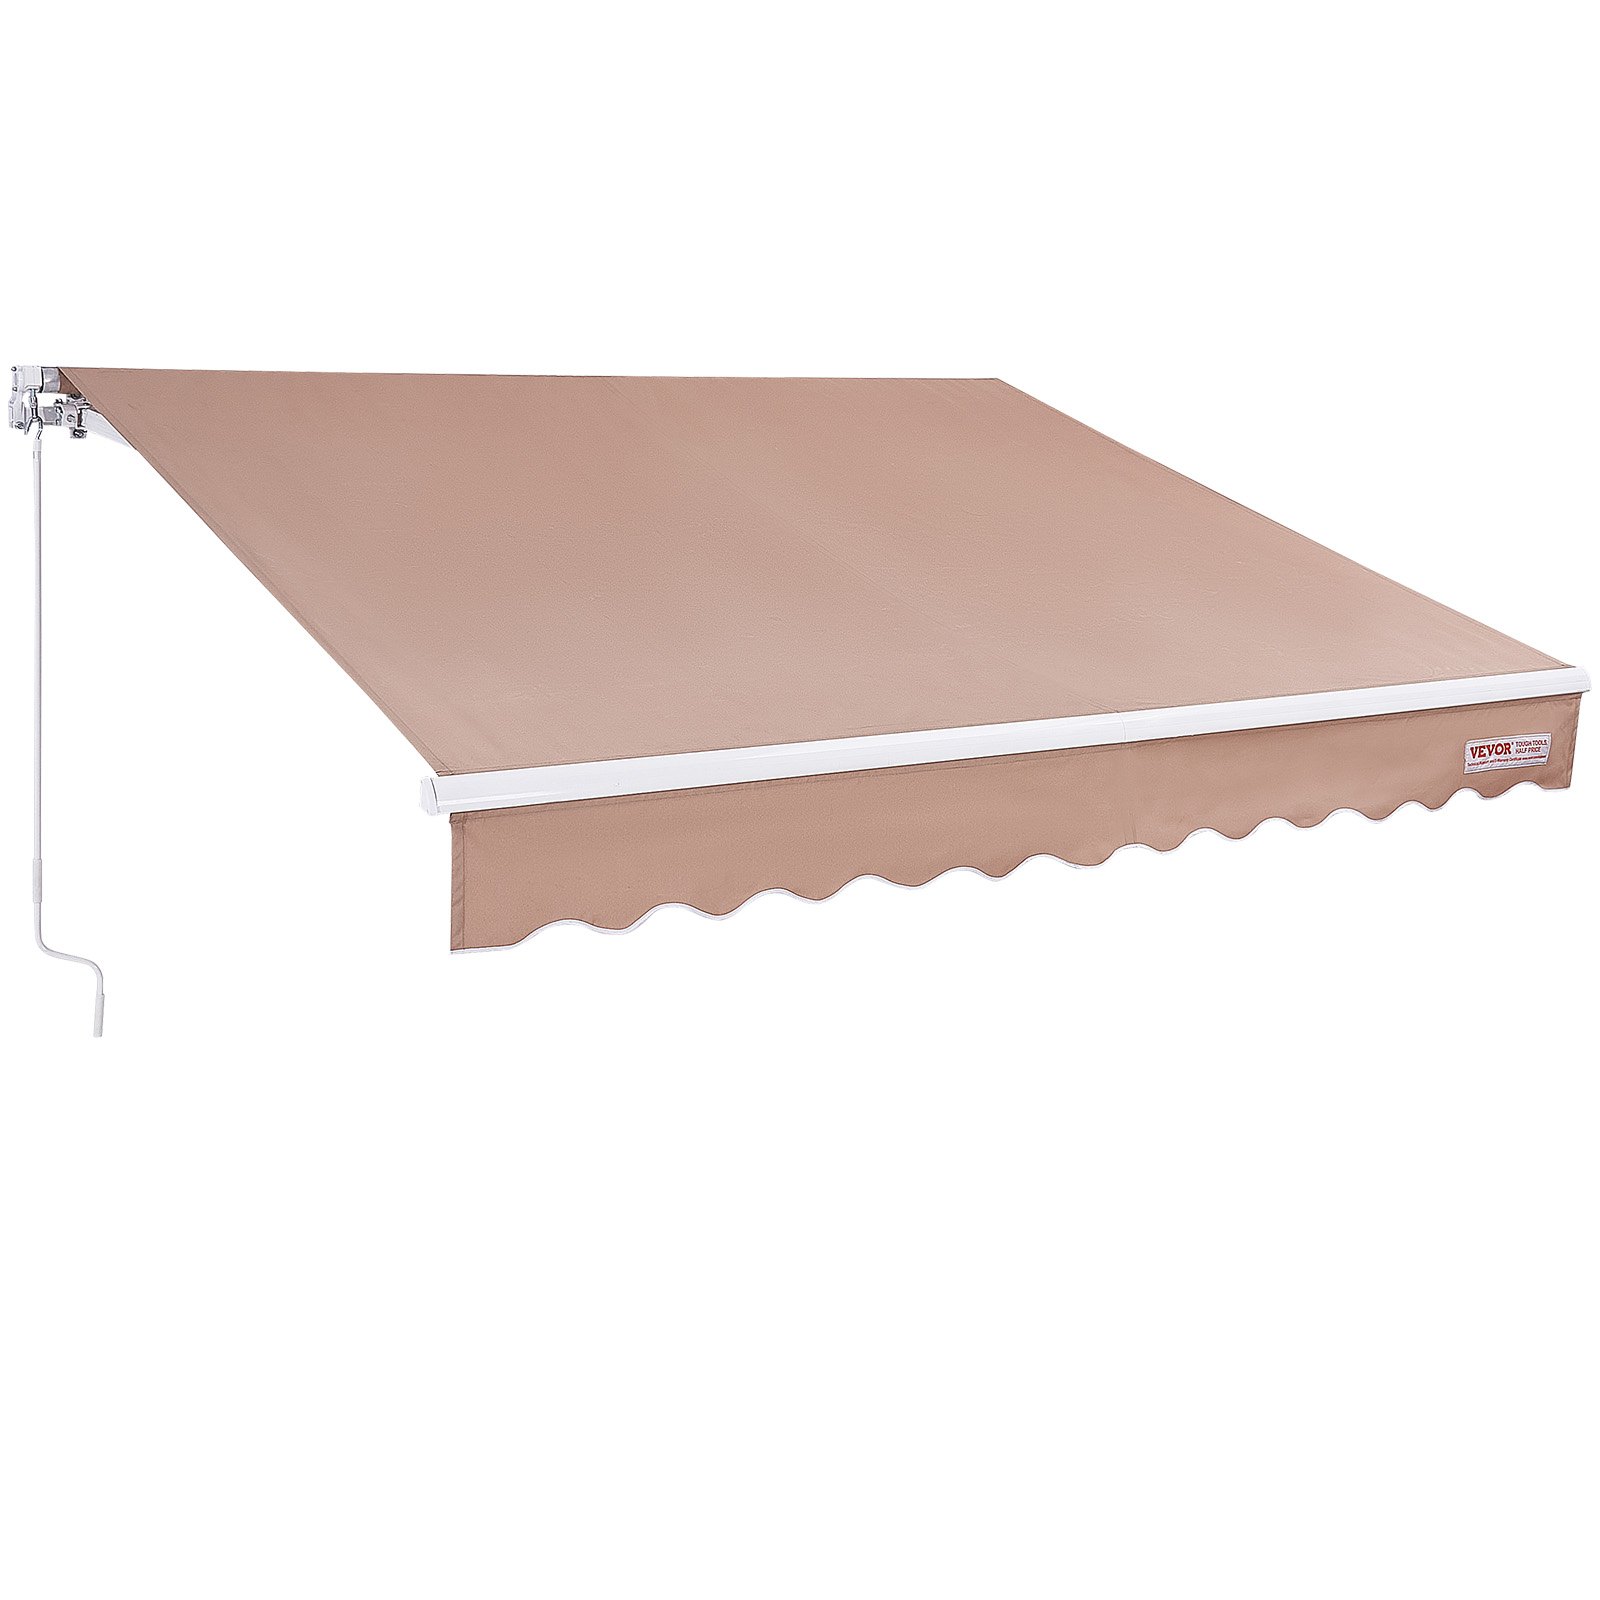
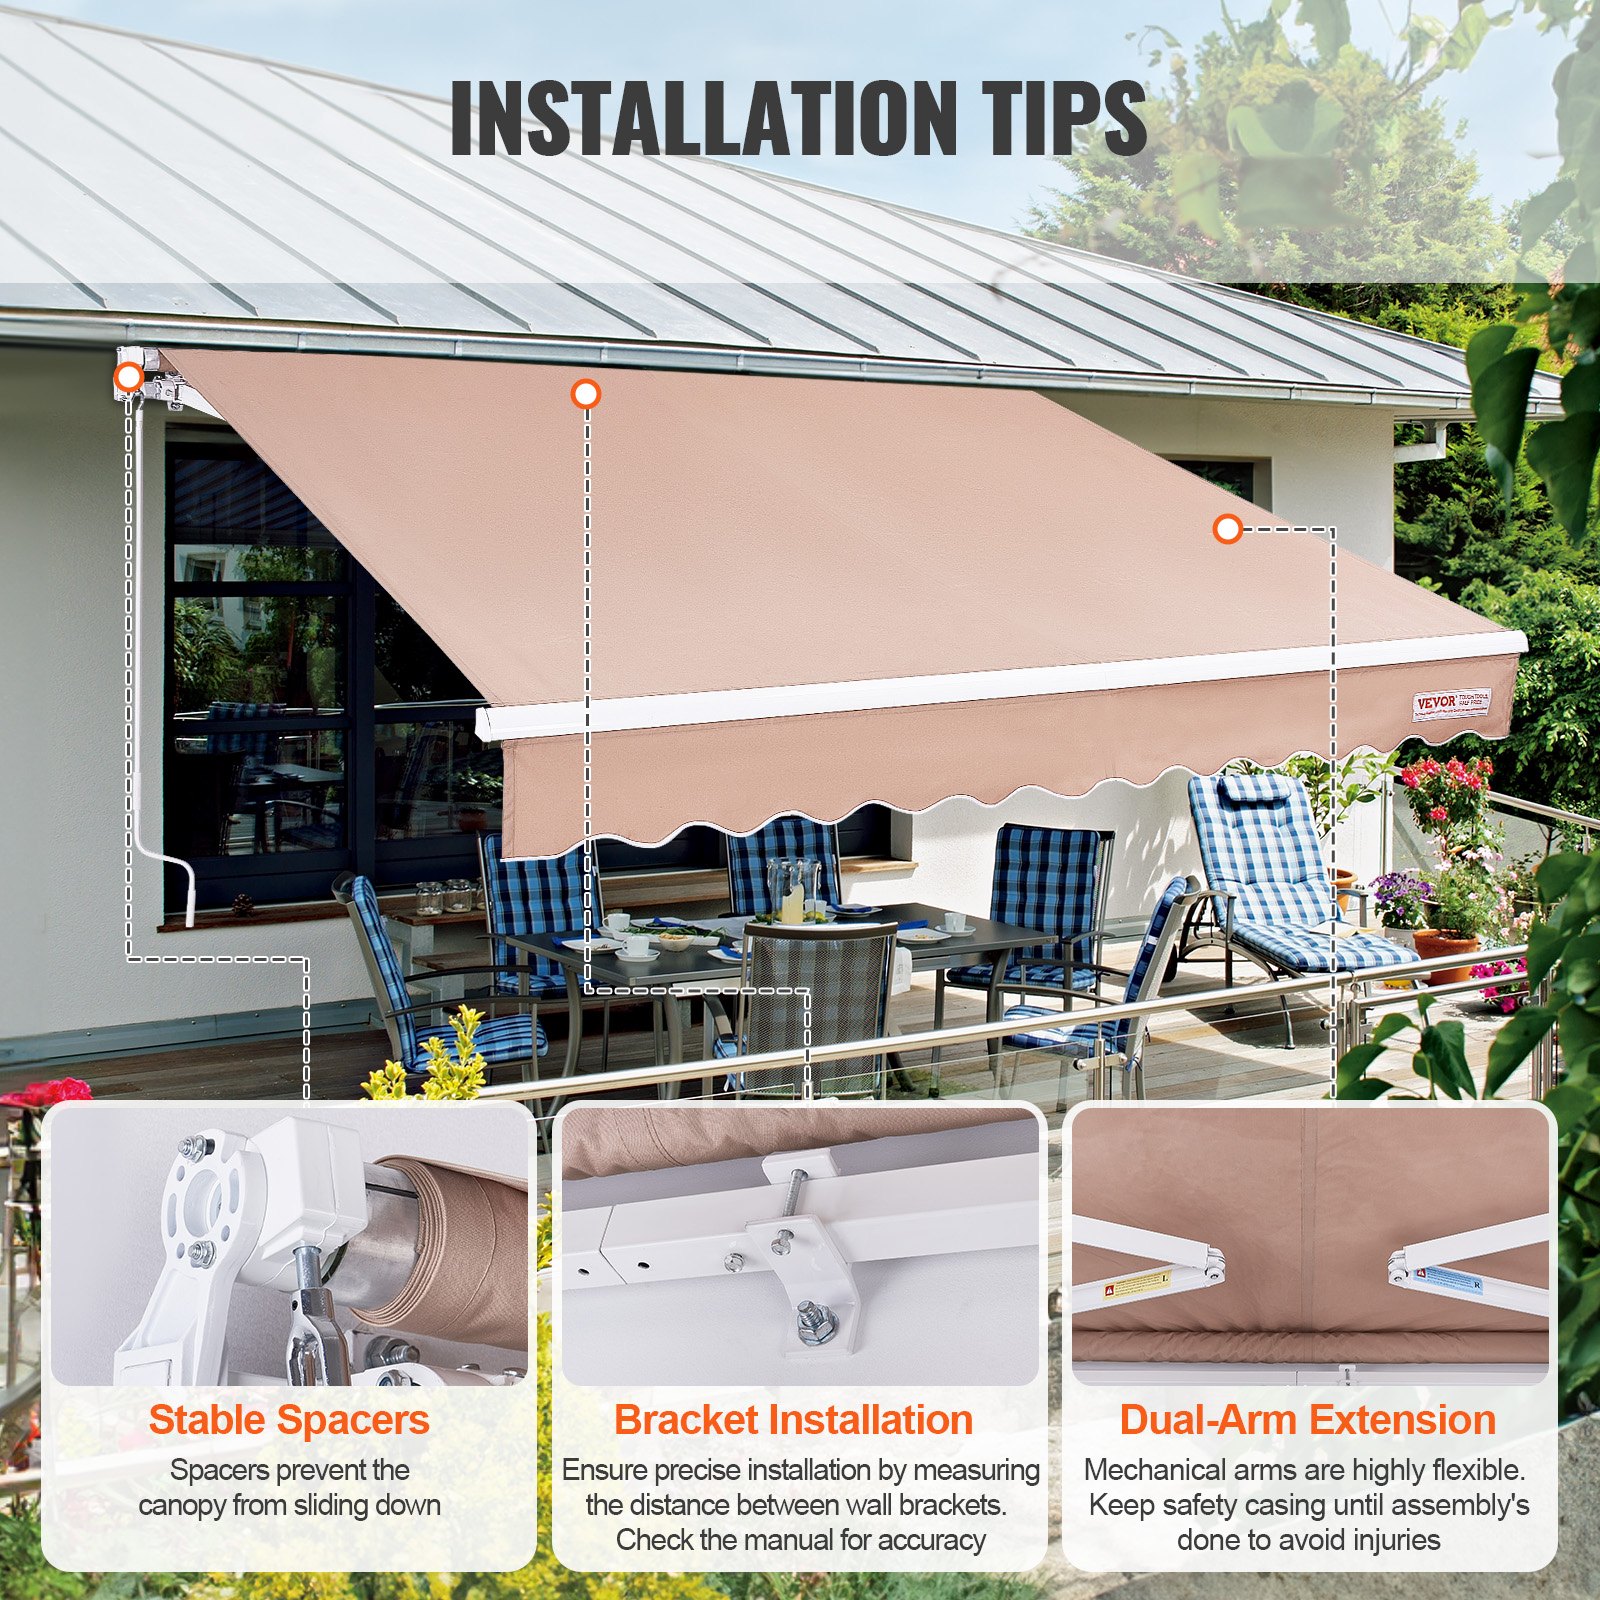
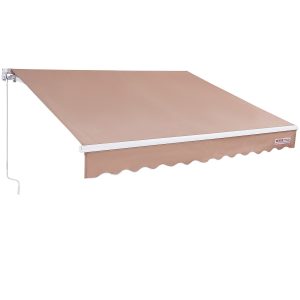
Unlock the full potential of your outdoor space with the VEVOR Manual Retractable Awning, 12 x 10 ft Outdoor Patio Awning Retractable Sun Shade.
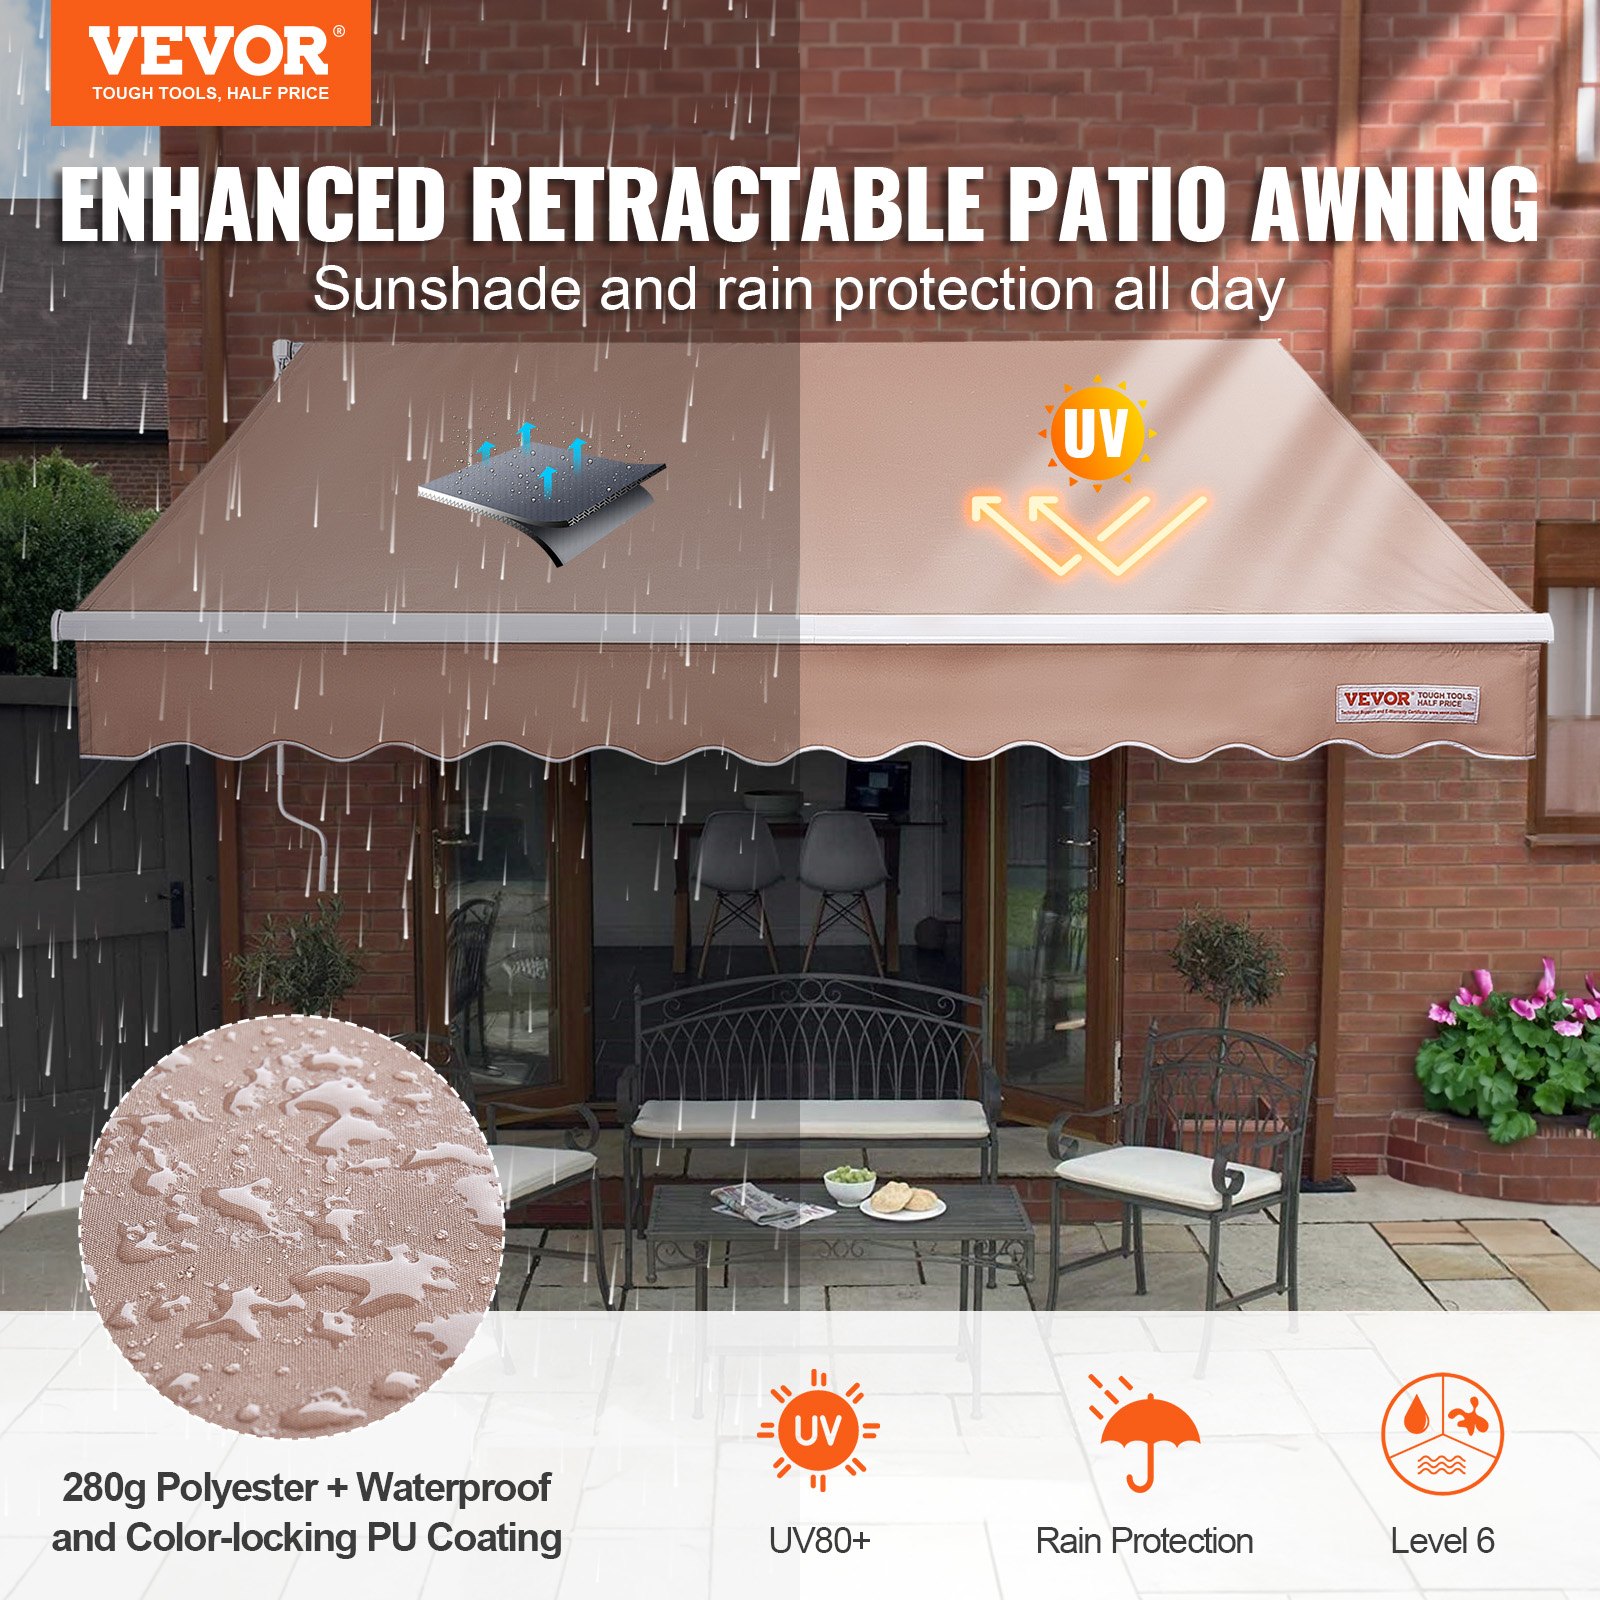
Our comprehensive product manual download provides detailed instructions for easy setup, troubleshooting, and optimization, ensuring you get the most out of your water-resistant polyester patio door window awning.
With step-by-step guidance and clear illustrations, you’ll find the manual indispensable for maintaining your awning’s functionality and longevity. Whether you’re installing it over your backyard, balcony, or patio, our user-friendly manual makes the process straightforward and stress-free. Download now to discover the full range of features and benefits, and enjoy a shaded, comfortable outdoor area in no time.
VEVOR Manual Retractable Awning User Manual
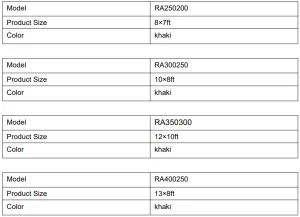
Models: RA250200, RA300250, RA350300, RA400250
Notice:
- Protect from severe weather conditions.
- Wipe clean with a moist cloth and mild detergent.
- Do not use abrasive materials or cleaners.
- Carelessness causes fire-keep open flames away from covers.
- 2 people are recommended for mounting this product. Please retain these instructions for future reference.
Specifications
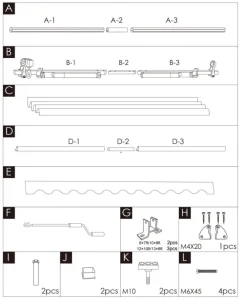
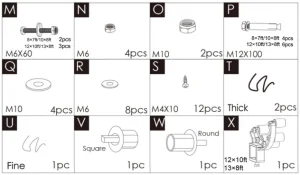
Parts List
WARNING
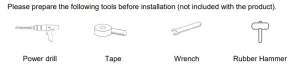
Please read the instruction manual carefully before using it. Please assemble this product strictly according to the instructions. Please double-check that all parts of the package contents are intact.
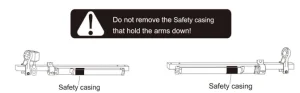
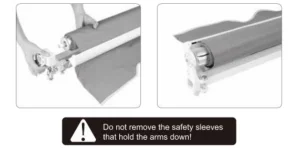
The mechanical arm will pop out immediately after the safety casing is removed, which will cause damage to the assembler. Please do not remove the safety casing.
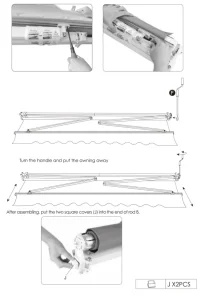
Manual Retractable Awning Assembly Steps
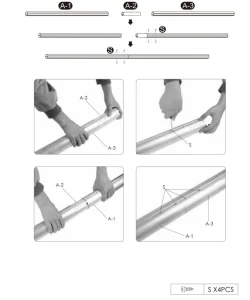
Roller assemble: Insert the roller connector (A-2) into the right roller (A-3) and secure it with the screw (S). Connect the left pulley (A-1) with the pulley connector (A-2) and fix it with the screw (S). Now you have a full-length roller.
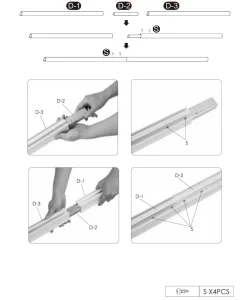
Front Pole Assemble: Insert Front Pole Connector (D-2) into Right Front Pole(D-3) and secure it with a screw (S). Connect the left front rod (D-1) to the connector (D-2) and secure it with the screw (S). You now have a full-length front bar.
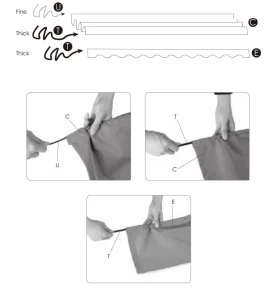
Unfold the awning fabric. You will have a large fabric (C) and a valance with a scalloped edge. You will also have three strips, two thick and one thinner. Insert the thick and thin strips into both ends of the large piece of fabric.
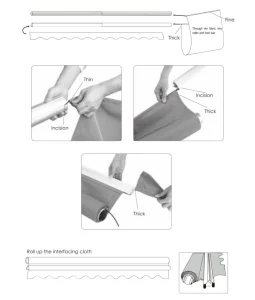
Put the end of the fabric with the thin strip in the groove of the roller. Then put the thick strip in the cut of the front bar and put the end of the flounce with the other cut.
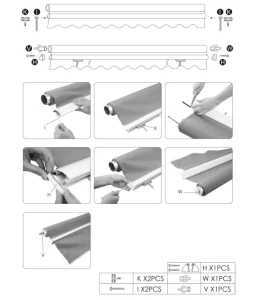
Slide the blocker (l) and arm-bar connector (K) into the passage/slot in the wedge-shaped front bar. Cut off the excess part of the long strip. Then pull the left and right plastic covers (H) on each end of the rod, and then screw in the screw (R) on the plastic cover to secure the cover (H) and strip (T) in place.
Insert the rotator (V, W) into the roller (A).
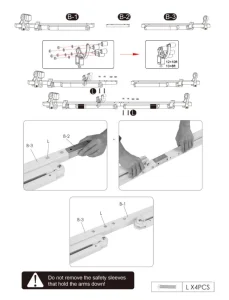
Slightly loosen the nut so the parts can be moved left and right for further assembly.
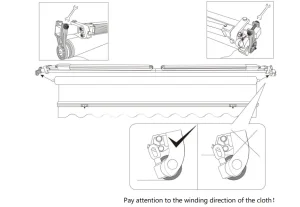
Assembly of the entire awning: Insert the square shaft with fabric into the square hole of the gear unit and connect it to the round shaft on the right-hand side with a hammer.
Loosen the nut slightly so the parts can be moved left and right for further assembly.
Assembly of the whole awning: Insert the square shaft in the roller with the fabric into the square hole of the gearbox, and link it with a round shaft on the right side using a hammer.
The next step is to unlock the security straps. We need to firmly hold the movement arm bar with our hands to prevent the limb of the movement arm bar from injuring people if it pops out of the safety band.
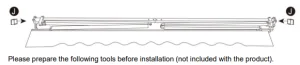
Manual Retractable Awning Installation Procedure
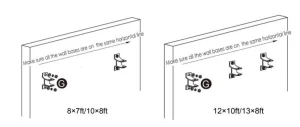
1. Measure the distance along the wall where it can be placed. Drill holes for wall brackets on the wall according to the installation distances and height of the wall brackets. The diameter and depth of the hole must be the same as the expansion bolts.
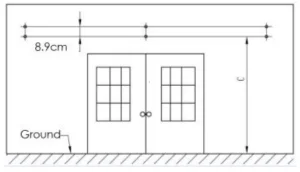
The holes of each group must be on the same line in the transversal and vertical directions. (Note: It is recommended to draw lines on the wall first to ensure the precise position and size of the holes.)
2. Hammer all the expansion bolts into the holes. Then take down the nuts and washer.
Note:
- The expansion bolts must be hammered into the wall completely.
- The bolts must stick out of the wall so the brackets can be installed.
- The nut and washer might be separated from the bolt during transportation. Please return them to their original positions before hammering them into the wall.)
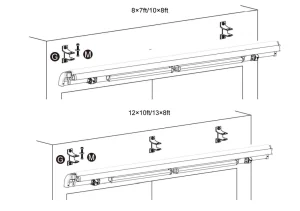
3. Take down the original bolts of the wall brackets, as shown in the figure. Use expansion bolts to fix the wall brackets on the wall. Do not tighten completely. Leave the wall brackets on the wall with a little movement.
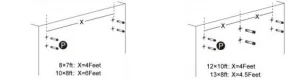
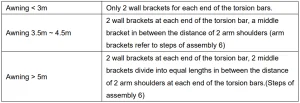
Installation Distance Between Wall Brackets
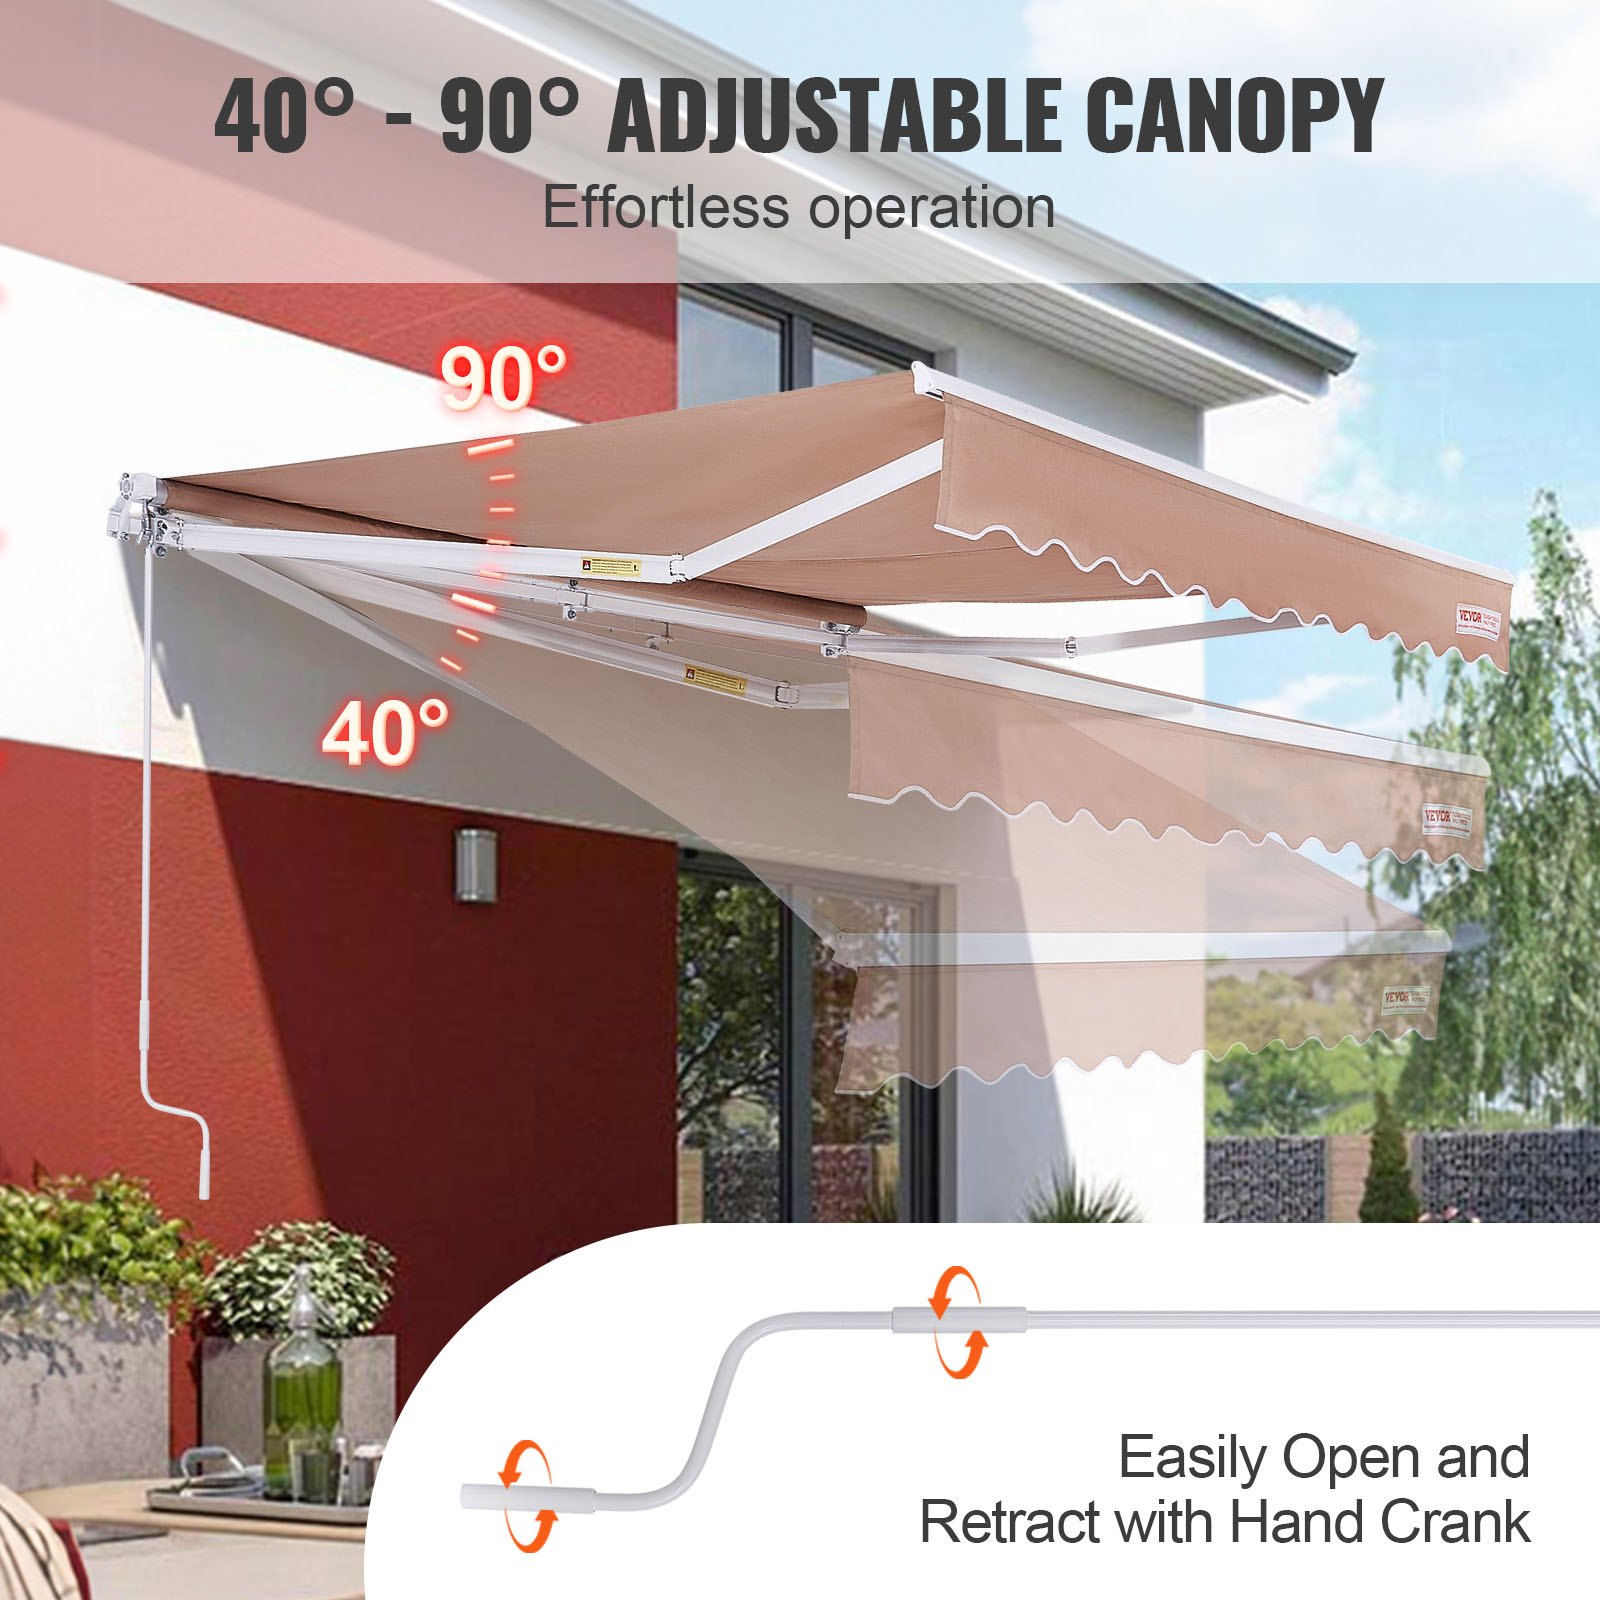
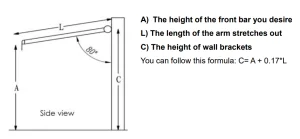
4. As shown in the figure, we recommend making the awning surface about 80 degrees with the wall when it is open.
5. Install the awning on the wall brackets according to “Installation distances between wall brackets” above, put the original bolts on them, and tighten them. Finally, fasten all expansion bolts.
CAUTION: Proper location of the brackets is the most important aspect of the awning installation. You must fasten all the mounting brackets to studs, joists, headers, or other major structural components.
WARNING: Failure to securely fasten all the brackets to the wall could result in the collapse of the awning and cause personal injury or death.
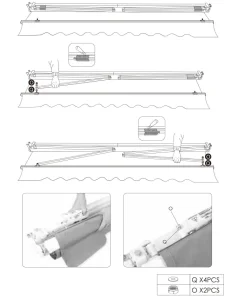
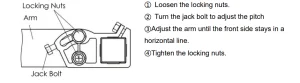
6. Instruction for front side leveling
FAQs About VEVOR Manual Retractable Awning
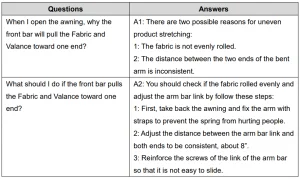
Question: What if the fabric wraps unevenly or the arms cannot open simultaneously?
Answer: Check the stability of the two arms and adjust the front handlebar wrist of the faster arm outwards accordingly.
◎Hang the Hand Crank on the Rotation Ring. You can rotate the Hand Crank in a clockwise/Anticlockwise direction to stretch/contract the awning flexibly.
◎When the awning is fully extended, the arm link on both sides is about 8” from the edge, but it must be noted that the distance between the two sides must be consistent. Otherwise, it will cause uneven stretching of the product.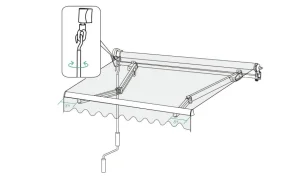
Recommended For Your Project
VEVOR Manual Retractable Awning, 12 x 10 ft Manual

Reviews
There are no reviews yet.