

Unlock the full potential of your VEVOR Front Door Handle and Deadbolt Set with our comprehensive product manual. This detailed guide is designed to make the setup, troubleshooting, and optimization of your Matte Black Front Door Lock Set a breeze.
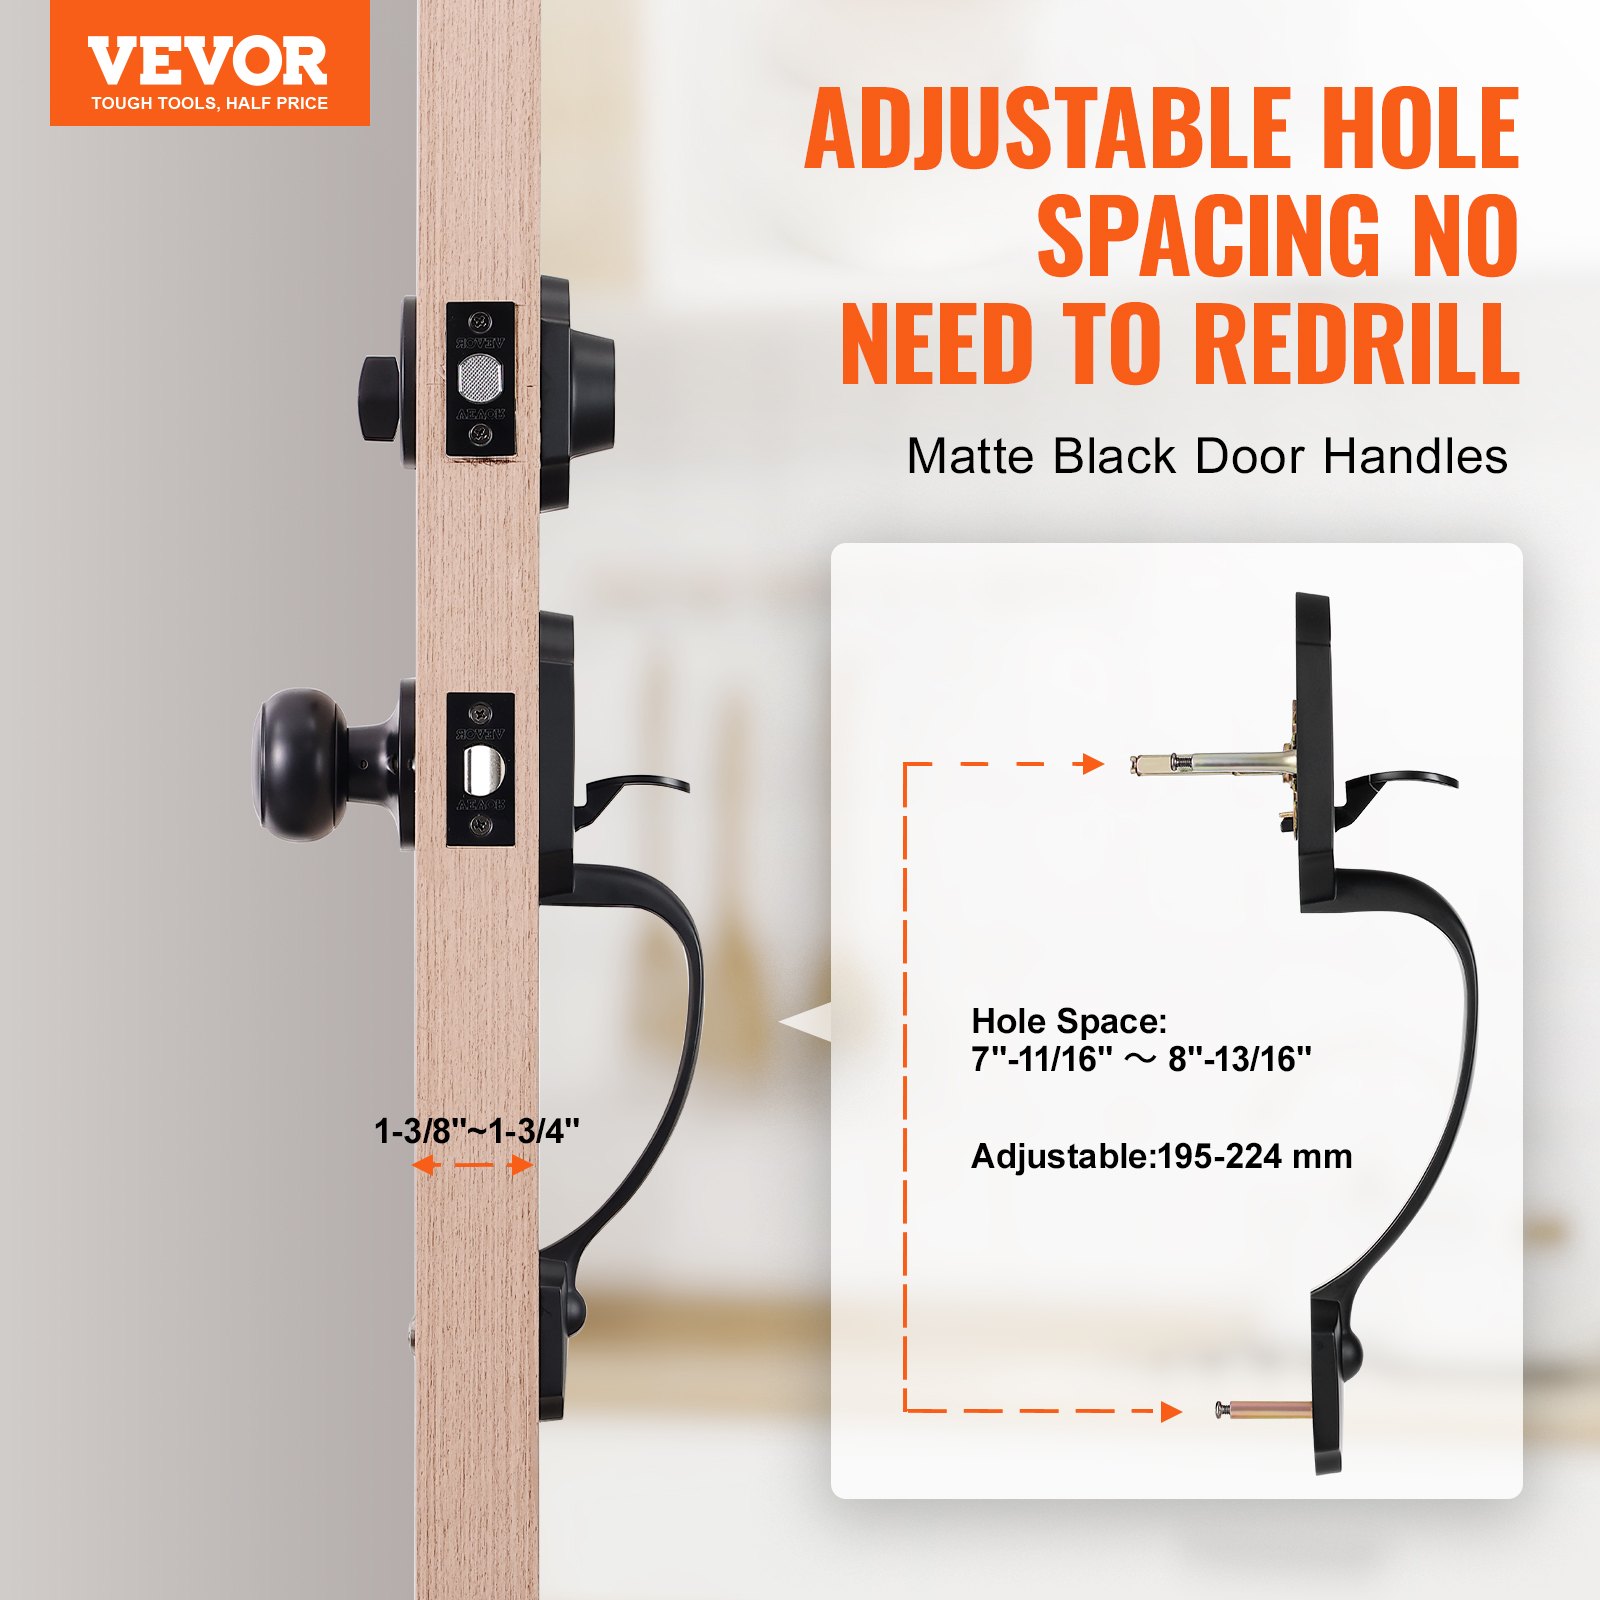
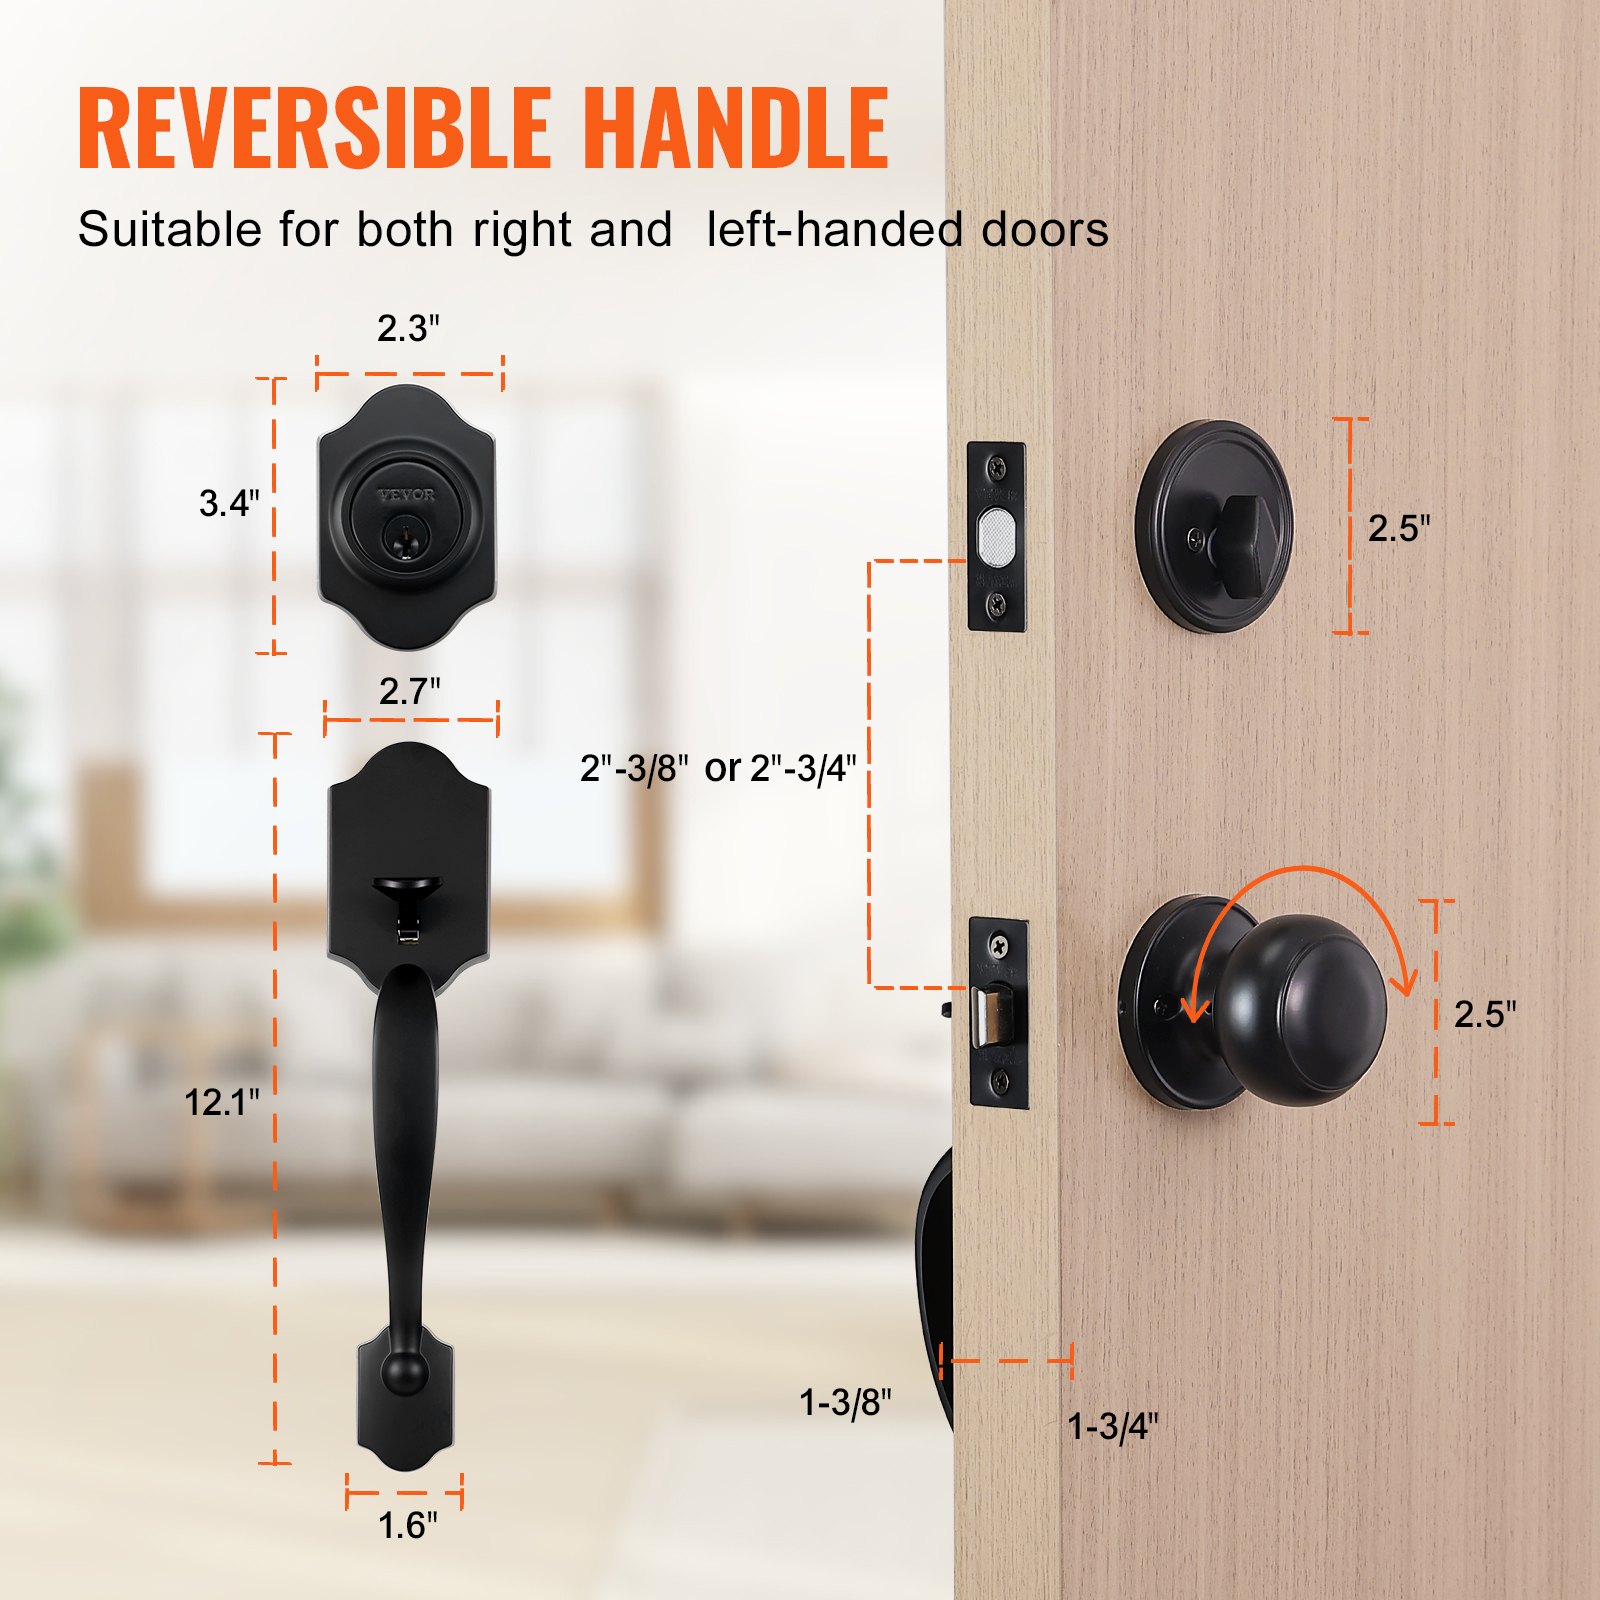
Whether you’re installing the Adjustable Hole Spacing Single Cylinder Handle set for a right- or left-handed entrance, our manual provides step-by-step instructions to ensure a smooth process.
The user-friendly layout and detailed illustrations help you navigate through each stage of installation and maintenance, ensuring your front door lock set functions perfectly for years to come. Download now to gain access to invaluable tips and expert guidance that will enhance the security and elegance of your entrance.
VEVOR Front Door Handle and Deadbolt Set User Manual

Safety Instructions
1. This product contains small parts. If swallowed, they can pose a choking hazard. Keep these small parts away from children!
2. Read, understand, and follow your power tool manufacturer’s safety instructions. Always wear safety glasses or eyeshields before assembly and commencing power tool operation. Always keep hands, face, hair, loose clothing, and body at a safe distance from spindles and cutting tools.
Always keep a firm grip on tool handles when in operation. Always disconnect from the power source before adjusting power tools.
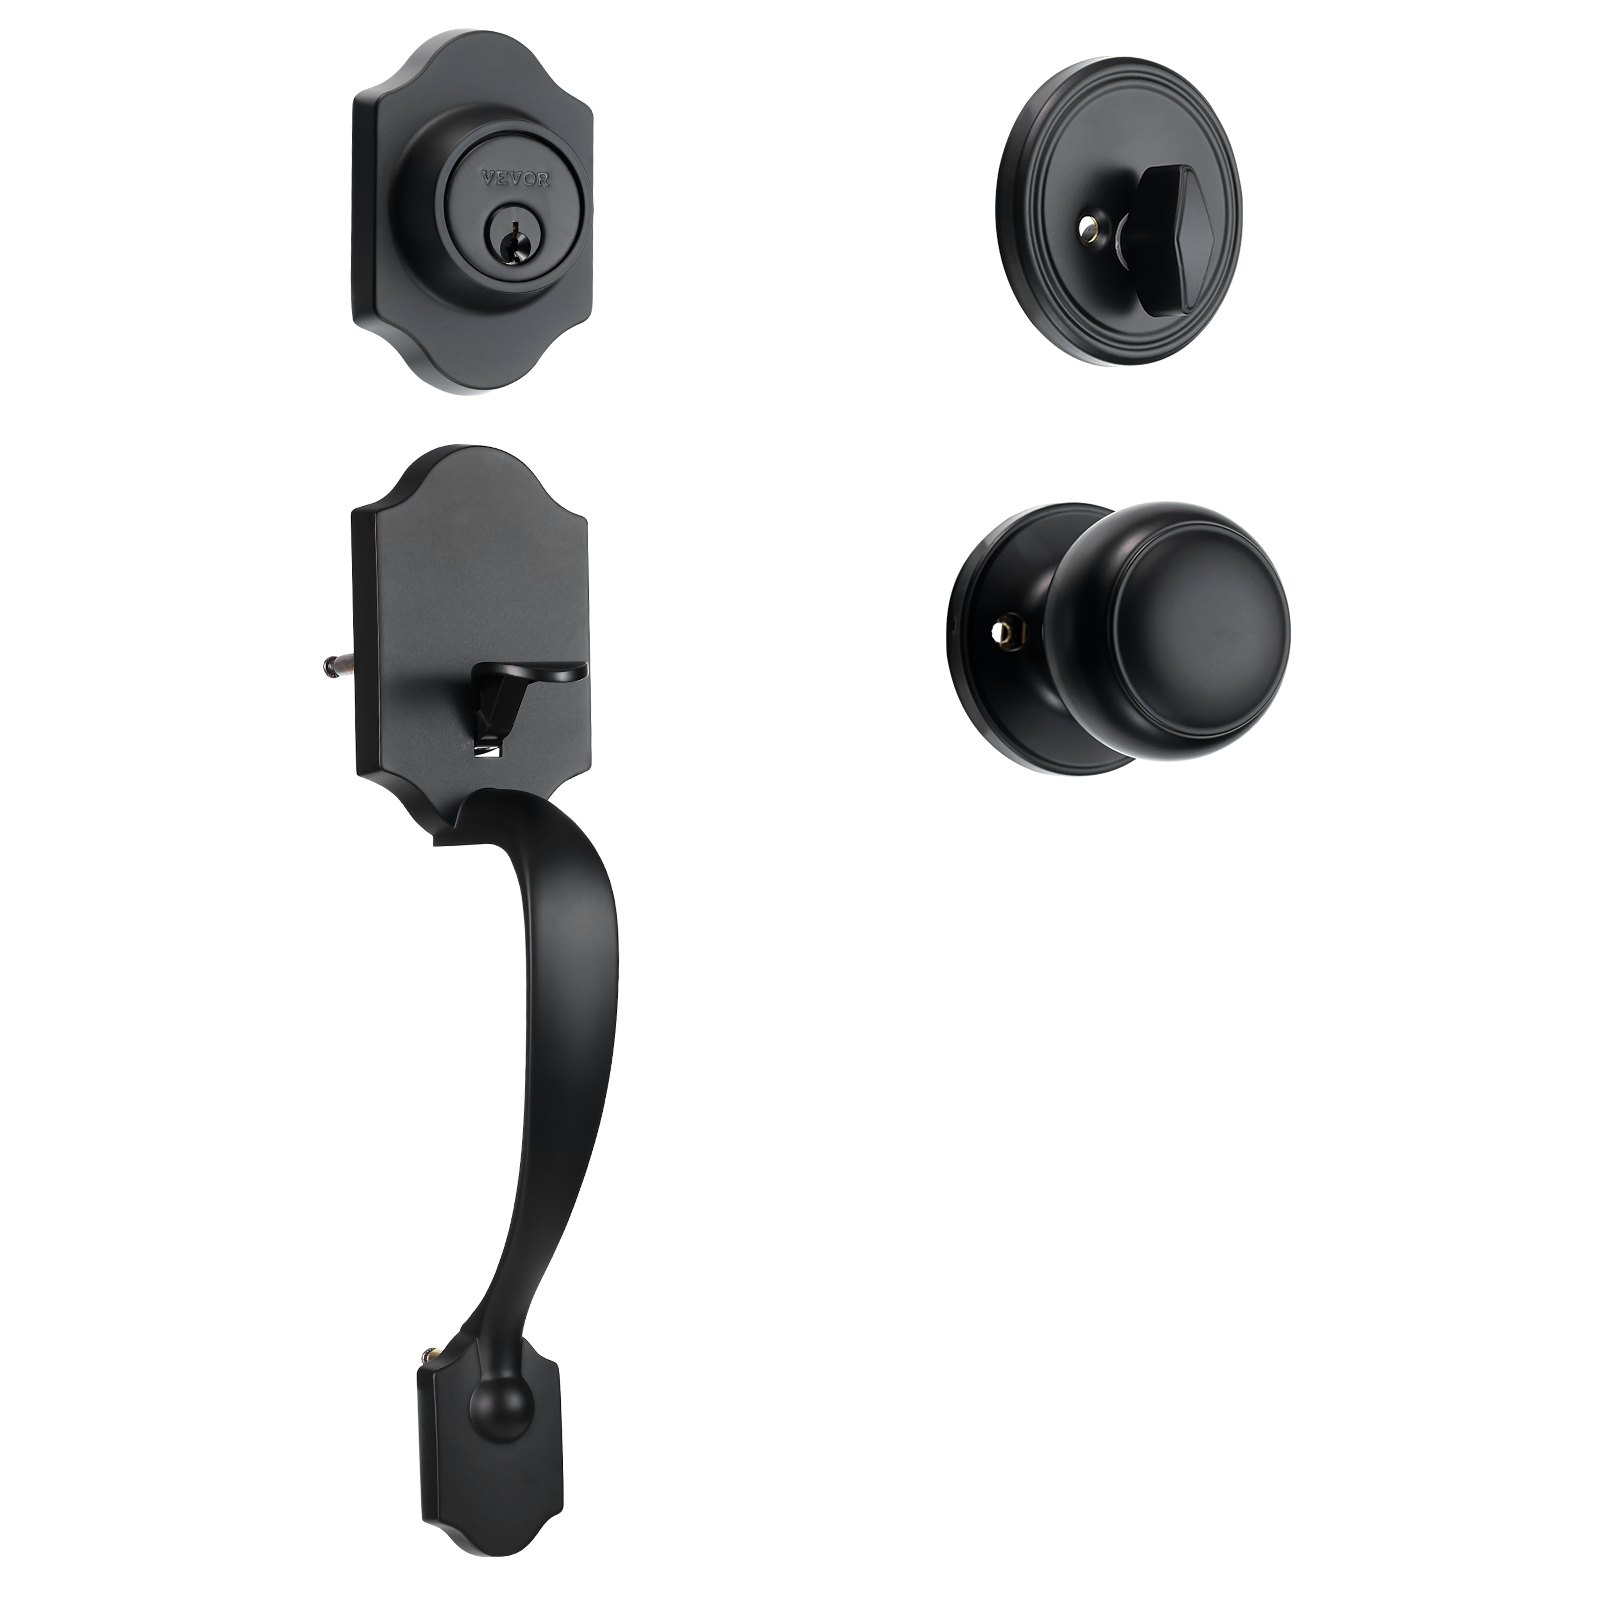
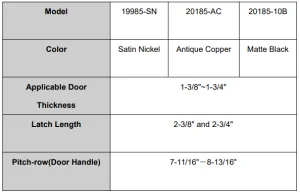
Front Door Handle and Deadbolt Model and Parameters
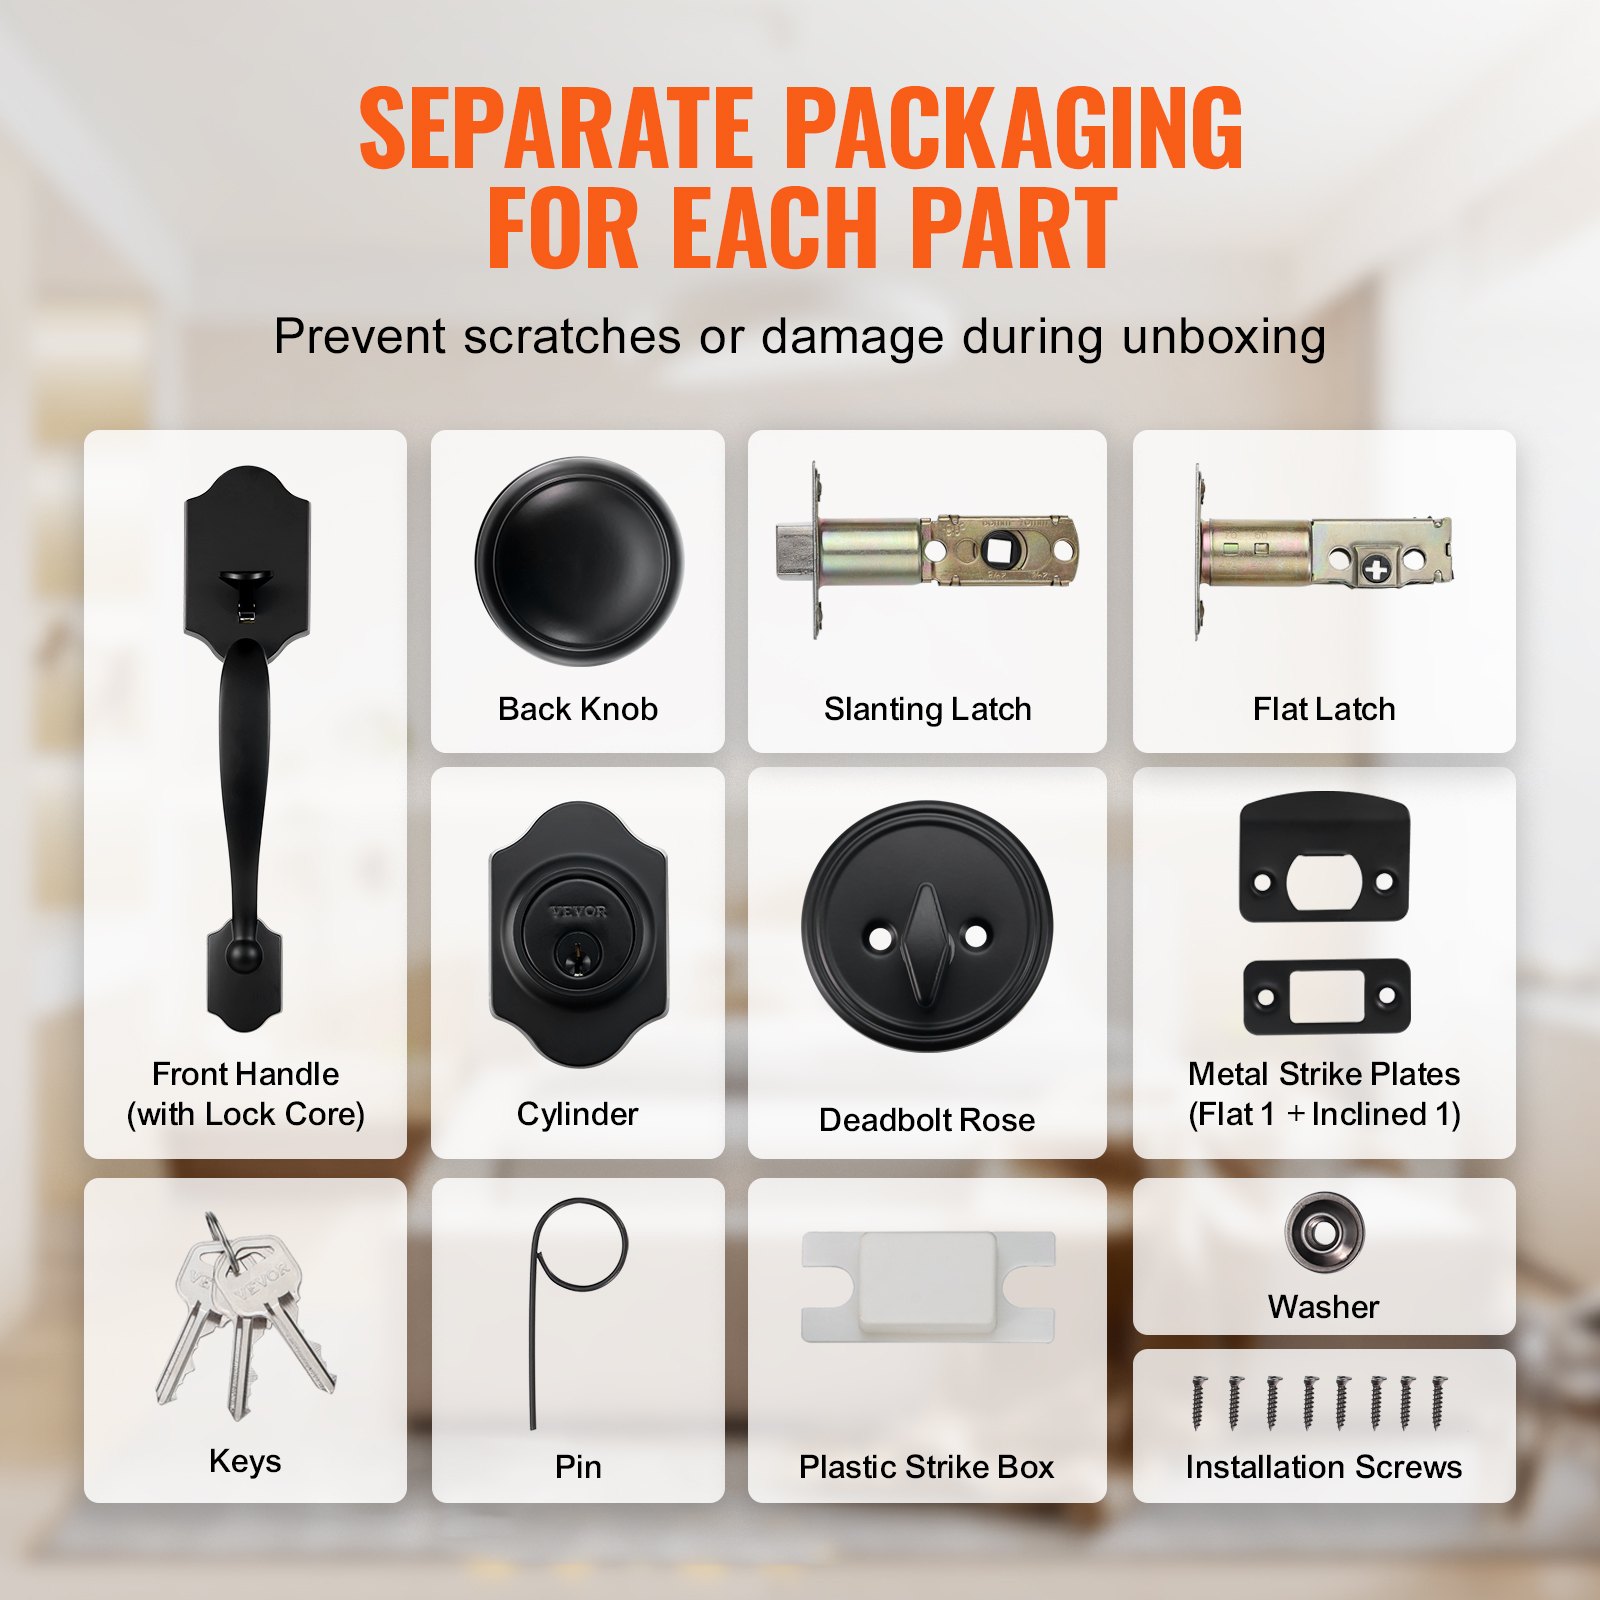
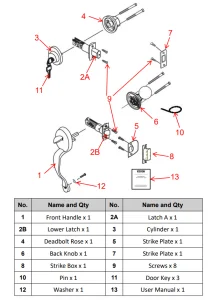
Structure Diagram and Components
Installation
1. MARK DOOR & BORE HOLES(Please refer to the attached opening diagram.)

A: Fold the template over the edge of the door and mark the 60 mm or 70 mm holes.
B: Bore the Φ54mm andΦ25mm holes through the door. C: Cut out a 58 x 26 x 3 mm base.
2. INSTALL THE LATCH
According to the site of lock holes, adjust the latch for 60mm or 70mm.

NOTE: The cam is pushed fully to the right for a 70 mm backset. (During the adjustment, keep two teeth of the cam forward always.)
3. INSTALL EXTERIOR HANDLE MECHANISM
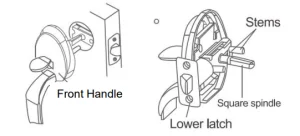
Place the front handle with stems and square spindle into the latch as shown. Press tightly against the door face.
4. INSTALL THE INTERIOR KNOBS
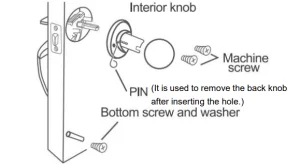
After the front handle is in position, install the interior knob and tighten the screws. Insert the screw through the washer and into the bottom hole, and tighten firmly.
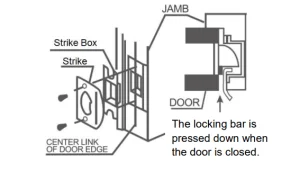
5. INSTALL THE STRIKES
Maintenance
- Do not strike with force to avoid damage to the latch and door frame.
- If dirt is present, use a dry cloth to remove it; do not scrub with chemicals such as dishwashing liquid. Otherwise, it will destroy the protective film of exposed parts and cause fading.
- Periodically (half a year or once a year) or when the key is not smoothly inserted and removed, graphite powder (pencil powder) can be added to the keyhole to lubricate it.
Recommended For Your Project
VEVOR Front Door Handle and Deadbolt Set, Matte Black Manual


Reviews
There are no reviews yet.