Unlock the full potential of your VEVOR Mini Pottery Wheel 30W Ceramic Wheel with our comprehensive product manual. This detailed guide is designed to assist both beginners and experienced users in setting up, troubleshooting, and optimizing their electric sculpting kits.
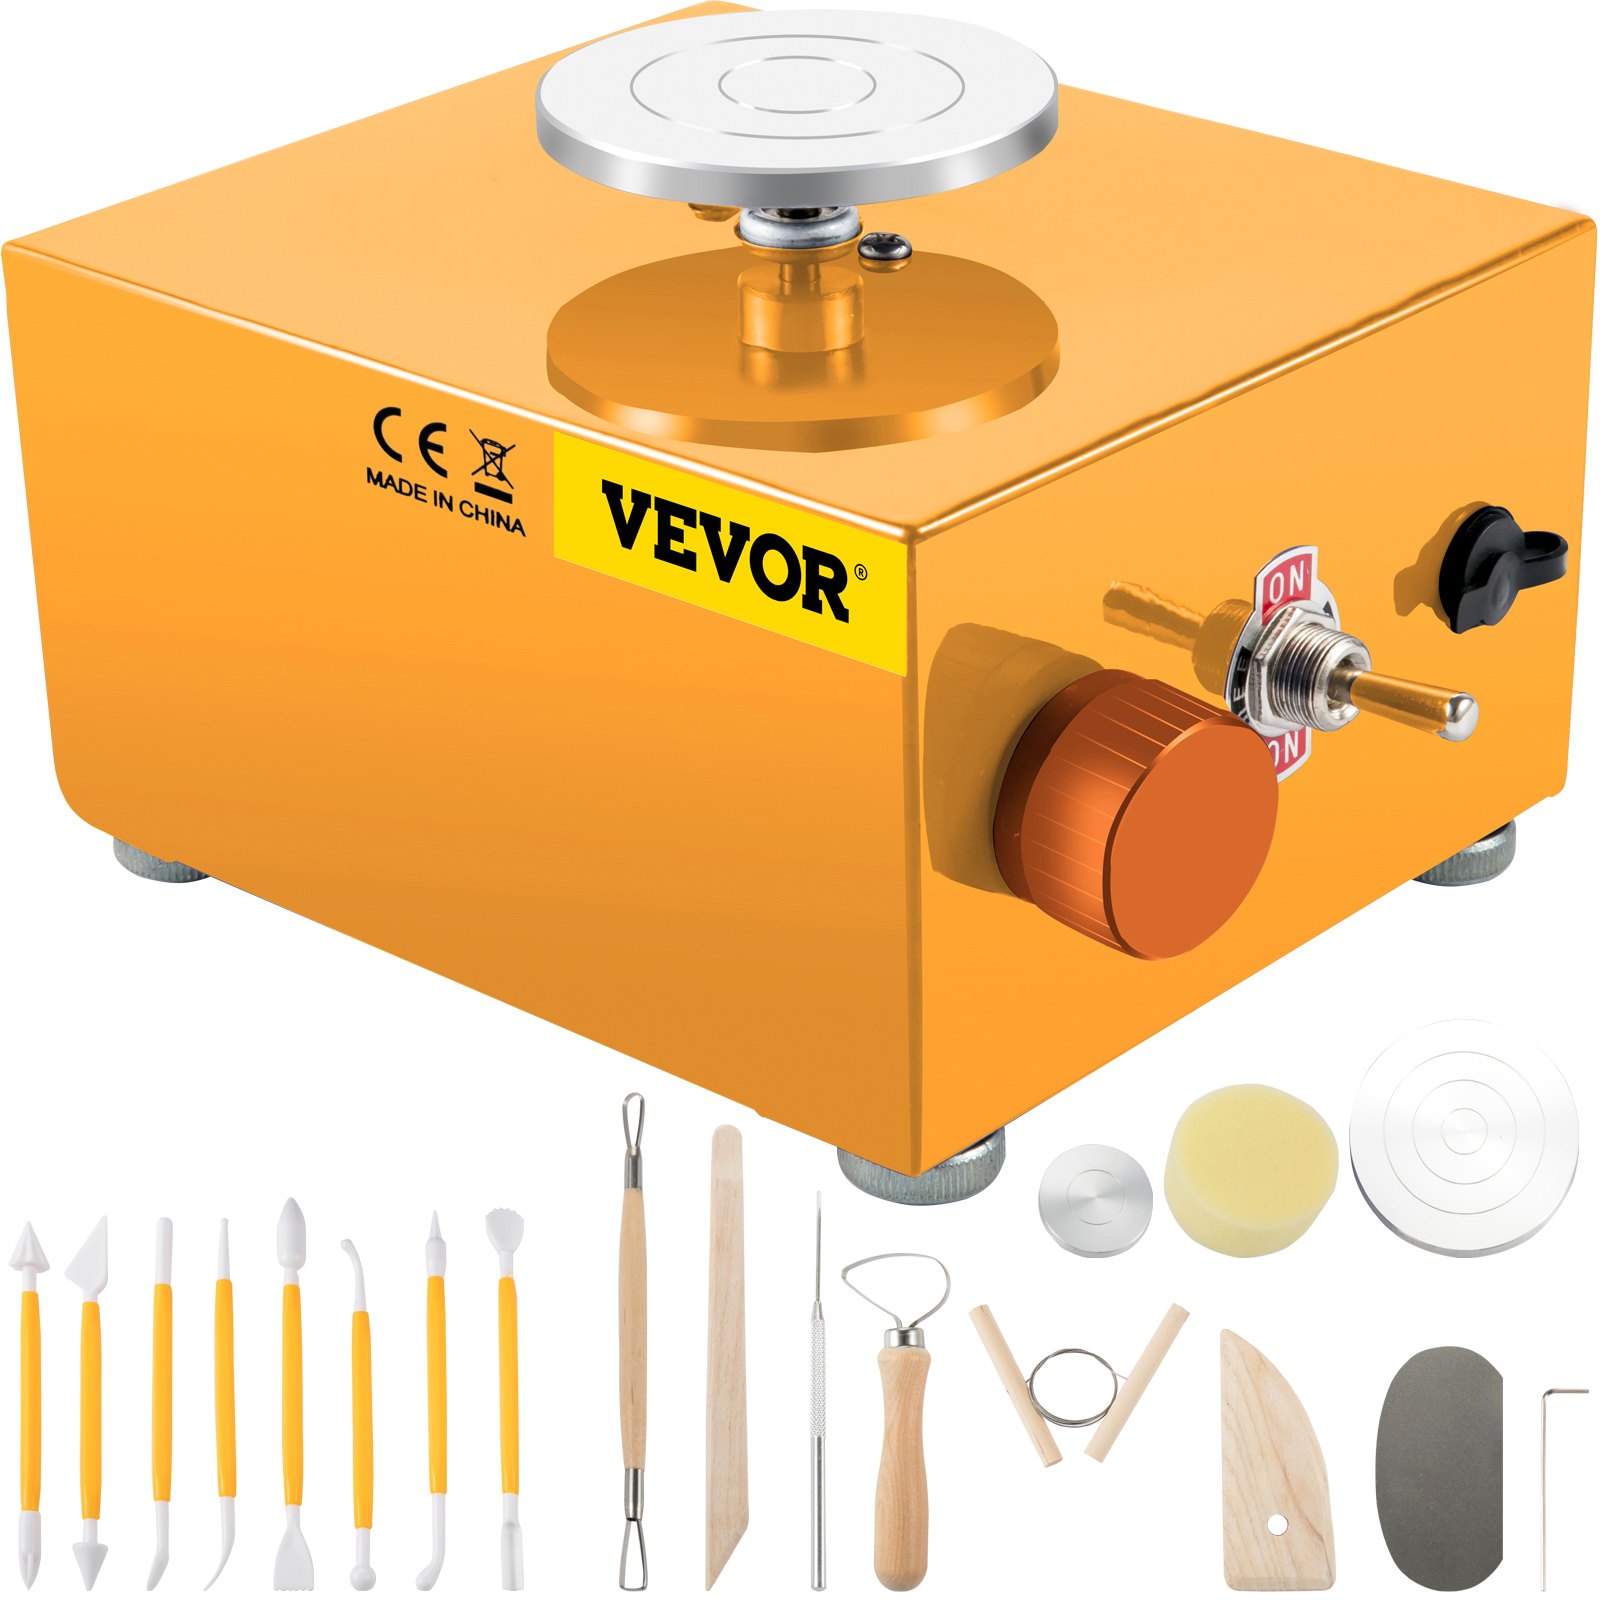
The VEVOR Mini Pottery Wheel has an adjustable speed control, three versatile turntables, and 16 essential tools, making it perfect for art and craft work, molding, and home DIY projects. Our manual simplifies the entire process, ensuring that you can focus on your creativity without any technical hurdles.
Whether you’re creating intricate pottery or teaching a class, this manual will be your go-to resource for mastering your ceramic wheel. Download it now for step-by-step instructions, tips, and tricks to make the most out of your VEVOR Mini Pottery Wheel.
VEVOR Mini Pottery Wheel User Manual
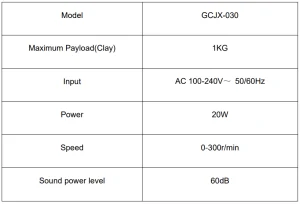
MODEL: GCJX-030
SAFETY INSTRUCTIONS
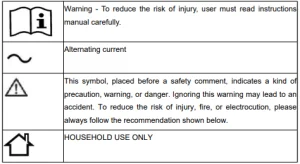
WARNING: Read all safety warnings, instructions, illustrations, and specifications provided with this electrical equipment. Failure to follow all instructions listed below may result in electric shock, fire, and/or serious injury.
Save all warnings and instructions for future reference.
- This equipment is only for ceramic drawings and cannot be used for other purposes. Do not use the equipment brutally.
- The equipment shall be placed on cool, ventilated, dry, dust-proof, and level ground.
- Users must wire and install the system according to electricity safety standards.
- Do not change the rotation direction when the motor is running. To change the rotation direction, stop it first, and start it after the motor completely stops rotating.
- Please use a towel or sponge to clean the machine body, and avoid excessive water when washing to prevent water from entering the motor, switch, bearing, and other parts, which can cause failure.
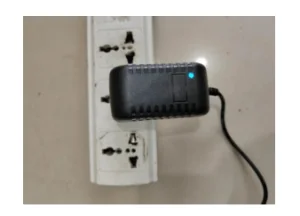
- Before use, ensure the switch and pedal are in the stop position, then insert the power.
- When repairing or replacing parts, the switch must be cut off and the power supply must be unplugged.
- Children should use this equipment with adults(Note: This appliance can be used by children aged 8 years and above and persons with reduced physical, sensory, or mental capabilities or lack of experience and knowledge if they have been given supervision or instruction concerning use of the appliance in a safe way and understand the hazards involved. Children shall not play with the appliance. Children shall not perform cleaning and user maintenance without supervision.
- Periodically check whether the power cable is damaged and the connector is loose.
- Press button(8A) on the leakage protector once a month to check whether the leakage protection works normally!
POTTERY WHEELS MODEL AND PARAMETERS
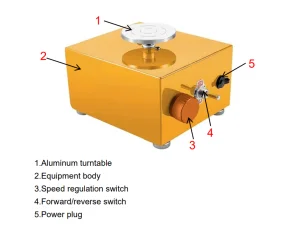
STRUCTURE DIAGRAM
TOOL ACCESSORIES AND USE
1. 8-Piece Tool Set (x1)
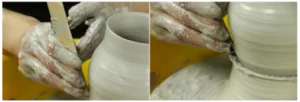
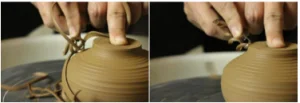
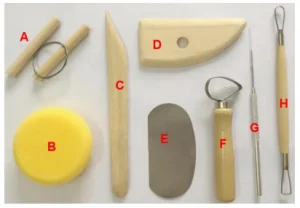 A(Clay cutting line): Assist in precisely cutting clay (cutting surface is very smooth)/repairing and leveling the mouth of the work/taking away the finished product.
B(Small yellow sponge): Add water or absorb water/trim the surface or mouth edge to make it smooth.
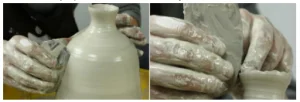
C(Wooden knife): Trim the bottom for later removal/trimming.
D(Wooden scraper): Trim the opening/shape and remove the excess clay on the surface to make it smooth.

E(Stainless steel scraper): Remove the excess clay on the surface to make it smooth.
F(Circular large flat wire knife): Trim the surface of the vessel/ control the thickness/trim out the bottom ring foot.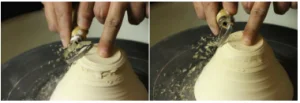
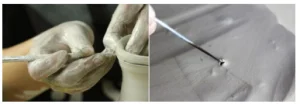
G(Steel needle): Scrap excess clay from the mouth edge/remove air bubbles/punch holes.
H(Ribbon flat wire knife): Finely trim the surface of the utensil or circle the foot
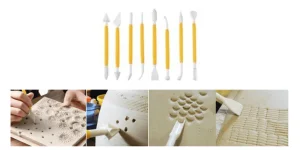
2. Plastic Printing 8-piece Set(x1): Texture decoration, bonding, clay modeling, and so on (As shown below).
3. Aluminium turntable (Φ45mm+Φ65mm+Φ100mm): The turntable’s size depends directly on the maximum diameter we can achieve. Loosen the bolt with a wrench and replace it.

NOTE: After the work, please clean the sludge on the turntable and basin in time, wipe it with a dry towel to avoid oxidizing the surface of the turntable!
Pottery Wheel Operating Steps
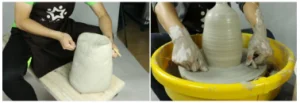
- Take out a proper amount of clay, throw the mud ball in the center of the wheel, and press it (wet your hands).

- Plug in the power (If the water basin is not installed, install the water basin first).
- Choose the direction of forward (clockwise)/reverse (counterclockwise)rotation according to your needs.

- Turn the knob to adjust the proper speed. (Clockwise acceleration, reverse deceleration)
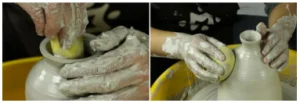
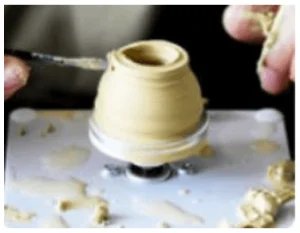
- Clay molding with tools.
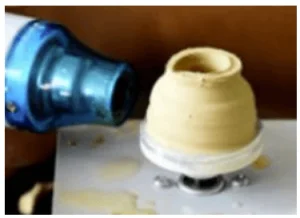
- Dry the body surface quickly with a hot air gun (1-3 minutes).
- Clay-mold repairs with tools.
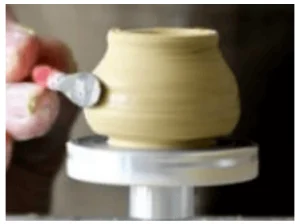
- Creative painting and coloring can be done according to their needs.
After the work is completed, stop the machine in reverse order.
Remove the molding with a scraper/clay cutting line.
Place in a cool place for some time before firing.
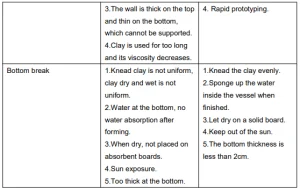
Pottery Wheel Skills Guidances
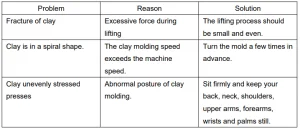

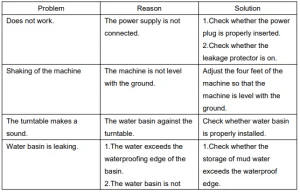
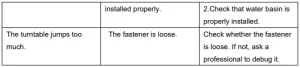
TROUBLESHOOTING INSTRUCTION
 CLEAN AND CARE RULES
- After finishing the equipment operation, it is necessary to clean the clay on the surface of the turntable and wipe the water stains on the surface of the turntable (Do not rinse directly with water).
- Check the parts regularly for looseness.
- If you use it sparingly, run it at least once a month.
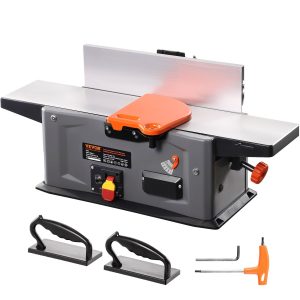
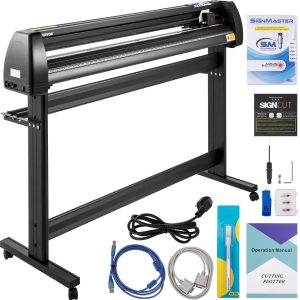
Recommended For Your Project
VEVOR Mini Pottery Wheel 30W Ceramic Wheel Adjustable Speed Clay Machines Manual

Reviews
There are no reviews yet.